CentOS安装
镜像资源下载
清华资源库地址:https://mirrors.tuna.tsinghua.edu.cn/
CentOS7:https://mirrors.tuna.tsinghua.edu.cn/centos/7.5.1804/isos/x86_64/
下载镜像到本地。
VMware下载
下载地址:https://www.vmware.com/cn/products/workstation-pro/workstation-pro-evaluation.html
到网上搜索相应版本的密钥激活即可
安装虚拟机
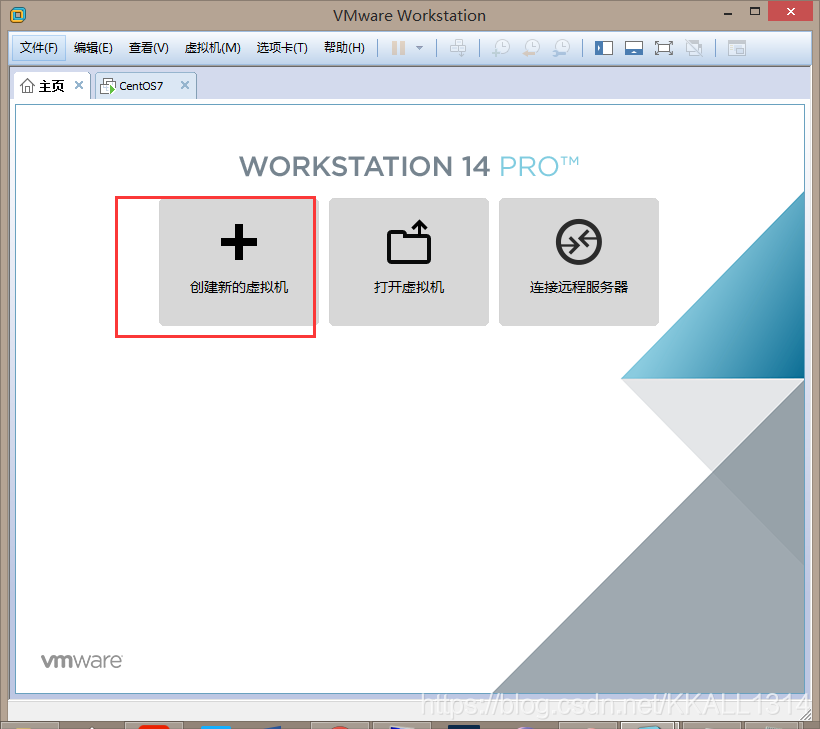
打开vmware

选择典型

选择之前下载的centos镜像

选择安装路径

分配存储空间

设置网络配置

后面再详细配置网络
点击确定按步骤安装即可
注:安装选择模式时不要选择minimal install,该版本少了很多基本命令
使用XShell连接虚拟机
vmware自带的cmd窗口很不友好,网上下载xshell
下载地址:https://xshell.en.softonic.com/
若想使用xshell连接虚拟机,需要先给虚拟机配置静态ip,默认是动态的。
步骤:
- 获取虚拟机的ip地址

2.在vmware中获得网关,子网掩码

- 在linux终端输入命令:
vi /etc/sysconfig/network-scripts/ifcfg-ens33
编辑该文件使其变为:
PROXY_METHOD=none
BROWSER_ONLY=no
BOOTPROTO=static
DEFROUTE=yes
IPV4_FAILURE_FATAL=no
IPV6INIT=yes
IPV6_AUTOCONF=yes
IPV6_DEFROUTE=yes
IPV6_FAILURE_FATAL=no
IPV6_ADDR_GEN_MODE=stable-privacy
NAME=ens33
UUID=e0816030-6c38-484a-a51f-944492c374f8
DEVICE=ens33
ONBOOT=yes
IPADDR=192.168.121.128
NETMASK=255.255.255.0
GATEWAY=192.168.121.2
NM_CONTROLLED=no
ZONE=public
vmware相应配置如下:

重启网络:service network restart
测试网络状态:ping www.baidu.com 能成功ping通说明可以连外网了
CentOS配置yum源
选择清华镜像源
步骤:
- 配置yum源需要修改本地的CentOS-Base.repo文件,首先备份该文件
mv /etc/yum.repos.d/CentOS-Base.repo /etc/yum.repos.d/CentOS-Base.repo.bak - 新建CentOS-Base.repo文件,
vi /etc/yum.repos.d/CentOS-Base.repo - 将如下内容写入该文件并保存
#
# The mirror system uses the connecting IP address of the client and the
# update status of each mirror to pick mirrors that are updated to and
# geographically close to the client.  You should use this for CentOS updates
# unless you are manually picking other mirrors.
#
# If the mirrorlist= does not work for you, as a fall back you can try the
# remarked out baseurl= line instead.
#
#

[base]
name=CentOS-$releasever - Base
baseurl=https://mirrors.tuna.tsinghua.edu.cn/centos/$releasever/os/$basearch/
#mirrorlist=http://mirrorlist.centos.org/?release=$releasever&arch=$basearch&repo=os
gpgcheck=1
gpgkey=file:///etc/pki/rpm-gpg/RPM-GPG-KEY-CentOS-7

#released updates
[updates]
name=CentOS-$releasever - Updates
baseurl=https://mirrors.tuna.tsinghua.edu.cn/centos/$releasever/updates/$basearch/
#mirrorlist=http://mirrorlist.centos.org/?release=$releasever&arch=$basearch&repo=updates
gpgcheck=1
gpgkey=file:///etc/pki/rpm-gpg/RPM-GPG-KEY-CentOS-7

#additional packages that may be useful
[extras]
name=CentOS-$releasever - Extras
baseurl=https://mirrors.tuna.tsinghua.edu.cn/centos/$releasever/extras/$basearch/
#mirrorlist=http://mirrorlist.centos.org/?release=$releasever&arch=$basearch&repo=extras
gpgcheck=1
gpgkey=file:///etc/pki/rpm-gpg/RPM-GPG-KEY-CentOS-7

#additional packages that extend functionality of existing packages
[centosplus]
name=CentOS-$releasever - Plus
baseurl=https://mirrors.tuna.tsinghua.edu.cn/centos/$releasever/centosplus/$basearch/
#mirrorlist=http://mirrorlist.centos.org/?release=$releasever&arch=$basearch&repo=centosplus
gpgcheck=1
enabled=0
gpgkey=file:///etc/pki/rpm-gpg/RPM-GPG-KEY-CentOS-7
也可以使用 wget -O CentOS.Base.repo http://xxxxxx直接将网络上的配置写入本地配置文件
保存后执行yum clean all ,然后执行yum makecache更新软件包缓存
本地yum源配置
https://blog.csdn.net/u012982280/article/details/80111274
挂载命令
mount -t iso9660 /dev/cdrom /mnt/cdrom
/mnt/cdrom是自己创建的用来挂载iso文件的目录
mount -t iso9660 -o loop /opt/CentOS-7-x86_64-DVD-1511_7.2.iso /media/CentOS7/
该命令可以指定挂载某个iso镜像到指定目录
安装jdk
安装了yum后配置jdk特别简单
yum -y install java即可,然后java -version查看到版本即安装成功
CentOS安装运行tomcat
tar包下载
新建一个下载用的文件夹:mkdir /usr/local/install
执行cd /usr/local/install 切换到该目录下:
获取tomcat的下载链接:

右键红框中的资源:复制链接地址
执行:wget https://mirrors.tuna.tsinghua.edu.cn/apache/tomcat/tomcat-8/v8.5.34/bin/apache-tomcat-8.5.34.tar.gz
若提示wget command not found ,说明没有安装该命令
执行:yum -y install wget
压缩包名字太长,改一下名:
mv /usr/local/install/apache-tomcat-8.5.34.tar.gz /usr/local/install/tomcat8.5
下载完解压到指定目录:
tar -zxvf /usr/local/install/usr/local/install/tomcat8.5 -C /usr/local/apps/tomcat
到tomcat的bin目录下执行startup.sh运行tomcat:
cd /usr/local/apps/tomcat/bin
执行./startup.sh
查看是否启动成功:
- 查看日志文件
执行vi /usr/local/apps/tomcat/logs/catalina.out
可以看到

启动成功! - 在浏览器访问tomcat首页判断是否启动成功
首先需要配置防火墙
执行firewall-cmd --zone=public --list-ports查看当前是否开启了8080端口
没有的话需要配置
firewall-cmd --zone=public --add-port=8080/tcp --permanent
显示success
然后firewall-cmd --reload
显示success
本地浏览器访问虚拟机的tomcat,直接使用虚拟机ip+8080端口即可

安装Nginx
https://blog.csdn.net/dxk539687357/article/details/53099752
这里直记录一个很详细的教程
centos下ftp服务器的配置
安装vsftpd服务
-
查询是否系统已经自带了vsftpd :
rpm -q vsftpd -
使用 yum 安装vsftpd:
yum -y install vsftpd(或者使用rpm安装vsftpd:rpm -ivh vsftpd-3.0.2-22.el7.x86_64) -
启动vsftpd服务:
service vsftpd start(设置开机启动:systemctl enable vsftpd.service) -
检查vsftpd是否开启:
ps -e|grep vsftpd或者 查看21端口是否被监听,netstat -an | grep 21 -
可以使用
netstat -ntpl | grep vsftpd命令查看到系统现在监听的vsftpd的端口为 21
开启防火墙
-
放开21端口:
firewall-cmd --zone=public --add-port=21/tcp --permanent -
永久开放 ftp 服務:
firewall-cmd --add-service=ftp --permanent(关闭ftp服务:firewall-cmd --remove-service=ftp --permanent) -
在不改变状态的条件下重新加载防火墙:
firewall-cmd --reload -
开机自启动ftp :
chkconfig vsftpd on
配置ftp权限
vsftpd的配置文件有:
- /etc/vsftpd/vsftpd.conf 主配置文件
- /etc/vsftpd/ftpuser 用户黑名单,禁止其中的用户登录ftp
- /etc/vsftpd/user_list 白名单
这里先贴出初始的vsftpd.conf ,以便和后续更改过的对比
#
# The default compiled in settings are fairly paranoid. This sample file
# loosens things up a bit, to make the ftp daemon more usable.
# Please see vsftpd.conf.5 for all compiled in defaults.
#
# READ THIS: This example file is NOT an exhaustive list of vsftpd options.
# Please read the vsftpd.conf.5 manual page to get a full idea of vsftpd's
# capabilities.
#
# Allow anonymous FTP? (Beware - allowed by default if you comment this out).
anonymous_enable=YES
#
# Uncomment this to allow local users to log in.
# When SELinux is enforcing check for SE bool ftp_home_dir
local_enable=YES
#
# Uncomment this to enable any form of FTP write command.
write_enable=YES
#
# Default umask for local users is 077. You may wish to change this to 022,
# if your users expect that (022 is used by most other ftpd's)
local_umask=022
#
# Uncomment this to allow the anonymous FTP user to upload files. This only
# has an effect if the above global write enable is activated. Also, you will
# obviously need to create a directory writable by the FTP user.
# When SELinux is enforcing check for SE bool allow_ftpd_anon_write, allow_ftpd_full_access
#anon_upload_enable=YES
#
# Uncomment this if you want the anonymous FTP user to be able to create
# new directories.
#anon_mkdir_write_enable=YES
#
# Activate directory messages - messages given to remote users when they
# go into a certain directory.
dirmessage_enable=YES
#
# Activate logging of uploads/downloads.
xferlog_enable=YES
#
# Make sure PORT transfer connections originate from port 20 (ftp-data).
connect_from_port_20=YES
#
# If you want, you can arrange for uploaded anonymous files to be owned by
# a different user. Note! Using "root" for uploaded files is not
# recommended!
#chown_uploads=YES
#chown_username=whoever
#
# You may override where the log file goes if you like. The default is shown
# below.
#xferlog_file=/var/log/xferlog
#
# If you want, you can have your log file in standard ftpd xferlog format.
# Note that the default log file location is /var/log/xferlog in this case.
xferlog_std_format=YES
#
# You may change the default value for timing out an idle session.
#idle_session_timeout=600
#
# You may change the default value for timing out a data connection.
#data_connection_timeout=120
#
# It is recommended that you define on your system a unique user which the
# ftp server can use as a totally isolated and unprivileged user.
#nopriv_user=ftpsecure
#
# Enable this and the server will recognise asynchronous ABOR requests. Not
# recommended for security (the code is non-trivial). Not enabling it,
# however, may confuse older FTP clients.
#async_abor_enable=YES
#
# By default the server will pretend to allow ASCII mode but in fact ignore
# the request. Turn on the below options to have the server actually do ASCII
# mangling on files when in ASCII mode.
# Beware that on some FTP servers, ASCII support allows a denial of service
# attack (DoS) via the command "SIZE /big/file" in ASCII mode. vsftpd
# predicted this attack and has always been safe, reporting the size of the
# raw file.
# ASCII mangling is a horrible feature of the protocol.
#ascii_upload_enable=YES
#ascii_download_enable=YES
#
# You may fully customise the login banner string:
#ftpd_banner=Welcome to blah FTP service.
#
# You may specify a file of disallowed anonymous e-mail addresses. Apparently
# useful for combatting certain DoS attacks.
#deny_email_enable=YES
# (default follows)
#banned_email_file=/etc/vsftpd/banned_emails
#
# You may specify an explicit list of local users to chroot() to their home
# directory. If chroot_local_user is YES, then this list becomes a list of
# users to NOT chroot().
# (Warning! chroot'ing can be very dangerous. If using chroot, make sure that
# the user does not have write access to the top level directory within the
# chroot)
#chroot_local_user=YES
#chroot_list_enable=YES
# (default follows)
#chroot_list_file=/etc/vsftpd/chroot_list
#
# You may activate the "-R" option to the builtin ls. This is disabled by
# default to avoid remote users being able to cause excessive I/O on large
# sites. However, some broken FTP clients such as "ncftp" and "mirror" assume
# the presence of the "-R" option, so there is a strong case for enabling it.
#ls_recurse_enable=YES
#
# When "listen" directive is enabled, vsftpd runs in standalone mode and
# listens on IPv4 sockets. This directive cannot be used in conjunction
# with the listen_ipv6 directive.
listen=NO
#
# This directive enables listening on IPv6 sockets. By default, listening
# on the IPv6 "any" address (::) will accept connections from both IPv6
# and IPv4 clients. It is not necessary to listen on *both* IPv4 and IPv6
# sockets. If you want that (perhaps because you want to listen on specific
# addresses) then you must run two copies of vsftpd with two configuration
# files.
# Make sure, that one of the listen options is commented !!
listen_ipv6=YES

pam_service_name=vsftpd
userlist_enable=YES
tcp_wrappers=YES
首先创建一个ftp用户:
useradd test -s /sbin/nologin
该命令会创建一个用户test,并且没有赋予登陆ssh的权限。
同时该命令会默认在/home下创建一个test文件夹,这是test用户的家目录
若想修改家目录 useradd test -s /sbin/nologin –d /opt/test
然后赋予密码:passwd test,会提示输入两次密码
查看test是否存在id test

下面对vsftpd.conf进行配置
vi /etc/vsftpd/vsftpd.conf
禁止匿名访问
将配置文件中”anonymous_enable=YES “改为 “anonymous_enable=NO”
然后启动服务:service vsftpd start
使用xftp连接 ftp

现在可以传文件了
可以修改对test目录的操作权限
先查看test的权限:ls -al /home

第一个rwx是用户级别的权限(读/写/执行),第二个r–是组级别的只有读权限,第三个r–是其他用户的
修改权限的方法
-
chmod u-w /home/test取消该目录对于用户的写权限

发现无法写入了,因为没有了写权限 -
数字法:
chmod 777 /home/test777是赋予三个级别的所有权限
读权限:4 写权限:2 执行:1
7表示4+2+1,即拥有全部权限,第一个7表示用户级别
其他的权限设置也可以根据这个规则来设置
一个问题
我按照网上设置用户不可cd到上级目录,
修改chroot_local_user=YES chroot_list_enable=NO之后连接报错

这个问题试了很多方法仍然无解,只能通过sftp的方式去链接
看到配置文件给的提示:
You may specify an explicit list of local users to chroot() to their home
directory. If chroot_local_user is YES, then this list becomes a list of
users to NOT chroot().
(Warning! chroot’ing can be very dangerous. If using chroot, make sure that
the user does not have write access to the top level directory within the
chroot)
这段注释说明了:vsftpd.conf中有三个属性可以用来配置用户的访问权限
- chroot_local_user
- chroot_list_enable
- chroot_list_file
有张表可以描述他们的关系:

这里我使用了都为yes的情况,也就是只能通过chroot_list来指定哪些用户不受限制。
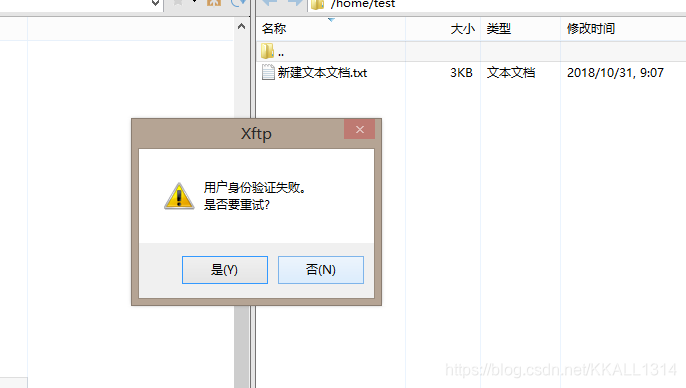
然而修改后在登陆ftp发现报错:xftp下报错" 用户身份认证失败"
从2.3.5之后,vsftpd增强了安全检查,如果用户被限定在了其主目录下,则该用户的主目录不能再具有写权限了!如果检查发现还有写权限,就会报该错误。
可以在vsftpd的配置文件中增加下列两项中的一项:
allow_writeable_chroot=YES
重启发现还是无法访问
解决办法:vi /etc/selinux/config
将SELINUX=enforcing 设置成SELINUX=disabled
然后reboot一下即可
测试一下:

想访问root文件夹,会报错,说明已经不允许该用户切换到其用户目录以外的目录了,大功告成!
记录常用的命令:
find /目录 -name 文件名 查找某个目录下的文件
> filename 清空文件内容
ps -ef|grep name 查看进程状态
cut -d : -f 1 /etc/passwd查看系统中有哪些用户
groupadd 组名 添加组
cat /etc/group 查看组列表
cat /etc/passwd 查看用户列表
usermod -G groupname username 或者:gpasswd -a user group 给组添加用户
grep '组名' /etc/group显示组下的用户