Mysql数据库与python连接
一、下载与安装mysql5.6
下载和安装请看连接【MySQL数据库下载与安装详细教程】
二、数据库的基本操作
cmd命令行下输入以下命令
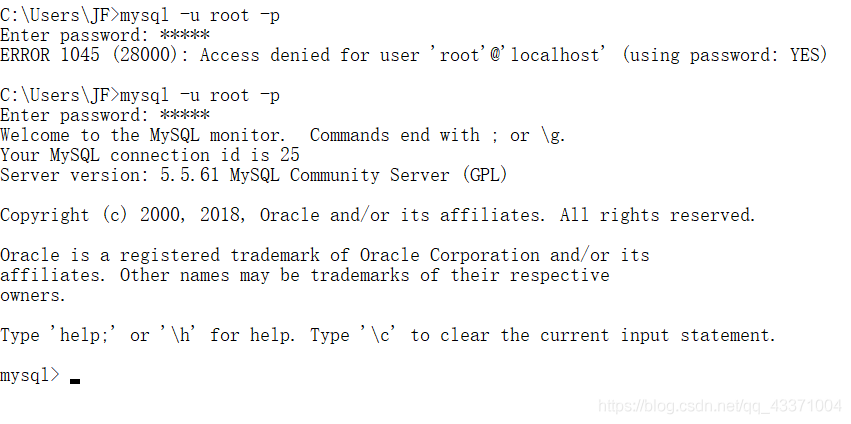
登陆
mysql -u root -p
密码 (输自己安装时候设置的)
就可以看到登陆成功的界面
创建数据库
【python操作时候先要创建好数据库,所以这一步必不可少】
create database 数据库名 [其他选项];
例如我们需要创建一个名为 samp_db 的数据库
create database samp_db
create database samp_db character set gbk;可以加上指定的编码类型
show databases; 命令查看已经创建了哪些数据库。
两种方式对数据库进行使用的选择:
一:在登录数据库时指定, 命令: mysql -D 所选择的数据库名 -h 主机名 -u 用户名 -p
例如登录时选择刚刚创建的数据库: mysql -D samp_db -u root -p
二:在登录后使用 use 语句指定, 命令: use 数据库名;
use 语句可以不加分号, 执行 use samp_db 来选择刚刚创建的数据库, 选择成功后会提示: Database changed
创建数据库表
使用 create table 语句可完成对表的创建, create table 的常见形式:
create table 表名称(列声明);
以创建 students 表为例, 表中将存放 学号(id)、姓名(name)、性别(sex)、年龄(age)、联系电话(tel) 这些内容:
create table students
(
id int unsigned not null auto_increment primary key,
name char(100) not null,
sex char(10) not null,
age tinyint unsigned not null,
tel char(13) null default “-”
);
show variables like ‘char%’; 查看编码值
set names ‘gbk’; 更改编码(可以解决输入中文乱码情况)

show tables; 命令可查看已创建了表的名称;
describe 表名; 命令可查看已创建的表的详细信息。
插入信息
insert into students values(NULL, “王刚”, “男”, 20, “13811371377”);插入每列项的值的情况
insert into students (name, sex, age) values(“孙丽华”, “女”, 21);插入其中列的值
查看表信息
查表中的name,age的信息.
select name, age from students;
也可以使用通配符 * 查询表中所有的内容, 语句:
select * from students;
以查询所有性别为女的信息为例, 输入查询语句:
select * from students where sex=“女”;
where 子句不仅仅支持 “where 列名 = 值” 这种名等于值的查询形式, 对一般的比较运算的运算符都是支持的,
例如 =、>、<、>=、<、!= 以及一些扩展运算符 is [not] null、in、like 等等。
还可以对查询条件使用 or 和 and 进行组合查询
select * from students where id<5 and age>20;
更新表中的数据
使用示例:
将id为5的手机号改为默认的"-": update students set tel=default where id=5;
将所有人的年龄增加1: update students set age=age+1;
将手机号为 13288097888 的姓名改为 “张伟鹏”, 年龄改为 19: update students set name=“张伟鹏”, age=19 where tel=“13288097888”;
删除表中的数据
delete 语句用于删除表中的数据, 基本用法为:
delete from 表名称 where 删除条件;
使用示例:
删除id为2的行: delete from students where id=2;
删除所有年龄小于21岁的数据: delete from students where age<20;
删除表中的所有数据: delete from students;
创建后表的修改
添加列
在表的最后追加列 address: alter table students add address char(60);
在名为 age 的列后插入列 birthday: alter table students add birthday date after age;
修改列
基本形式: alter table 表名 change 列名称 列新名称 新数据类型;
示例:
将表 tel 列改名为 telphone: alter table students change tel telphone char(13) default “-”;
将 name 列的数据类型改为 char(16): alter table students change name name char(16) not null;
删除列
基本形式: alter table 表名 drop 列名称;
示例:
删除 birthday 列: alter table students drop birthday;
重命名表
基本形式: alter table 表名 rename 新表名;
示例:
重命名 students 表为 workmates: alter table students rename workmates;
删除整张表
基本形式: drop table 表名;
示例: 删除 workmates 表: drop table workmates;
删除整个数据库
基本形式: drop database 数据库名;
示例: 删除 samp_db 数据库: drop database samp_db;
修改 root 用户密码
使用 mysqladmin 方式:
打开命令提示符界面, 执行命令: mysqladmin -u root -p password 新密码
执行后提示输入旧密码完成密码修改, 当旧密码为空时直接按回车键确认即可。
可视化管理工具 MySQL Workbench
尽管我们可以在命令提示符下通过一行行的输入或者通过重定向文件来执行mysql语句, 但该方式效率较低,
由于没有执行前的语法自动检查, 输入失误造成的一些错误的可能性会大大增加,
这时不妨试试一些可视化的MySQL数据库管理工具, MySQL Workbench
就是 MySQL 官方 为 MySQL 提供的一款可视化管理工具, 你可以在里面通过可视化的方式直接管理数据库中的内容,
并且 MySQL Workbench 的 SQL 脚本编辑器支持语法高亮以及输入时的语法检查, 当然, 它的功能强大, 绝不仅限于这两点。
MySQL Workbench官方介绍: http://www.mysql.com/products/workbench/
MySQL Workbench 下载页: http://dev.mysql.com/downloads/tools/workbench/
三、python代码连接数据库
1、安装pymysql库
cmd运行pip install pymysql
2、代码建表
import pymysql
db = pymysql.connect("localhost", "root", "admin", "test1")#admin为自己数据库密码,test1为自己cmd中创建的数据库名
cursor = db.cursor()
cursor.execute("drop table if exists fin;") #如果存在fin表时候先删除
sql = '''create table fin
	(
		id int unsigned not null auto_increment primary key,
		姓名 char(100) not null,
		性别 char(4) not null,
		年龄 tinyint unsigned not null,
		电话 char(13) null default "-"
	);'''
cursor.execute(sql)
db.close()
结果可在cmd命令行数据库中查看,如图:

3,代码向表中插入内容
import pymysql
db = pymysql.connect("localhost", "root", "admin", "test1")#admin为自己数据库密码,test1为自己cmd中创建的数据库名
cursor = db.cursor()
# cursor.execute("drop table if exists fin;") #如果存在fin表时候先删除
# sql = '''create table fin
# 	(
# 		id int unsigned not null auto_increment primary key,
# 		姓名 char(100) not null,
# 		性别 char(4) not null,
# 		年龄 tinyint unsigned not null,
# 		电话 char(13) null default "-"
# 	);'''
# cursor.execute(sql)
name = '李白'
sex = '男'
age = '20'
tel = '123456789'
sql = "insert into fin (姓名,性别,年龄,电话) values ('%s','%s','%s','%s');" % (name, sex, age, tel)
cursor.execute(sql)
#为了遵循mysql语法也可以用以下两句字符串拼接
#sql = 'insert into fin  (姓名,性别,年龄,电话) values (\"'+name+'\",\"'+sex+'\",\"'+age+'\",\"'+tel+'\");'
#cursor.execute(sql)
db.commit()
db.close()
结果如图:

四、将爬虫信息保存到mysql数据库
import requests
from bs4 import BeautifulSoup
import pymysql

list_url = []#存储生成的从第一页到第5页的网页连接
list_info_experience = []#存储求职要求经验
list_info_education = []#存储求职要求学历
list_info_money = []#存储求职要求薪资区间
list_name = []#存储求职公司名称
db = pymysql.connect("localhost", "root", "admin", "Myinterview")
cursor = db.cursor()

#mysql建表
def Create_Table(cursor):
    cursor.execute("drop table if exists employee;")  # 如果存在fin表时候先删除
    sql = '''create table employee
    	(
    		id int unsigned not null auto_increment primary key,
    		公司名称 char(100) not null,
    		工作经验 char(50) not null,
    		学历要求 char(50) not null,
    		薪资范围 char(50) null default "-"
    	);'''
    cursor.execute(sql)

#插入爬取的信息
def Mysql_Content(cursor,JobName, JobExperience, JobEducation, JobMoney):
    print(JobName, JobExperience, JobEducation, JobMoney)
    sql = 'INSERT INTO employee(公司名称,工作经验,学历要求,薪资范围) VALUES (\"' + JobName + '\",\"' + JobExperience + '\",\"' + JobEducation + '\",\"' + JobMoney + '\")'
    #print(sql)
    cursor.execute(sql)
    db.commit()


#网页有很多页,这里把每一页的连接存储在list_url中
def Make_Url():
    for i in range(1, 4):
        global URL
        URL = 'https://www.jobui.com/jobs?jobKw=python&cityKw=%E5%8C%97%E4%BA%AC&n={}'.format(i)
        list_url.append(URL)
        #print(list_url)

#获取给定URL页的html信息
def Get_Wb(URL):

    headers = {'User-Agent': 'Mozilla/5.0 (Windows NT 10.0; Win64; x64) AppleWebKit/537.36 (KHTML, like Gecko) Chrome/69.0.3497.100 Safari/537.36'}
    wb_data = requests.get(URL, headers=headers)
    global soup
    soup = BeautifulSoup(wb_data.content, 'lxml')
    #print(soup)

#获取每家公司的名称
def Get_Name():
    names = soup.select('#search-match > div.header-2014 > div.astruct.cfix > div.aleft > div.jk-box.jk-matter.j-jobInfo > ul > li > div > div > div.cfix > a')
    for i in names:
        list_name.append(i.get_text().strip())

#获取每家公司的经验要求,学历要求,薪资区间
def Get_Msg():
    for i in range(1, 16):
        xxx = 'div.header-2014 > div.astruct.cfix > div.aleft > div.jk-box.jk-matter.j-jobInfo > ul > li:nth-of-type({}) > div > div > div:nth-of-type(4)'.format(i)
        #print(xxx)
        msg = soup.select(xxx)
        #print(msg)
        for y in msg:
            info = y.get_text()
            info = info.split('|')#将经验要求,学历要求,薪资区间3个信息,以|分割开,存储为列表格式
            list_info_experience.append(info[0].strip())
            list_info_education.append(info[1].strip())
            list_info_money.append(info[2].strip())
#最后以字典形式输出
def DictOutput():
    for JobName, JobExperience, JobEducation, JobMoney in zip(list_name, list_info_experience, list_info_education, list_info_money):

        AllData = {'公司名称': JobName,
                   '工作经验': JobExperience,
                   '学历要求': JobEducation,
                   '薪资范围': JobMoney
        }
        print(AllData)
        Mysql_Content(cursor, JobName, JobExperience, JobEducation, JobMoney)
print('北京市招聘信息')
Make_Url()
#先输出3页
for i in range(0, 3):
    Get_Wb(list_url[i])
    #print(list_url[i])#所爬取的网页链接
    Get_Msg()
    Get_Name()
Create_Table(cursor)
DictOutput()
db.close()
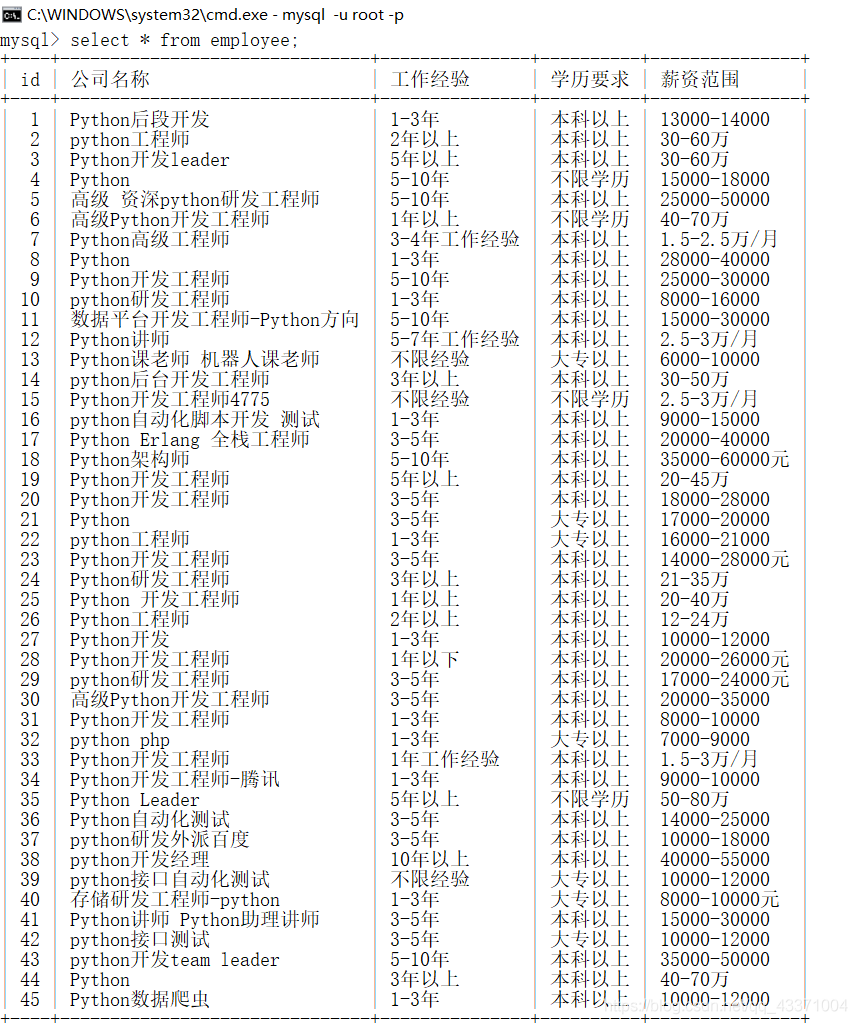
结果如图:
------------------------------------------------------------------------
谢谢支持!