最近安装了下vue cli3版本,与 cli 2 相比,文件少了,以前配置方法也不管用了。demo 中的大量的数据,需要做成 ajax 请求的方式来展示数据,因此,需要启动两个服务,一个用作前端请求,一个用作后端发送。
双服务的配置方法在 build / webpack.dev.conf.js 中写入。
在安装成功 vue 后,是仅有一个 端口为 8080 的服务,默认的服务名称为:devServer,为了满足两个服务的需求,需要在这个文件中再配一个服务,服务名称为 : api-server
const devWebpackConfig = merge(baseWebpackConfig, {
  module: {
    rules: utils.styleLoaders({ sourceMap: config.dev.cssSourceMap, usePostCSS: true })
  },
  // cheap-module-eval-source-map is faster for development
  devtool: config.dev.devtool,

  // these devServer options should be customized in /config/index.js
  devServer: {
    clientLogLevel: 'warning',
    historyApiFallback: {
      rewrites: [
        { from: /.*/, to: path.posix.join(config.dev.assetsPublicPath, 'index.html') },
      ],
    },
    hot: true,
    contentBase: false, // since we use CopyWebpackPlugin.
    compress: true,
    host: HOST || config.dev.host,
    port: PORT || config.dev.port,
    open: config.dev.autoOpenBrowser,
    overlay: config.dev.errorOverlay
      ? { warnings: false, errors: true }
      : false,
    publicPath: config.dev.assetsPublicPath,
    proxy: config.dev.proxyTable,
    quiet: true, // necessary for FriendlyErrorsPlugin
    watchOptions: {
      poll: config.dev.poll,
    }
  },
  plugins: [
    new webpack.DefinePlugin({
      'process.env': require('../config/dev.env')
    }),
    new webpack.HotModuleReplacementPlugin(),
    new webpack.NamedModulesPlugin(), // HMR shows correct file names in console on update.
    new webpack.NoEmitOnErrorsPlugin(),
    // https://github.com/ampedandwired/html-webpack-plugin
    new HtmlWebpackPlugin({
      filename: 'index.html',
      template: 'index.html',
      inject: true
    }),
    // copy custom static assets
    new CopyWebpackPlugin([
      {
        from: path.resolve(__dirname, '../static'),
        to: config.dev.assetsSubDirectory,
        ignore: ['.*']
      }
    ])
  ]
})
api-server 的服务需要用到 express / body-parser / fs,除了 express 不用安装外,还需要安装 body-parser / fs
npm install body-parser
npm i fs
服务端的配置文件在 devServer 服务结束后:
/**新配置的 api-server,用来使用 axios 分页获取数据
 *
 * 1.需要使用 express 来新建并启动服务,需要安装 express / body-parser / fs /
 * 2.port 的设置从 PORT || config.dev.port 中解析,因为 port 的解析存在于 config/index.js的 dev 中
 * 3.数据的地址通过 readFile()读取,数据目录同 src 同级
 * 4.api-server 的请求地址为:http://localhost:8081/api/shop?page=1  必须加参数 page ,否则获取不到数据
 *
 * 5.请求的端口号为 8080 ,服务端的端口号为 8181
 */
const express=require('express')
const apiServer = express()
const bodyParser = require('body-parser')
apiServer.use(bodyParser.urlencoded({ extended: true }))
apiServer.use(bodyParser.json())
const apiRouter = express.Router()
const port = PORT || config.dev.port
const fs = require('fs')
apiRouter.route('/:apiName')
.all(function (req, res) {
  var page=req.query.page;
  //请求的数据地址
  fs.readFile('./db/data.json', 'utf8', function (err, data) {
    // if (err) throw err
    var data = JSON.parse(data)
    if (data[req.params.apiName]) {
      var result=data[req.params.apiName];
      //newData 为请求数据的参数
      var newData=result.slice((page-1)*10,page*10);
      res.json(newData);
    }
    else {
      res.send('no such api name')
    }
  })
})

apiServer.use('/api', apiRouter);
apiServer.listen(port + 1, function (err) {
  if (err) {
    console.log(err)
    return
  }
  //dev-server默认端口为8080,因此新建的server,端口号 +1 ,不会冲突
  console.log('Listening at http://localhost:' + (port + 1) + '\n')
});
当服务配置好后,需要重启 npm run dev.
当前的请求端口为8080,而服务端的端口为8081,如果直接用下面的地址请求,无疑会发生跨域而请求失败:
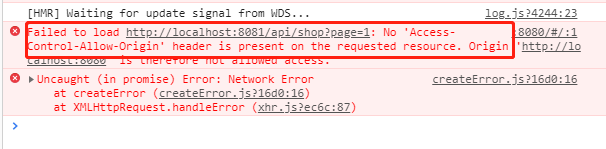
const url = "http://localhost:8080/api/shop?page=";
解决跨域的办法是,在 config / index.js / dev 的 proxyTable 对象中设置代理。当通过 8080 请求数据 /api/ 时,通过它指向数据来源 8081。
dev: {

    // Paths
    assetsSubDirectory: 'static',
    assetsPublicPath: '/',
    //设置代理,当请求 /api/ 时,指向 8081
    proxyTable: {
      '/api/':'http://localhost:8081/'
    },
}
重新启动服务:npm run dev,再次请求
http://localhost:8080/api/shop?page=1 时,就可以摸拟请求而获取到第1页的数据:
export default {
    data () {
    return {
      list: [],
      page:0
    }
  },
  mounted(){
      //结构加载完后,这里写请求数据的方法
        this.page++;
        axios.get(url + this.page).then(res=>{
            console.log('shopList=' + res.data)
            this.list = res.data;
        })
  }
}
完。