在很多网站上我们都可以看到一些动态的图片,比如水的滴落,风的流动,树的摇曳,花瓣的飘散,等等,比如这样的:
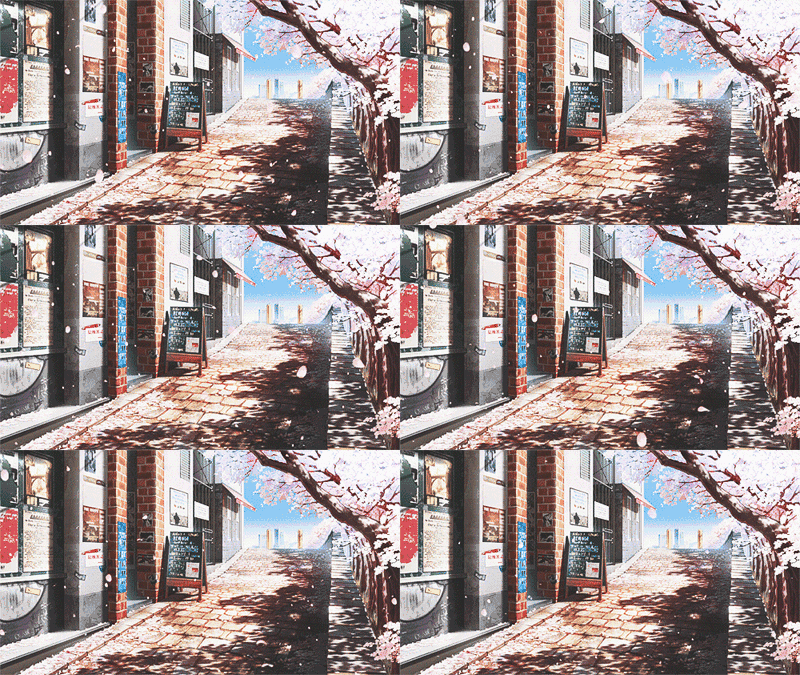
这样的:

挺唯美的是不是?
这些图片是怎么做出来的,笔者也不是很清楚,不过笔者最近正好在学习p5.js,里面的有些技术正好可以实现这种效果,让我们一起来看看吧;
其实笔者一开始想做的并不是花瓣,而是雪花,首先通过p5.js,绘制出雪花的一部分:
       var width;
function draw(){
    width=5;
    background(0);
    translate(300, 400);
    stroke(0, 153, 255);
    strokeWeight(width);
    line(0, 0, 0, 10 * width);
    line(-3 * width, 7.5 * width, 0, 5 * width);
    line(3 * width, 7.5 * width, 0, 5 * width);
    line(-2.5 * width, 5 * width, 0, 3 * width);
    line(-1 * width, 3.8 * width, -2 * width, 3 * width);
}
运行一下

还行,让我们旋转一下,一朵完整的雪花就出来了:

我们将绘制雪花的代码放入函数中,附上完整代码:
    function snowflake(x, y, width) {//绘制雪花,参数分别为雪花的x坐标,y坐标和宽度
        stroke(0, 153, 255);//设置颜色
        strokeWeight(width);//设置雪花线宽
        translate(x, y);//转化坐标系到x,y
        line(0, 0, 0, 10 * width);
        line(-3 * width, 7.5 * width, 0, 5 * width);
        line(3 * width, 7.5 * width, 0, 5 * width);
        line(-2.5 * width, 5 * width, 0, 3 * width);
        line(-1 * width, 3.8 * width, -2 * width, 3 * width);
        rotate(PI / 3);//旋转60度,绘制下一片雪花(注意旋转的是坐标系,为了避免影响其他代码,最后需要旋转回去/或旋转一周)
        line(0, 0, 0, 10 * width);
        line(-3 * width, 7.5 * width, 0, 5 * width);
        line(3 * width, 7.5 * width, 0, 5 * width);
        line(-2.5 * width, 5 * width, 0, 3 * width);
        line(-1 * width, 3.8 * width, -2 * width, 3 * width);
        rotate(PI / 3);
        line(0, 0, 0, 10 * width);
        line(-3 * width, 7.5 * width, 0, 5 * width);
        line(3 * width, 7.5 * width, 0, 5 * width);
        line(-2.5 * width, 5 * width, 0, 3 * width);
        line(-1 * width, 3.8 * width, -2 * width, 3 * width);
        rotate(PI / 3);
        line(0, 0, 0, 10 * width);
        line(-3 * width, 7.5 * width, 0, 5 * width);
        line(3 * width, 7.5 * width, 0, 5 * width);
        line(-2.5 * width, 5 * width, 0, 3 * width);
        line(-1 * width, 3.8 * width, -2 * width, 3 * width);
        rotate(PI / 3);
        line(0, 0, 0, 10 * width);
        line(-3 * width, 7.5 * width, 0, 5 * width);
        line(3 * width, 7.5 * width, 0, 5 * width);
        line(-2.5 * width, 5 * width, 0, 3 * width);
        line(-1 * width, 3.8 * width, -2 * width, 3 * width);
        rotate(PI / 3);
        line(0, 0, 0, 10 * width);
        line(-3 * width, 7.5 * width, 0, 5 * width);
        line(3 * width, 7.5 * width, 0, 5 * width);
        line(-2.5 * width, 5 * width, 0, 3 * width);
        line(-1 * width, 3.8 * width, -2 * width, 3 * width);
        rotate(PI / 3);
        translate(-x, -y);//切换回原坐标系(左上角0.0为圆点)
    }
很好,一片雪花已经绘制出来了,接下来我们要让他动起来
在draw设置一个参数i,i的初值设置为0,然后将i放入调用的雪花函数中,并在每次绘制后让i++:`
var i=0;
function draw(){
background(0);
snowflake(400,500+i,5);
i++;
}
效果:

一朵雪花缓慢的下落,很简单是不是?
让我们多加一些东西:
在雪花的绘制中加入参数angle,每次绘制时,先将坐标系旋转angle后,再绘制:
var i=0;
var angle=0;
function draw() {
background(0);
snowflake(400, 100 + i, 5, angle);
i++;
angle = angle + 0.02;
}
function snowflake(x, y, width, angle) {
    stroke(0, 153, 255);
    strokeWeight(width);
    translate(x, y);
    rotate(angle);
    line(0, 0, 0, 10 * width);
    line(-3 * width, 7.5 * width, 0, 5 * width);
    line(3 * width, 7.5 * width, 0, 5 * width);
    line(-2.5 * width, 5 * width, 0, 3 * width);
    line(-1 * width, 3.8 * width, -2 * width, 3 * width);
    rotate(PI / 3);
    line(0, 0, 0, 10 * width);
    line(-3 * width, 7.5 * width, 0, 5 * width);
    line(3 * width, 7.5 * width, 0, 5 * width);
    line(-2.5 * width, 5 * width, 0, 3 * width);
    line(-1 * width, 3.8 * width, -2 * width, 3 * width);
    rotate(PI / 3);
    line(0, 0, 0, 10 * width);
    line(-3 * width, 7.5 * width, 0, 5 * width);
    line(3 * width, 7.5 * width, 0, 5 * width);
    line(-2.5 * width, 5 * width, 0, 3 * width);
    line(-1 * width, 3.8 * width, -2 * width, 3 * width);
    rotate(PI / 3);
    line(0, 0, 0, 10 * width);
    line(-3 * width, 7.5 * width, 0, 5 * width);
    line(3 * width, 7.5 * width, 0, 5 * width);
    line(-2.5 * width, 5 * width, 0, 3 * width);
    line(-1 * width, 3.8 * width, -2 * width, 3 * width);
    rotate(PI / 3);
    line(0, 0, 0, 10 * width);
    line(-3 * width, 7.5 * width, 0, 5 * width);
    line(3 * width, 7.5 * width, 0, 5 * width);
    line(-2.5 * width, 5 * width, 0, 3 * width);
    line(-1 * width, 3.8 * width, -2 * width, 3 * width);
    rotate(PI / 3);
    line(0, 0, 0, 10 * width);
    line(-3 * width, 7.5 * width, 0, 5 * width);
    line(3 * width, 7.5 * width, 0, 5 * width);
    line(-2.5 * width, 5 * width, 0, 3 * width);
    line(-1 * width, 3.8 * width, -2 * width, 3 * width);
    rotate(PI / 3);
    rotate(-angle);
    translate(-x, -y);
}
运行:

雪花自己转起来了;
然后我们再用这些方法做多个雪花,具体就不多说了,直接上代码:
var num = 20;
var mixnum;
var gravity = 0.05;
var snows = [];
var i=0;

function setup() {
    mixnum=num;
    createCanvas(windowWidth, windowHeight);
    createObject();
    var int=self.setInterval("createObject()",2500);
}
function createObject() {
    for (i; i < mixnum; i++) {
        snows[i] = new Snow(
            random(0, windowWidth),
            random(0, 200),
            random(1, 5),
            random(1, 3),
            random(1, 3),
            0
        );
    }
    mixnum=mixnum+num;
}

function draw() {
    background(240);
    snows.forEach(snow => {
        snow.move();
        snow.display();
        snow.delete();
    });
}

function Snow(x, y, width, dx, dy,angle) {
    this.x = x;//落点横坐标
    this.y = y;//落点纵坐标
    this.move = function () {
        this.x += dx;
        this.y += dy;
        angle=angle+random(0,0.02);
    };
    this.display = function () {
        snowflake(this.x, this.y, width,angle);
    };
    this.delete=function () {
        if(this.y>=windowHeight){
            snows.splice(this,1);
        }

    }
}

function snowflake(x, y, width,angle) {
    stroke(0, 153, 255);
    strokeWeight(width);
    translate(x, y);
    rotate(angle);
    line(0, 0, 0, 10 * width);
    line(-3 * width, 7.5 * width, 0, 5 * width);
    line(3 * width, 7.5 * width, 0, 5 * width);
    line(-2.5 * width, 5 * width, 0, 3 * width);
    line(-1 * width, 3.8 * width, -2 * width, 3 * width);
    rotate(PI / 3);
    line(0, 0, 0, 10 * width);
    line(-3 * width, 7.5 * width, 0, 5 * width);
    line(3 * width, 7.5 * width, 0, 5 * width);
    line(-2.5 * width, 5 * width, 0, 3 * width);
    line(-1 * width, 3.8 * width, -2 * width, 3 * width);
    rotate(PI / 3);
    line(0, 0, 0, 10 * width);
    line(-3 * width, 7.5 * width, 0, 5 * width);
    line(3 * width, 7.5 * width, 0, 5 * width);
    line(-2.5 * width, 5 * width, 0, 3 * width);
    line(-1 * width, 3.8 * width, -2 * width, 3 * width);
    rotate(PI / 3);
    line(0, 0, 0, 10 * width);
    line(-3 * width, 7.5 * width, 0, 5 * width);
    line(3 * width, 7.5 * width, 0, 5 * width);
    line(-2.5 * width, 5 * width, 0, 3 * width);
    line(-1 * width, 3.8 * width, -2 * width, 3 * width);
    rotate(PI / 3);
    line(0, 0, 0, 10 * width);
    line(-3 * width, 7.5 * width, 0, 5 * width);
    line(3 * width, 7.5 * width, 0, 5 * width);
    line(-2.5 * width, 5 * width, 0, 3 * width);
    line(-1 * width, 3.8 * width, -2 * width, 3 * width);
    rotate(PI / 3);
    line(0, 0, 0, 10 * width);
    line(-3 * width, 7.5 * width, 0, 5 * width);
    line(3 * width, 7.5 * width, 0, 5 * width);
    line(-2.5 * width, 5 * width, 0, 3 * width);
    line(-1 * width, 3.8 * width, -2 * width, 3 * width);
    rotate(PI / 3);
    rotate(-angle);
    translate(-x, -y);
}
最终效果:

不知道会不会有点卡,我传的时候好像挺卡的。
好了,雪花飞舞的感觉做出来了(虽然有点简陋),那让我们把雪花换成花瓣:

在插入背景图片:


是不是有点感觉了?第一张图原本的比例不太够,所以小姐姐的脸被我拉长了,不过能看效果就好了。
附上完整代码:
   var num = 20;
    var mixnum;
    var gravity = 0.05;
    var follows = [];
    var i=0;

    var img;
    function preload(){
        //加载图片文件
        img = loadImage("3.jpg");
    }
    function setup() {
        mixnum=num;
        createCanvas(windowWidth, windowHeight);
        createObject();
        var int=self.setInterval("createObject()",2500);
    }
    function createObject() {
        for (i; i < mixnum; i++) {
            follows[i] = new Follow(
                random(-500,windowWidth),
                random(-200,0),
                random(1, 3),
                random(1, 3)
            );
        }
        mixnum=mixnum+num;
    }

    function draw() {
        background(255);
        image(img, 0, 0,windowWidth, windowHeight);
        follows.forEach(follow => {
            follow.move();
            follow.display();
            follow.delete();
        });
    }

    function Follow(x, y, dx, dy) {
        this.x = x;//落点横坐标
        this.y = y;//落点纵坐标
        var randomNum = Math.ceil(Math.random()*3);
        this.move = function () {
            this.x += dx;
            this.y += dy;
        };
        this.display = function () {
            follow(this.x, this.y, randomNum);
        };
        this.delete=function () {
            if(this.y>=windowHeight){
                follows.splice(this,1);
            }

        }


    }

    function follow(x, y, flag) {
        noStroke();
        translate(x, y);
        rotate(PI/3);
        if(flag==1) {
            fill(255,192,203);
            arc(0, 0, 40, 20, 0, PI);
            arc(0, 0, 40, 20, PI, 2 * PI);
        }
        if(flag==2) {
            fill(249,204,226);
            arc(0, 0, 30, 15, 0, PI / 3);
        }
        if(flag==3) {
            fill(242,156,177);
            ellipse(0, 0, 20, 8);
        }
        if(flag==4){

        }
        rotate(-PI/3);
        translate(-x, -y);
    }
我在follow函数中绘制了三种不同形状大小颜色的樱花,然后用随机数来决定生成哪种樱花,这样看起来更好看一些,当然樱花的形状越多越好,这里笔者只是展示一种效果,就不绘制太多的樱花了;
OK,以上就是码绘的代码和效果,那么接下来是手绘。。
手绘的雪花:

手绘的花雨:

不擅长手绘,见谅一下;
手绘与码绘的对比:
从笔者这个例子来看,手绘和码绘都各有各的优点:
码绘的优点:
表现力:码绘可以通过代码控制物体的旋转,运动,用动态的场景更形象的表现出花雨的姿态;
可量产:码绘可以通过循环、递归等方式大量的调用函数,绘制大量对象,并且可以控制对象的大小、宽度等,这是码绘较难做到的;
可套用:就像花瓣飞舞这个效果,可以将做好的动态效果,套用在不同的背景图片中,做出不同的图片;
准确性:在一些单纯由线条组成的,具有固定形态的物体(如雪花),码绘可以更精确的控制旋转的角度,每片雪花每个方向的长度,等等,这是手绘比较难做到的。
手绘的优点:
直观:可以很轻松的画出来,而不需要像码绘一样,确定各点坐标、旋转;
随机性:手绘可以很轻松的绘制出不同形态、不同大小的花瓣,而码绘只能在原本已经绘制好的花瓣中挑选(没有合适的智能绘制算法)。
创作体验:
作为一个灵魂画手,手绘基本断手的笔者,码绘自然是最佳选择。在码绘的过程中,经常会产生没想到的效果,比如一开始绘制雪花的时候,想着通过旋转花瓣来绘制整朵雪花,结果尝试了半天都没成功,结果从网上早了挺久才知道了可以通过操作坐标系来旋转绘制这种方法,经常会有“哦,原来如此”“还能这样”的感慨,算是一种比较开心的体验吧。而且通过自己的学习,去实现一些原来不会的事情,也是一种快乐呢。
参考资料:
p5.js官方案例:https://p5js.org/examples/motion-bouncy-bubbles.html
p5.js入门教程:https://blog.csdn.net/qq_27534999/article/details/75151515
用p5.js绘制毕达哥拉斯树:https://www.jb51.net/article/136944.htm