权限控制框架有:Spring security 重量级安全框架
Apache Shiro轻量级安全框架
Shiro是什么??
Apache Shiro是一个强大且易用的Java安全框架,有身份验证、授权、密码学和会话管理。使用Shiro的易于理解的API,您可以快速、轻松地获得任何应用程序,从最小的移动应用程序到最大的网络和企业应用程序。
Shiro四大基石:身份验证、授权、密码学和会话管理

那么Shiro如何集成Spring呢?? (集成Spring的核心就是把框架的核心类(SecurityManager,Subject,Realm)交给Spring管理!)
代码所在项目位置截图:

第一步:导入jar包 [注意:这是Maven项目导jar的方式哦!其他的根据自己项目情况]
    <!-- shiro的支持包 -->
    <dependency>
      <groupId>org.apache.shiro</groupId>
      <artifactId>shiro-all</artifactId>
      <version>1.4.0</version>
      <type>pom</type>
    </dependency>
    <!-- shiro与Spring的集成包 -->
    <dependency>
      <groupId>org.apache.shiro</groupId>
      <artifactId>shiro-spring</artifactId>
      <version>1.4.0</version>
</dependency>第二步:web.xml配置shiro和spring所需的过滤器
   <!-- Shiro和Spring集成时必须引入的一个过滤器
     DelegatingFilterProxy:委派的过滤器,代理的过滤器
     注意:它什么功能都没有,最后功能还是Spring去做 -->
  <filter>
    <filter-name>shiroFilter</filter-name>
    <filter-class>org.springframework.web.filter.DelegatingFilterProxy</filter-class>
    <init-param>
      <param-name>targetFilterLifecycle</param-name>
      <param-value>true</param-value>
    </init-param>
  </filter>
  <filter-mapping>
    <filter-name>shiroFilter</filter-name>
    <url-pattern>/*</url-pattern>
  </filter-mapping>
第三步:拷贝shiro的Spring配置文件并集成Spring

下面是我的applicationContext-shiro.xml配置文件: (注意:这里的配置文件还需要下面的一个过滤器和自定义Realm结合使用哦!)
<?xml version="1.0" encoding="UTF-8"?>
<beans xmlns="http://www.springframework.org/schema/beans"
       xmlns:xsi="http://www.w3.org/2001/XMLSchema-instance"
       xsi:schemaLocation="
       http://www.springframework.org/schema/beans http://www.springframework.org/schema/beans/spring-beans-3.0.xsd">

    <!--  创建securityManager对象 -->
    <bean id="securityManager" class="org.apache.shiro.web.mgt.DefaultWebSecurityManager">
        <!-- 代表我们的验证规则与数据 -->
        <property name="realm" ref="jpaRealm"/>
    </bean>

    <!-- 自定义的Realm -->
    <bean id="jpaRealm" class="com.zhengqing.aisell.shiro.JpaRealm">
        <!-- 自定义Realm的加密规则-->
        <property name="credentialsMatcher">
            <bean class="org.apache.shiro.authc.credential.HashedCredentialsMatcher">
                <!-- 编码的方式使用:md5 -->
                <property name="hashAlgorithmName" value="MD5"/>
                <!-- 编码的次数:10 -->
                <property name="hashIterations" value="10" />
            </bean>
        </property>
    </bean>

    <!-- shiro中的bean的对象的生命周期 -->
    <bean id="lifecycleBeanPostProcessor" class="org.apache.shiro.spring.LifecycleBeanPostProcessor"/>
    <!-- 支持注解的权限判断 -->
    <bean class="org.springframework.aop.framework.autoproxy.DefaultAdvisorAutoProxyCreator"
          depends-on="lifecycleBeanPostProcessor"/>
    <bean class="org.apache.shiro.spring.security.interceptor.AuthorizationAttributeSourceAdvisor">
        <property name="securityManager" ref="securityManager"/>
    </bean>

    <!-- Spring对于shiro的权限过滤
         注意:这个id的名称必需和web.xml中的代理过滤器名称一致 -->
    <bean id="shiroFilter" class="org.apache.shiro.spring.web.ShiroFilterFactoryBean">
        <property name="securityManager" ref="securityManager"/>
        <!-- 登录的路径: 如果你没有登录则会跳到这个页面中 -->
        <property name="loginUrl" value="/s/login.jsp"/>
        <!-- 登录成功后的主页面 -->
        <property name="successUrl" value="/s/main.jsp"/>
        <!-- 没有权限的时候会跳转到的页面 -->
        <property name="unauthorizedUrl" value="/s/unauthorized.jsp"/>

        <!-- 代表咱们的过滤由一个map对象来决定 :filterChainDefinitionMap  -->
        <property name="filterChainDefinitionMap" ref="filterChainDefinitionMap" />
    </bean>
    <!-- 调用另一个bean(filterChainDefinitionBuilder)的builderFilterChainDefinitionMap方法返回的对象 -->
    <bean id="filterChainDefinitionMap"
          factory-bean="filterChainDefinitionBuilder"
          factory-method="builderFilterChainDefinitionMap" />
    <!-- 拿到map的功能 -->
    <bean id="filterChainDefinitionBuilder" class="com.zhengqing.aisell.shiro.FilterChainDefinitionBuilder" />
</beans>
注意:这里的过滤器和自定义Realm是模拟从数据库中取权限做测试哦,具体的使用根据自己的项目情况,这里掌握使用方法即可
shiro的真实过滤器(这里是在外面的java类中去引入到配置文件中,why?---> 方便以后我们可以从数据库中去获取我们配置的权限路径 )
public class FilterChainDefinitionBuilder {
    public Map<String,String> builderFilterChainDefinitionMap(){
        Map<String,String> filterChainDefinitionMap = new LinkedHashMap<>();
        filterChainDefinitionMap.put("/s/login.jsp", "anon"); //anon:不需要登录也可以访问
        filterChainDefinitionMap.put("/login", "anon");
        filterChainDefinitionMap.put("/s/permission.jsp", "perms[user:index]");  //对应的权限拦截(可从数据库中拿到,这里是做模拟)
        filterChainDefinitionMap.put("/**", "authc"); //所有的访问都需要登录
        return filterChainDefinitionMap;
    }
}
自定义的Realm:
public class JpaRealm extends AuthorizingRealm {

    @Override
    public String getName() {
        return "jpaRealm";
    }

    @Override
    protected AuthorizationInfo doGetAuthorizationInfo(PrincipalCollection principalCollection) {
        String username = (String) principalCollection.getPrimaryPrincipal(); //拿到用户的名称
        Set<String> perms =  findPermsByName(username); //根据用户名拿到对应的权限
        SimpleAuthorizationInfo authorizationInfo = new SimpleAuthorizationInfo();
        authorizationInfo.setStringPermissions(perms);
        return authorizationInfo;
    }

    private Set<String> findPermsByName(String username) {
        Set<String> perms = new HashSet<>();
        perms.add("user:*");
        //perms.add("employee:*");
        return perms;
    }

    @Override
    protected AuthenticationInfo doGetAuthenticationInfo(AuthenticationToken authenticationToken) throws AuthenticationException {
        UsernamePasswordToken token = (UsernamePasswordToken)authenticationToken;
        String username = token.getUsername();
        String password = findByName(username); //根据用户名拿到对应的密码
        if(password==null){  //如果密码没有拿到,代表用户不存在
            return null;//返回null -> shiro就会知道这是用户不存在的异常
        }
        ByteSource salt = ByteSource.Util.bytes("zhengqing"); //准备盐值
        SimpleAuthenticationInfo authenticationInfo =  new SimpleAuthenticationInfo(username,password,salt,getName());
        return authenticationInfo;
    }

    private String findByName(String username) {
        if("admin".equals(username)){
            /**
             * 123456: 加密一次 : e10adc3949ba59abbe56e057f20f883e
             * 123456: 加密10次 : 4a95737b032e98a50c056c41f2fa9ec6
             * 123456: 加密10次,zhengqing盐值 : 766f7c4ba177d1e22a8414ed1512983a
             */
            return "766f7c4ba177d1e22a8414ed1512983a";
        }
        return null;
    }
}
第四步:注意要在spring的配置文件中引入shiro的配置
    <!-- 引入shiro的核心配置 -->
<import resource="classpath:applicationContext-shiro.xml" />第五步:测试-->上面的配置是除了登录界面能够正常访问之外,其他的都要跳转到登录界面,登录成功之后即可访问其他的所有路径
LoginController.java
@Controller
public class LoginController {

    @RequestMapping("/login")
    public String login(String username,String password){
        Subject currentUser = SecurityUtils.getSubject();  //拿到当前用户(可能还是游客,没有登录)
        if(!currentUser.isAuthenticated()){ //如果这个用户没有登录,进行登录功能
            try {
                UsernamePasswordToken token = new UsernamePasswordToken(username,password);
                currentUser.login(token);
            }catch (UnknownAccountException e) {
                e.printStackTrace();
                System.out.println("用户名错误!");
            }catch (IncorrectCredentialsException e) {
                e.printStackTrace();
                System.out.println("密码错误!");
            } catch (AuthenticationException e) {
                e.printStackTrace();
                System.out.println("其他错误!");
            }
        }
        return "redirect:/s/main.jsp";  //如果成功,跳到main页面
    }

    @RequestMapping("/logout")
    public String logout(){
        Subject currentUser = SecurityUtils.getSubject(); //拿到当前用户
        currentUser.logout();
        return "redirect:/s/login.jsp";
    }
}
login.jsp
<%@ page contentType="text/html;charset=UTF-8" language="java" %>
<html>
<head>
    <title>Title</title>
</head>
<body>
<form action="/login" method="post">
    用户名<input type="text" name="username" /> <br />
    密码:<input type="password" name="password" /> <br />
    <input type="submit" value="登录" />
</form>
</body>
</html>
main.jsp
<%@ page contentType="text/html;charset=UTF-8" language="java" %>
<html>
<head>
    <title>Title</title>
</head>
<body>
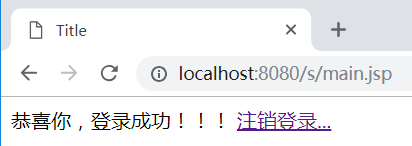
     恭喜你,登录成功!!! <a href="/logout">注销登录...</a>
</body>
</html>
permission.jsp
<%@ page contentType="text/html;charset=UTF-8" language="java" %>
<html>
<head>
    <title>Title</title>
</head>
<body>
     <h1>有user:index权限才可以访问我</h1>
</body>
</html>
unauthorized.jsp
<%@ page contentType="text/html;charset=UTF-8" language="java" %>
<html>
<head>
    <title>Title</title>
</head>
<body>
     没有权限进入的页面...
</body>
</html>效果图:【访问其他页面时,如果没有登录则跳转到登录页面进行登录操作,登录成功即进入主界面也可访问其他路径页面,失败则继续在登录页面,注销后就不能访问其他路径页面,访问即从新跳转到登录页面】


代码分析:

过滤器分析
