版权声明:本文为博主原创文章,未经博主允许不得转载。 https://blog.csdn.net/billll/article/details/53448183
前一段时间公司Vue.js项目需要使用UEditor富文本编辑器,在百度上搜索一圈没有发现详细的说明,决定自己尝试,忙活了一天终于搞定了。
1. 总体思路
1.1 模块化
vue的很大的一个优势在于模块化,我们可以通过模块化实现页面和逻辑的复用。所以可以把Ueditor重新封装成一个.vue的模板文件。其他组件通过引入这个模板实现代码复用。
1.2 数据传输
首先父组件需要设置编辑器的长度、宽度、初始文本,这些数据可以通过props来传递。编辑器中的文本变化可以通过vue自定义事件向父组件传递。
2. 具体实现步骤
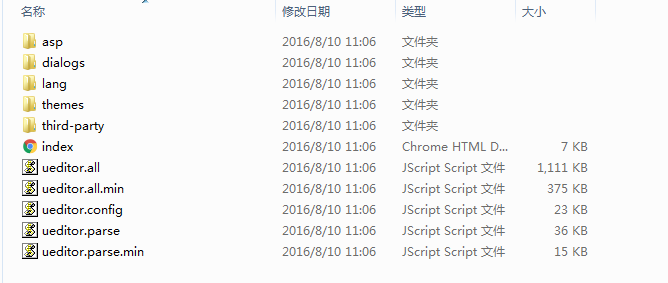
2.1 引入关键的JS以及CSS文件
将以下文件全部拷贝到项目中
2.2 配置Ueditor.config.js
首先配置URL参数,我们需要将这个路径指向刚才拷贝的文件的更目录,注意这里最好使用相对路劲。
var URL = window.UEDITOR_HOME_URL || '/static/ueditor/';然后是默认宽度高度的设置
,initialFrameWidth:null  // null表示宽度自动
,initialFrameHeight:320
其他功能的配置可以在官方文档查看
2.3 创建编辑器模板
我们需要在编辑器模板中import Ueditor核心JS库,并添加contentChange回调函数就大功告成了。
之所以使用import语法来引入核心JS库是因为这样更符合ES6模块化的规范,我看到网上有人建议在main.js中引入JS,但是过早地引入JS可能导致页面首次加载缓慢。
<template>
  <div ref="editor"></div>
</template>

<script>
  /* eslint-disable */
  import '../../../assets/js/ueditor/ueditor.config';
  import '../../../assets/js/ueditor/ueditor.all';
  import '../../../assets/js/ueditor/lang/zh-cn/zh-cn';

  import { generateRandonInteger } from '../../../vuex/utils';

  export default {
    data() {
      return {
        id: generateRandonInteger(100000) + 'ueditorId',
      };
    },
    props: {
      value: {
        type: String,
        default: null,
      },
      config: {
        type: Object,
        default: {},
      }
    },
    watch: {
      value: function value(val, oldVal) {
        this.editor = UE.getEditor(this.id, this.config);
        if (val !== null) {
          this.editor.setContent(val);
        }
      },
    },
    mounted() {
      this.$nextTick(function f1() {
        // 保证 this.$el 已经插入文档

        this.$refs.editor.id = this.id;
        this.editor = UE.getEditor(this.id, this.config);

        this.editor.ready(function f2() {
          this.editor.setContent(this.value);

          this.editor.addListener("contentChange", function () {
            const wordCount = this.editor.getContentLength(true);
            const content = this.editor.getContent();
            const plainTxt = this.editor.getPlainTxt();
            this.$emit('input', { wordCount: wordCount, content: content, plainTxt: plainTxt });
          }.bind(this));

          this.$emit('ready', this.editor);
        }.bind(this));
      });
    },
  };
</script>

<style>
    body{
        background-color:#ff0000;
    }
</style>
3. 编辑器的使用
使用编辑器模板的时候我需要通过props传入config以及初始文本value。
<template xmlns:v-on="http://www.w3.org/1999/xhtml">
    <div class="edit-area">
      <ueditor v-bind:value=defaultMsg v-bind:config=config v-on:input="input" v-on:ready="ready"></ueditor>
    </div>

</template>

<script>
  import ueditor from './ueditor.vue';

  export default {
    components: {
      ueditor,
    },
    data() {
      return {
        defaultMsg: '初始文本',
        config: {
          initialFrameWidth: null,
          initialFrameHeight: 320,
        },
      };
    },
  };
</script>


----------
如果需要让Ueditor上传图片的话,还需要在后台配置一个接口。这部分还没有时间研究,等过几天补上。