音视频实践学习
- android全平台编译ffmpeg以及x264与fdk-aac实践
- ubuntu下使用nginx和nginx-rtmp-module配置直播推流服务器
- android全平台编译ffmpeg合并为单个库实践
- android-studio使用cmake编译ffmpeg实践
- android全平台编译ffmpeg视频解码器实践
- android全平台编译ffmpeg支持命令行实践
- android全平台编译ffmpeg视频推流实践
- android平台下音频编码之编译LAME库转码PCM为MP3
- ubuntu平台下编译vlc-android视频播放器实践
- 图解YU12、I420、YV12、NV12、NV21、YUV420P、YUV420SP、YUV422P、YUV444P的区别
- 图解RGB565、RGB555、RGB16、RGB24、RGB32、ARGB32等格式的区别
- YUV420P、YUV420SP、NV12、NV21和RGB互相转换并存储为JPEG以及PNG图片
- android全平台编译libyuv库实现YUV和RGB的转换
RGB转YUV420P
这里就不新建android工程来测试了,直接使用Clion来运行测试输出
首先将我们目标的JPEG图片转换为RGB文件:
ffmpeg -i main.jpg -s 510x510 -pix_fmt rgb24 rgb24.rgb
开始运行转换RGB24转换为YUV,这里要注意的一点就是,RGB24实际占用的内存为width * height * 3,而YUV420P实际占用的内存为width * height * 3 / 2
unsigned char ClipValue(unsigned char x, unsigned char min_val, unsigned char max_val) {
    if (x > max_val) {
        return max_val;
    } else if (x < min_val) {
        return min_val;
    } else {
        return x;
    }
}


void RGB2YUV420P(unsigned char *rgb24, int width, int height, unsigned char *yuv420p) {
    unsigned char *ptrY, *ptrU, *ptrV;
    memset(yuv420p, 0, width * height * 3 / 2);
    ptrY = yuv420p;
    ptrU = yuv420p + width * height;
    ptrV = ptrU + (width * height * 1 / 4);
    unsigned char y, u, v, r, g, b;
    int index = 0;
    for (int j = 0; j < height; j++) {
        for (int i = 0; i < width; i++) {
            index = width * j * 3 + i * 3;
            r = rgb24[index];
            g = rgb24[index + 1];
            b = rgb24[index + 2];
            y = (unsigned char) ((66 * r + 129 * g + 25 * b + 128) >> 8) + 16;
            u = (unsigned char) ((-38 * r - 74 * g + 112 * b + 128) >> 8) + 128;
            v = (unsigned char) ((112 * r - 94 * g - 18 * b + 128) >> 8) + 128;
            *(ptrY++) = ClipValue(y, 0, 255);
            if (j % 2 == 0 && i % 2 == 0) {
                *(ptrU++) = ClipValue(u, 0, 255);
            } else if (i % 2 == 0) {
                *(ptrV++) = ClipValue(v, 0, 255);
            }

        }
    }
}
void rgb24_to_yuv420(char *rgbPath, char *yuvPath, int width, int height) {
    FILE *fp_rgb = fopen(rgbPath, "rb+");
    FILE *fp_yuv = fopen(yuvPath, "wb+");

    unsigned char *rgb24_data = (unsigned char *) malloc(width * height * 3);
    unsigned char *yuv420_data = (unsigned char *) malloc(width * height * 3 / 2);

    fread(rgb24_data, 1, width * height * 3, fp_rgb);
    RGB2YUV420P(rgb24_data, width, height, yuv420_data);
    fwrite(yuv420_data, 1, width * height * 3 / 2, fp_yuv);

    free(rgb24_data);
    free(yuv420_data);
    fclose(fp_rgb);
    fclose(fp_yuv);
}
我们可以使用ffplay来播放我们最终生成的rgb24.yuv文件

YUV420P转RGB
你也可以根据上面的例子一样,直接使用Clion转换完之后,使用雷神的yuvplayer来查看,这里笔者直接新建了一个native-yuv2rgb,将最终的yuv文件转换为RGB数据之后基于ANativeWindow渲染出来。

定义好java层的接口
package com.onzhou.graphic.yuv2rgb;

import android.view.Surface;

public class NativeYUV2RGB {

    static {
        System.loadLibrary("native-yuv2rgb");
    }

    public native void yuv2rgb(String imagePath, int width, int height, Surface surface);

}
接下来就是核心的native层实现
/**
 * YUV420P转RGB24
 * @param data
 * @param rgb
 * @param width
 * @param height
 */
void YUV420P_TO_RGB24(unsigned char *data, unsigned char *rgb, int width, int height) {
    int index = 0;
    unsigned char *ybase = data;
    unsigned char *ubase = &data[width * height];
    unsigned char *vbase = &data[width * height * 5 / 4];
    for (int y = 0; y < height; y++) {
        for (int x = 0; x < width; x++) {
            //YYYYYYYYUUVV
            u_char Y = ybase[x + y * width];
            u_char U = ubase[y / 2 * width / 2 + (x / 2)];
            u_char V = vbase[y / 2 * width / 2 + (x / 2)];


            rgb[index++] = Y + 1.402 * (V - 128); //R
            rgb[index++] = Y - 0.34413 * (U - 128) - 0.71414 * (V - 128); //G
            rgb[index++] = Y + 1.772 * (U - 128); //B
        }
    }
}
上面这个方法的主要作用就是将输入的YUV数据转换为RGB,转换公式可以参考之前的博客,或者百度一下。
接下来我们需要通过ANativeWindow_fromSurface获取应用的窗口,然后读取YUV文件转换为最终的RGB数据,接着将最终的RGB数据写入到窗口的buffer中去,完成渲染。
void drawYUV(const char *path, int width, int height, ANativeWindow_Buffer buffer) {
    FILE *file = fopen(path, "rb");

    unsigned char *yuvData = new unsigned char[width * height * 3 / 2];

    fread(yuvData, 1, width * height * 3 / 2, file);

    unsigned char *rgb24 = new unsigned char[width * height * 3];

    //YUV420P转RGB24
    YUV420P_TO_RGB24(yuvData, rgb24, width, height);

    uint32_t *line = (uint32_t *) buffer.bits;
    for (int y = 0; y < height; y++) {
        for (int x = 0; x < width; x++) {
            int index = y * width + x;
            line[x] = rgb24[index * 3 + 2] << 16
                      | rgb24[index * 3 + 1] << 8
                      | rgb24[index * 3];
        }
        line = line + buffer.stride;
    }

    //释放内存
    delete[] yuvData;
    delete[] rgb24;

    //关闭文件句柄
    fclose(file);
}

void yuv2rgb(JNIEnv *env, jobject obj, jstring jpegPath, jint width, jint height, jobject surface) {

    const char *path = env->GetStringUTFChars(jpegPath, 0);

    //获取目标surface
    ANativeWindow *window = ANativeWindow_fromSurface(env, surface);
    if (NULL == window) {
        ThrowException(env, "java/lang/RuntimeException", "unable to get native window");
        return;
    }
    //默认的是RGB_565
    int32_t result = ANativeWindow_setBuffersGeometry(window, 0, 0, WINDOW_FORMAT_RGBA_8888);
    if (result < 0) {
        ThrowException(env, "java/lang/RuntimeException", "unable to set buffers geometry");
        //释放窗口
        ANativeWindow_release(window);
        window = NULL;
        return;
    }
    ANativeWindow_acquire(window);

    ANativeWindow_Buffer buffer;
    //锁定窗口的绘图表面
    if (ANativeWindow_lock(window, &buffer, NULL) < 0) {
        ThrowException(env, "java/lang/RuntimeException", "unable to lock native window");
        //释放窗口
        ANativeWindow_release(window);
        window = NULL;
        return;
    }

    //绘制YUV
    drawYUV(path, width, height, buffer);

    //解锁窗口的绘图表面
    if (ANativeWindow_unlockAndPost(window) < 0) {
        ThrowException(env, "java/lang/RuntimeException",
                       "unable to unlock and post to native window");
    }

    env->ReleaseStringUTFChars(jpegPath, path);
    //释放
    ANativeWindow_release(window);
}
在启动的Activity中,读取目标的YUV文件,将路径以及surface传递给native层完成转换以及渲染。
    public void onYUV420PToRGB24(View view) {
        File file = new File(getExternalFilesDir(null), "yuv420p.yuv");
        mNativeYUV2RGB.yuv2rgb(file.getAbsolutePath(), NativeYUV2RGB.Type.YUV420P_TO_RGB24, 510, 510, mSurfaceView.getHolder().getSurface());
    }
最终显示的效果图:

NV12转RGB24
之前的博客也说了,NV12(NV12: YYYYYYYYUVUV =>YUV420SP)本质上也属于YUV420SP,在进行这个例子之前,我们先拿到一张最原始的NV12的文件。
ffmpeg -i main.jpg -s 510x510 -pix_fmt nv12 nv12.yuv
转换过程跟上述类似,下面给出具体的转换公式:
/**
 * NV12属于YUV420SP格式
 * @param data
 * @param rgb
 * @param width
 * @param height
 */
void NV12_TO_RGB24(unsigned char *data, unsigned char *rgb, int width, int height) {
    int index = 0;
    unsigned char *ybase = data;
    unsigned char *ubase = &data[width * height];
    for (int y = 0; y < height; y++) {
        for (int x = 0; x < width; x++) {
            //YYYYYYYYUVUV
            u_char Y = ybase[x + y * width];
            u_char U = ubase[y / 2 * width + (x / 2) * 2];
            u_char V = ubase[y / 2 * width + (x / 2) * 2 + 1];

            rgb[index++] = Y + 1.402 * (V - 128); //R
            rgb[index++] = Y - 0.34413 * (U - 128) - 0.71414 * (V - 128); //G
            rgb[index++] = Y + 1.772 * (U - 128); //B
        }
    }
}
NV21转RGB24
同上面所述,NV21(NV21: YYYYYYYYVUVU =>YUV420SP)同样上也属于YUV420SP,这个格式通常也默认是android手机相机的格式,在进行这个例子之前,我们先拿到一张最原始的NV21的文件。
ffmpeg -i main.jpg -s 510x510 -pix_fmt nv21 nv21.yuv
转换公式:
/**
 * NV12属于YUV420SP格式,android相机默认格式
 * @param data
 * @param rgb
 * @param width
 * @param height
 */
void NV21_TO_RGB24(unsigned char *data, unsigned char *rgb, int width, int height) {
    int index = 0;

    unsigned char *ybase = data;
    unsigned char *ubase = &data[width * height];
    for (int y = 0; y < height; y++) {
        for (int x = 0; x < width; x++) {
            //YYYYYYYYVUVU
            u_char Y = ybase[x + y * width];
            u_char U = ubase[y / 2 * width + (x / 2) * 2 + 1];
            u_char V = ubase[y / 2 * width + (x / 2) * 2];

            rgb[index++] = Y + 1.402 * (V - 128); //R
            rgb[index++] = Y - 0.34413 * (U - 128) - 0.71414 * (V - 128); //G
            rgb[index++] = Y + 1.772 * (U - 128); //B
        }
    }
}
项目地址:native-yuv2rgb
https://github.com/byhook/graphic4android
存储为JPEG图片
YUV数据是无法直接存储为JPEG图片的,这里需要先转换为RGB数据,然后利用libjpeg-turbo库,完成JPEG转换。
YUV420P转RGB24:
void YUV420P_TO_RGB24(unsigned char *yuv420p, unsigned char *rgb24, int width, int height) {
    int index = 0;
    for (int y = 0; y < height; y++) {
        for (int x = 0; x < width; x++) {

            int indexY = y * width + x;
            int indexU = width * height + y / 2 * width / 2 + x / 2;
            int indexV = width * height + width * height / 4 + y / 2 * width / 2 + x / 2;

            u_char Y = yuv420p[indexY];
            u_char U = yuv420p[indexU];
            u_char V = yuv420p[indexV];

            rgb24[index++] = Y + 1.402 * (V - 128); //R
            rgb24[index++] = Y - 0.34413 * (U - 128) - 0.71414 * (V - 128); //G
            rgb24[index++] = Y + 1.772 * (U - 128); //B
        }
    }
}
然后将转换后的RGB数据通过libjpeg-turbo写入文件:
int YUV2JPEG::RGB24_TO_JPEG(const char *filename, u_char *rgbData, int image_width,
                            int image_height,
                            int quality) {
    jpeg_compress_struct jpegCompress;
    jpeg_error_mgr jpegError;

    jpegCompress.err = jpeg_std_error(&jpegError);
    //初始化压缩对象
    jpeg_create_compress(&jpegCompress);

    FILE *pFile = fopen(filename, "wb");
    if (pFile == NULL) {
        return -1;
    }

    jpeg_stdio_dest(&jpegCompress, pFile);

    //设置压缩参数
    jpegCompress.client_data = &pFile;
    jpegCompress.image_width = image_width;
    jpegCompress.image_height = image_height;
    jpegCompress.input_components = 3;
    jpegCompress.in_color_space = JCS_RGB;
    jpeg_set_defaults(&jpegCompress);
    //指定亮度及色度质量
    jpegCompress.q_scale_factor[0] = jpeg_quality_scaling(100);
    jpegCompress.q_scale_factor[1] = jpeg_quality_scaling(100);
    //图像采样率,默认为2 * 2
    jpegCompress.comp_info[0].v_samp_factor = 2;
    jpegCompress.comp_info[0].h_samp_factor = 2;
    //设置压缩质量
    jpeg_set_quality(&jpegCompress, quality, TRUE);  //100 is the highest

    //开始压缩图片
    jpeg_start_compress(&jpegCompress, TRUE);

    JSAMPROW row_pointer[1];

    //从上到下,设置每一个像素
    for (unsigned int i = 0; i < jpegCompress.image_height; i++) {
        row_pointer[0] = rgbData + i * jpegCompress.image_width * 3;
        jpeg_write_scanlines(&jpegCompress, row_pointer, 1);
    }
    //完成压缩
    jpeg_finish_compress(&jpegCompress);

    fclose(pFile);
    pFile = NULL;
    jpeg_destroy_compress(&jpegCompress);
    return 0;

}

void YUV2JPEG::YUV420P_TO_JPEG(const char *yuvPath, const char *jpegPath, int width, int height) {
    FILE *file = fopen(yuvPath, "rb");

    unsigned char *yuv420p = new unsigned char[width * height * 3 / 2];

    fread(yuv420p, 1, width * height * 3 / 2, file);

    unsigned char *rgb24 = new unsigned char[width * height * 3];

    //YUV420P转RGB24
    yuvutils::YUV420P_TO_RGB24(yuv420p, rgb24, width, height);
	//RGB24转JPEG
    RGB24_TO_JPEG(jpegPath, rgb24, width, height, 100);

    //释放内存
    delete[] yuv420p;
    delete[] rgb24;

    //关闭文件句柄
    fclose(file);
}
存储为PNG图片
同样的,跟上面的例子类似,YUV数据也是无法直接存储为PNG图片的,这里需要先转换为RGB数据,然后利用libpng库,完成PNG转换。
bool YUV2PNG::RGB24_TO_PNG(const char *filename, u_char *rgbData, int width, int height,
                           int quality) {
    FILE *fp;
    png_structp png_ptr = NULL;
    png_infop info_ptr = NULL;
    fp = fopen(filename, "wb");
    if (fp) {
        png_ptr = png_create_write_struct(PNG_LIBPNG_VER_STRING, NULL, NULL, NULL);
        info_ptr = png_create_info_struct(png_ptr);
        if (png_ptr == NULL || info_ptr == NULL) {
            fclose(fp);
            return false;
        }
        png_init_io(png_ptr, fp);
        png_set_IHDR(png_ptr, info_ptr, width, height, 8, PNG_COLOR_TYPE_RGB, PNG_INTERLACE_NONE,
                     PNG_COMPRESSION_TYPE_BASE, PNG_FILTER_TYPE_BASE);
        png_write_info(png_ptr, info_ptr);
        png_set_packing(png_ptr);
        uint8_t *data = new uint8_t[width * 3];
        memset(data, 255, width * 3);
        int nv_start = width * height;
        uint32_t rgb_index = 0, pos;
        int r, g, b, nv_index, y, ru, rv;
        for (uint32_t i = 0; i < height; ++i) {
            for (uint32_t j = 0; j < width; ++j) {
                data[j * 3 + 0] = rgbData[rgb_index++];
                data[j * 3 + 1] = rgbData[rgb_index++];
                data[j * 3 + 2] = rgbData[rgb_index++];
            }
            png_write_row(png_ptr, data);
        }

        delete data;
        png_write_end(png_ptr, info_ptr);
        png_destroy_write_struct(&png_ptr, &info_ptr);
        fclose(fp);
        return true;
    }
    return false;
}


void YUV2PNG::YUV420P_TO_PNG(const char *yuvPath, const char *pngPath, int width, int height) {
    FILE *file = fopen(yuvPath, "rb");

    unsigned char *yuv420p = new unsigned char[width * height * 3 / 2];

    fread(yuv420p, 1, width * height * 3 / 2, file);

    unsigned char *rgb24 = new unsigned char[width * height * 3];

    //YUV420P转RGB24
    yuvutils::YUV420P_TO_RGB24(yuv420p, rgb24, width, height);

    //RGB24转PNG文件
    RGB24_TO_PNG(pngPath, rgb24, width, height, 100);

    //释放内存
    delete[] yuv420p;
    delete[] rgb24;

    //关闭文件句柄
    fclose(file);
}
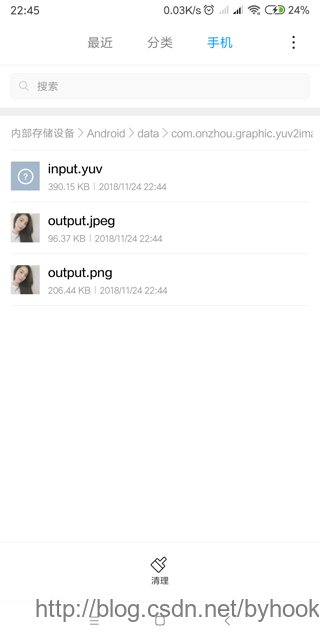
项目地址:native-yuv2image
https://github.com/byhook/graphic4android
参考:
https://blog.csdn.net/leixiaohua1020/article/details/50534150
https://blog.csdn.net/yixianfeng41/article/details/52181578
https://blog.csdn.net/yangyang031213/article/details/84191652