转载请注明出处:http://blog.csdn.net/dongdong9223/article/details/84940992
本文出自【我是干勾鱼的博客】
Ingredients:
之前在吸星大法NiFi——NiFi下载及安装中讲述了NiFi搭建的方法,今天使用NiFi实现一个简单的操作:磁盘文件同步。
我们要做的是,原文件夹:
/opt/tmp/ninf/input/
有一个文件file.txt:
root@iZuf67********************:/opt/tmp/nifi/input# ls -al
total 12
drwxr-xr-x 2 root root 4096 Dec 10 21:55 .
drwxr-xr-x 4 root root 4096 Dec 7 22:36 …
-rw-r–r-- 1 root root 14 Dec 10 21:55 file.txt
其内容为:
Hello world!
要使用NiFi将其移动到目标文件夹:
/opt/tmp/ninf/output/
并且保留源文件夹中的源文件。
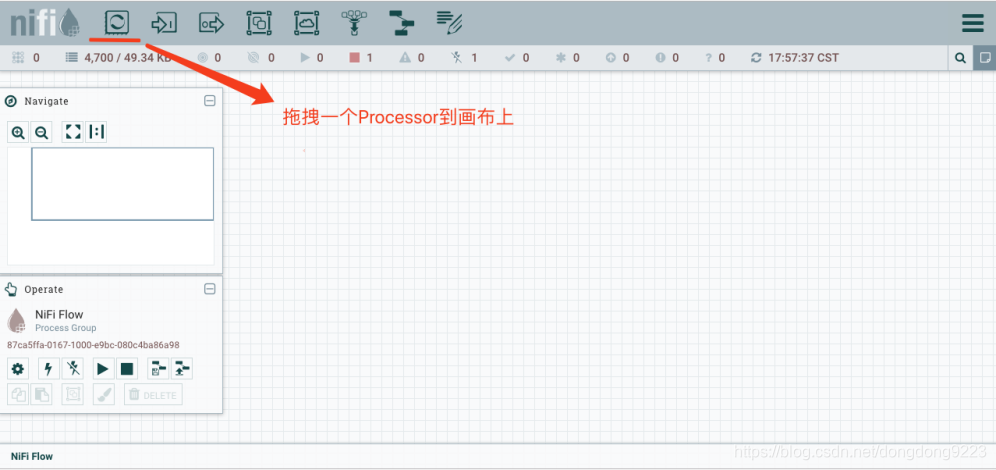
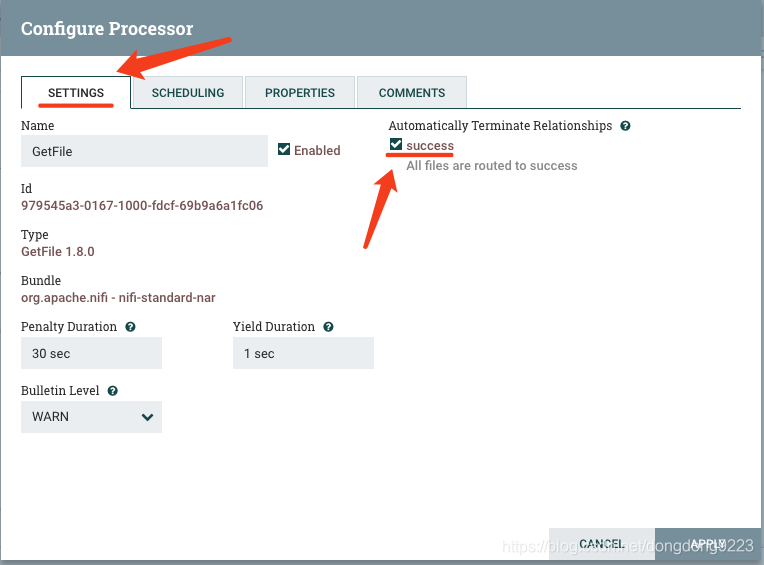
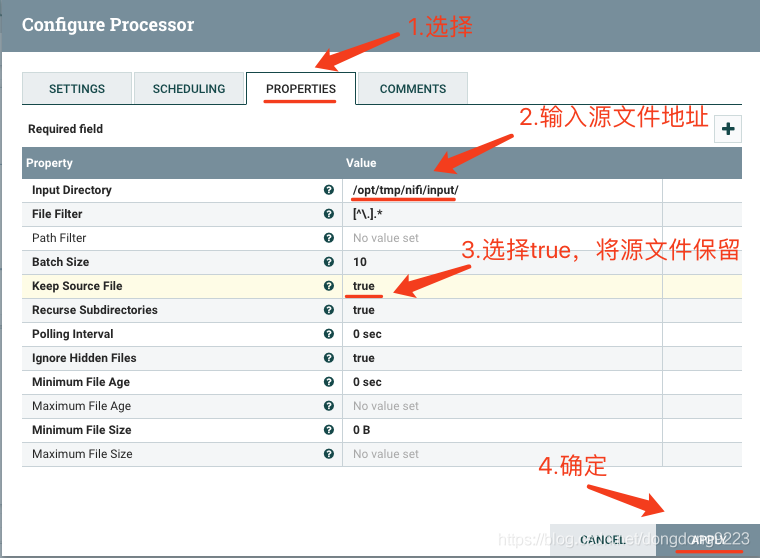
1 创建GetFile Processor
从工具栏中拖入一个Processor,如图所示:
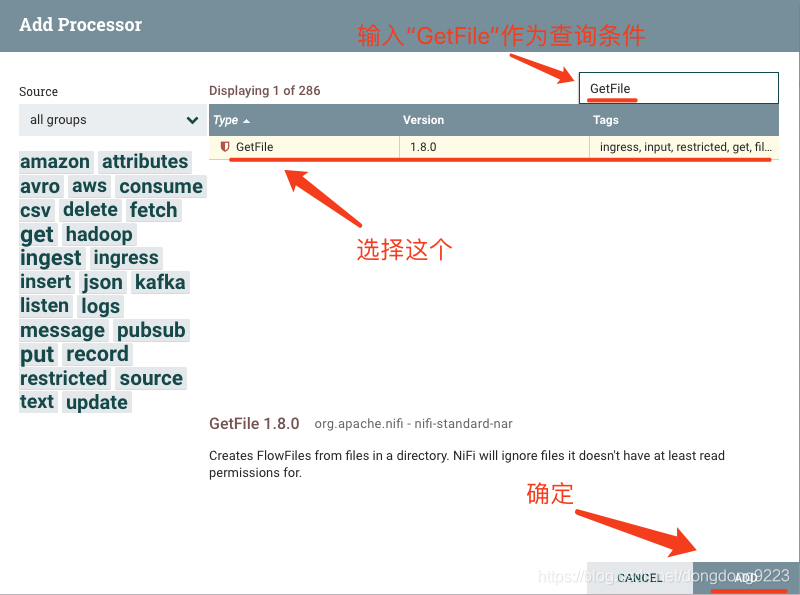
在弹出面板中搜索GetFIle,然后确认,如图所示:
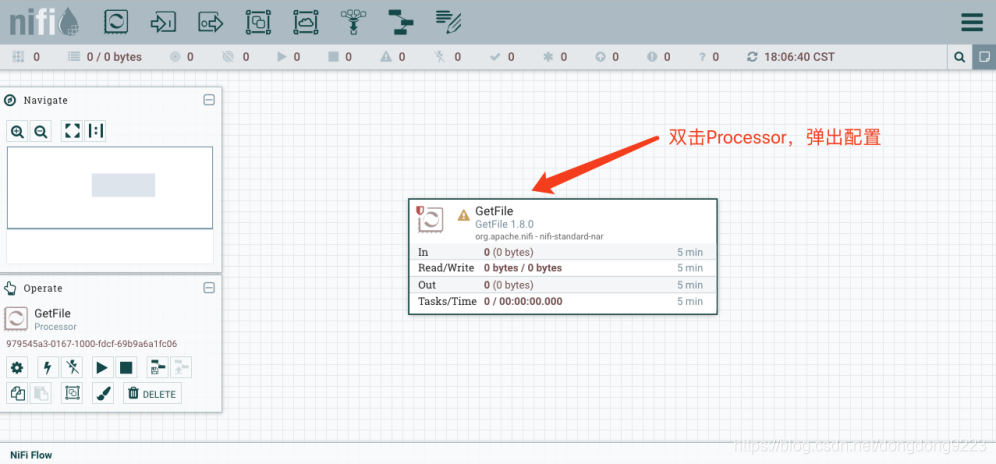
双击Processor,弹出配置信息,如图所示:
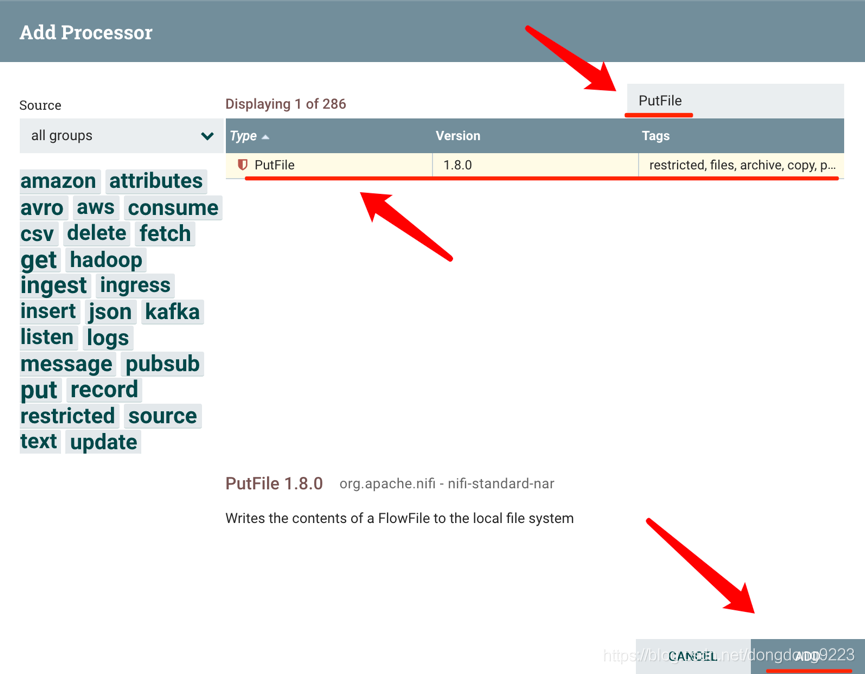
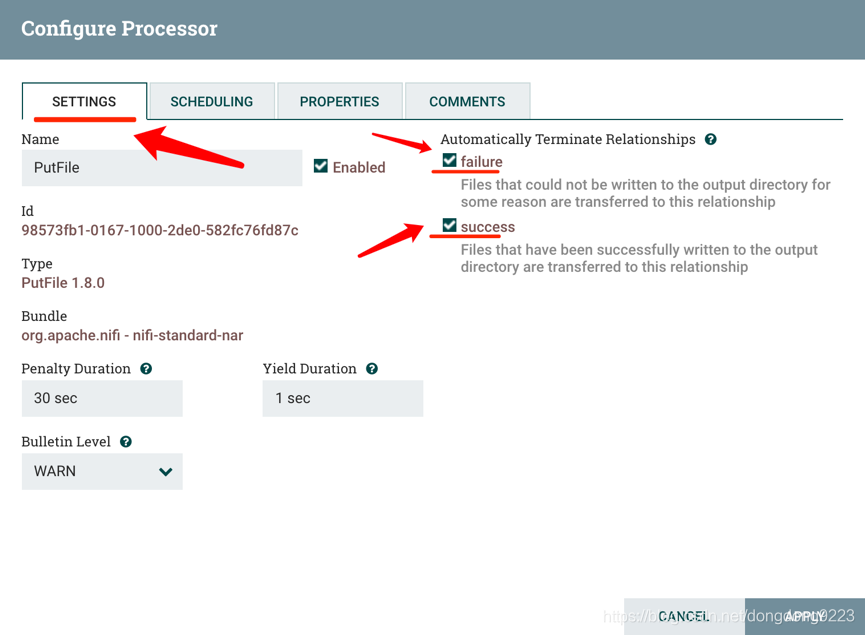
2 创建PutFile Processor
同样再拖入一个Processor,搜索“PutFile”,如图所示:
双击Processor,弹出配置信息,如图所示:
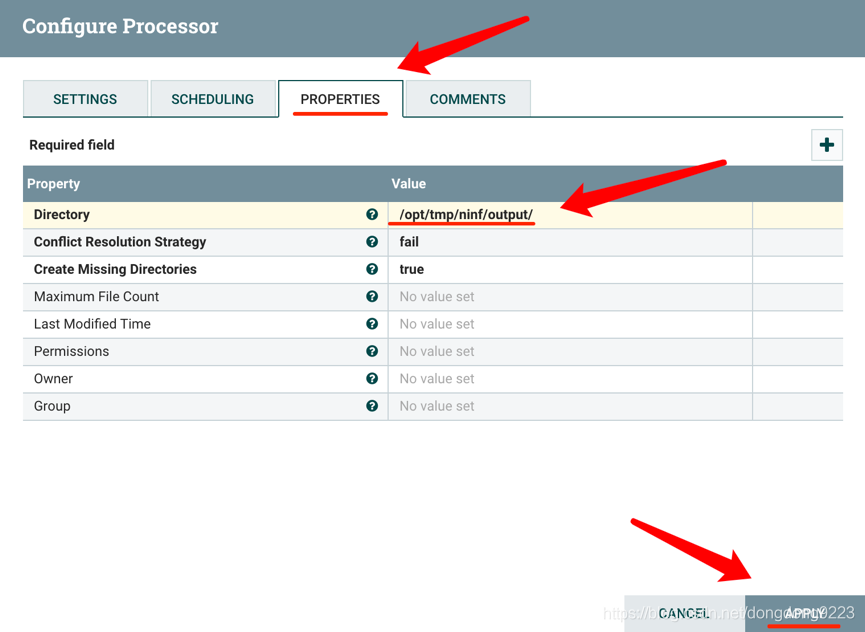
3 创建Connection
此时这2个Processor如图所示:
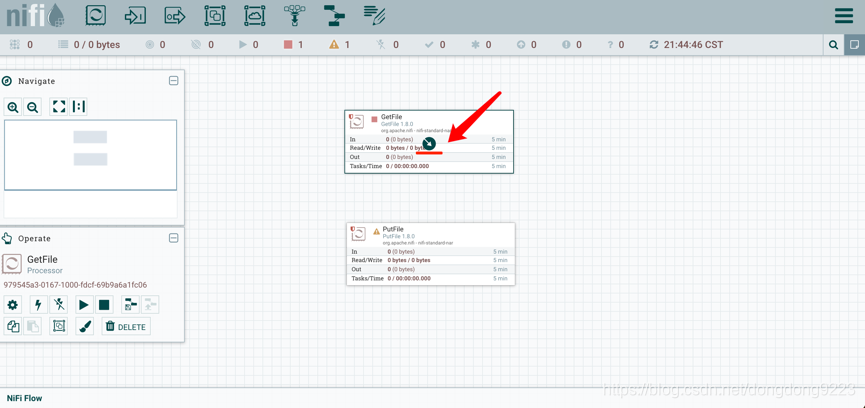
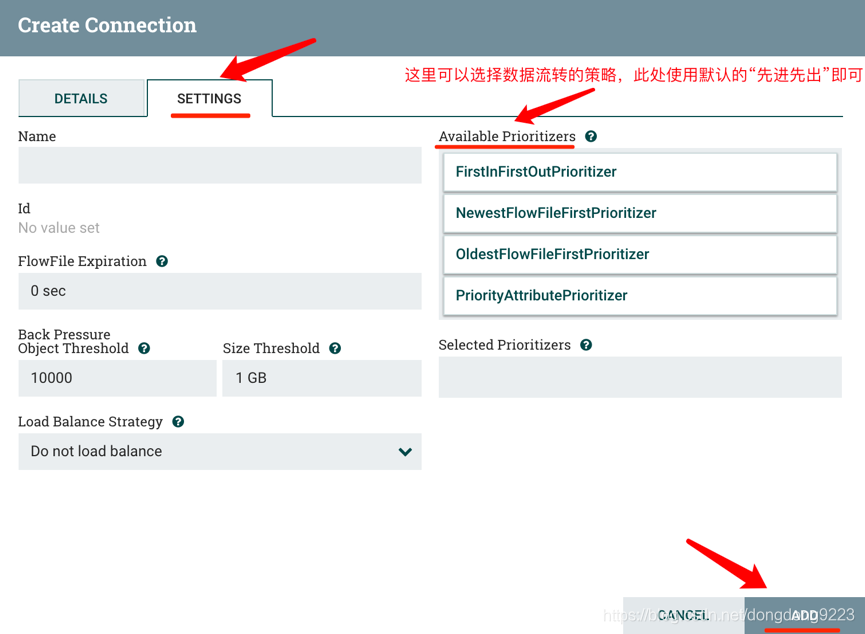
拖拽GetFile的箭头到PutFile,上图所示,此时会弹出Create Connection,如下图所示:
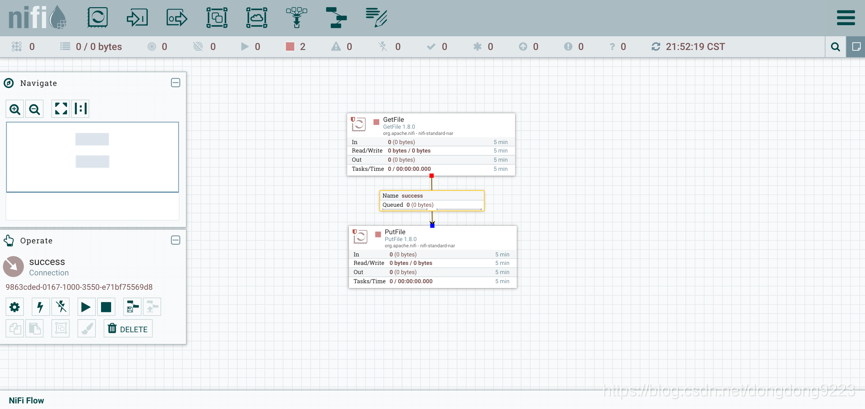
此时如图:
4 运行Processor
同时选中2个Processor,然后右键选择Start,如图所示:
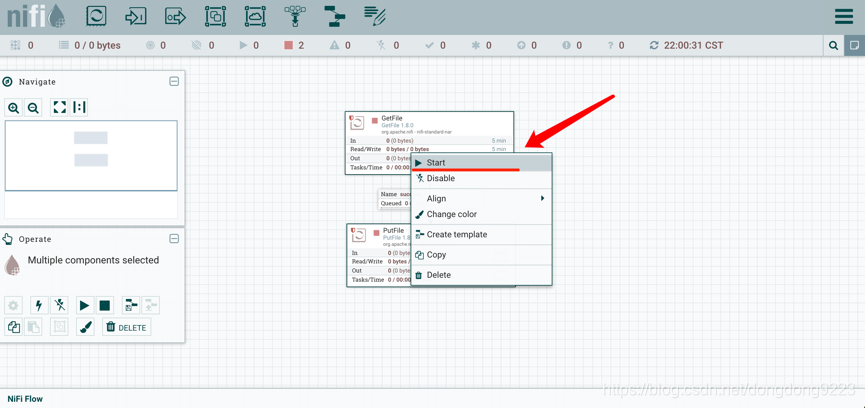
能够看到目标文件夹出现了文件:
root@iZuf67*********************:/opt/tmp/nifi/input# ls -al …/output/
total 12
drwxr-xr-x 2 root root 4096 Dec 10 22:12 .
drwxr-xr-x 4 root root 4096 Dec 7 22:36 …
-rw-r–r-- 1 root root 13 Dec 10 22:12 file.txt
5 停止Processor
右键Stop即可将其停止。
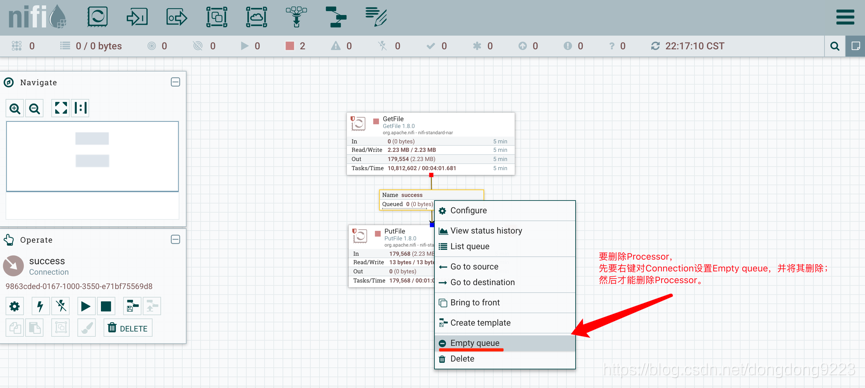
6 删除Processor
注意,如果想删除Processor,先要右键对Connection设置“Empty queue”,并将其删除;然后就可以右键将Processor删除了,如图所示: