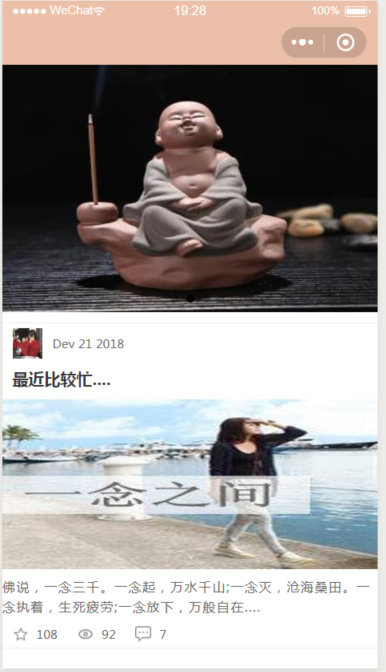
文章列表 每篇文章包含文章标题、文章头图、文章概要、评论数和阅读数,基本上使用view, image, text 这三个组件就可以完成
先将准备好的图片放在根目录images文件相应的路径下,没有创建,不过多解释
我们在前序博文微信轮播图实现项目下继续操作操作
在post.wxml swiper组件后追加如下代码
<view class="post-container">
  <view class="post-author-date">
    <image src="../../images/avatar/avator-3.jpg"></image>
    <text> Dev 21 2018</text>
  </view>
  <text class="post-title">最近比较忙....</text>
  <image class="post-image" src="/../images/post/post-7.jpg"></image>
  <text class="post-content">佛说,一念三千。一念起,万水千山;一念灭,沧海桑田。一念执着,生死疲劳;一念放下,万般自在....
  </text>
  <view class="post-like">
    <image src="../../images/icon/wx_app_collect.png"></image>
    <text>108</text>
    <image src="../../images/icon/wx_app_view.png"></image>
    <text>92</text>
    <image src="../../images/icon/wx_app_message.png"></image>
    <text>7</text>
  </view>
</view>
在post.wxss下追加并且编写组件样式
swiper{         /*设置swiper组件的宽度和高度*/
  width:100%;
  height:600rpx;
}
swiper image{   /*设置image组件的样式*/
  width:100%;
  height:600rpx;
}
.post-container{
  flex-direction:column;
  display:flex;
  margin:20rpx 0 40rpx;
  background-color:#fff;
  border-bottom:1px solid#ededed;
  border-top:1px solid#ededed;
  padding-bottom:5px;
}
.post-author-date{
  margin:10rpx 0 20rpx 10px;
  display:flex;
  flex-direction:row;
  align-items:center;
}
.post-author-date image{
  width:60rpx;
  height:60rpx;
}
.post-author-date text{
  margin-left:20rpx;
}
.post-title{
  font-size:16px;
  font-weight:600;
  color:#333;
  margin-bottom:10px;
  margin-left:10px;
}
.post-image{
  width:100%;
  height:340rpx;
  margin-bottom:15rpx;
}
.post-content{
  color:#666;
  font-size:26rpx;
  margin-bottom:20rpx;
  letter-spacing:2rpx;
  line-height:40rpx;
}
.post-like{
  display:flex;
  flex-direction:row;
  font-size:13px;
  line-height:16px;
  margin-left:10px;
  align-items:center;
}
.post-like image{
  height:16px;
  width:16px;
  margin-right:8px;
}
.post-like text{
  margin-right:20px;
}
保存并运行,效果如下

时间和数量也就是108 92 7 Nev 21 2018 更改这些字体的大小和颜色
在app.wxss全局样式表中添加默认字体样式
text{
  font-size:24rpx;
  font-family:Microsoft YaHei;
  color:#666;
}
保存并运行,效果如下: