当今SSM框架已经成为了一种主流,其中spring,spring mvc和mybatis框架的功能很强大,给我们程序员节省了很多力气,可以说这三种框架简直就是我们程序员的福音,但是我们都知道,框架在自身带来便捷的同时,也存在很多的配置文件,更别说当三个框架整合的时候那就更加的困难了,所以我将这三个框架的环境搭建做了一下整理,希望可以给初学者一点引导.
搭建一个SSM项目主要分为以下几个步骤:
1.创建一个web项目
2.导入jar包(maven和手动)
其中用到的主要jar包有:(注意,因为版本之间存在不兼容情况,所以对于初学者强烈建议使用一下版本)
spring4.37(context,mvc,jdbc,tx),jsckson2.81,mybatis3.4.5,
mytatis-spring1.3.1,druid1.0.14,mysql-connection5.0.8
commons-fileupload1.3.2+Apache poi3.13
3.创建java类
com.tarena.dao 接口
com.tarena.service 业务的接口
com.tarena.service.impl 业务接口的实现
com.tarena.controller springmvc的controller类
com.tarena.entity 实例类,序列化
com.tarena.vo 值对象,序列化
com.tarena.util 工具
4.配置文件
a.项目入口web.xml
b.spring.xml 配置spring容器
c.spring_mvc.xml 配置springmvc容器
d.spring_mybatis.xml 配置mybatis
5.跑项目
6.添加项目静态资源(html,css,js,image,video等)
7.跑项目
8.边写代码,边调试
下面就将每一步的代码贴上
-
1.创建一个web项目
我创建的maven项目,注意是war项目 -
2.导入jar包(maven和手动)
<project xmlns="http://maven.apache.org/POM/4.0.0"
	xmlns:xsi="http://www.w3.org/2001/XMLSchema-instance"
	xsi:schemaLocation="http://maven.apache.org/POM/4.0.0 http://maven.apache.org/xsd/maven-4.0.0.xsd">
	<modelVersion>4.0.0</modelVersion>
	<groupId>com.lxk</groupId>
	<artifactId>tes_ssm</artifactId>
	<version>0.0.1-SNAPSHOT</version>
	<packaging>war</packaging>
	<properties>
		<project.build.sourceEncoding>UTF-8</project.build.sourceEncoding>
		<spring.version>4.3.7.RELEASE</spring.version>
	</properties>
	<dependencies>
		<!-- spring context -->
		<dependency>
			<groupId>org.springframework</groupId>
			<artifactId>spring-context</artifactId>
			<version>${spring.version}</version>
		</dependency>
		<!-- spring mvc -->
		<dependency>
			<groupId>org.springframework</groupId>
			<artifactId>spring-web</artifactId>
			<version>${spring.version}</version>
		</dependency>
		<dependency>
			<groupId>org.springframework</groupId>
			<artifactId>spring-webmvc</artifactId>
			<version>${spring.version}</version>
		</dependency>
		<!-- spring jdbc 依赖包,为了添加声明式事务 -->
		<dependency>
			<groupId>org.springframework</groupId>
			<artifactId>spring-jdbc</artifactId>
			<version>${spring.version}</version>
		</dependency>
		<!-- spring tx依赖包,为了添加声明式事务 -->
		<dependency>
			<groupId>org.springframework</groupId>
			<artifactId>spring-tx</artifactId>
			<version>${spring.version}</version>
		</dependency>
		<!-- spring mvc的辅助包,json转换工具 -->
		<dependency>
			<groupId>com.fasterxml.jackson.core</groupId>
			<artifactId>jackson-core</artifactId>
			<version>2.8.1</version>
		</dependency>
		<dependency>
			<groupId>com.fasterxml.jackson.core</groupId>
			<artifactId>jackson-databind</artifactId>
			<version>2.8.1</version>
		</dependency>
		<!-- mybatis 的依赖包 -->
		<dependency>
			<groupId>org.mybatis</groupId>
			<artifactId>mybatis</artifactId>
			<version>3.4.5</version>
		</dependency>
		<!-- mybatis整合spring的依赖包 -->
		<dependency>
			<groupId>org.mybatis</groupId>
			<artifactId>mybatis-spring</artifactId>
			<version>1.3.1</version>
		</dependency>
		<!-- mysql驱动的依赖 -->
		<dependency>
			<groupId>mysql</groupId>
			<artifactId>mysql-connector-java</artifactId>
			<version>5.0.8</version>
		</dependency>
		<!-- 阿里巴巴的数据库连接池的依赖 -->
		<dependency>
			<groupId>com.alibaba</groupId>
			<artifactId>druid</artifactId>
			<version>1.0.14</version>
		</dependency>
		<!-- 文件上传的依赖包 -->
		<dependency>
			<groupId>commons-fileupload</groupId>
			<artifactId>commons-fileupload</artifactId>
			<version>1.3.2</version>
		</dependency>
		<!-- 微软的office文档操作 -->
		<dependency>
			<groupId>org.apache.poi</groupId>
			<artifactId>poi</artifactId>
			<version>3.13</version>
		</dependency>
		<!-- log4j 日志的依赖包 -->
<!-- 		<dependency> -->
<!-- 			<groupId>log4j</groupId> -->
<!-- 			<artifactId>log4j</artifactId> -->
<!-- 			<version>1.2.16</version> -->
<!-- 		</dependency> -->
	</dependencies>
	<build>
		<plugins>
			<plugin>
				<groupId>org.apache.maven.plugins</groupId>
				<artifactId>maven-compiler-plugin</artifactId>
				<version>2.0.2</version>
				<configuration>
					<source>1.8</source>
					<target>1.8</target>
					<encoding>${project.build.sourceEncoding}</encoding>
				</configuration>
			</plugin>
		</plugins>
	</build>
</project>
-
3.创建java类
com.tarena.dao 接口
com.tarena.service 业务的接口
com.tarena.service.impl 业务接口的实现
com.tarena.controller springmvc的controller类
com.tarena.entity 实例类,序列化
com.tarena.vo 值对象,序列化
com.tarena.util 工具 -
4.配置文件(最重要的一点)
a.项目入口web.xml
<?xml version="1.0" encoding="UTF-8"?>
<web-app xmlns:xsi="http://www.w3.org/2001/XMLSchema-instance"
	xmlns="http://java.sun.com/xml/ns/javaee"
	xsi:schemaLocation="http://java.sun.com/xml/ns/javaee http://java.sun.com/xml/ns/javaee/web-app_2_5.xsd"
	version="2.5">
	<display-name>tes_ssm</display-name>
	<welcome-file-list>
		<welcome-file>index.html</welcome-file>
		<welcome-file>index.htm</welcome-file>
		<welcome-file>index.jsp</welcome-file>
		<welcome-file>default.html</welcome-file>
		<welcome-file>default.htm</welcome-file>
		<welcome-file>default.jsp</welcome-file>
	</welcome-file-list>
	<!-- 全局初始化数据,spring的监听器读取此配置文件 多个配置文件用分号分隔 -->
	<context-param>
		<param-name>contextConfigLocation</param-name>
		<param-value>
		          classpath:conf/spring.xml;
		          classpath:conf/spring_mybatis.xml
		</param-value>
	</context-param>
	<!-- spring容器初始化的监听器,会读取全局初始化的数据(xml文件) -->
	<listener>
		<listener-class>org.springframework.web.context.ContextLoaderListener</listener-class>
	</listener>
	<!-- spring处理中文乱码问题 -->
	<filter>
		<filter-name>encodingFilter</filter-name>
		<filter-class>org.springframework.web.filter.CharacterEncodingFilter</filter-class>
		<init-param>
			<param-name>encoding</param-name>
			<param-value>UTF-8</param-value>
		</init-param>
		<init-param>
			<param-name>forceEncoding</param-name>
			<param-value>true</param-value>
		</init-param>
	</filter>
	<filter-mapping>
		<filter-name>encodingFilter</filter-name>
		<url-pattern>/*</url-pattern>
	</filter-mapping>

	<!-- spring mvc的入口 加载spring mvc 前端控制器 restful -->
	<!-- restful模式,必须注意在spring_mvc.xml中配置,刨除静态资源 -->
	<servlet>
		<servlet-name>dispatcher_restful</servlet-name>
		<servlet-class>org.springframework.web.servlet.DispatcherServlet</servlet-class>
		<init-param>
			<param-name>contextConfigLocation</param-name>
			<param-value>classpath:conf/spring_mvc.xml</param-value>
		</init-param>
		<load-on-startup>1</load-on-startup>
	</servlet>
	<servlet-mapping>
		<servlet-name>dispatcher_restful</servlet-name>
		<url-pattern>/</url-pattern>
	</servlet-mapping>
</web-app>
b.spring.xml 配置spring容器
<?xml version="1.0" encoding="UTF-8"?>
<beans xmlns="http://www.springframework.org/schema/beans"
	xmlns:xsi="http://www.w3.org/2001/XMLSchema-instance"
	xmlns:aop="http://www.springframework.org/schema/aop"
	xmlns:tx="http://www.springframework.org/schema/tx"
	xmlns:p="http://www.springframework.org/schema/p"
	xmlns:util="http://www.springframework.org/schema/util"
	xmlns:context="http://www.springframework.org/schema/context"
	xmlns:mvc="http://www.springframework.org/schema/mvc"
	xsi:schemaLocation="
        http://www.springframework.org/schema/beans
        http://www.springframework.org/schema/beans/spring-beans.xsd
        http://www.springframework.org/schema/aop
        http://www.springframework.org/schema/aop/spring-aop.xsd
        http://www.springframework.org/schema/tx
        http://www.springframework.org/schema/tx/spring-tx.xsd
        http://www.springframework.org/schema/util
        http://www.springframework.org/schema/util/spring-util.xsd
        http://www.springframework.org/schema/context
        http://www.springframework.org/schema/context/spring-context.xsd
        http://www.springframework.org/schema/mvc
        http://www.springframework.org/schema/mvc/spring-mvc.xsd">

   <!-- 加载属性文件 此种方式加载属性文件是给spring的配置文件使用的 -->
   <context:property-placeholder
      location="classpath:conf/mysql.properties"/>
   <!-- 加载属性文件,用于在属性文件内通过@Value注解注入java对象中 -->
   <util:properties id="manyProperties"
         location="classpath:conf/page.properties"></util:properties>
   <!-- 扫描service包,实例化带有@Service注解 -->
   <context:component-scan base-package="com.lxk.service"></context:component-scan>
   <!-- 扫描util包,实例化带有@Component注解 -->
   <context:component-scan base-package="com.lxk.util"></context:component-scan>
</beans>
c.spring_mvc.xml 配置springmvc容器
<?xml version="1.0" encoding="UTF-8"?>
<beans xmlns="http://www.springframework.org/schema/beans"
	xmlns:xsi="http://www.w3.org/2001/XMLSchema-instance"
	xmlns:aop="http://www.springframework.org/schema/aop"
	xmlns:tx="http://www.springframework.org/schema/tx"
	xmlns:p="http://www.springframework.org/schema/p"
	xmlns:util="http://www.springframework.org/schema/util"
	xmlns:context="http://www.springframework.org/schema/context"
	xmlns:mvc="http://www.springframework.org/schema/mvc"
	xsi:schemaLocation="
        http://www.springframework.org/schema/beans
        http://www.springframework.org/schema/beans/spring-beans.xsd
        http://www.springframework.org/schema/aop
        http://www.springframework.org/schema/aop/spring-aop.xsd
        http://www.springframework.org/schema/tx
        http://www.springframework.org/schema/tx/spring-tx.xsd
        http://www.springframework.org/schema/util
        http://www.springframework.org/schema/util/spring-util.xsd
        http://www.springframework.org/schema/context
        http://www.springframework.org/schema/context/spring-context.xsd
        http://www.springframework.org/schema/mvc
        http://www.springframework.org/schema/mvc/spring-mvc.xsd">

	<!-- 在restful模式下,添加静态资源 -->
	<mvc:resources location="/js/" mapping="/js/**"></mvc:resources>
	<mvc:resources location="/" mapping="/**"></mvc:resources>

	<!-- 扫描spring的组件 -->
	<context:component-scan base-package="com.lxk.controller"></context:component-scan>


	<!-- 扫描 spring mvc的注解 @RequestMapping @ResponseBody -->
	<mvc:annotation-driven></mvc:annotation-driven>

	<!-- spring mvc 文件上传 -->
	<bean id="multipartResolver"
		class="org.springframework.web.multipart.commons.CommonsMultipartResolver">
		<!--能配置多少个property,可以查文档和查询源代码 -->
		<!--最大上传文件的大小 -->
		<property name="maxUploadSize" value="8388608"></property>
		<property name="resolveLazily" value="true"></property>
	</bean>

</beans>
d.spring_mybatis.xml 配置mybatis
这是spring-mybatis的清单文件
因为spring没有整合mybatis,所以mybatis自己向spring靠拢
<?xml version="1.0" encoding="UTF-8"?>
<beans xmlns="http://www.springframework.org/schema/beans"
	xmlns:xsi="http://www.w3.org/2001/XMLSchema-instance"
	xmlns:aop="http://www.springframework.org/schema/aop"
	xmlns:tx="http://www.springframework.org/schema/tx"
	xmlns:p="http://www.springframework.org/schema/p"
	xmlns:util="http://www.springframework.org/schema/util"
	xmlns:context="http://www.springframework.org/schema/context"
	xmlns:mvc="http://www.springframework.org/schema/mvc"
	xsi:schemaLocation="
        http://www.springframework.org/schema/beans
        http://www.springframework.org/schema/beans/spring-beans.xsd
        http://www.springframework.org/schema/aop
        http://www.springframework.org/schema/aop/spring-aop.xsd
        http://www.springframework.org/schema/tx
        http://www.springframework.org/schema/tx/spring-tx.xsd
        http://www.springframework.org/schema/util
        http://www.springframework.org/schema/util/spring-util.xsd
        http://www.springframework.org/schema/context
        http://www.springframework.org/schema/context/spring-context.xsd
        http://www.springframework.org/schema/mvc
        http://www.springframework.org/schema/mvc/spring-mvc.xsd">

	<!-- 数据库连接池 commons-dbcp ,c3p0,proxool,阿里巴巴druid -->
	<bean id="alibabaDataSource"
	      class="com.alibaba.druid.pool.DruidDataSource"
	      init-method="init"
	      destroy-method="close">
	    <!-- 数据库连接的4项 -->
		<property name="driverClassName">
			<value>${jdbc_driverClass}</value>
		</property>
		<property name="url">
			<value>${jdbc_url}</value>
		</property>
		<property name="username">
			<value>${jdbc_userName}</value>
		</property>
		<property name="password">
			<value>${jdbc_userPassword}</value>
		</property>
		<!-- 连接池中的最大连接数 -->
		<property name="maxActive">
			<value>5</value>
		</property>
		<!-- 初始化的连接数 -->
		<property name="initialSize">
			<value>2</value>
		</property>
		<!-- 获取连接的最大等待时间 -->
		<property name="maxWait">
			<value>6000</value>
		</property>
		<!-- 连接池的最大空闲 -->
		<property name="maxIdle">
			<value>2</value>
		</property>
		<!-- 连接池的最小空闲 -->
		<property name="minIdle">
			<value>2</value>
		</property>
		<!-- 自动清除无用的连接 -->
		<property name="removeAbandoned">
			<value>true</value>
		</property>
		<!-- 自动清除无用的连接的等待时间 -->
		<property name="removeAbandonedTimeout">
			<value>180</value>
		</property>
		<!-- 连接属性 -->
		<property name="connectionProperties">
			<value>clientEncoding=UTF-8</value>
		</property>
	</bean>
	<!-- 实例化MyBatis的SqlSessionFactoryBean对象-->
	<!--mybatis配置,读取配置文件(扫描配置文件)-->
    <bean id="sqlSessionFactory"
        class="org.mybatis.spring.SqlSessionFactoryBean"
		p:dataSource-ref="alibabaDataSource"
		p:configLocation="classpath:conf/configuration.xml"
		p:mapperLocations="classpath:mapper/*.xml">
    </bean>
    <!-- 扫描所有XXXMapper的对象 -->
	<bean class="org.mybatis.spring.mapper.MapperScannerConfigurer"
        p:basePackage="com.lxk.dao"
		p:sqlSessionFactoryBeanName="sqlSessionFactory">

    </bean>

    <!-- spring 事务管理开始 -->

    <!-- Spring jdbc 的事务管理器 -->
    <bean id="txManager" class="org.springframework.jdbc.datasource.DataSourceTransactionManager">
        <property name="dataSource" ref="alibabaDataSource"/>
    </bean>

    <!-- 扫描事务有关的注解@Transactional -->
    <tx:annotation-driven transaction-manager="txManager"/>

    <!-- Spring事务管理结束 -->
</beans>
mybatis的总清单文件
<?xml version="1.0" encoding="UTF-8" ?>
<!DOCTYPE configuration PUBLIC "-//mybatis.org//DTD Config 3.0//EN"
"http://mybatis.org/dtd/mybatis-3-config.dtd">
<configuration>

	<typeAliases>

	</typeAliases>


</configuration>
这样整个项目就算基本搭建完成了
搭建完之后的样子是下面这样的:

其中mapper里面两个xml是mybatis的映射文件.还有conf中的mysql.properties和page.properties是属性文件,这个根据自己的实际情况去配置,我就不赘述了.
然后就可一启动Tomcat了,如果出现下面的信息就表明你配置成功了,
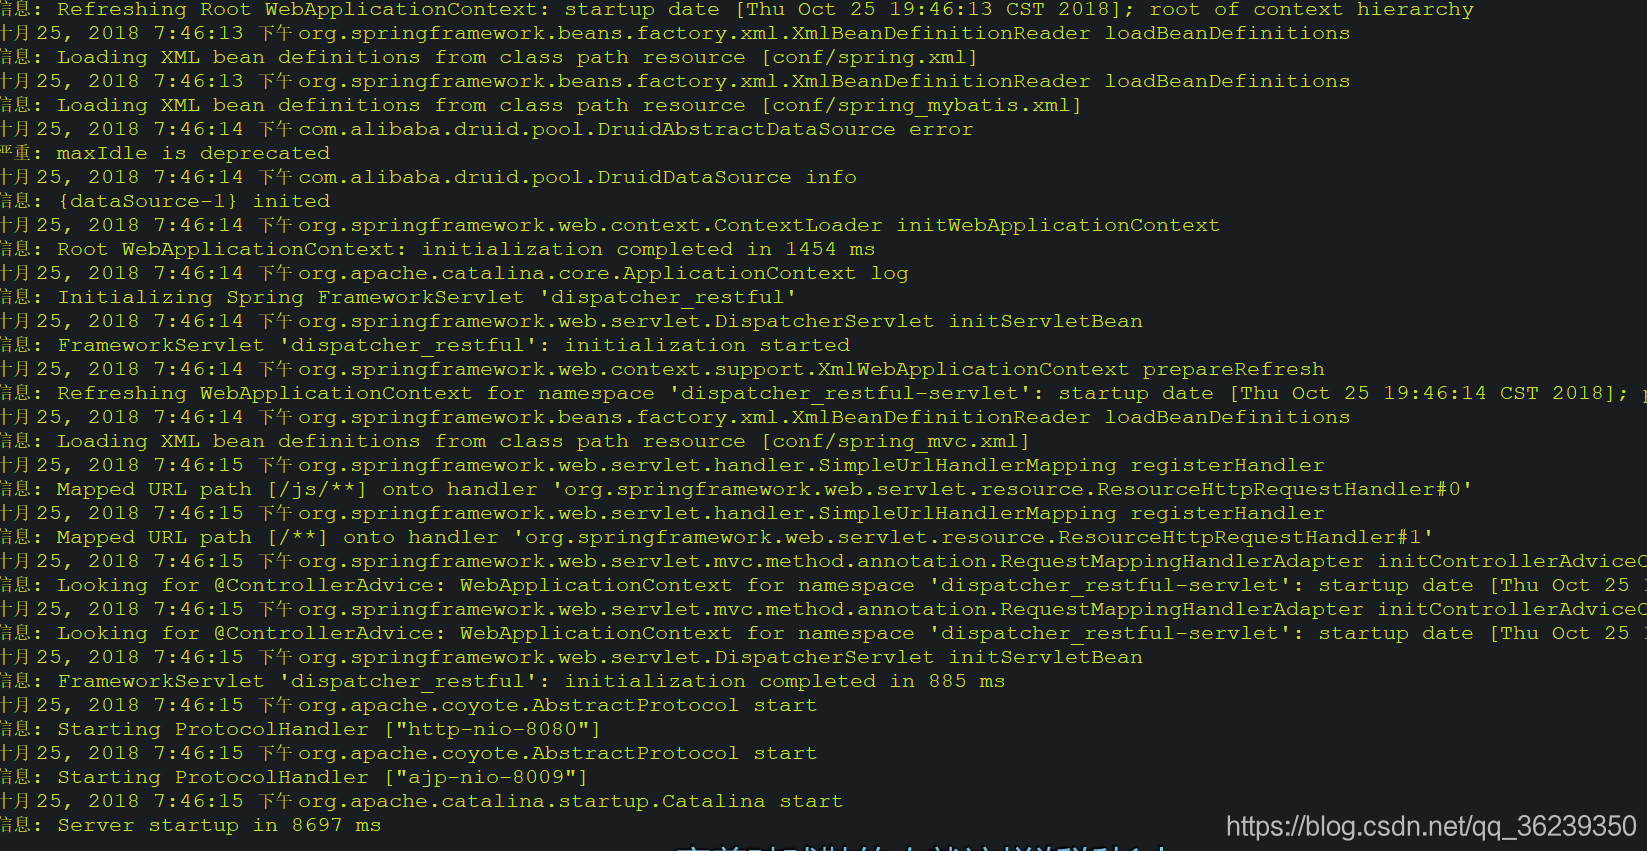
到这就万事大吉了!