最近开发IOS的推送通知,现把流程及遇到的问题整理一下:
一、证书的准备工作
1.在开发电脑MAC上申请证书
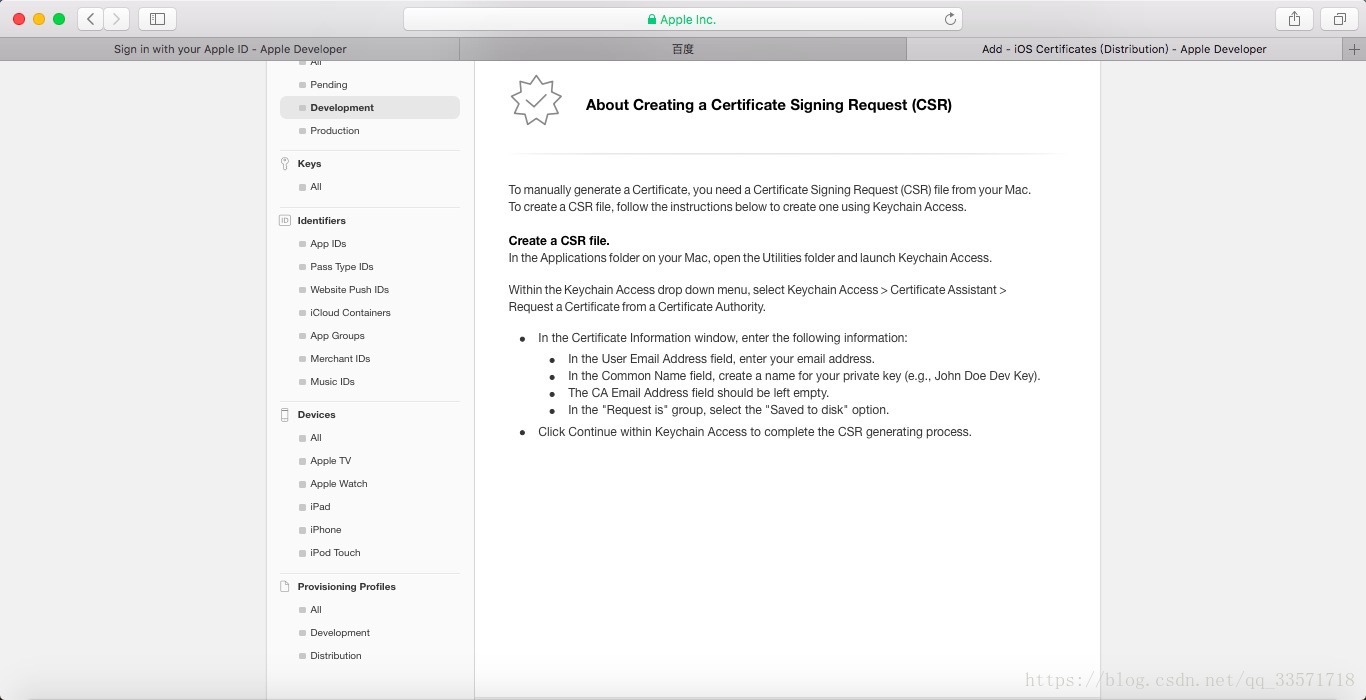
打开钥匙串访问
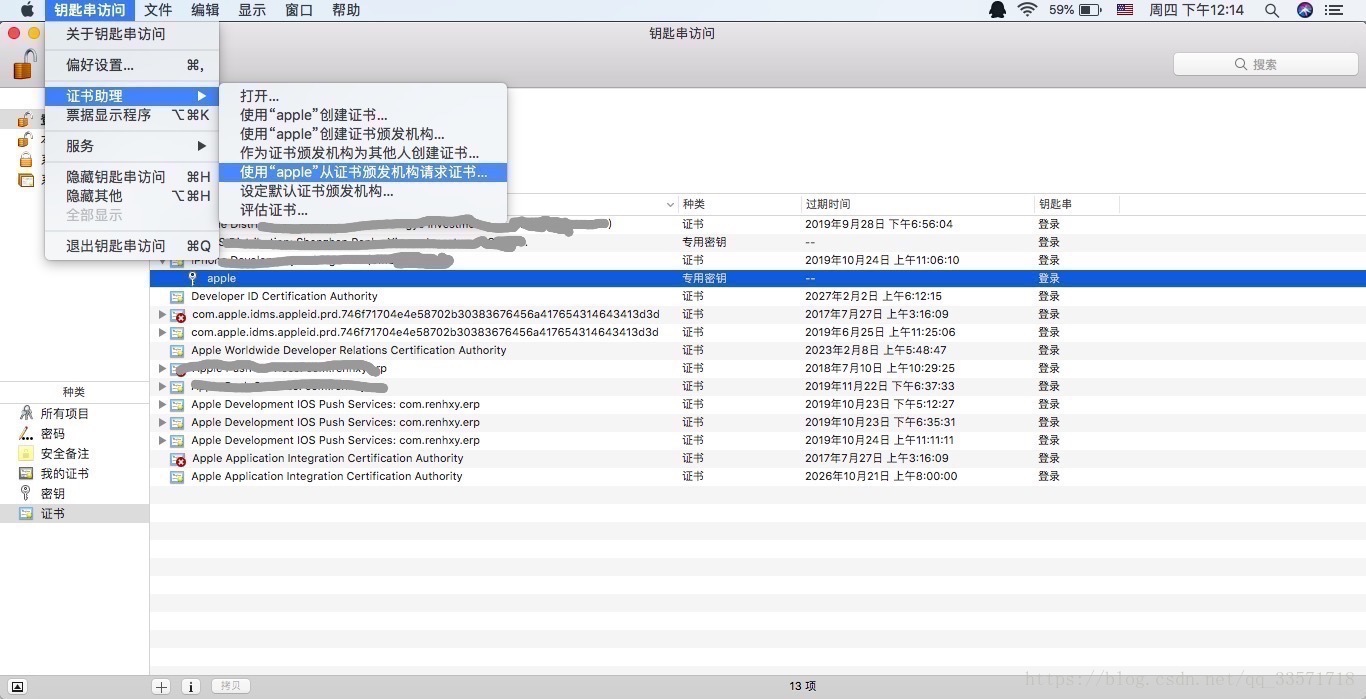
选择从证书颁发机构请求证书
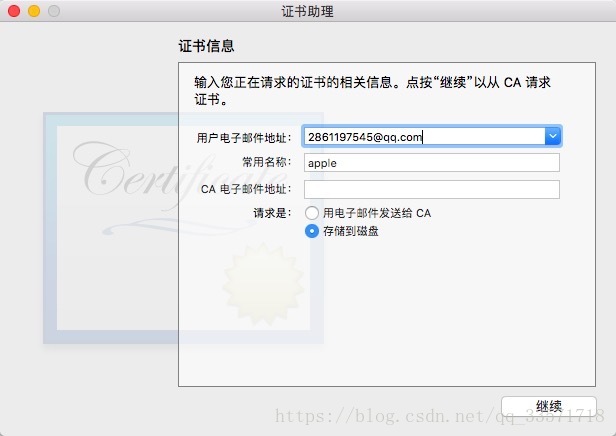
这里的邮箱账号写你自己的,常用名称可以随便写
选择存储到磁盘
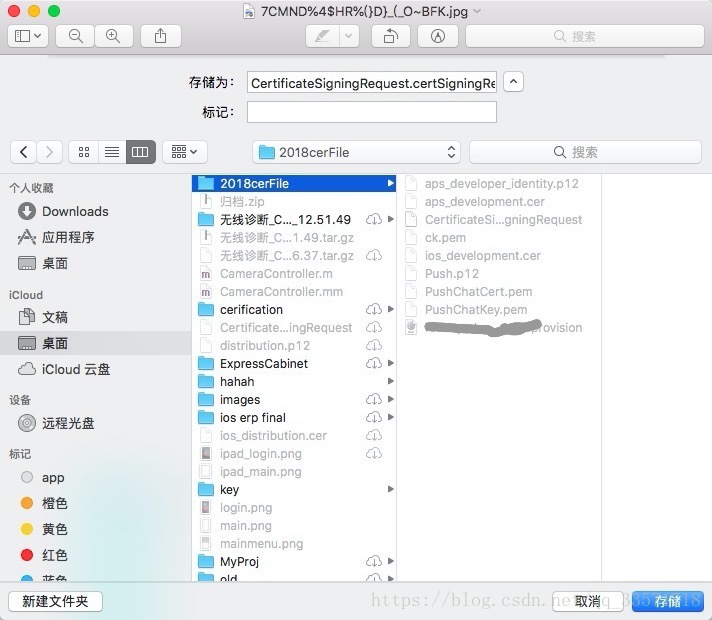
这里最好新建一个文件夹 用来专门存储这些文件
2、在苹果开发平台生成开发证书或者生产证书
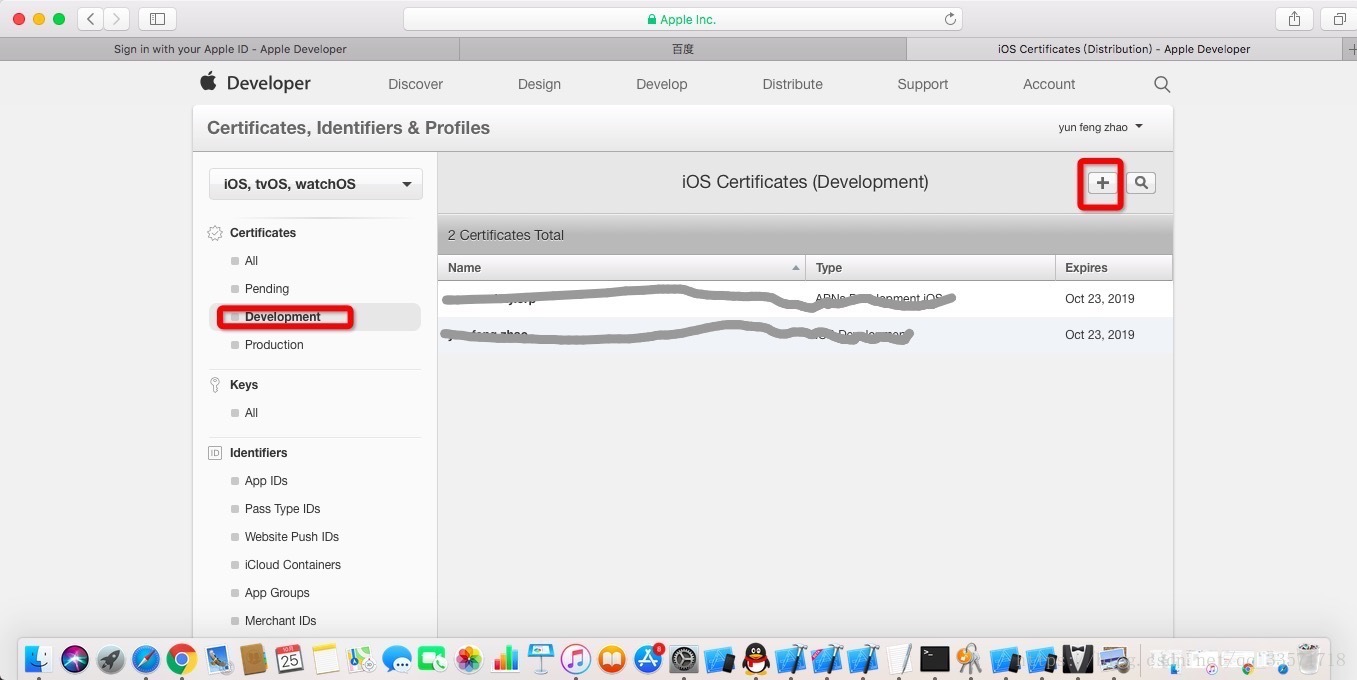
登录开发者账号

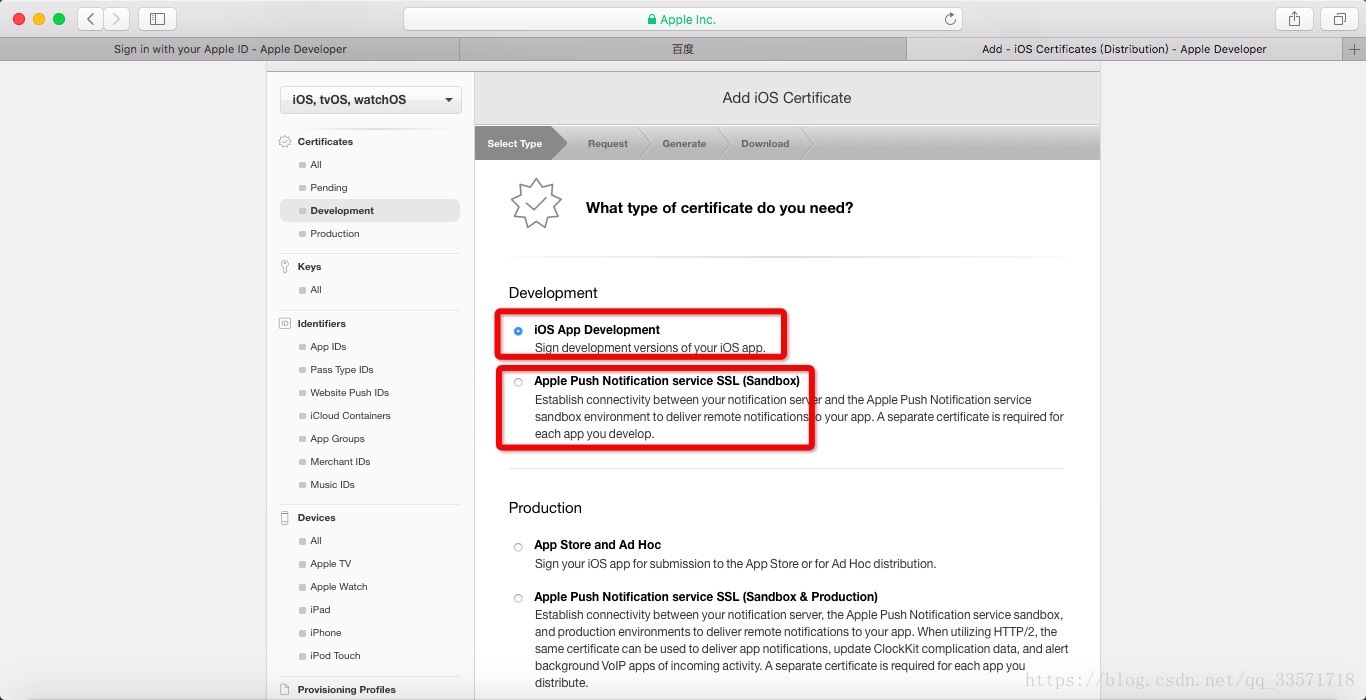
选择Development 点击'+'按钮新增,我这里有证书在试用中
Development下面有两个选项 第一个是不带Push Notification,如果你选的是这个那你后期需要使用推送的时候,修改即可;第二种是带有Push Notification,所以我们选择第二个即可;页面下方点击continue
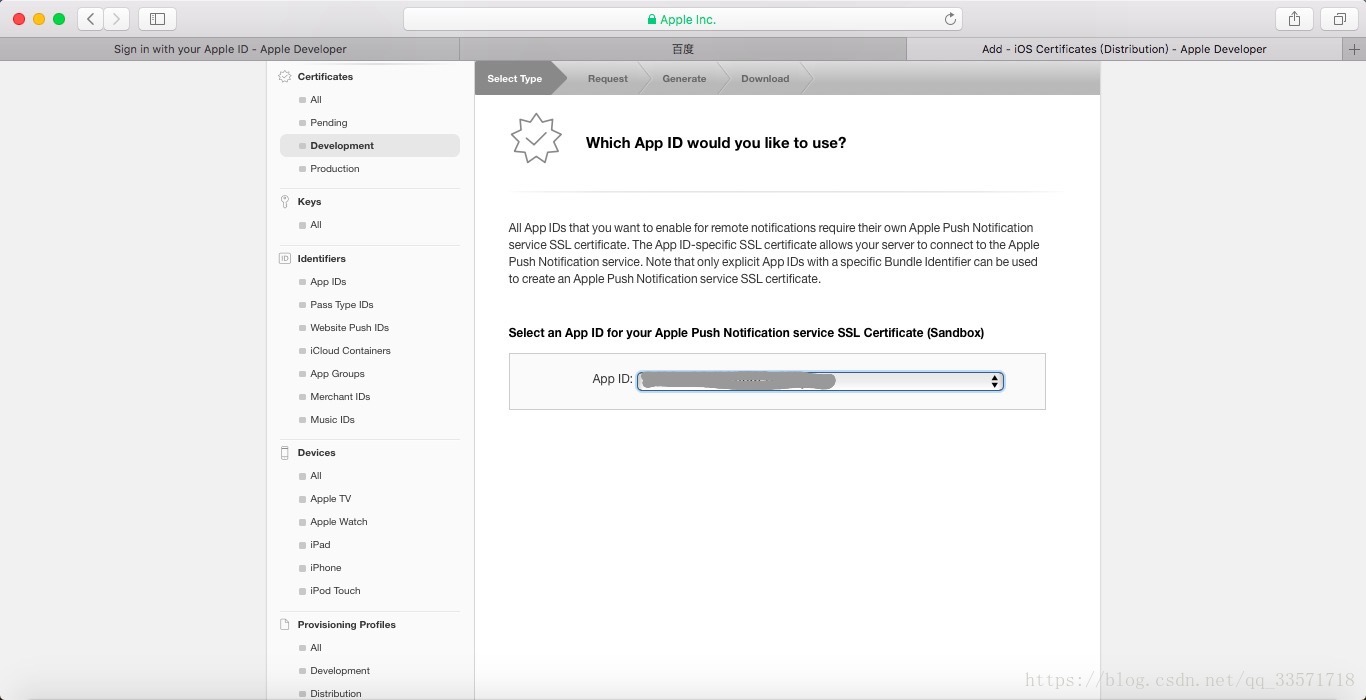
这里要注意,如果你在上一步选择的是没有Push Notification的,就不会出现下面这个页面;这个页面是要求你选择APP ID;
这里一定要看清楚,不要选错了,否则到时候推送通知推送不了,就是证书不匹配的问题
continue;
continue;
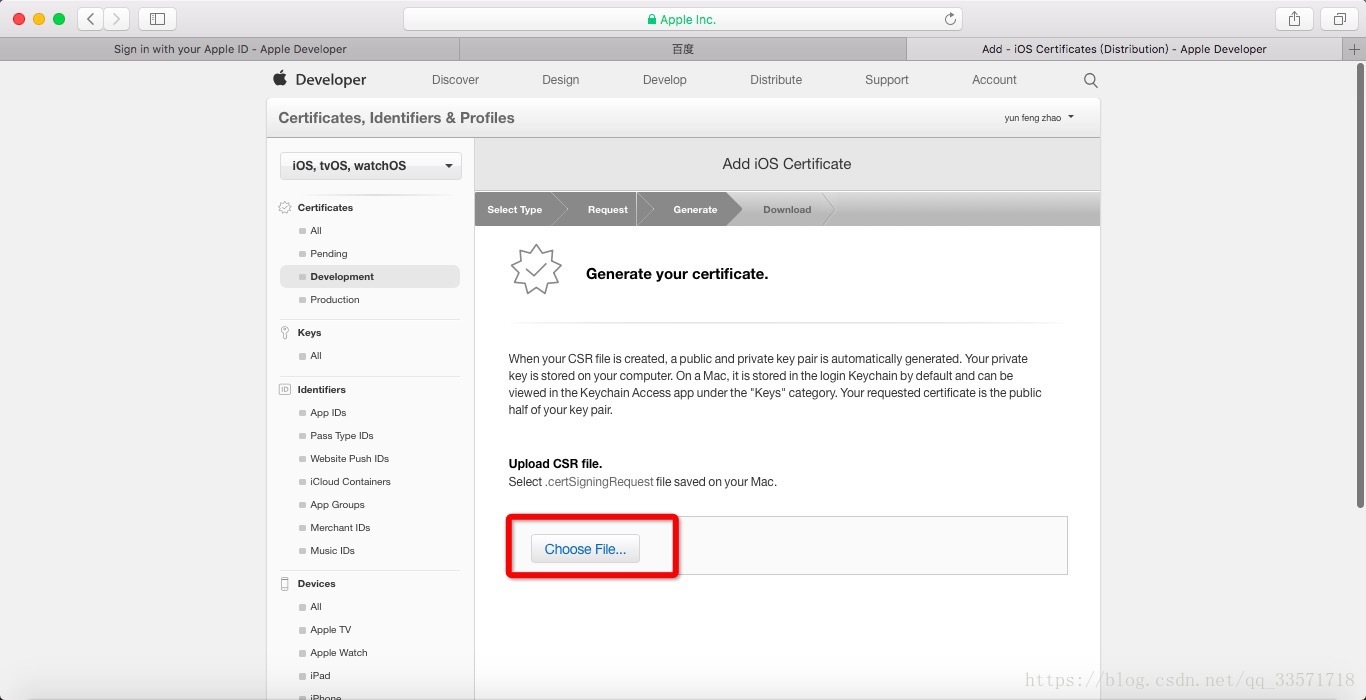
这里选择我们第一步到处的证书申请文件:CertificateSigningRequest.certSigningRequest
continue;
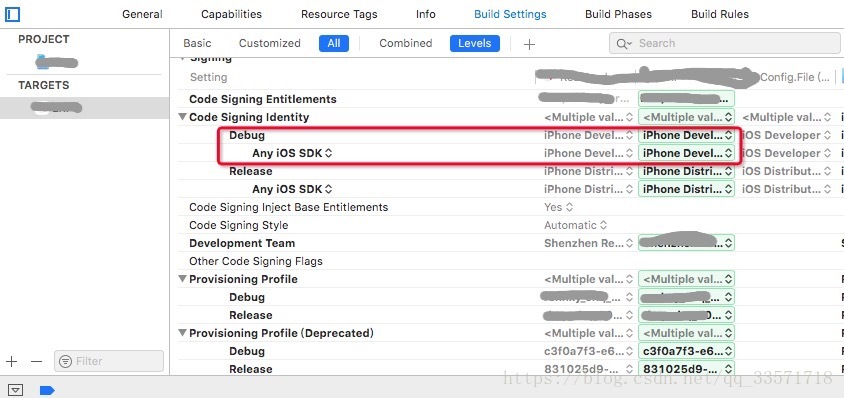
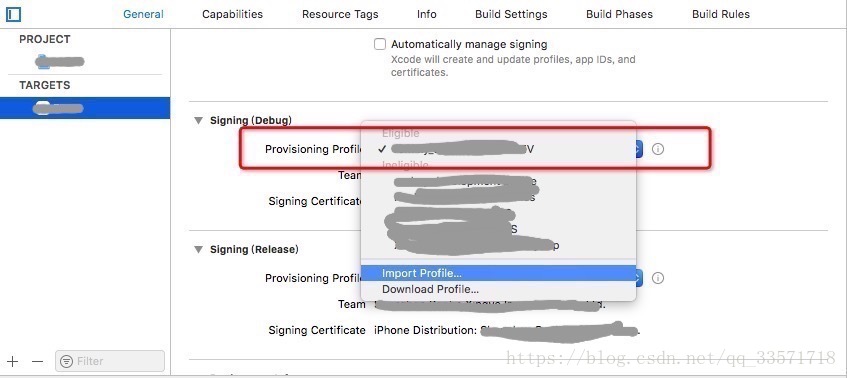
最后点击下载,下载完成以后双击安装该证书到钥匙串当中,一样的这个文件不能乱放等下会用到的,同csr文件放在一个目录中最好;这里需要在xcode 更换一下开发证书
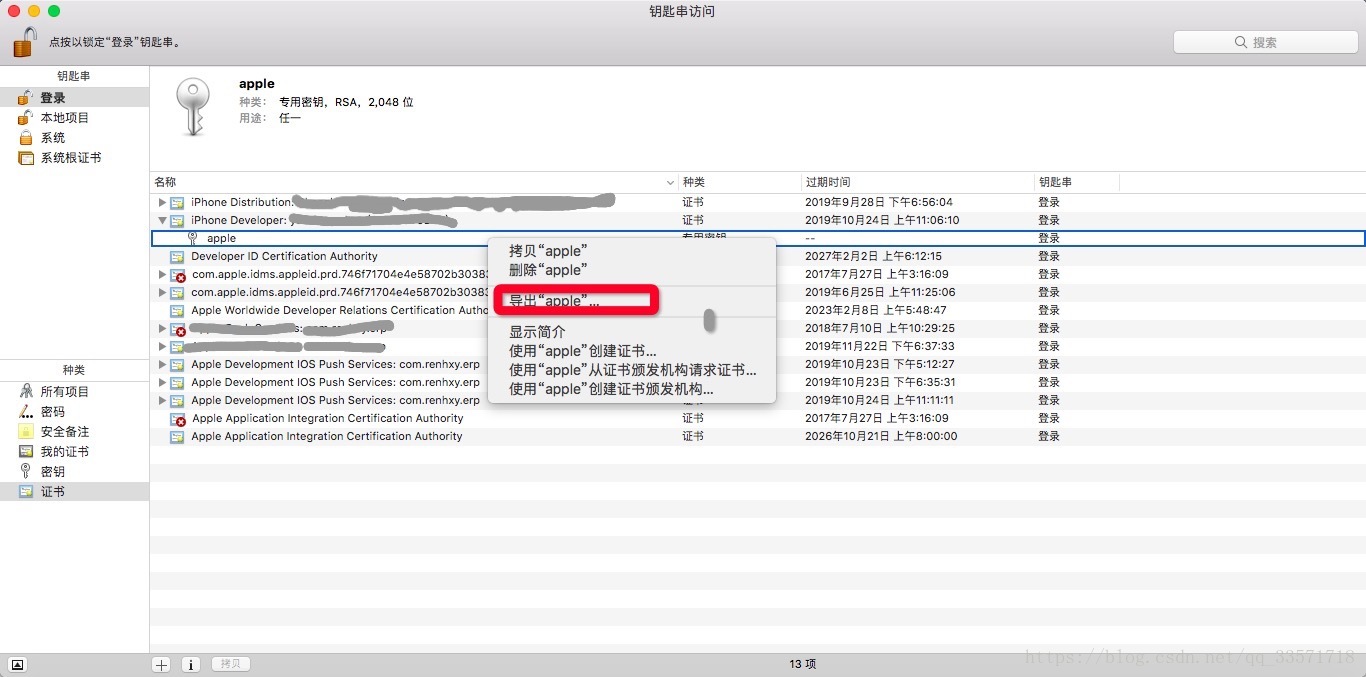
3、导出开发证书格式为p12个人信息交换
展开开发证书,右击菜单选择导出
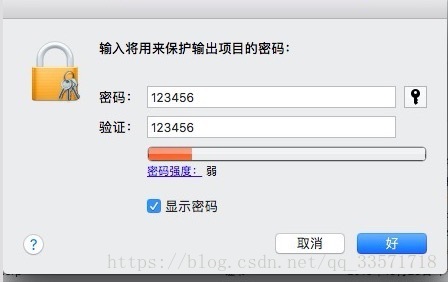
证书名字这里存储为Push,存储位置与上面一样;文件格式一定要p12
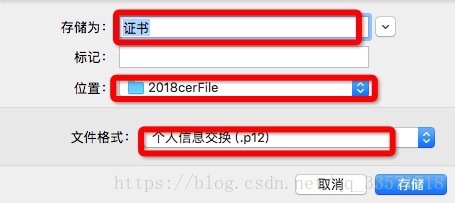
点击存储
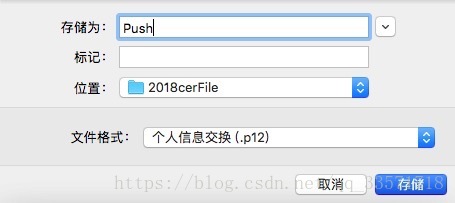
这里需要输入证书的验证密码 这里就设置简单点:123456
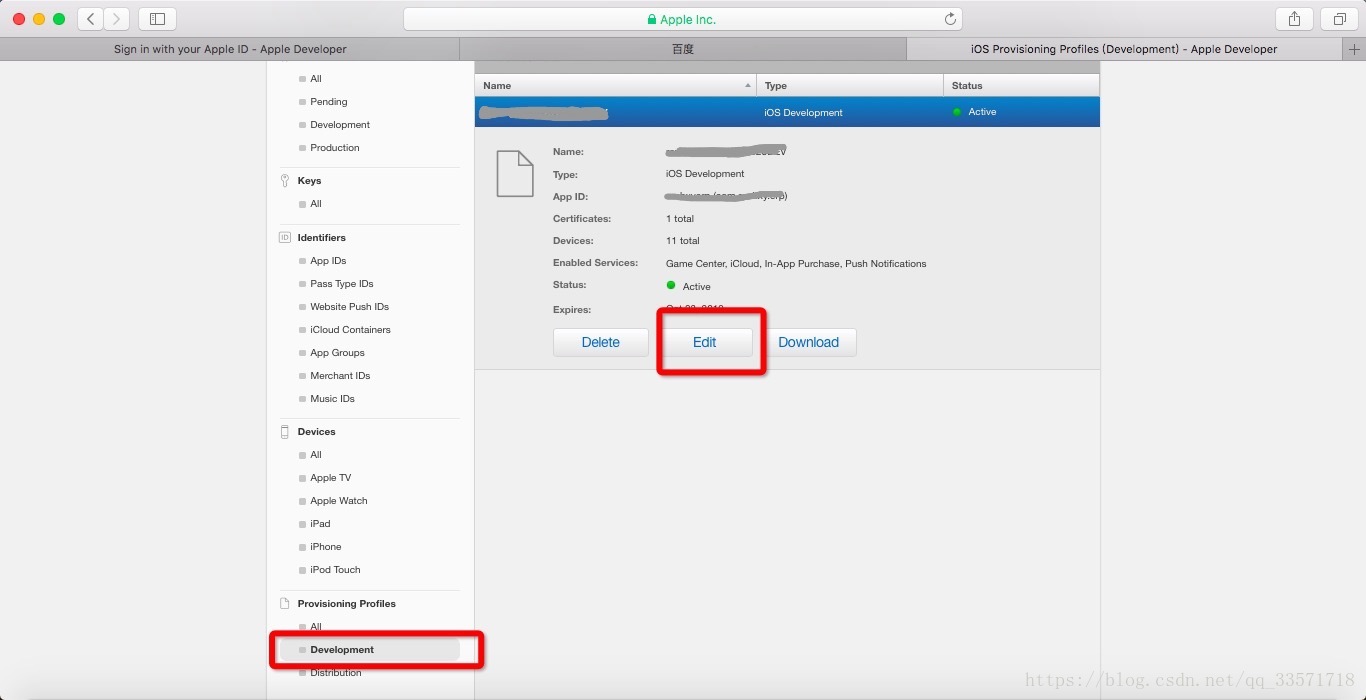
到这里我们需要的文件都已经齐了,因为这个证书是新的证书,还需要修改一下描述文件
在开发平台 选择Provisioning Profiles,点击 Development,选择Edit;这里你选择的栏目必须是你项目中的APP ID,不要弄错了
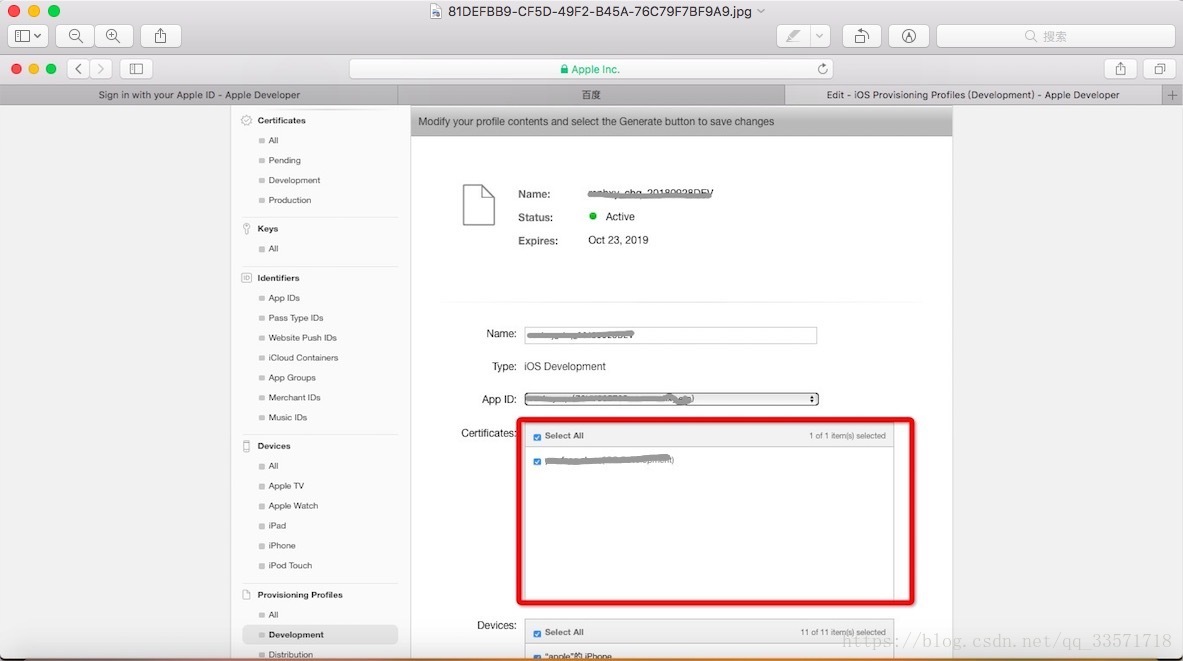
在选择Certificates选择刚刚新建的开发证书 注意APP ID
点击Generate
将该描述文件下载下来,这个你可以放在其他位置,不用存放在上面的目录;
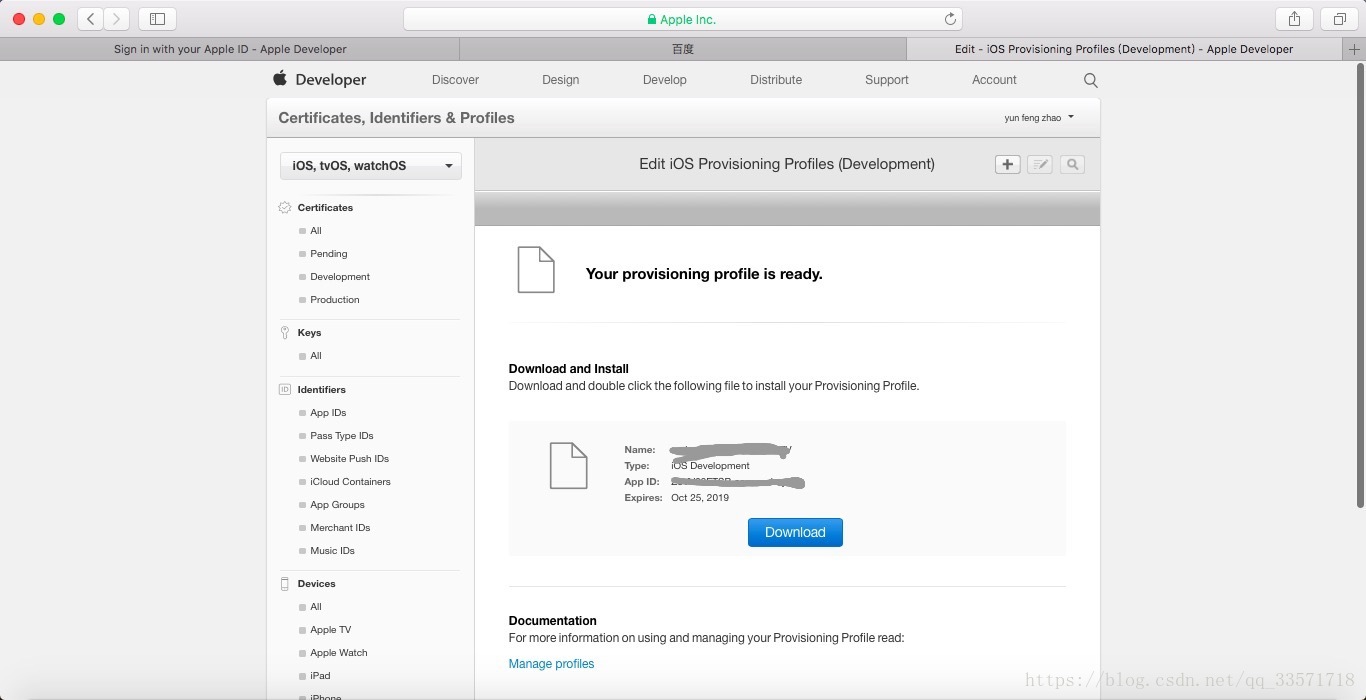
打开xcode打开项目替换一下描述文件即可
4.处理证书
进入终端,我这里是获取了root权限了
进入上面的目录
生成一个PushChatCert.pem文件
openssl x509 -in aps_development.cer -inform der -out PushChatCert.pem把私钥Push.p12文件转化为.pem文件:
openssl pkcs12 -nocerts -out PushChatKey.pem -in Push.p12对生成的这两个pem文件再生成一个p12文件,来把证书和私钥整合到一个文件里:
openssl pkcs12 -export -in PushChatCert.pem -inkey PushChatKey.pem -certfile CertificateSigningRequest.certSigningRequest -name "aps_developer_identity" -out aps_developer_identity.p12注意在这里有可能会报错,我这里是有错误:
命令行提示unable to load certificates
删除 -certfile CertificateSigningRequest.certSigningRequest,再次执行命令,需要你输入之前在钥匙串导出p12文件设置的密码
最后成功生成文件aps_developer_identity.p12
5.打开xcode项目,添加Push Notification代码
在AppDelegate.m中添加一下代码:
- (BOOL)application:(UIApplication *)applicationdidFinishLaunchingWithOptions:(NSDictionary *)launchOptions

{

……


	//消息推送注册
    if ([[[UIDevice currentDevice] systemVersion] floatValue] >= 10.0) {
        //iOS 10 later
        UNUserNotificationCenter *center = [UNUserNotificationCenter currentNotificationCenter];
        //必须写代理,不然无法监听通知的接收与点击事件
        center.delegate = self;
        [center requestAuthorizationWithOptions:(UNAuthorizationOptionBadge | UNAuthorizationOptionSound | UNAuthorizationOptionAlert) completionHandler:^(BOOL granted, NSError * _Nullable error) {
            if (!error && granted) {
                //用户点击允许
                NSLog(@"注册成功");
            }else{
                //用户点击不允许
                NSLog(@"注册失败");
            }
        }];

        // 可以通过 getNotificationSettingsWithCompletionHandler 获取权限设置
        //之前注册推送服务,用户点击了同意还是不同意,以及用户之后又做了怎样的更改我们都无从得知,现在 apple 开放了这个 API,我们可以直接获取到用户的设定信息了。注意UNNotificationSettings是只读对象哦,不能直接修改!
        [center getNotificationSettingsWithCompletionHandler:^(UNNotificationSettings * _Nonnull settings) {
            NSLog(@"========%@",settings);
        }];

        [application registerForRemoteNotifications];
    }else if ([[[UIDevice currentDevice] systemVersion] floatValue] >= 8.0){
        //iOS 8 - iOS 10系统
        //UIUserNotificationSettings *settings = [UIUserNotificationSettings settingsForTypes:UIUserNotificationTypeAlert | UIUserNotificationTypeBadge | UIUserNotificationTypeSound categories:nil];
        //[application registerUserNotificationSettings:settings];
        [[UIApplication sharedApplication] registerUserNotificationSettings:[UIUserNotificationSettings
                                                                             settingsForTypes:(UIUserNotificationTypeSound | UIUserNotificationTypeAlert | UIUserNotificationTypeBadge)
                                                                             categories:nil]];


        [application registerForRemoteNotifications];
    }else{
        //iOS 8.0系统以下
        [application registerForRemoteNotificationTypes:UIRemoteNotificationTypeBadge | UIRemoteNotificationTypeAlert | UIRemoteNotificationTypeSound];
    }


    NSUserDefaults *userDefaults = [NSUserDefaults standardUserDefaults];
    [userDefaults setObject:@"" forKey:@"token"];

   return YES;

}


- (void)application:(UIApplication *)applicationdidRegisterForRemoteNotificationsWithDeviceToken:(NSData *)pToken {

  	NSString *token = [NSString stringWithFormat:@"%@", deviceToken];
    //获取终端设备标识,这个标识需要通过接口发送到服务器端,服务器端推送消息到APNS时需要知道终端的标识,APNS通过注册的终端标识找到终端设备。
    NSLog(@"My token is:%@", token);

    NSUserDefaults *userDefaults = [NSUserDefaults standardUserDefaults];
    [userDefaults setObject:token forKey:@"token"];

}

- (void)application:(UIApplication *)application didReceiveRemoteNotification:(NSDictionary *)userInfo{

    // 处理推送消息

    NSLog(@"userinfo:%@",userInfo);


    NSLog(@"收到推送消息:%@",[[userInfo objectForKey:@"aps"] objectForKey:@"alert"]);

}

- (void)application:(UIApplication *)applicationdidFailToRegisterForRemoteNotificationsWithError:(NSError *)error {

   NSLog(@"Registfail%@",error);

}
五、服务端添加javapns代码
将第3步生成的p12文件传送到服务端,我是在windows下测试的,
String certificatePath = "D:/aps_developer_identity.p12";public class IOSBgNotice {
private static final Logger log = LogManager.getLogger(IOSBgNotice.class);
public static String certificatePath = "";
public static void notice(String deviceToken, String alert, int badge) {
/************************************************
测试的服务器地址:gateway.sandbox.push.apple.com /端口2195
产品推送服务器地址:gateway.push.apple.com / 2195
***************************************************/
//为了兼容开发测试 所以推送需要发送两次
sendNotice(deviceToken, alert, badge, "gateway.sandbox.push.apple.com");//developer
sendNotice(deviceToken, alert, badge, "gateway.push.apple.com");//distribution
}
private static void sendNotice(String deviceToken, String alert, int badge, String host) {
try {
deviceToken = deviceToken.replaceAll(" ", "");
PushNotificationPayload payload = new PushNotificationPayload();
payload.addAlert(alert);//push的内容
payload.addBadge(badge);//图标小红圈的数值
payload.addSound("default");//铃音
PushNotificationManager pushManager = new PushNotificationManager();
pushManager.addDevice("iPhone", deviceToken);
//Connect to APNs
int port = 2195;
String certificatePath = "D:/aps_developer_identity.p12";//导出的证书
String certificatePassword = "123456";//此处注意导出的证书密码不能为空因为空密码会报错
// pushManager.initializeConnection(host,port, certificatePath,certificatePassword, SSLConnectionHelper.KEYSTORE_TYPE_PKCS12);
pushManager.initializeConnection(new AppleNotificationServerBasicImpl(
certificatePath, certificatePassword, "PKCS12", host, port));
List<PushedNotification> notifications = new ArrayList<PushedNotification>();
// 开始推送消息
// Send Push
Device client = pushManager.getDevice("iPhone");
log.debug("推送消息: " + client.getToken() + "\n" + payload.toString() + " ");
PushedNotification notification = pushManager.sendNotification(client, payload);
notifications.add(notification);
List<PushedNotification> failedNotification = PushedNotification
.findFailedNotifications(notifications);
List<PushedNotification> successfulNotification = PushedNotification
.findSuccessfulNotifications(notifications);
int failed = failedNotification.size();
int successful = successfulNotification.size();
log.debug("功数:" + successful);
log.debug("失败数:" + failed);
pushManager.stopConnection();
pushManager.removeDevice("iPhone");
log.debug("消息推送完毕");
} catch (Exception e) {
e.printStackTrace();
}
}
}我这里发送两次是因为代码打包以后,生成服务器也会使用
6、测试
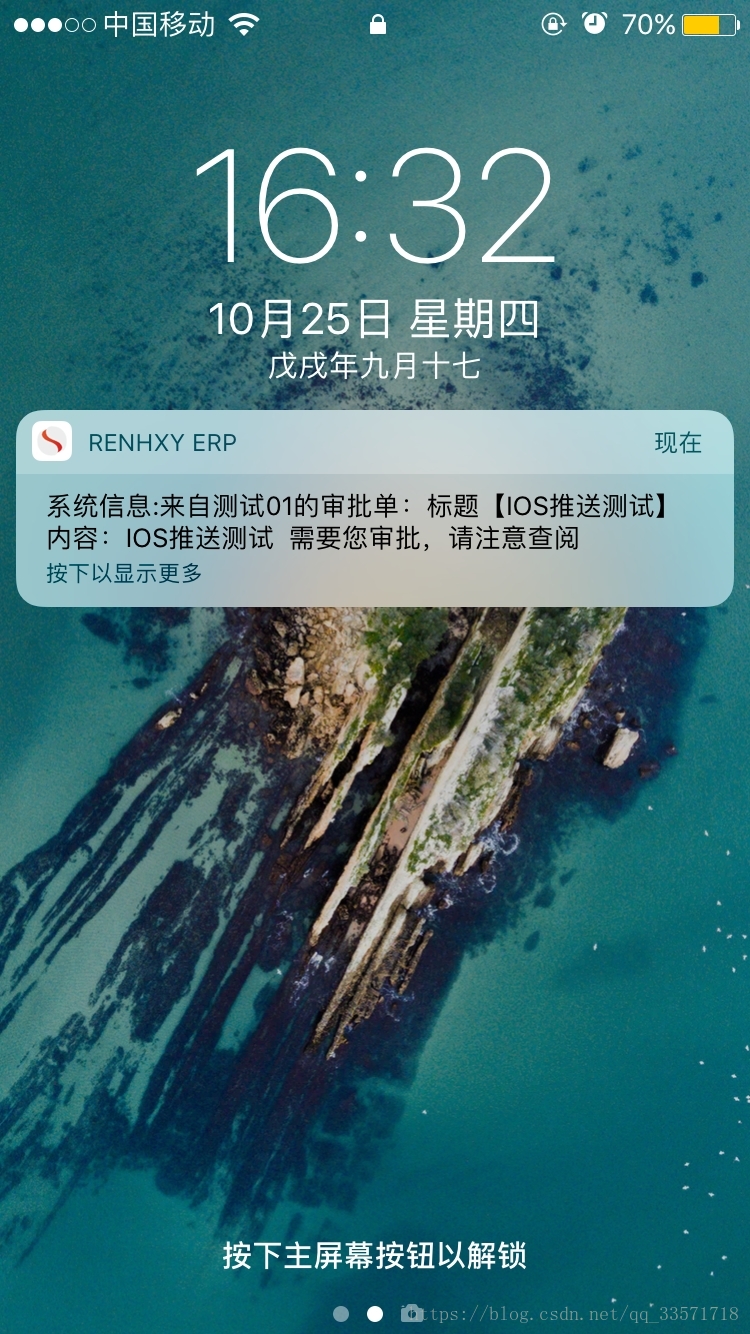
IOS需要在真机上测试,因为要获取token
运行代码以后,手机上收到推送通知
最重要的就是p12文件的制作,最开始在测试的时候一直报下面的异常:
javax.net.ssl.SSLException: Received fatal alert: internal_error
at sun.security.ssl.Alerts.getSSLException(Alerts.java:208)
at sun.security.ssl.Alerts.getSSLException(Alerts.java:154)
at sun.security.ssl.SSLSocketImpl.recvAlert(SSLSocketImpl.java:1991)
at sun.security.ssl.SSLSocketImpl.readRecord(SSLSocketImpl.java:1104)
at sun.security.ssl.SSLSocketImpl.performInitialHandshake(SSLSocketImpl.java:1343)
at sun.security.ssl.SSLSocketImpl.writeRecord(SSLSocketImpl.java:728)
at sun.security.ssl.AppOutputStream.write(AppOutputStream.java:123)
at java.io.OutputStream.write(OutputStream.java:75)
at Push_1.main(Push_1.java:62)
出现这种情况,有两种原因:
第一、你IOS打包时的环境和p12证书不匹配,有可能你导出的时候不仔细,用的是生产的证书:
gateway.sandbox.push.apple.com第二、Push Notification时,如果是开发环境就要使用开发苹果的开发服务器去推送;如果是生产环境就要使用生产服务器去推送:
gateway.push.apple.com
一定要注意这两点,必须要匹配才行
其他链接:
https://segmentfault.com/q/1010000000452323
https://blog.csdn.net/showhilllee/article/details/8631734