首先创建项目:
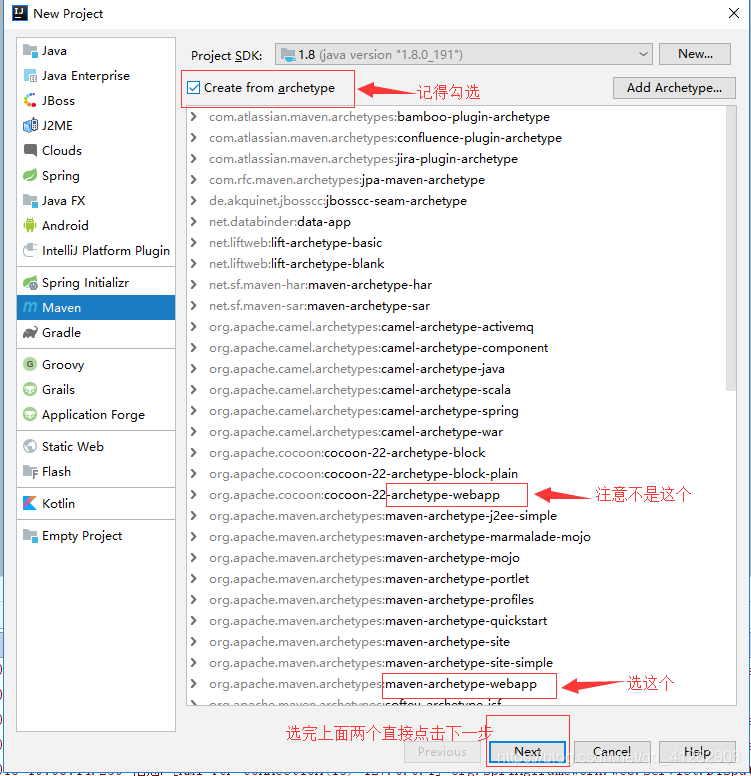
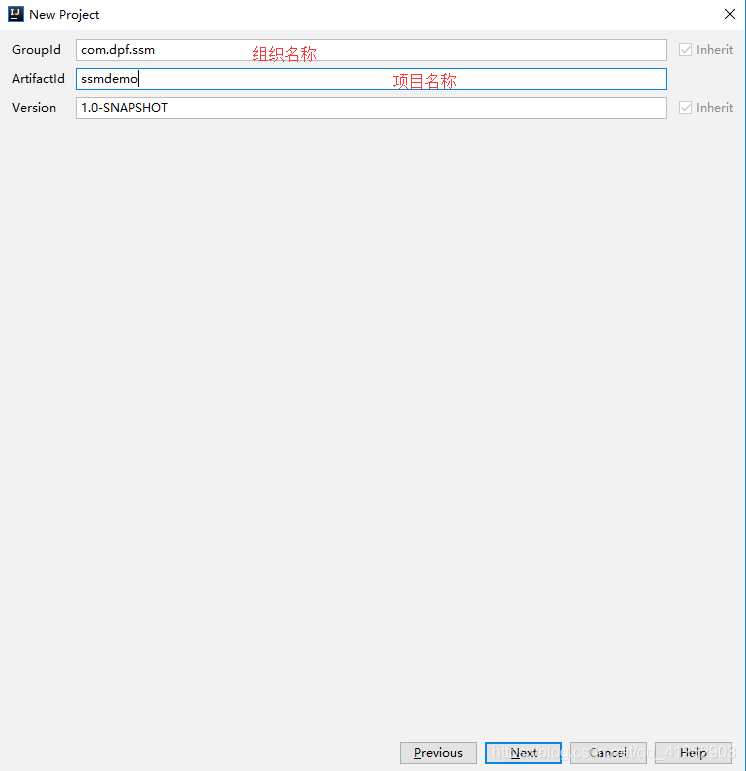
- 填写组织名称跟war包名称
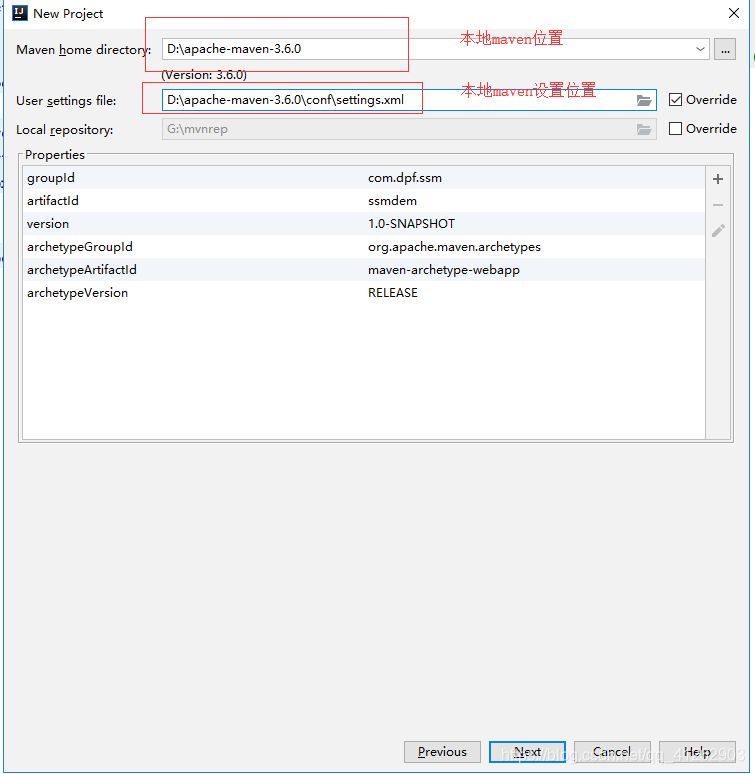
- 选择本地maven仓库
- 填写项目名称跟选址项目储存位置,点击finish即可成功创建项目
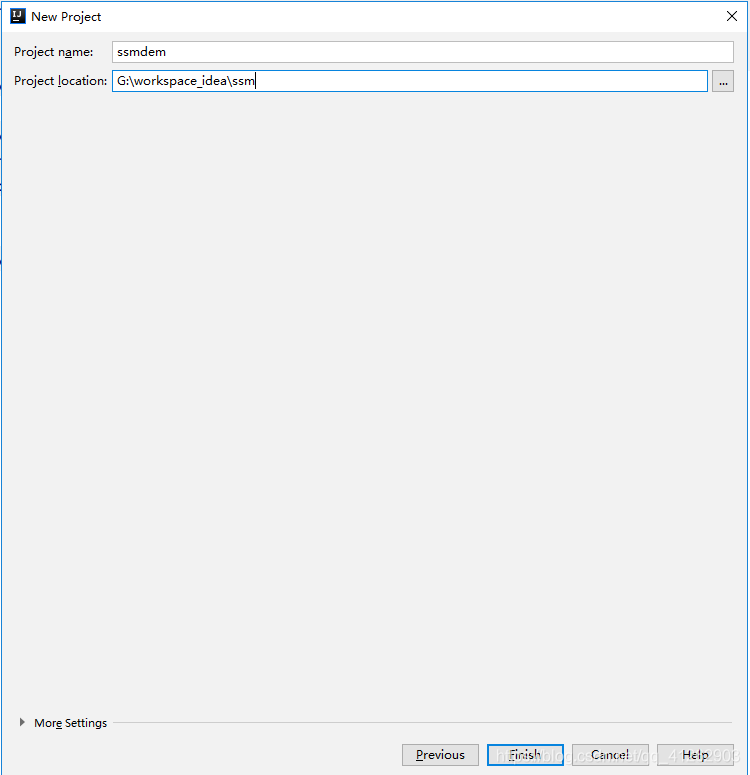
- 项目创建成功
如果没有以上项目列表可以等一会或者按一下步骤抄作
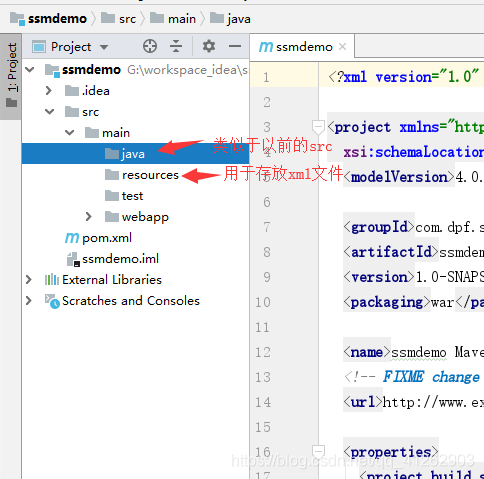
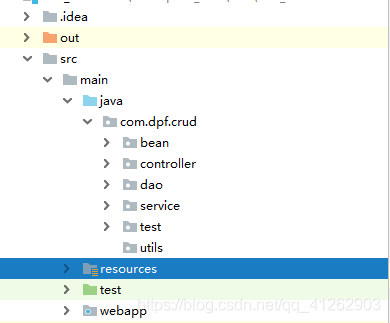
- 创建项目需要的文件夹
使文件夹变成系统可读文件夹:
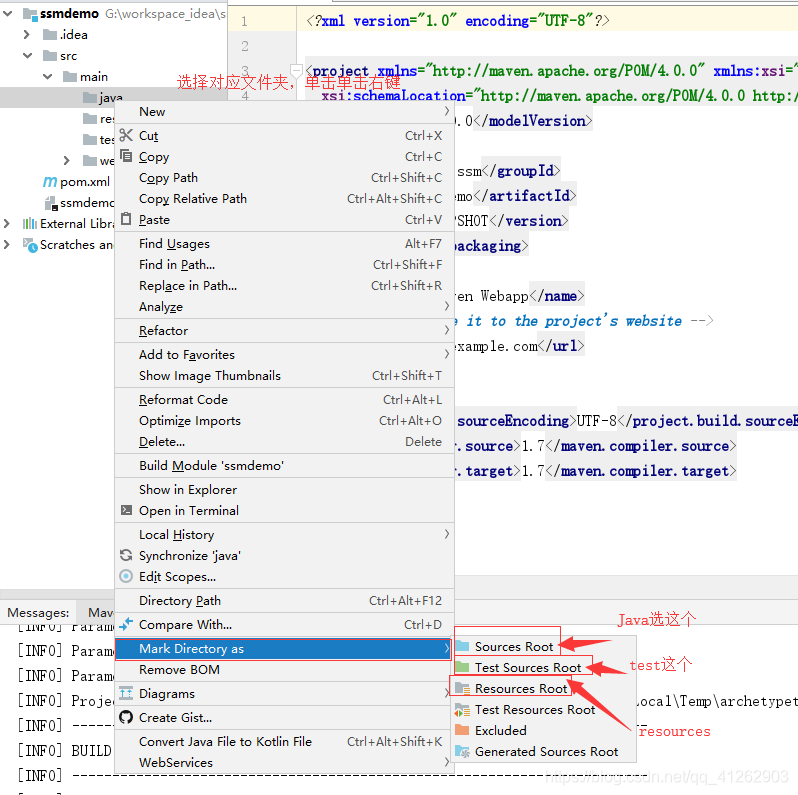
选择后:
在java中创建对应包
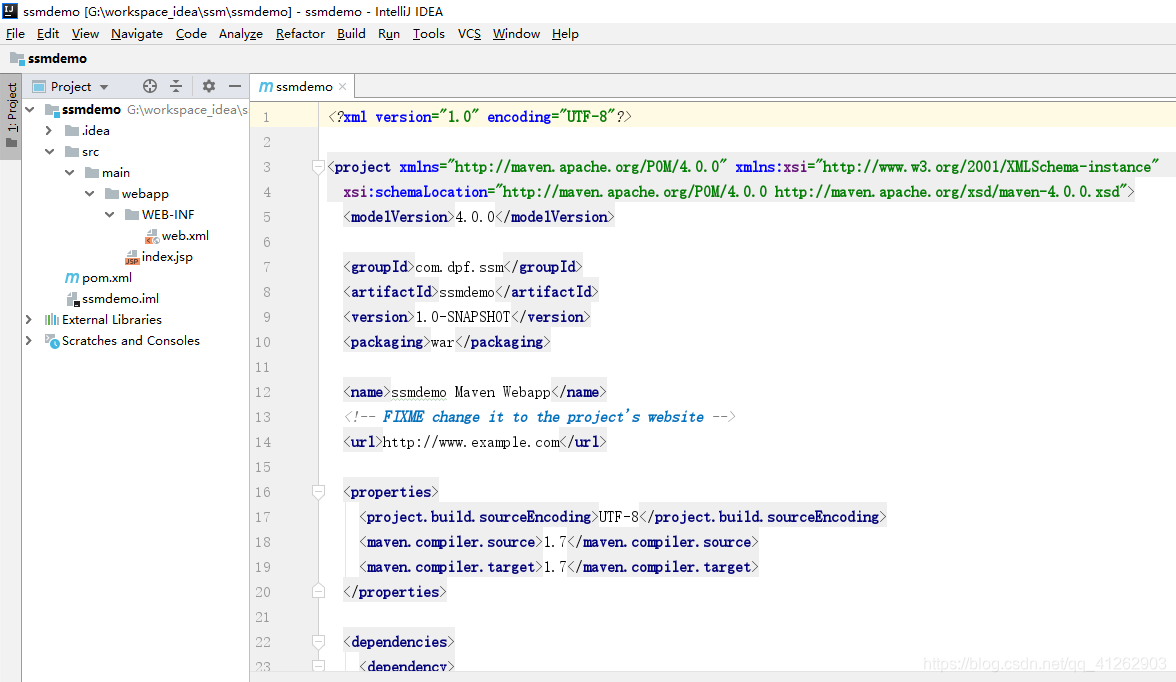
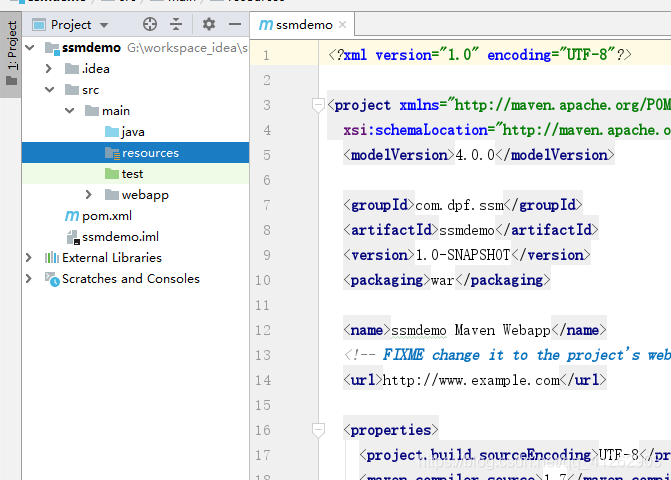
- 配置pom.xml,导入需要的jar包
//在pom文件中找到这个标签,配置所需要的jar包
//里面每一个<dependency>配置一个jar包
<dependencies>
    <dependency>
      <groupId>junit</groupId>
      <artifactId>junit</artifactId>
      <version>4.11</version>
      <scope>test</scope>
    </dependency>

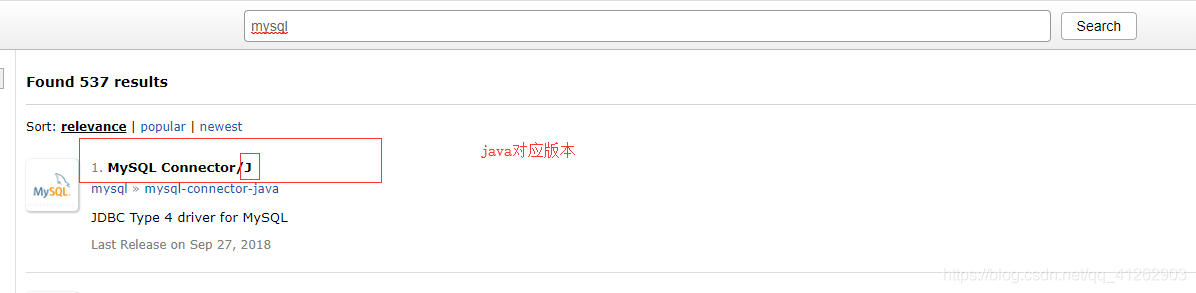
</dependencies>所需要的jar都在mvn中查找:https://mvnrepository.com/
你需要什么jar包直接搜索就可以了
例如我需要连接数据库的jar,直接搜索mysql
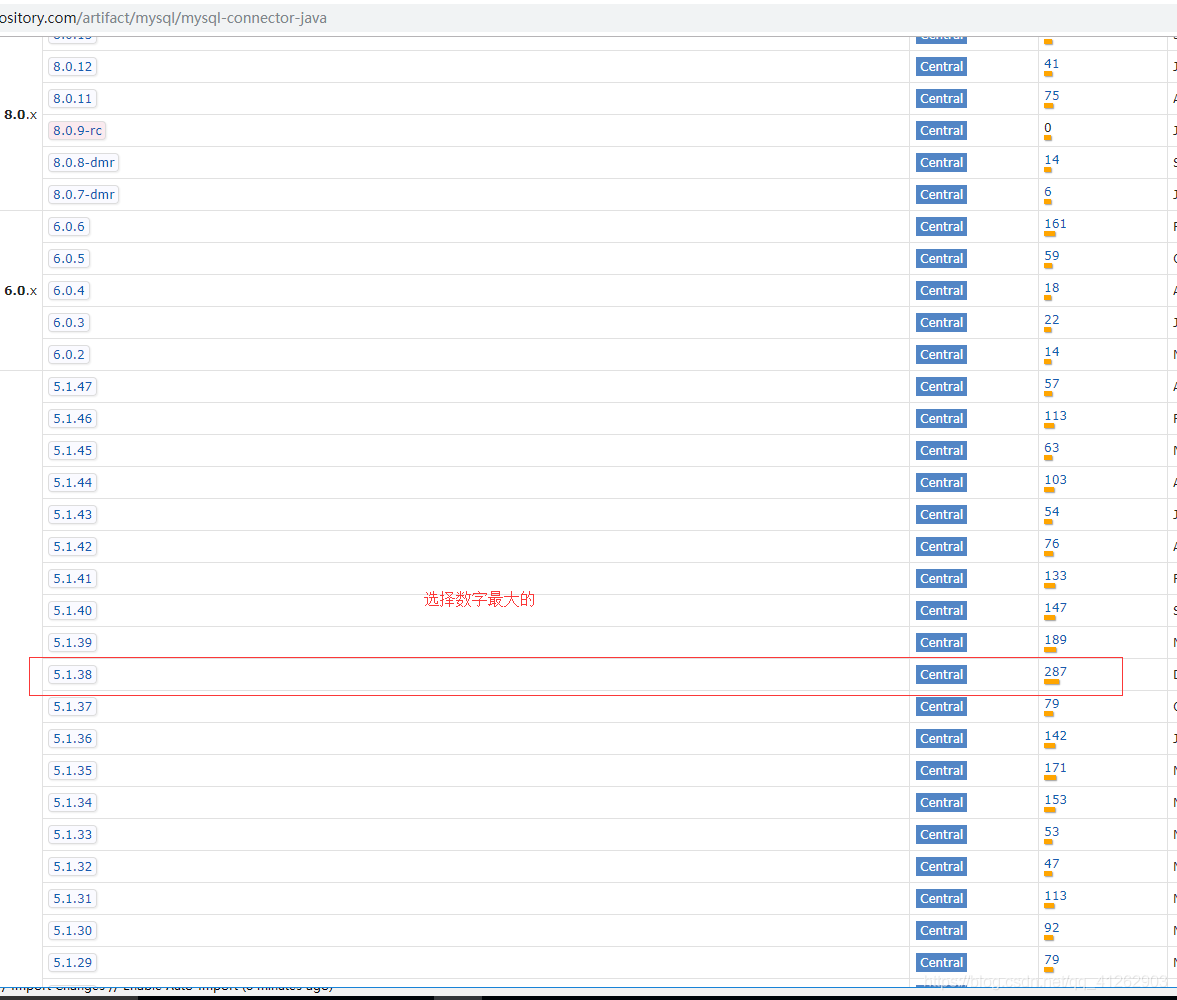
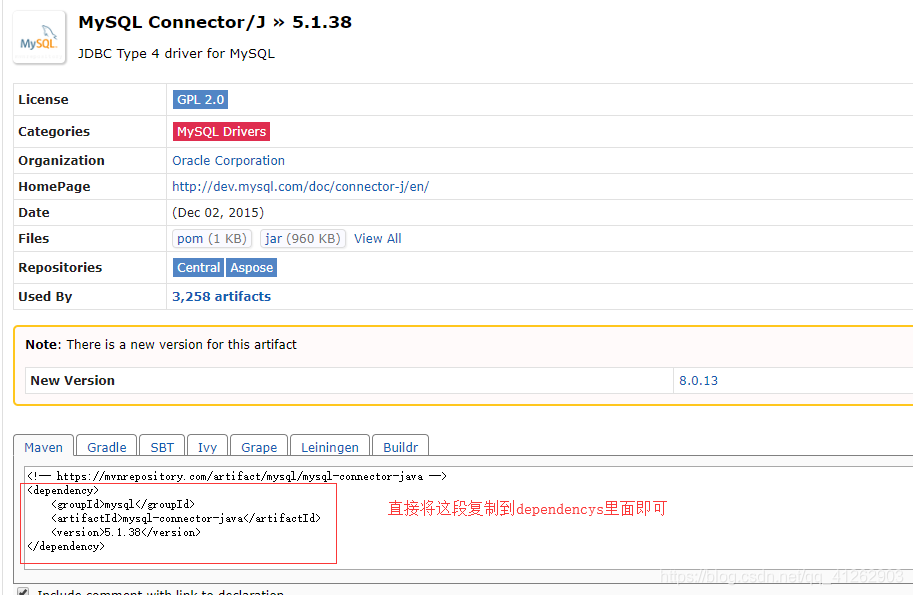
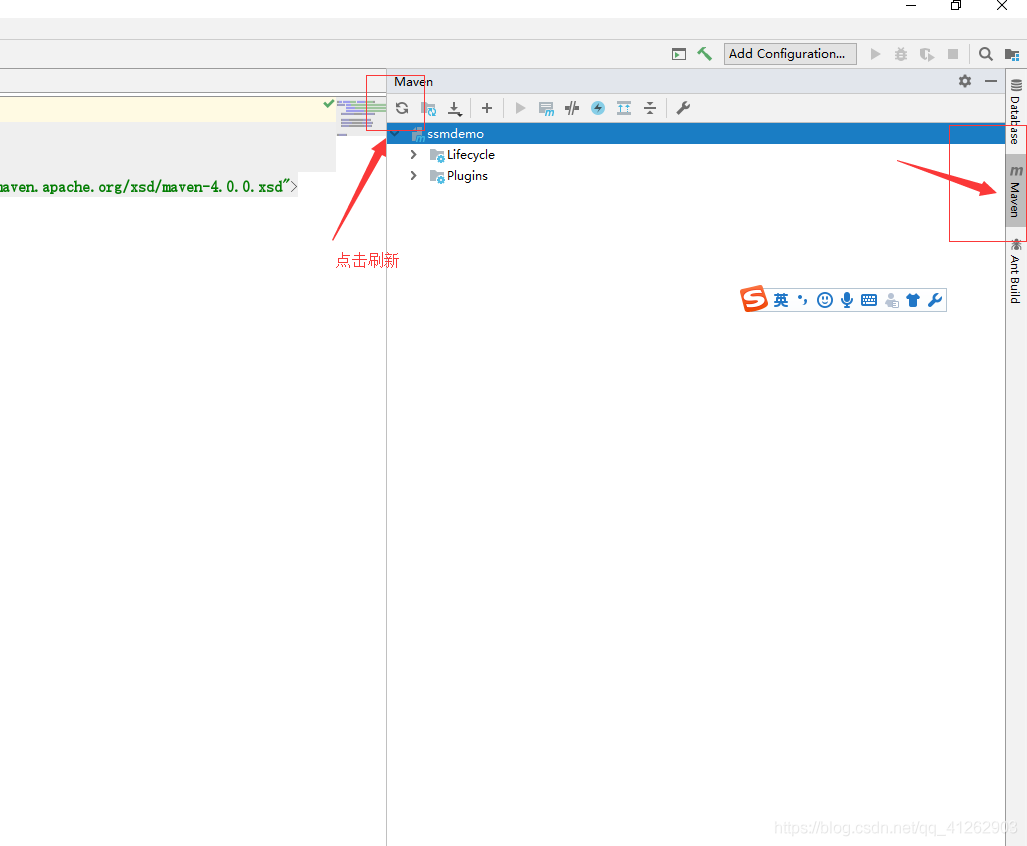
按照上面的配置方法你可以将你需要的jar包全部配置好,配置完成后点击idea右上角的maven中的刷新按钮即可将jar包引入进来
- 配置完pom.xml之后配置web.xml
<!DOCTYPE web-app PUBLIC
 "-//Sun Microsystems, Inc.//DTD Web Application 2.3//EN"
 "http://java.sun.com/dtd/web-app_2_3.dtd" >

<web-app version="2.4"
         xmlns="http://java.sun.com/xml/ns/j2ee"
         xmlns:xsi="http://www.w3.org/2001/XMLSchema-instance"
         xsi:schemaLocation="http://java.sun.com/xml/ns/j2ee http://java.sun.com/xml/ns/j2ee/web-app_2_4.xsd">
  <!-- 默认浏览页面 -->
  <welcome-file-list>
    <welcome-file>index.html</welcome-file>
    <welcome-file>index.htm</welcome-file>
    <welcome-file>index.jsp</welcome-file>
    <welcome-file>default.html</welcome-file>
    <welcome-file>default.htm</welcome-file>
    <welcome-file>default.jsp</welcome-file>
  </welcome-file-list>


  <!--1、启动Spring的容器  -->
  <!-- needed for ContextLoaderListener -->
  <context-param>
    <param-name>contextConfigLocation</param-name>
    <param-value>classpath:applicationContext.xml</param-value>
  </context-param>

  <!-- Bootstraps the root web application context before servlet initialization -->
  <listener>
    <listener-class>org.springframework.web.context.ContextLoaderListener</listener-class>
  </listener>

  <!--2、springmvc的前端控制器,拦截所有请求  -->
  <!-- The front controller of this Spring Web application, responsible for handling all application requests -->
  <servlet>
    <servlet-name>dispatcherServlet</servlet-name>
    <servlet-class>org.springframework.web.servlet.DispatcherServlet</servlet-class>
    <init-param>
      <param-name>contextConfigLocation</param-name>
      <param-value>classpath:springmvc.xml</param-value>
    </init-param>
    <load-on-startup>1</load-on-startup>
  </servlet>
  <!-- springmvc拦截器 Map all requests to the DispatcherServlet for handling-->
  <servlet-mapping>
    <servlet-name>dispatcherServlet</servlet-name>
    <url-pattern>/</url-pattern>
  </servlet-mapping>

  <!-- 3、字符编码过滤器,一定要放在所有过滤器之前 -->
  <filter>
    <filter-name>CharacterEncodingFilter</filter-name>
    <filter-class>org.springframework.web.filter.CharacterEncodingFilter</filter-class>
    <init-param>
      <param-name>encoding</param-name>
      <param-value>utf-8</param-value>
    </init-param>
    <init-param>
      <param-name>forceRequestEncoding</param-name>
      <param-value>true</param-value>
    </init-param>
    <init-param>
      <param-name>forceResponseEncoding</param-name>
      <param-value>true</param-value>
    </init-param>
  </filter>
  <filter-mapping>
    <filter-name>CharacterEncodingFilter</filter-name>
    <url-pattern>/*</url-pattern>
  </filter-mapping>

  <!-- 4、使用Rest风格的URI,将页面普通的post请求转为指定的delete或者put请求 -->
  <filter>
    <filter-name>HiddenHttpMethodFilter</filter-name>
    <filter-class>org.springframework.web.filter.HiddenHttpMethodFilter</filter-class>
  </filter>
  <filter-mapping>
    <filter-name>HiddenHttpMethodFilter</filter-name>
    <url-pattern>/*</url-pattern>
  </filter-mapping>
  <filter>
    <filter-name>HttpPutFormContentFilter</filter-name>
    <filter-class>org.springframework.web.filter.HttpPutFormContentFilter</filter-class>
  </filter>
  <filter-mapping>
    <filter-name>HttpPutFormContentFilter</filter-name>
    <url-pattern>/*</url-pattern>
  </filter-mapping>


</web-app>
- 配置spring(applicationContext.xml)、外部数据库信息(dbconfig.properties)、springmvc(springmvc.xml)、mybatis
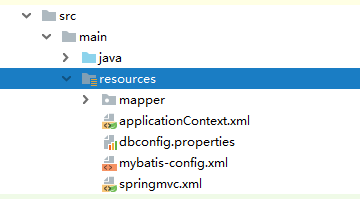
applicationContext.xml:
<?xml version="1.0" encoding="UTF-8"?>
<beans xmlns="http://www.springframework.org/schema/beans"
       xmlns:xsi="http://www.w3.org/2001/XMLSchema-instance"
       xmlns:context="http://www.springframework.org/schema/context"
       xmlns:aop="http://www.springframework.org/schema/aop" xmlns:tx="http://www.springframework.org/schema/tx"
       xsi:schemaLocation="http://www.springframework.org/schema/beans http://www.springframework.org/schema/beans/spring-beans.xsd http://www.springframework.org/schema/context http://www.springframework.org/schema/context/spring-context.xsd http://www.springframework.org/schema/aop http://www.springframework.org/schema/aop/spring-aop.xsd http://www.springframework.org/schema/cache http://www.springframework.org/schema/cache/spring-cache.xsd http://www.springframework.org/schema/tx http://www.springframework.org/schema/tx/spring-tx.xsd">

    <context:component-scan base-package="com.dpf.crud">
        <context:exclude-filter type="annotation" expression="org.springframework.stereotype.Controller"/>
    </context:component-scan>

    <!-- Spring的配置文件,这里主要配置和业务逻辑有关的 -->
    <!--=================== 数据源,事务控制,xxx ================-->
    <context:property-placeholder location="classpath:dbconfig.properties"/>
    <bean id="pooledDataSource" class="com.mchange.v2.c3p0.ComboPooledDataSource">
        <property name="jdbcUrl" value="${jdbc.jdbcUrl}"></property>
        <property name="driverClass" value="${jdbc.driverClass}"></property>
        <property name="user" value="${jdbc.user}"></property>
        <property name="password" value="${jdbc.password}"></property>
    </bean>

    <!--================== 配置和MyBatis的整合=============== -->
    <bean id="sqlSessionFactory" class="org.mybatis.spring.SqlSessionFactoryBean">
        <!-- 指定mybatis全局配置文件的位置 -->
        <property name="configLocation" value="classpath:mybatis-config.xml"></property>
        <property name="dataSource" ref="pooledDataSource"></property>
        <!-- 指定mybatis,mapper文件的位置 -->
        <property name="mapperLocations" value="classpath:mapper/*.xml"></property>
    </bean>

    <!-- 配置扫描器,将mybatis接口的实现加入到ioc容器中 -->
    <bean class="org.mybatis.spring.mapper.MapperScannerConfigurer">
        <!--扫描所有dao接口的实现,加入到ioc容器中 -->
        <property name="basePackage" value="com.dpf.crud.dao"></property>
    </bean>

    <!-- 配置一个可以执行批量的sqlSession -->
    <bean id="sqlSession" class="org.mybatis.spring.SqlSessionTemplate">
        <constructor-arg name="sqlSessionFactory" ref="sqlSessionFactory"></constructor-arg>
        <constructor-arg name="executorType" value="BATCH"></constructor-arg>
    </bean>
    <!--=============================================  -->

    <!-- ===============事务控制的配置 ================-->
    <bean id="transactionManager" class="org.springframework.jdbc.datasource.DataSourceTransactionManager">
        <!--控制住数据源  -->
        <property name="dataSource" ref="pooledDataSource"></property>
    </bean>
    <!--开启基于注解的事务,使用xml配置形式的事务(必要主要的都是使用配置式)  -->
    <aop:config>
        <!-- 切入点表达式 -->
        <aop:pointcut expression="execution(* com.dpf.crud.service..*(..))" id="txPoint"/>
        <!-- 配置事务增强 -->
        <aop:advisor advice-ref="txAdvice" pointcut-ref="txPoint"/>
    </aop:config>

    <!--配置事务增强,事务如何切入  -->
    <tx:advice id="txAdvice" transaction-manager="transactionManager">
        <tx:attributes>
            <!-- 所有方法都是事务方法 -->
            <tx:method name="*"/>
            <!--以get开始的所有方法  -->
            <tx:method name="get*" read-only="true"/>
        </tx:attributes>
    </tx:advice>

    <!-- Spring配置文件的核心点(数据源、与mybatis的整合,事务控制) -->
</beans>
dbconfig.properties(填写你的):
jdbc.jdbcUrl=jdbc:mysql://localhost:3306/ssm_crud
jdbc.driverClass=com.mysql.jdbc.Driver
jdbc.user=root
jdbc.password=123456
springmvc.xml:
<?xml version="1.0" encoding="UTF-8"?>
<beans xmlns="http://www.springframework.org/schema/beans"
       xmlns:xsi="http://www.w3.org/2001/XMLSchema-instance"
       xmlns:context="http://www.springframework.org/schema/context"
       xmlns:mvc="http://www.springframework.org/schema/mvc"
       xsi:schemaLocation="http://www.springframework.org/schema/beans http://www.springframework.org/schema/beans/spring-beans.xsd http://www.springframework.org/schema/context http://www.springframework.org/schema/context/spring-context.xsd http://www.springframework.org/schema/mvc http://www.springframework.org/schema/mvc/spring-mvc.xsd">

    <!--SpringMVC的配置文件,包含网站跳转逻辑的控制,配置  -->
    <context:component-scan base-package="com.dpf.crud" use-default-filters="false">
        <!--只扫描控制器。  -->
        <context:include-filter type="annotation" expression="org.springframework.stereotype.Controller"/>
    </context:component-scan>

    <!--配置视图解析器,方便页面返回  -->
    <bean class="org.springframework.web.servlet.view.InternalResourceViewResolver">
        <property name="prefix" value="/WEB-INF/views/"></property>
        <property name="suffix" value=".jsp"></property>
    </bean>

    <!--两个标准配置  -->
    <!-- 将springmvc不能处理的请求交给tomcat -->
    <mvc:default-servlet-handler/>
    <!-- 能支持springmvc更高级的一些功能,JSR303校验,快捷的ajax...映射动态请求 -->
    <mvc:annotation-driven/>
</beans>
mybatis:
<?xml version="1.0" encoding="UTF-8"?>
<!DOCTYPE configuration
        PUBLIC "-//mybatis.org//DTD Config 3.0//EN"
        "http://mybatis.org/dtd/mybatis-3-config.dtd">
<configuration>
    <settings>
        <!--设置驼峰命名规则-->
        <setting name="mapUnderscoreToCamelCase" value="true"/>
    </settings>


    <typeAliases>
        <!--起别名 引用时只要打相应的类名即可-->
        <package name="com.dpf.crud.bean"/>
    </typeAliases>

    <!-- 注册插件 -->
    <plugins>
        <plugin interceptor="com.github.pagehelper.PageInterceptor">
            <!--分页参数合理化  -->
            <property name="reasonable" value="true"/>
        </plugin>
    </plugins>

</configuration>
到这里整合就基本完成了。
下一篇:ssm逆向工程https://blog.csdn.net/qq_41262903/article/details/85059641