今天我们需要了解的是Angular的路由。在使用路由的时候我们需要在低级模块中导入AppRoutingModule , 它专注于路由功能。然后有根模块AppModule 导入。
当我们使用CLI创建新项目的时候。我们发现项目中已经有app-routing,如果你是手动创建项目我们需要在顶级目录src/app中创建app-routing.module.ts
我们可以使用CLI命令:
ng generate module app-routing --flat --module-app
--flat 吧这个文件放入src/app中,而不是单独的目录,之前我们在用CLI创建component的时候可以发现CLI会自动给我们创建对应的文件夹。
--module=app 告诉CLI把它注册到AppModule的imports的数组中。
我们可以看到CLI给我们生成如下文件。
import { NgModule } from '@angular/core';
import { CommonModule } from '@angular/common';

@NgModule({
  imports: [
    CommonModule
  ],
  declarations: []
})
export class AppRoutingModule { }
我们通常不会再路由模块中声明组件,所以我们可以删除@NgModule.declarations 和 CommonModule的引用,我们需要引入RouterModule 并使用Routes来配置路由。
所以我们import(导入)RouterModule
import { RouterModule, Routes } from '@angular/router';
并添加@NgModule.exports数组已导出RouterModule让理由七可以在AppModule中使用相关指令。
接着我们添加路由定义。
path : 一个用于匹配浏览器地址栏中URL的字符串
component : 当导航到路由是。路由器对应的组件Component
我们给Heroes添加路由
//我们需要导入我们需要使用的组件
import { HeroesComponent } from './heroes/heroes.component';

//并定义路由规则数组
const routes: Routes = [
  { path: 'heroes', component: HeroesComponent }
];
我们的路由就配置好了。但是Angular怎么知道URL是对应的路由勒。我们就需要使用RouterModule.forRoot()来监听浏览器地址变化。
所以我们在@NgModule.imports数组中导入监听器。
imports: [ RouterModule.forRoot(routes) ],
我们引入了监听器,也配置好了路由。最后一步我们需要告诉Angular 在哪里开始显示路由到视图。我们需要添加
<router-outlet></router-outlet>来告诉Angular从这里开始
好了。我们所有的配置都已经完成。那我们来看看我们配置之后的文件
//app-routing.module.ts
import { NgModule } from '@angular/core';
import { Routes, RouterModule } from '@angular/router';

import { HeroesComponent } from './heroes/heroes.component';
import { HeroesDetailComponent } from './heroes-detail/heroes-detail.component';

const routes: Routes = [
  { path: 'hero', component: HeroesComponent }
];

@NgModule({
  imports: [RouterModule.forRoot(routes)],
  exports: [RouterModule]
})
export class AppRoutingModule { }
//app.component.html
<router-outlet></router-outlet>
我们可以运行起来。发现路由器已经工作了。但是我们只有浏览器的URL是/hero的时候我们才可以看到我们想要的视图。有时候我们可能会忘记输入任何地址在后面。那么我们就可能发现项目似乎很奇怪。看不到任何东西。Angular为我们想到了这个事情。所以我们可以在路由中配置默认路由地址:
{ path: '', redirectTo: '/hero', pathMatch: 'full' },
当我们不输入任何path,路由器会自动跳转到想要的路由。
这样我们就可以根据路由访问不同的页面(Component)了。但是可能有人会有疑问。我们怎么才可以把参数带到某些页面勒?
那么接下来我们就来说说当我们有参数需要带到下一个页面或者跳转到其他的页面的时候我们怎么把参数带上。
路由带参数。我们只需要修改路由规则如下,使用冒号来表示。
{ path: 'hero-detail/:id', component: HeroesDetailComponent }
:id 表示一个占位符,他表示某一个特定的id。这样我们的路由就就绪了。我们只需要在跳转你的时候加入参数,就可以在相应的Component中获取id并使用。
我们想要获取Route的参数。我们需要在相应的Component导入ActivatedRoute
import { ActivatedRoute } from '@angular/router';
ActivateRoute , Angular把他放在了router中。而并非core。
当我们想要使用它们的时候我们需要在购置函数值引入它们,我们在hero-detail加入如下代码:
//在构造函数中引入
constructor(private activatedRoute: ActivatedRoute,
private location: Location) { }
//在方法中使用snapshot.paraMap 根据名字获取想要的参数
this.id = this.activatedRoute.snapshot.paramMap.get('id');
我们在页面上输出参数值,看我们是否获取到正确的值。
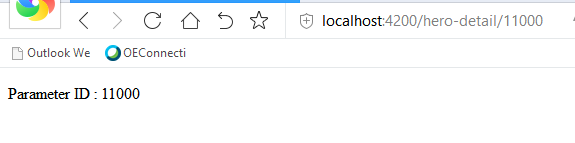
我们传入的参数是id = 11000。