Updated March 6, 2018
准备环境
windows10 x64
node.js v8.9.3
git version 2.16.1.windows.4
Markdown编辑器:http://markdownpad.com/
熟练掌握git和github的基本操作
参考廖雪峰教程:
https://www.liaoxuefeng.com/wiki/0013739516305929606dd18361248578c67b8067c8c017b000
然后,
在github中新建仓库,名称设置为github用户名.github.io
node.js+hexo
下载安装node.js,打开git-bash,分别输入npm -v和node -v,返回版本信息说明安装成功
新建文件夹D:\hexo,在文件夹hexo中使用git-bash进行操作
输入npm install -g hexo-cli来安装hexo
依次输入hexo init blog, cd blog和npm install建站
输入hexo generate生成静态页面
输入hexo server启动服务
如果提示端口4000被占用, 那就需要改端口hexo server -p 5000
hexo配置
hexo官方文档:https://hexo.io/zh-cn/docs/
修改/hexo/blog/_config.yml文件
# Deployment
## Docs: https://hexo.io/docs/deployment.html
deploy:
  type: git
  repo: https://github.com/lema1987/lema1987.github.io.git
  branch: master
设置语言,网站标题,修改/hexo/blog/_config.yml文件
# Site
title: # 网站标题
subtitle:
description:
author: # 作者
language: zh-Hans # 语言
timezone:
菜单中添加分类页标签页:
教程:https://github.com/iissnan/hexo-theme-next/blob/master/README.cn.md
修改/hexo/blog/themes/next/_config.yml
menu:
  home: / || home
  关于我: /about/ || user
  tags: /tags/ || tags
  categories: /categories/ || th
  archives: /archives/ || archive
  #schedule: /schedule/ || calendar
  #sitemap: /sitemap.xml || sitemap
  #commonweal: /404/ || heartbeat
腾讯404公益http://www.qq.com/404/
在/hexo/blog目录下新建404.md:
<html>
<head>
  <meta http-equiv="content-type" content="text/html;charset=utf-8;"/>
  <meta http-equiv="X-UA-Compatible" content="IE=edge,chrome=1" />
  <meta name="robots" content="all" />
  <meta name="robots" content="index,follow"/>
</head>
<body>

<script type="text/javascript" src="//qzonestyle.gtimg.cn/qzone/hybrid/app/404/search_children.js" charset="utf-8" homePageUrl="http://lema1987.github.io" homePageName="回到我的主页"></script>

</body>
</html>
https://github.com/hexojs/hexo-deployer-git
npm install hexo-deployer-git --save
hexo主题配置
下载next主题:https://github.com/iissnan/hexo-theme-next
把主题代码存放在/hexo/blog/themes/next中
修改/hexo/blog/_config.yml文件:
# Extensions
## Plugins: https://hexo.io/plugins/
## Themes: https://hexo.io/themes/
theme: next
新建文章
在/hexo/blog/sources/_posts中新建文章.md
在开头输入
---
title: #文章标题
date: 2016-06-01 23:47:44 #文章生成時間
categories: "Hexo教程" #文章分類目錄 可以省略
tags: #文章標籤 可以省略
     - 标签1
     - 标签2
description: #你對本頁的描述 可以省略
---
部署项目
hexo clean  清除缓存
hexo g  生成页面
hexo d  一键部署项目到服务器上
或者 hexo clean && hexo g && hexo d

hexo s  启动本地服务器
实现各种优化
为主题增加动态粒子背景
教程:https://github.com/hustcc/canvas-nest.js/blob/master/README-zh.md
把下面的js代码复制粘贴到/hexo/blog/themes/next/layout/_layout.swig中的</body>之前:
{% if theme.canvas_nest %}
<script type='text/javascript' color='252,3,184' zIndex='-1' opacity='20' count='99' src='//cdn.bootcss.com/canvas-nest.js/1.0.0/canvas-nest.min.js'></script>
{% endif %}
把/hexo/blog/themes/next/_config.yml中所有的canvas_nest设置为true值
hexo文章添加本地图片
方法1:此方法有时会出错,不能成功引入图片
将/hexo/blog/_config.yml中的post_asset_folder设置为true
在/hexo/blog/source下创建/images文件夹,本地图片丢里面
引入图片时按照markdown格式引入图片,如[图片上传失败...(image-deba05-1527085003150)]
方法2:引入外链, 推荐使用第二种方法
注册申请七牛云账号
上传图片到七牛云,七牛云作为图片托管
取外链粘贴在文章中
参考教程:https://www.jianshu.com/p/ec2c8acf63cd
添加字数统计,阅读时长功能
参考链接:https://www.jianshu.com/p/baea8c95e39b
安装插件
npm -i --save hexo-wordcount
npm install hexo-wordcount@2 --save
修改配置文件
/hexo/blog/themes/next/_config.yml
post_wordcount:
  item_text: true
  wordcount: true # 改为true
  min2read: true # 改为true
  totalcount: false
  separated_meta: true
编辑/hexo/blog/themes/next/layout/_macro/post.swig
<span title="{{ __('post.wordcount') }}">
    {{ wordcount(post.content) }} 字
</span>
<span title="{{ __('post.min2read') }}">
    {{ min2read(post.content) }} 分钟
</span>
添加友链
编辑/hexo/blog/themes/next/_config.yml
# Blog rolls
links_icon: link
links_title: 友情链接
links_layout: block
#links_layout: inline
links:
  #Title: http://example.com/
  武沛齐: http://www.cnblogs.com/wupeiqi
  离别歌: https://www.leavesongs.com/
  Chybeta: https://chybeta.github.io/
  Sakura: http://eternalsakura13.com/
  andseclab: https://www.andseclab.cn/
自定义鼠标样式
打开/themes/next/source/css/_custom/custom.styl,输入
 * {
      cursor: url("http://om8u46rmb.bkt.clouddn.com/sword2.ico"),auto!important
  }
添加github丝带
在/hexo/blog/themes/next/layout/_layout.swig中加入相关代码
相关代码的访问链接: https://blog.github.com/2008-12-19-github-ribbons/
鼠标点击显示小红心
在/hexo/blog/themes/next/source/js/src目录下添加love.js文件,内容为
!function(e,t,a){function n(){c(".heart{width: 10px;height: 10px;position: fixed;background: #f00;transform: rotate(45deg);-webkit-transform: rotate(45deg);-moz-transform: rotate(45deg);}.heart:after,.heart:before{content: '';width: inherit;height: inherit;background: inherit;border-radius: 50%;-webkit-border-radius: 50%;-moz-border-radius: 50%;position: fixed;}.heart:after{top: -5px;}.heart:before{left: -5px;}"),o(),r()}function r(){for(var e=0;e<d.length;e++)d[e].alpha<=0?(t.body.removeChild(d[e].el),d.splice(e,1)):(d[e].y--,d[e].scale+=.004,d[e].alpha-=.013,d[e].el.style.cssText="left:"+d[e].x+"px;top:"+d[e].y+"px;opacity:"+d[e].alpha+";transform:scale("+d[e].scale+","+d[e].scale+") rotate(45deg);background:"+d[e].color+";z-index:99999");requestAnimationFrame(r)}function o(){var t="function"==typeof e.onclick&&e.onclick;e.onclick=function(e){t&&t(),i(e)}}function i(e){var a=t.createElement("div");a.className="heart",d.push({el:a,x:e.clientX-5,y:e.clientY-5,scale:1,alpha:1,color:s()}),t.body.appendChild(a)}function c(e){var a=t.createElement("style");a.type="text/css";try{a.appendChild(t.createTextNode(e))}catch(t){a.styleSheet.cssText=e}t.getElementsByTagName("head")[0].appendChild(a)}function s(){return"rgb("+~~(255*Math.random())+","+~~(255*Math.random())+","+~~(255*Math.random())+")"}var d=[];e.requestAnimationFrame=function(){return e.requestAnimationFrame||e.webkitRequestAnimationFrame||e.mozRequestAnimationFrame||e.oRequestAnimationFrame||e.msRequestAnimationFrame||function(e){setTimeout(e,1e3/60)}}(),n()}(window,document);
在/hexo/blog/themes/next/layout/_layout.swing文件中添加一下代码(要在之前添加)
<!-- 小红心 -->
<script type="text/javascript" src="/js/src/love.js"></script>
设置hexo首页文章不显示全文只显示预览
第一种方法:
在/hexo/blog/themes/next/_config.yml中将下面代码中的enable值改为true
# Automatically Excerpt. Not recommend.
# Please use <!-- more --> in the post to control excerpt accurately.
auto_excerpt:
  enable: true
  length: 150
第二种方法:
在每一篇文章中添加<!--more-->手动进行截断,推荐使用第二种方法
设置hexo支持评论系统
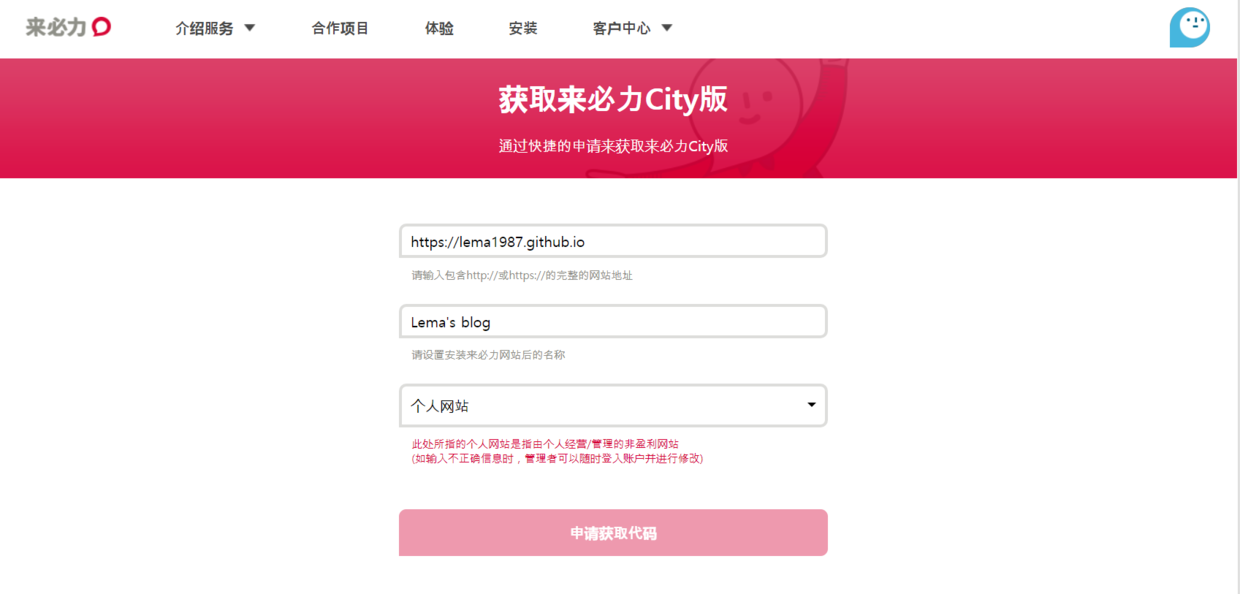
本文选用韩国的产品来必力: https://livere.com/, 支持多个国内外账号登录
注册并登录来必力账号, 选择安装LiveReCity免费版, 添加站点信息

然后在/hexo/blog/themes/next/_config.yml中找到livere_uid
livere_uid: 输入你的uid
修改超链接显示样式
将超链接设置为蓝色, 鼠标划过时显示下划线
在/hexo/blog/themes/next/source/css/_custom/custom.styl中添加以下css样式
.post-body p a {
	color: #0593d3;
	border-bottom: none;
 	&:hover {
		color: #0477ab;
 		text-decoration: underline;
  	}
}
添加头像
在/hexo/blog/themes/next/_config.yml中找到并修改以下代码:
# Sidebar Avatar
# in theme directory(source/images): /images/avatar.gif
# in site  directory(source/uploads): /uploads/avatar.gif
avatar: http://p5zqim58x.bkt.clouddn.com/touxiang.jpg
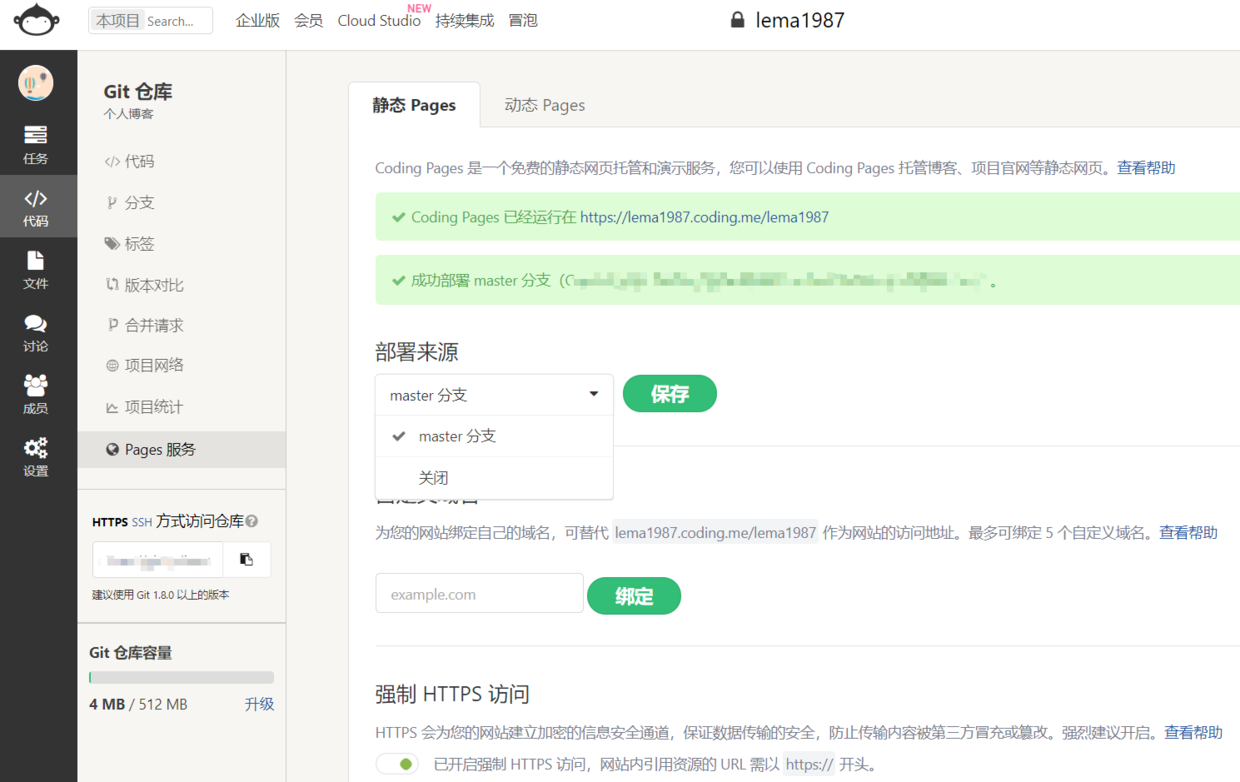
将博客托管到coding pages上
教程: https://blog.csdn.net/xiaoliuge01/article/details/50997754
在coding官网 https://coding.net/ 注册账号并绑定腾讯云账号
创建一个项目

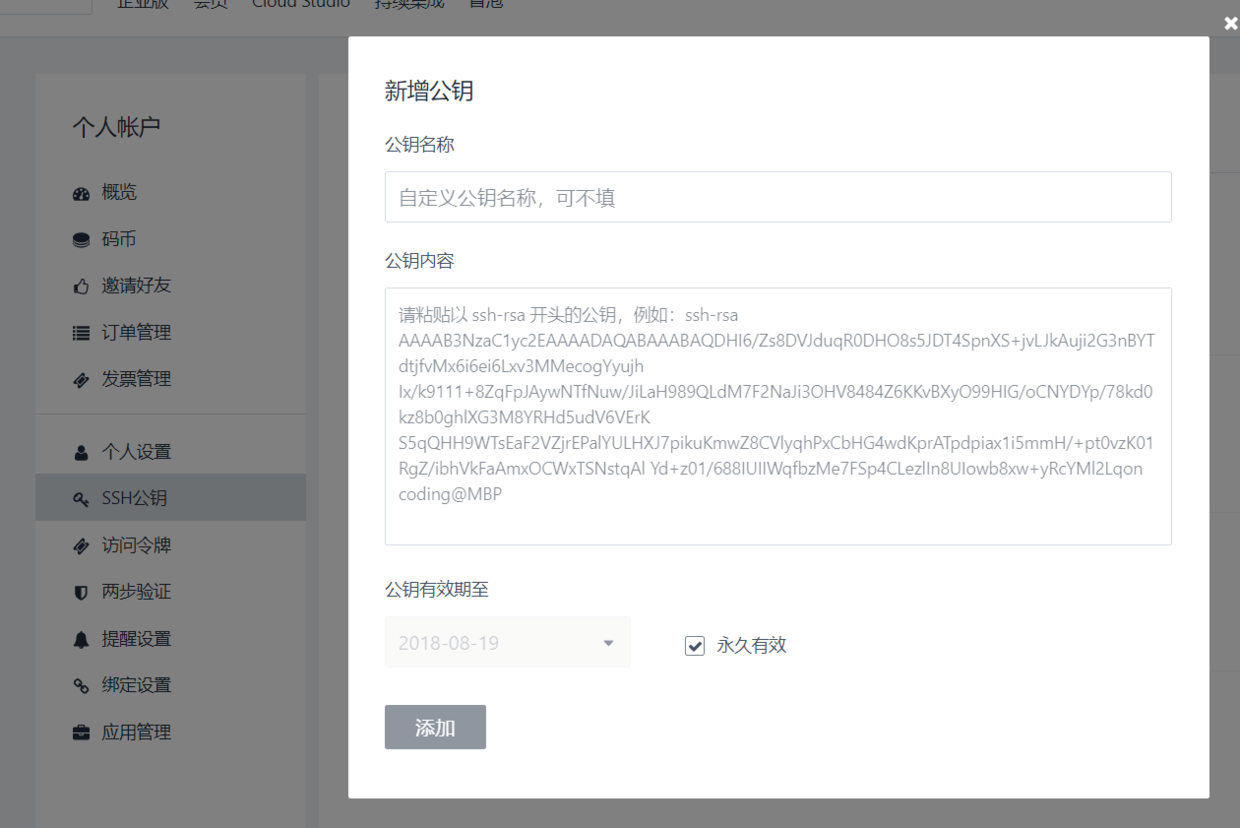
添加ssh key到coding上:
打开git bash, 输入
cd ~/.ssh
cat id_rsa.pub
复制一整串公钥
在coding上配置公钥
输入ssh -T [email protected]看看是否配置成功
选择master分支, 开启https
打开hexo/blog/_config.yml修改添加以下代码
# Deployment
## Docs: https://hexo.io/docs/deployment.html
deploy:
  type: git
  repo:
      github: https://github.com/lema1987/lema1987.github.io.git
      coding: [email protected]:lema1987/lema1987.git
  branch: master
本地项目部署到coding上
hexo clean
hexo g
hexo s