1.使用mapper接口,定义了mapper接口,在mapper.xml中关联mapper文件的。
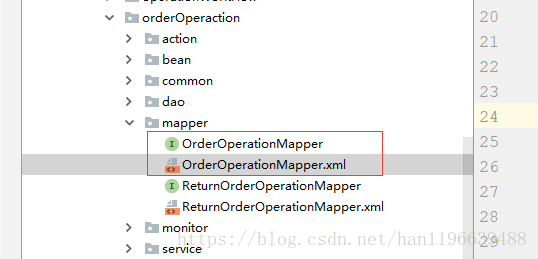
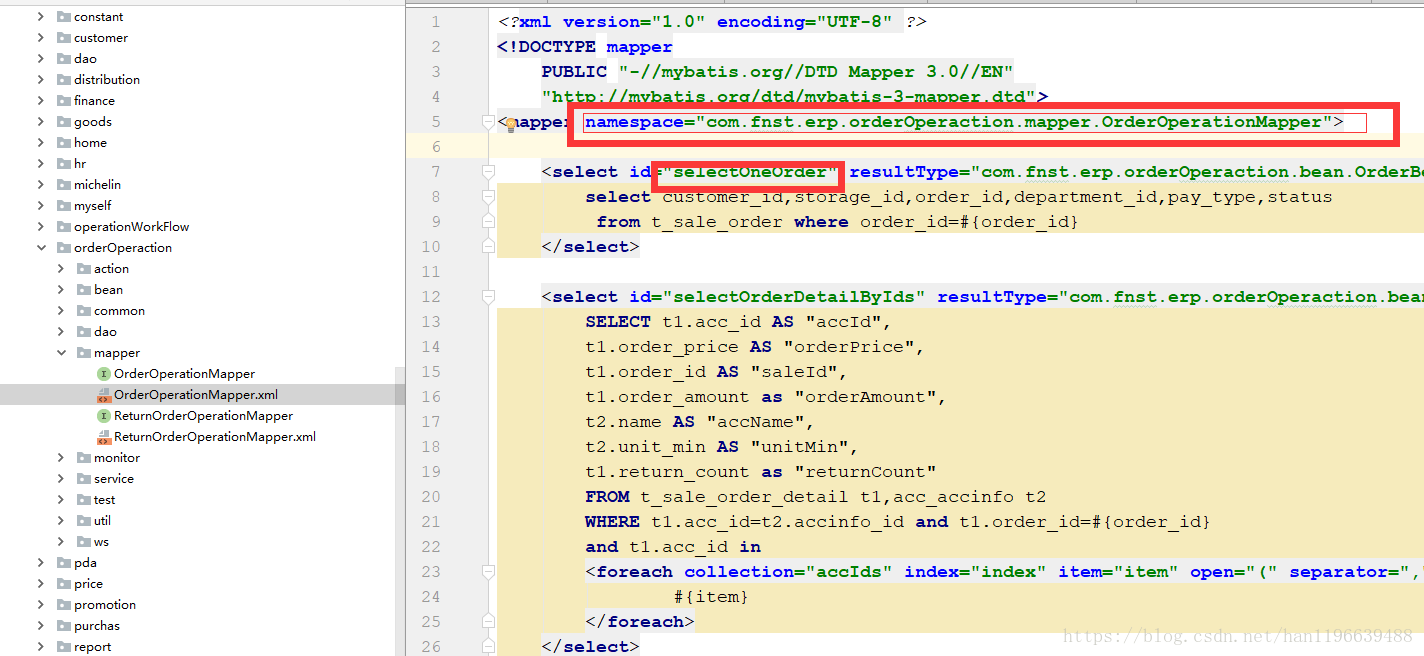
其中mapper定义了接口,其类名与xml中的namespace一致,id与接口定义的方法名一直,这样,把xml加载到spring中后,mybatis的初始化配置sqlsession时就会通过namespace+id的方式找到对应的sql进行执行,mybatis会自动匹配xml与mapper接口的对应关系,需要文件名称一致。
下面进行三个配置文件的配置。
1.配置web.xml文件
<?xml version="1.0" encoding="UTF-8"?>
<web-app xmlns:xsi="http://www.w3.org/2001/XMLSchema-instance" xmlns="http://java.sun.com/xml/ns/javaee"
        xsi:schemaLocation="http://java.sun.com/xml/ns/javaee http://java.sun.com/xml/ns/javaee/web-app_3_0.xsd" id="WebApp_ID"
        version="3.0">
        <display-name>website1</display-name>
        <!-- 设置监听,在web容器启动时自动装配ApplicationContext的配置信息-->
        <listener>
                <listener-class>org.springframework.web.context.ContextLoaderListener</listener-class>
        </listener>
        <!-- 设置Spring容器加载配置文件路径 -->
        <context-param>
            <param-name>contextConfigLocation</param-name>
            <param-value>
         classpath:config/springmvc-servlet.xml,
         classpath:config/ApplicationContext.xml
            </param-value>
        </context-param>
        <!-- 字符编码过滤器 -->
        <filter>
                <filter-name>encodingFilter</filter-name>
                <filter-class>org.springframework.web.filter.CharacterEncodingFilter</filter-class>
                <init-param>
                        <param-name>encoding</param-name>
                        <param-value>utf-8</param-value>
                </init-param>
                <init-param>
                        <param-name>forceEncoding</param-name>
                        <param-value>true</param-value>
                </init-param>
        </filter>
        <filter-mapping>
                <filter-name>encodingFilter</filter-name>
                <url-pattern>*.do</url-pattern>
        </filter-mapping>
        <!-- 前端控制器 -->
        <servlet>
                <servlet-name>springmvc</servlet-name>
                <servlet-class>org.springframework.web.servlet.DispatcherServlet</servlet-class>
                <init-param>
                        <param-name>contextConfigLocation</param-name>
                        <param-value>classpath:config/springmvc-servlet.xml</param-value>
                </init-param>
                <!-- 这个配置文件在容器启动的时候 就加载 -->
                <load-on-startup>1</load-on-startup>
        </servlet>
        <servlet-mapping>
                <servlet-name>springmvc</servlet-name>
                <!-- 拦截请求 -->
                <url-pattern>*.do</url-pattern>
        </servlet-mapping>
        <welcome-file-list>
                <welcome-file>index.html</welcome-file>
                <welcome-file>index.htm</welcome-file>
                <welcome-file>index.jsp</welcome-file>
                <welcome-file>default.html</welcome-file>
                <welcome-file>default.htm</welcome-file>
                <welcome-file>default.jsp</welcome-file>
        </welcome-file-list>
</web-app>
(2)、扫描控制层、自动注入以及视图解析器的配置 springmvc-servlet.xml
<?xml version="1.0" encoding="UTF-8"?>
<beans xmlns="http://www.springframework.org/schema/beans" xmlns:xsi="http://www.w3.org/2001/XMLSchema-instance"
        xmlns:aop="http://www.springframework.org/schema/aop" xmlns:context="http://www.springframework.org/schema/context"
        xmlns:mvc="http://www.springframework.org/schema/mvc" xmlns:util="http://www.springframework.org/schema/util"
        xmlns:tx="http://www.springframework.org/schema/tx" xmlns:jdbc="http://www.springframework.org/schema/jdbc"
        xmlns:cache="http://www.springframework.org/schema/cache"
        xsi:schemaLocation="
        http://www.springframework.org/schema/beans http://www.springframework.org/schema/beans/spring-beans-3.1.xsd
        http://www.springframework.org/schema/aop http://www.springframework.org/schema/aop/spring-aop-3.1.xsd
        http://www.springframework.org/schema/context http://www.springframework.org/schema/context/spring-context-3.1.xsd
        http://www.springframework.org/schema/mvc http://www.springframework.org/schema/mvc/spring-mvc-3.1.xsd
        http://www.springframework.org/schema/util http://www.springframework.org/schema/util/spring-util-3.1.xsd
        http://www.springframework.org/schema/tx http://www.springframework.org/schema/tx/spring-tx-3.1.xsd
        http://www.springframework.org/schema/jdbc http://www.springframework.org/schema/jdbc/spring-jdbc-3.1.xsd
        http://www.springframework.org/schema/cache  http://www.springframework.org/schema/cache/spring-cache-3.1.xsd">

        <!-- 注解驱动 -->
        <mvc:annotation-driven />
        <!-- <context:annotation-config /> -->
        <!-- context:component-scan 具有annotation-config 的功能 -->
        <!-- 扫描 控制层 -->
        <context:component-scan base-package="com.website.controller"></context:component-scan>
        <!-- 视图解析器 -->
        <bean id="viewResolver" class="org.springframework.web.servlet.view.InternalResourceViewResolver">
                <property name="prefix" value="/WEB-INF/view/">
                </property>
                <property name="suffix" value=".jsp"></property>
        </bean>
</beans>
(3)spring代管sqlsessionFactory 、dao层接口动态代理以及事务的配置ApplicationContext.xml
<?xml version="1.0" encoding="UTF-8"?>
<beans xmlns="http://www.springframework.org/schema/beans" xmlns:xsi="http://www.w3.org/2001/XMLSchema-instance"
        xmlns:tx="http://www.springframework.org/schema/tx" xmlns:context="http://www.springframework.org/schema/context"
        xsi:schemaLocation="http://www.springframework.org/schema/beans http://www.springframework.org/schema/beans/spring-beans-3.2.xsd
                http://www.springframework.org/schema/context
                 http://www.springframework.org/schema/context/spring-context-3.2.xsd
                http://www.springframework.org/schema/tx
                http://www.springframework.org/schema/tx/spring-tx-3.2.xsd">

        <!-- 加载配置JDBC文件 -->
        <context:property-placeholder location="classpath:db.properties" />
        <!-- 数据源 -->
        <bean id="dataSource" class="org.springframework.jdbc.datasource.DriverManagerDataSource">
                <property name="driverClassName">
                        <value>${jdbc.driverClassName}</value>
                </property>
                <property name="url">
                        <value>${jdbc.url}</value>
                </property>
                <property name="username">
                        <value>${jdbc.username}</value>
                </property>
                <property name="password">
                        <value>${jdbc.password}</value>
                </property>
        </bean>

        <!-- 开启注解配置 即Autowried -->
        <!-- <context:annotation-config/> -->
        <!--其实component-scan 就有了annotation-config的功能即把需要的类注册到了spring容器中 -->
        <context:component-scan base-package="com.website.service" />

        <!-- 在使用mybatis时 spring使用sqlsessionFactoryBean 来管理mybatis的sqlsessionFactory -->
        <bean id="sqlSessionFactory" class="org.mybatis.spring.SqlSessionFactoryBean">
                <property name="dataSource" ref="dataSource" />
                <!-- mybatis配置文件路径 -->
                <property name="configLocation" value="" />
                <!-- 实体类映射文件路径,这里只有一个就写死了,多个可以使用mybatis/*.xml来替代 -->
                <property name="mapperLocations" value="classpath:mybatis/*.xml" />
        </bean>

        <!-- <bean id="sqlSession" class="org.mybatis.spring.SqlSessionTemplate"> <constructor-arg index="0"> <ref bean="sqlSessionFactory"/>
                </constructor-arg> </bean> -->

        <!--动态代理实现 不用写dao的实现 -->
        <bean id="MapperScannerConfigurer" class="org.mybatis.spring.mapper.MapperScannerConfigurer">
                <!-- 这里的basePackage 指定了dao层接口路劲,这里的dao接口不用自己实现 -->
                <property name="basePackage" value="com.website.dao" />
                <!-- 如果只有一个数据源的话可以不用指定,但是如果有多个数据源的话必须要指定 -->
                <!-- <property name="sqlSessionFactoryBeanName" value="sqlSessionFactory" /> -->
                <!--直接指定了sqlsessionTemplate名称,这个和上面的其实是一样的 -->
                <!-- <property name="sqlSessionTemplateBeanName" value="sqlSession" /> -->
        </bean>

        <!--事务管理器 -->
        <bean id="transactionManager" class="org.springframework.jdbc.datasource.DataSourceTransactionManager">
                <property name="dataSource" ref="dataSource" />
        </bean>
        <!-- 使用全注释事务 -->
        <tx:annotation-driven transaction-manager="transactionManager" />
</beans>
在MapperScannerConfigurer中,我们知道sqlSessionFactory的注入方式有四种,分别是sqlSessionFactory,sqlSessionFactoryBeanName,sqlSessionTemplate,sqlSessionTemplateBeanName,而sqlSessionFactory这种已经过时,所以我们用到的是sqlSessionFactoryBeanName,接下来说说这个的好处,为什么要用到它!
原因1:
注入sqlSessionFactory,(可以不用配置)只有当配置多数据源的时候,这时会有多个sqlSessionFactory,可以通过改属性来指定哪一个sqlSessionFactory(综合网上的总结)
原因2(重点):
注入sqlSessionFactory,后面的value是SqlSessionFactory的bean的名字,也就是sqlSessionFactory的id当我们的mapperscannerconfigurer启动的时候,可能会出现我们的jdbc.properties文件未被加载,这样的话它拿到的DataSource就是错误的,因为像${jdbc.url}这类的属性还没有被替换掉,所以通过BeanName后处理的方式,当我们去用我们的Mybatis的时候,它才会去找我们对应的sqlSessionFactory,为了防止它提前初始化我们的sqlSessionFactory .
(4)如果使用单数据源配置sqlSessionTemplateBeanName 这个属性值需要额外加此段代码配置,(注释的部分解开)
        <!-- 在使用mybatis时 spring使用sqlsessionFactoryBean 来管理mybatis的sqlsessionFactory -->
        <bean id="sqlSessionFactory" class="org.mybatis.spring.SqlSessionFactoryBean">
                <property name="dataSource" ref="dataSource" />
                <!-- mybatis配置文件路径 -->
                <property name="configLocation" value="" />
                <!-- 实体类映射文件路径,这里只有一个就写死了,多个可以使用mybatis/*.xml来替代 -->
                <property name="mapperLocations" value="classpath:mybatis/userMapper.xml" />
        </bean>

        <bean id="sqlSession" class="org.mybatis.spring.SqlSessionTemplate">
                <constructor-arg index="0">
                        <ref bean="sqlSessionFactory" />
                </constructor-arg>
        </bean>

        <!--动态代理实现 不用写dao的实现 -->
        <bean id="MapperScannerConfigurer" class="org.mybatis.spring.mapper.MapperScannerConfigurer">
                <!-- 这里的basePackage 指定了dao层接口路劲,这里的dao接口不用自己实现 -->
                <property name="basePackage" value="com.website.dao" />
                <!-- 如果只有一个数据源的话可以不用指定,但是如果有多个数据源的话必须要指定 -->
                <!-- <property name="sqlSessionFactoryBeanName" value="sqlSessionFactory" /> -->
                <!--直接制定了sqlsessionTemplate名称,这个和上面的其实是一样的 -->
                <property name="sqlSessionTemplateBeanName" value="sqlSession" />
        </bean>
注意如果是多数据源则一定要使用sqlSessionFactoryBeanName 或sqlSessionTemplateBeanName 来指定具体的数据源,不知道在上面的配置中有没有注意到,如果使用sqlSessionTemplateBeanName 的话要来创建具体的实例并赋值给sqlSessionTemplateBeanName 这个属性。
总结:
我们使用mapper接口的形式,在mapper接口名称和xml的文件名称对应且等于namespace一致,方法名和sql的id一致,这样我们在配置扫描器
<bean id="sqlSessionFactory" class="org.mybatis.spring.SqlSessionFactoryBean">
                <property name="dataSource" ref="dataSource" />
                <!-- mybatis配置文件路径 -->
                <property name="configLocation" value="" />
                <!-- 实体类映射文件路径,这里只有一个就写死了,多个可以使用mybatis/*.xml来替代 -->
                <property name="mapperLocations" value="classpath:mybatis/*.xml" />
        </bean>
就能扫描到我们的xml文件,然后我们在配置
<bean id="MapperScannerConfigurer" class="org.mybatis.spring.mapper.MapperScannerConfigurer">
                <!-- 这里的basePackage 指定了dao层接口路劲,这里的dao接口不用自己实现 -->
                <property name="basePackage" value="com.website.dao" />
                <!-- 如果只有一个数据源的话可以不用指定,但是如果有多个数据源的话必须要指定 -->
                <!-- <property name="sqlSessionFactoryBeanName" value="sqlSessionFactory" /> -->
                <!--直接制定了sqlsessionTemplate名称,这个和上面的其实是一样的 -->
                <property name="sqlSessionTemplateBeanName" value="sqlSession" />
        </bean>
就可以将我们的mapper接口文件扫描到,mybatis将他们匹配生成对应关系,我们在调用的时候,通过namespace+id的方式进行调用sql语句。所以你的映射文件的namespace 必须是接口的类全名称而id 必须是接口中的方法名称,这样动态代理就能找到路劲了也有了参数了。
二、使用SqlSessionTemplate进行调用sql语句的配置。
1mybatis核心配置
<?xml version="1.0" encoding="UTF-8"?>
<beans xmlns="http://www.springframework.org/schema/beans"
    xmlns:xsi="http://www.w3.org/2001/XMLSchema-instance" xmlns:tx="http://www.springframework.org/schema/tx"
    xmlns:context="http://www.springframework.org/schema/context"
    xsi:schemaLocation="http://www.springframework.org/schema/beans http://www.springframework.org/schema/beans/spring-beans-3.2.xsd
                http://www.springframework.org/schema/context
                 http://www.springframework.org/schema/context/spring-context-3.2.xsd
                http://www.springframework.org/schema/tx
                http://www.springframework.org/schema/tx/spring-tx-3.2.xsd">

    <!-- 加载配置JDBC文件 -->
    <context:property-placeholder location="classpath:db.properties" />
    <!-- 数据源 -->
    <bean id="dataSource"
        class="org.springframework.jdbc.datasource.DriverManagerDataSource">
        <property name="driverClassName">
            <value>${jdbc.driverClassName}</value>
        </property>
        <property name="url">
            <value>${jdbc.url}</value>
        </property>
        <property name="username">
            <value>${jdbc.username}</value>
        </property>
        <property name="password">
            <value>${jdbc.password}</value>
        </property>
    </bean>

    <!-- 开启注解配置 即Autowried -->
    <!--component-scan拥有 annotation-config的功能即注入需要的类到spring容器中 -->
    <!--<context:annotation-config/> -->
    <!--使用自动注入的时候要 添加他来扫描bean之后才能在使用的时候 -->
    <context:component-scan base-package="com.website.service ,com.website.dao" />

    <!-- 在使用mybatis时 spring使用sqlsessionFactoryBean 来管理mybatis的sqlsessionFactory -->
    <!-- 而像这种使用接口实现的方式 是使用sqlsessionTemplate来进行操作的,他提供了一些方法 -->
    <bean id="sqlSessionFactory" class="org.mybatis.spring.SqlSessionFactoryBean">
        <property name="dataSource" ref="dataSource" />
        <!-- mybatis配置文件路径 -->
        <property name="configLocation" value="" />
        <!-- 实体类映射文件路径,在开发中映射文件肯定是多个所以使用mybatis/*.xml来替代 -->
        <property name="mapperLocations" value="classpath:mybatis/UserMapping.xml" />
    </bean>

    <!--其实这里类的实例就是mybatis中SQLSession -->
    <bean id="sqlSession" class="org.mybatis.spring.SqlSessionTemplate">
        <constructor-arg index="0">
            <ref bean="sqlSessionFactory" />
        </constructor-arg>
    </bean>

    <bean id="transactionManager"
        class="org.springframework.jdbc.datasource.DataSourceTransactionManager">
        <property name="dataSource" ref="dataSource" />
    </bean>
    <!--使用全注释事务 -->
    <tx:annotation-driven transaction-manager="transactionManager" />
</beans>
其中少了这样的配置,去掉了动态代理的实现,不采用接口的形式。
<!--动态代理实现 不用写dao的实现 -->
        <bean id="MapperScannerConfigurer" class="org.mybatis.spring.mapper.MapperScannerConfigurer">
                <!-- 这里的basePackage 指定了dao层接口路劲,这里的dao接口不用自己实现 -->
                <property name="basePackage" value="com.website.dao" />
                <!-- 如果只有一个数据源的话可以不用指定,但是如果有多个数据源的话必须要指定 -->
                <!-- <property name="sqlSessionFactoryBeanName" value="sqlSessionFactory" /> -->
                <!--直接制定了sqlsessionTemplate名称,这个和上面的其实是一样的 -->
                <property name="sqlSessionTemplateBeanName" value="sqlSession" />
        </bean>
这样就必须我们自己实现mybatis的sql语句的调用,这样我们需要在dao层注入在配置文件中实例化的sqlSession这个bean,使用它进行selectOne,selectList()的调用,传入namespace.id的参数,确定唯一的sql语句。
package com.website.dao;

import java.util.Map;

import org.mybatis.spring.SqlSessionTemplate;
import org.springframework.beans.factory.annotation.Autowired;
import org.springframework.stereotype.Repository;

/**
 * @author WHD data 2016年6月5日
 */
@Repository("userDao")
public class UserDao {
    @Autowired
    private SqlSessionTemplate sqlSession;

    public void saveUser(Map<String, String> map) {
        int end = sqlSession.insert("com.website.userMapper.insertUser", map);
        System.out.println("end" + end);
    }
}
这里进行sqlSession.insert方法调用,第一个参数是string型,statement的id,第二个参数是param。