业务逻辑开发
—————— 学习周报 2018.12.2
一 、本周计划:
- 完成上周第6章剩余的2节学习 ——— 找回密码
- 完成第7章—— 课程机构功能实现(7-1 ------- 7-8)
- 模块继承
- 课程机构列表页数据展示
- 列表分页功能
- 列表筛选功能
- modelform提交我要学习咨询
二 、完成情况:
- 实现找回密码
- 实现模块继承
- 实现课程机构列表页数据展示
- 实现列表分页功能
- 实现列表筛选功能
- 实现modelform提交我要学习咨询
三、 展示:
1、通过Django后台找回密码
- forgetpwd.html页面:
应该注意增加:{% csrf_token %}和{% load staticfiles %}

- activt_fail.html:
- send_sucess.html:
<!DOCTYPE html>
<html lang="en">
<head>
    <meta charset="UTF-8">
    <title></title>
</head>
<body>
<p>邮件已发送, 请查收</p>

</body>
</html>
- 当在忘记密码页面输入邮箱和验证码后,弹出提示信息:
检查邮箱:——成功接收

- 写页面重置password_reset.html页面:(当把收到邮件的链接进入后)

进入此页面后,之前代码中的<input type="hidden" name="email" value="{{ email }}">的这一句就会发生变化,在网页查看源码后发现<input type="hidden" name="email" value="[email protected]">这一句就会自动上传我之前忘记密码填写的邮箱,自动判断我修改的是我之前填写的邮箱的修改密码。
-
在view.py中写forgetpwd方法(并在url中注册)
-
在view.py中写ResetView(方法(并在url中注册)
-
进入密码重置页面,需要填写密码并提交,所以需要配置form.py表单:
class ForgetForm(forms.Form):
    email = forms.EmailField(required=True)
    captcha = CaptchaField(error_messages={"invalid": u"验证码错误"})


class ModifyPwdForm(forms.Form):
    password1 = forms.CharField(required=True, min_length=5)
    password2 = forms.CharField(required=True, min_length=5)
- 在view.py中写 ModifyPwdView方法(并在url中注册)
----》实现找回密码!
4、实现模块继承
- 使用
{% block title %}机构首页 - 慕学网{% endblock %}就是为了子模板可以继承它或者说是重写它。
例子: 继承base.html实现org-listhtml:
- 错误1:在base.html文件中的css,js等指明路径时,由于我还是采用原来的static/ 去指明路径,这样就导致样式文件没有加载出来,找不到路径, 应该用{% static ‘js/deco-common.js’%},这样才能找到static的路径。
- 重新指定路径后,正常显示:

3、实现课程机构列表页数据展示
- 对后台管理系统进行操作,存入“城市”“课程机构”的信息。

-
- 对org-list.html文件进行更改,将机构名称,城市,共多少家等静态数据改为动态数据。
例子:对城市进行传入动态数据:
- 对org-list.html文件进行更改,将机构名称,城市,共多少家等静态数据改为动态数据。
   {% for city in all_citys %}
        <a href="?city=1&ct="><span class="">{{ city.name }}</span></a>
   {% endfor %}
- 一定要记得在setting中—
'django.core.context_processors.media',
TEMPLATES = [ { 'BACKEND': 'django.template.backends.django.DjangoTemplates', 'DIRS': [os.path.join(BASE_DIR, 'templates')] , 'APP_DIRS': True, 'OPTIONS': { 'context_processors': [ 'django.template.context_processors.debug', 'django.template.context_processors.request', 'django.contrib.auth.context_processors.auth', 'django.contrib.messages.context_processors.messages', 'django.core.context_processors.media', ], }, }, ]
4、 实现列表分页功能
-
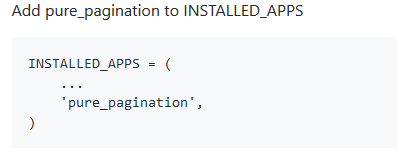
引入做分页的开发库(很强大的一个库):pure pagination

-
安装:
pip install django-pure-paginatio

解决pip安装黄字提示–version问题:python -m pip install --upgrade pip


-
使用开发库:


-
配置org_list.html,setting.py,organiation/vews.py,实现分页功能,5个一页:
p = Paginator(all_orgs, 5, request=request) -
实现自动分页,不再是写死的:
		 <div class="pageturn">
            <ul class="pagelist">
                 {% if all_orgs.has_previous %}
                    <li class="long"><a href="?{{ all_orgs.previous_page_number.querystring }}">上一页</a></li>
                 {% endif %}

                  {% for page in all_orgs.pages %}
                    {% if page %}
                        {% ifequal page all_orgs.number %}
                             <li class="active"><a href="?{{ page.querystring }}">{{ page }}</a></li>
                        {% else %}
                             <li><a href="?{{ page.querystring }}" class="page">{{ page }}</a></li>
                        {% endifequal %}
                    {% else %}
                        <li class="none"><a href="">...</a></li>
                    {% endif %}
                {% endfor %}
                {% if all_orgs.has_next %}
                    <li class="long"><a href="?{{ all_orgs.next_page_number.querystring }}">下一页</a></li>
                {% endif %}

            </ul>
         </div>
5、实现列表筛选功能
- 城市筛选:
					<h2>所在地区</h2>
					<div class="more">更多</div>
					<div class="cont">
                        <a href="?ct={{ category }}"><span class="{% ifequal city_id '' %}active2{% endifequal %}">全部</span></a>
                            {% for city in all_citys %}
                                <a href="?city={{ city.id }}&ct={{ category }}"><span class="{% ifequal city_id city.id|stringformat:"i" %}active2{% endifequal %}">{{ city.name }}</span></a>
                            {% endfor %}
					</div>
- 类别筛选:
					<h2>机构类别</h2>
					<div class="cont">
                        <a href="?city={{ city_id }}"><span class="{% ifequal category '' %}active2{% endifequal %}">全部</span></a>

                            <a href="?ct=pxjg&city={{ city_id }}"><span class="{% ifequal category 'pxjg' %}active2{% endifequal %}">培训机构</span></a>

                            <a href="?ct=gx&city={{ city_id }}"><span class="{% ifequal category 'gx' %}active2{% endifequal %}">高校</span></a>

                            <a href="?ct=gr&city={{ city_id }}"><span class="{% ifequal category 'gr' %}active2{% endifequal %}">个人</span></a>

					</div>
- 授课机构排名的排序功能:——根据点击量
			<div class="head">授课机构排名</div>

            {% for curent_org in hot_orgs %}
                <dl class="des">
                    <dt class="num fl">{{ forloop.counter }}</dt>
                    <dd>
                        <a href="/company/2/"><h1>{{ curent_org.name }}</h1></a>
                        <p>{{ curent_org.address }}</p>
                    </dd>
                </dl>
            {% endfor %}

- 按类别筛选后,按学习人数和课程数排名:

6、实现modelform提交我要学习咨询
为了避免后期维护大,在每一个app下建立自己的urls.py,便于维护。
- organization下建立form.py表单:(model转化为form)
- organization下的view.py写class AddUserAskView(View)类:
class AddUserAskView(View):
    """
    用户添加咨询
    """
    def post(self, request):
        userask_form = UserAskForm(request.POST)
        if userask_form.is_valid():
            user_ask = userask_form.save(commit=True)
            return HttpResponse('{"status":"success"}', content_type='application/json')
        else:
            return HttpResponse('{"status":"fail", "msg":"添加出错"}', content_type='application/json')
- 通过HttpResponse可以指明我们给用户返回什么数据(json):
HttpResponse('{"status":"success"}', content_type='application/json')
- 表单js代码:
{% block custom_js %}
    <script>
    $(function(){
        $(document).ready(function() {
            $('#jsStayBtn').on('click', function () {
                $.ajax({
                    cache: false,
                    type: "POST",
                    url: "/org/add_ask/",
                    data: $('#jsStayForm').serialize(),
                    async: true,
                    success: function (data) {
                        if (data.status == 'success') {
                            $('#jsStayForm')[0].reset();
                            alert("提交成功")
                        } else if (data.status == 'fail') {
                            $('#jsCompanyTips').html(data.msg)
                        }
                    },
                });
            });
        });
    })

</script>
{% endblock %}
-
页面:
- 什么都不填时:
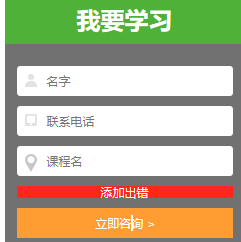
-提交时:

- 什么都不填时:
-
查看后台数据库:
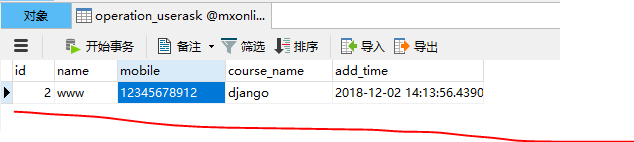
-
增加验证手机号: (在organization下的form.py表单)——(正则表达式做)
	import re
    def clean_mobile(self):
        """
        验证手机号码是否合法
        """
        mobile = self.cleaned_data['mobile']
        REGEX_MOBILE = "^1[358]\d{9}$|^147\d{8}$|^176\d{8}$"
        p = re.compile(REGEX_MOBILE)
        if p.match(mobile):
            return mobile
        else:
            raise forms.ValidationError(u"手机号码非法", code="mobile_invalid")
下周任务:
- 完成第7章剩余的——(7-9 ~ 7-12)
- 机构详情展示
- 课程机构收藏
- 完成第8章—— (8-1 ~ 8~3)
- 课程列表
- 课程详情页