版权声明:《==study hard and make progress every day==》 https://blog.csdn.net/qq_38225558/article/details/85297182
可参考CXF官网-使用Spring编写服务文档:http://cxf.apache.org/docs/writing-a-service-with-spring.html
1.添加依赖
        <!-- spring与cxf 整合webservice 所需 -->
        <dependency>
            <groupId>org.apache.cxf</groupId>
            <artifactId>cxf-core</artifactId>
            <version>3.1.5</version>
        </dependency>
        <dependency>
            <groupId>org.apache.cxf</groupId>
            <artifactId>cxf-rt-frontend-jaxws</artifactId>
            <version>3.1.5</version>
        </dependency>
        <dependency>
            <groupId>org.apache.cxf</groupId>
            <artifactId>cxf-rt-transports-http</artifactId>
            <version>3.1.5</version>
        </dependency>
2. 编写提供服务的接口和类
@WebService
public interface ICustomerWSService {
    @WebMethod
    public @WebResult(name="customer") String queryCustomerByTel(@WebParam(name="tel") String tel);
}
@WebService(endpointInterface = "com.zhengqing.basic.ws.service.ICustomerWSService")
public class CustomerWSServiceImpl implements ICustomerWSService {
@Autowired
private CustomerMapper customerMapper;
@WebMethod
public String queryCustomerByTel(String tel) {
Customer customer = customerMapper.selectByTel(tel);
return customer.toString();
}
}3.配置applicationContext-ws.xml
<?xml version="1.0" encoding="UTF-8"?>
<beans xmlns="http://www.springframework.org/schema/beans"
       xmlns:xsi="http://www.w3.org/2001/XMLSchema-instance" xmlns:jaxws="http://cxf.apache.org/jaxws"
       xmlns:cxf="http://cxf.apache.org/core"
       xsi:schemaLocation="http://www.springframework.org/schema/beans http://www.springframework.org/schema/beans/spring-beans.xsd http://cxf.apache.org/jaxws http://cxf.apache.org/schemas/jaxws.xsd http://cxf.apache.org/core http://cxf.apache.org/schemas/core.xsd">

    <!-- 引入配置文件 -->
    <import resource="classpath:META-INF/cxf/cxf.xml"/>
    <import resource="classpath:META-INF/cxf/cxf-servlet.xml"/>

    <!-- cxf拦截器获取方法信息和参数信息 -->
    <cxf:bus>
        <cxf:inInterceptors>
            <ref bean="authenInterceptor"/>
        </cxf:inInterceptors>
    </cxf:bus>

    <bean name="authenInterceptor" class="com.zhengqing.basic.ws.interceptor.AuthInfoInInterceptor"></bean>

    <!-- 将服务暴露出去 -->
    <bean id="customerWSService" class="com.zhengqing.basic.ws.service.impl.CustomerWSServiceImpl"></bean>

    <jaxws:endpoint
            implementor="#customerWSService"
            address="/getCustomer">
    </jaxws:endpoint>

</beans>
4.再将 applicationContext-ws.xml 配置到spring的核心配置文件 applicationContext.xml 中 (温馨小提示:我这里是多模块项目 所以是在web.xml中配置的)

5.web.xml中配置CXF的Servlet
    <!-- cxf的servlet -->
    <servlet>
        <servlet-name>CXFServlet</servlet-name>
        <servlet-class>org.apache.cxf.transport.servlet.CXFServlet</servlet-class>
    </servlet>

    <servlet-mapping>
        <servlet-name>CXFServlet</servlet-name>
        <url-pattern>/webservice/*</url-pattern>
    </servlet-mapping>
6.测试:启动tomcat - 自动发布服务
运行可访问 http://localhost:8080/webservice/getCustomer?wsdl

接下来就可以编写自己的客户端了:
public class ClientTest {
	public static void main(String[] args) {
		// 1.创建JaxWsProxyFactoryBean的对象,用于接收服务
		JaxWsProxyFactoryBean proxyFactoryBean = new JaxWsProxyFactoryBean();
		// 2.设置服务的发布地址,表示去哪里过去服务
		proxyFactoryBean.setAddress("http://localhost:8080/webservice/getCustomer");
		// 3.设置服务的发布接口,使用本地的代理接口
		proxyFactoryBean.setServiceClass(ICustomerWSService.class);
		// 4.通过create方法返回接口代理实例
		ICustomerWSService service = (ICustomerWSService) proxyFactoryBean.create();
		// 5.调用远程方法
		System.out.println(service.queryCustomerByTel("10086"));
	}
}
最后即可查询指定电话号码的信息 
如果做拦截器,如下 (判断用户是否有权限去做事情)
public class AuthInfoInInterceptor extends AbstractPhaseInterceptor<SoapMessage>{
@Autowired
private EmployeeMapper employeeMapper;
public AuthInfoInInterceptor() {
super(Phase.PRE_INVOKE);
}
@Override
public void handleMessage(SoapMessage message) throws Fault {
String username = null;
String password = null;
// 获取方法信息
Exchange exchange = message.getExchange();
BindingOperationInfo bop = exchange.get(BindingOperationInfo.class);
MethodDispatcher md = (MethodDispatcher) exchange.get(Service.class).get(MethodDispatcher.class.getName());
Method method = md.getMethod(bop);
//方法名
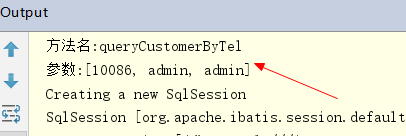
String methodName = method.getName();
System.out.println("方法名:"+methodName);
// 获取参数
List<String> content = message.getContent(List.class);
System.out.println("参数:"+content);
username = content.get(1);
password = content.get(2);
Employee employee = employeeMapper.selectByUsername(username);
if(!(employee!=null&&employee.getPassword().equals(password))){
throw new Fault(new IllegalArgumentException("用户名或密码错误!"));
}
}
}
我们可以拿到从客户端传过来的参数然后去做自己的业务