一、spring mvc 静态资源国际化
1.配置spring mvc 国际化拦截器 <property name="paramName" value="lang" />拦截参数名
       <mvc:interceptors>
                <!-- 国际化操作拦截器 如果采用基于(请求/Session/Cookie)则必需配置 -->
                <bean class="org.springframework.web.servlet.i18n.LocaleChangeInterceptor" />
        </mvc:interceptors>
    <mvc:interceptors>
        <bean id="localeChangeInterceptor" class="org.springframework.web.servlet.i18n.LocaleChangeInterceptor">
            <property name="paramName" value="lang" />
        </bean>
    </mvc:interceptors>
<bean id="localeResolver" class="org.springframework.web.servlet.i18n.SessionLocaleResolver" />
2.配置国际化资源文件
    <!-- 国际化资源文件 -->
    <bean id="messageSource" class="org.springframework.context.support.ResourceBundleMessageSource">
        <property name="basename" value="messages" />
    </bean>
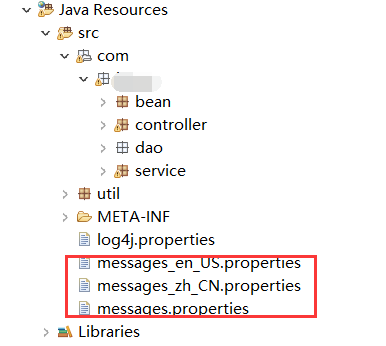
3.加入spring mvc国际化需要的资源文件,将资源文件放到根目录下面,文件名开头要和spring mvc配置中的一致<property name="basename" value="messages" />,messages.properties为spring默认的资源文件,文件内可以不写任何代码,但是必须要有。
4、后台配置完成后,开始在前台jsp页面使用。在需要使用国际化的页面加入spring国际化的标签:
<%@taglib prefix="spring" uri="http://www.springframework.org/tags" %>

使用spring国际化标签,code中对应的值要在spring mvc 国际化资源文件中配置,没有的话会报错。
<spring:message code="INDEX2"/> //messages资源文件中配置的INDEX的值将在这里展示。

语言切换的按钮

到此spring mvc 配置的静态资源国际化结束。
二、配置数据库切换。
1.配置spring数据源切换事物切面
        <!-- 事务切面 -->
    <bean id="transactionManager" class="org.springframework.jdbc.datasource.DataSourceTransactionManager">
        <property name="dataSource" ref="dataSource"></property>
    </bean>
2.配置数据源,这里底层框架使用的是 Mybatis。
<!--中英切换数据源配置——————————————————————————start --> <!--数据源 A--> <bean id="dataSourceCn" class="org.springframework.jdbc.datasource.DriverManagerDataSource"> <!-- 使用properties来配置 --> <property name="driverClassName"> <value>com.mysql.jdbc.Driver</value> </property> <property name="url"> <value>jdbc:mysql://xxx.xxx.x.x:xxx/xxx?useSSL=false&useUnicode=true&characterEncoding=UTF-8</value> </property> <property name="username"> <value>xxx</value> </property> <property name="password"> <value>xxxxx</value> </property> </bean> <!--数据源 B--> <bean id="dataSourceEn" class="org.springframework.jdbc.datasource.DriverManagerDataSource"> <!-- 使用properties来配置 --> <property name="driverClassName"> <value>com.mysql.jdbc.Driver</value> </property> <property name="url"> <value>${jdbcURL}</value> </property> <property name="username"> <value>${jdbcUserName}</value> </property> <property name="password"> <value>${jdbcPassword}</value> </property> </bean> <!-- 数据源路由 --> <bean id="dataSource" class="com.jintuo.bean.DynamicDataSource"> <property name="targetDataSources"> <map key-type="java.lang.String"> <entry key="dataSourceCn" value-ref="dataSourceCn"/> <entry key="dataSourceEn" value-ref="dataSourceEn"/> </map> </property> <!-- 默认数据源 --> <property name="defaultTargetDataSource" ref="dataSourceCn"/> </bean> <!-- 自动扫描了所有的XxxxMapper.xml对应的mapper接口文件,这样就不用一个一个手动配置Mpper的映射了,只要Mapper接口类和Mapper映射文件对应起来就可以了。 --> <bean class="org.mybatis.spring.mapper.MapperScannerConfigurer"> <property name="basePackage"> <!-- <value>com.xide.dao.iface</value> --> <value>com.jintuo.dao.iface</value> </property> </bean> <!-- 配置Mybatis的文件 ,mapperLocations配置**Mapper.xml文件位置,configLocation配置mybatis-config文件位置--> <bean id="sqlSessionFactory" class="org.mybatis.spring.SqlSessionFactoryBean"> <property name="dataSource" ref="dataSource" /> <property name="mapperLocations" value="classpath:com/jintuo/dao/mapper/*.xml"/> <!-- <property name="configLocation" value="classpath:mybatis/mybatis-config.xml" /> --> <!-- <property name="typeAliasesPackage" value="com.tiantian.ckeditor.model"/> --> </bean> <!--中英切换数据源————————————————————end! -->
还有一种是使用c3p0配置数据源
<!-- 使用C3P0数据源 --> <!-- <bean id="dataSource" class="com.mchange.v2.c3p0.ComboPooledDataSource"> <property name="driverClass"> <value>com.mysql.jdbc.Driver</value> </property> <property name="jdbcUrl"> <value>jdbc:mysql://xxx.xxx.x.xx:xxxx/xxxx?useSSL=false&useUnicode=true&characterEncoding=UTF-8</value> </property> <property name="user"> <value>xxx</value> </property> <property name="password"> <value>xxx</value> </property> <property name="maxPoolSize" value="100"></property> <property name="maxIdleTime" value="60"></property> <property name="minPoolSize" value="10"></property> <property name="maxStatements" value="0"></property> </bean> -->
3.spring 数据源配置好了,开始配置数据源切换代码
需要切换的数据源名称:DataSourceName
public interface  DataSourceName {
       static final String DATA_EN="dataSourceEn";
       static final String DATA_CN="dataSourceCn";
}
DataSourceContextHolder:
public class DataSourceContextHolder {
    private static final ThreadLocal<String> contextHolder = new ThreadLocal<String>();

    public static void setDbType(String dbType) {
           contextHolder.set(dbType);
    }

    public static String getDbType() {
           return ((String) contextHolder.get());
    }

    public static void clearDbType() {
           contextHolder.remove();
    }

}
数据源切换:DynamicDataSource
import org.springframework.jdbc.datasource.lookup.AbstractRoutingDataSource;

import util.DataSourceContextHolder;

public class DynamicDataSource extends AbstractRoutingDataSource {

    @Override
    protected Object determineCurrentLookupKey() {
        return DataSourceContextHolder.getDbType();
    }

}
数据源切换的拦截器:CommonInterceptor
public class CommonInterceptor extends HandlerInterceptorAdapter {

    private final Log log = LogFactory.getLog(CommonInterceptor.class);

    /**
     * 在业务处理器处理请求之前被调用
     * 如果返回false
     *     从当前的拦截器往回执行所有拦截器的afterCompletion(),再退出拦截器链
     * 如果返回true
     *    执行下一个拦截器,直到所有的拦截器都执行完毕
     *    再执行被拦截的Controller
     *    然后进入拦截器链,
     *    从最后一个拦截器往回执行所有的postHandle()
     *    接着再从最后一个拦截器往回执行所有的afterCompletion()
     */
    @Override
    public boolean preHandle(HttpServletRequest request,
            HttpServletResponse response, Object handler) throws Exception {
          log.info("==============登陆拦截开始==================");
          String sessionId = request.getSession().getId();
          String Lang_code = request.getParameter("lang");
          System.out.println("lang_code!!!!!:"+request.getParameter("lang"));
          log.info("==============sessionID:"+sessionId+"==============");
         /* PersonnelVo user=UserUtils.findUserByCache(sessionId);
          if(user==null){
              log.info("====未登陆跳转到登陆页面===");
              response.addHeader("t", "111");
//              request.getRequestDispatcher("/upload.jsp").forward(request, response);
              response.sendRedirect("http://localhost/ssm_test/upload.jsp");
              return false;
          }*/
          log.info("==============登陆拦截结束==================");
          log.info("============数据源选择开始========");
         Cookie[] cooks=request.getCookies();  //获取cookie
          String lang="";
          if(cooks!=null){
          for (Cookie cookie : cooks) {  //从cookie中拿到标识
              System.out.println(cookie.getValue());
              if(cookie.getValue().equals("en")||cookie.getValue().equals("cn")){
                  lang=cookie.getValue();
                  //通过标识切换数据源
              }else{
                  lang="cn";
              }
           }
          }
          DataSourceContextHolder.setDbType(lang.equals("cn")?DataSourceName.DATA_CN:DataSourceName.DATA_EN);


          return true;
    }
}
前台页面将语言切换时将标识存入cookie中
获取cookie的工具类:cookies.js
var cookie={   //cookie工具类
    setCookie:function(c_name,value,expiredays){  //设值
        var exdate=new Date()
        exdate.setDate(exdate.getDate()+expiredays)
        document.cookie=c_name+ "=" +escape(value)+
        ((expiredays==null) ? "" : ";expires="+exdate.toGMTString())
    },
    getCookie:function(c_name){   //取值
        if (document.cookie.length>0)
          {
          c_start=document.cookie.indexOf(c_name + "=")
          if (c_start!=-1)
            {
            c_start=c_start + c_name.length+1
            c_end=document.cookie.indexOf(";",c_start)
            if (c_end==-1) c_end=document.cookie.length
            return unescape(document.cookie.substring(c_start,c_end))
            }
          }
        return "";
    },
    checkCookie:function(){   //验证
        username=getCookie('username')
        if (username!=null && username!="")
          {alert('Welcome again '+username+'!')}
        else
          {
          username=prompt('Please enter your name:',"")
          if (username!=null && username!="")
            {
            setCookie('username',username,365)
            }
          }
    }
}
将切换语言的标志存入cookie中
var lang = cookie.getCookie("lang");
function changeZh(){  //中文切换
    cookie.setCookie("lang", "cn", 1);
    location.reload();


}
function changeEn(){  //英文切换
    cookie.setCookie("lang", "en", 1);
    location.reload();
}
到此配置完成后,我们的数据源也可以随静态资源一起切换了!