CentOS 下 yum 源的搭建
我们在安装完 Linux 操作系统后,往往会需要安装好多软件,同时我们在编译代码时也需要安装很多依赖的 yum软件包,但是我们的服务器又不能连接外网的话,这个就很麻烦。
如果我们公司局域网内有自己的 yum 源,我们就可以很方便的使用 yum 来安装软件了。如果可以的话,我们也可以对外提供 yum 源,定期更新软件包,为 IT 工作人员提供公网公开的 yum 源。
以下是国内几个常用的 yum 源:
- http://mirrors.aliyun.com/
- http://mirrors.163.com/centos
- http://mirrors.sohu.com
- http://centos.ustc.edu.cn
今天我们就简单介绍一下 yum 源的搭建方法。
我们分几种不同的场景来搭建。
第一种场景
我们服务器本地就有 ISO 镜像,ISO 镜像里带着我们软件开发所需要的所有 yum 包,也就是本地文件的 yum 源。
1. 准备 ISO 镜像
这一步可以从 CentOS 官网下载或者从光盘获取。
官网下载地址:https://www.centos.org/download/
2. 挂载镜像
如果是从官网下载的 ISO 文件,那我们首先需要将 ISO 挂在到系统指定路径下:
[root@10-255-1-40 home]# mkdir /mnt/CentOS
[root@10-255-1-40 home]# mount -t iso9660 -o loop /home/CentOS-7-x86_64-DVD-1810.iso /mnt/CentOS
mount: /dev/loop0 写保护,将以只读方式挂载
[root@10-255-1-40 home]# cd /mnt/CentOS/
[root@10-255-1-40 CentOS]# ls
CentOS_BuildTag  EFI  EULA  GPL  images  isolinux  LiveOS  Packages  repodata  RPM-GPG-KEY-CentOS-7  RPM-GPG-KEY-CentOS-Testing-7  TRANS.TBL
[root@10-255-1-40 CentOS]#
mount -t iso9660 -o loop /home/CentOS-7-x86_64-DVD-1810.iso /mnt/CentOS
主要是这条命令:
mount -t iso9660 -o loop /home/CentOS-7-x86_64-DVD-1810.iso /mnt/CentOS
ISO 文件具体路径根据你实际存放的路径为准。
挂载后如下:
[root@10-255-1-40 CentOS]# pwd
/mnt/CentOS
[root@10-255-1-40 CentOS]#
[root@10-255-1-40 CentOS]# ls -al
总用量 689
drwxrwxr-x  8 root root   2048 11月 25 23:53 .
drwxr-xr-x. 3 root root     20 12月 31 04:36 ..
-rw-rw-r--  1 root root     14 11月 25 16:01 CentOS_BuildTag
-rw-r--r--  1 root root     29 11月 25 16:16 .discinfo
drwxr-xr-x  3 root root   2048 11月 25 16:20 EFI
-rw-rw-r--  1 root root    227 8月  30 2017 EULA
-rw-rw-r--  1 root root  18009 12月  9 2015 GPL
drwxr-xr-x  3 root root   2048 11月 25 16:21 images
drwxr-xr-x  2 root root   2048 11月 25 16:20 isolinux
drwxr-xr-x  2 root root   2048 11月 25 16:20 LiveOS
drwxrwxr-x  2 root root 663552 11月 25 23:52 Packages
drwxrwxr-x  2 root root   4096 11月 25 23:53 repodata
-rw-rw-r--  1 root root   1690 12月  9 2015 RPM-GPG-KEY-CentOS-7
-rw-rw-r--  1 root root   1690 12月  9 2015 RPM-GPG-KEY-CentOS-Testing-7
-r--r--r--  1 root root   2883 11月 25 23:54 TRANS.TBL
-rw-r--r--  1 root root    354 11月 25 16:21 .treeinfo
[root@10-255-1-40 CentOS]#
假如我们使用的设备是光盘 sr0,则使用如下方式挂载:
mount /dev/sr0 /mnt/CentOS
3. 配置 yum 源
备份系统原有的 yum 源
mkdir /etc/yum.repos.d/bak
mv /etc/yum.repos.d/* /etc/yum.repos.d/bak/
然后清除本地所有缓存
yum clean all
编写自己的 repo 文件
[centos7]
name=CentOS-$releasever - Media
baseurl=file:///mnt/CentOS/
gpgcheck=0
enabled=1
gpgkey=file:///mnt/CentOS/RPM-GPG-KEY-CentOS-7
我们已经把所有原来的 repo 文件做好了备份,最后把自己的 repo 放进来,然后重建缓存如下:
yum makecache
重建缓存,将它保存为 centos7.repo,放在 /etc/yum.repos.d/ 目录下。GPGkey 可以不指定,只是你开启 GPGcheck 后需要指定路径。
重建 yum 缓存(元数据)
[root@10-255-1-40 yum.repos.d]# yum makecache
已加载插件:fastestmirror
centos7                                                                                                                                | 3.6 kB  00:00:00
(1/4): centos7/group_gz                                                                                                                | 166 kB  00:00:00
(2/4): centos7/primary_db                                                                                                              | 3.1 MB  00:00:00
(3/4): centos7/other_db                                                                                                                | 1.3 MB  00:00:00
(4/4): centos7/filelists_db                                                                                                            | 3.2 MB  00:00:00
Determining fastest mirrors
元数据缓存已建立
4. 测试一下
[root@10-255-1-40 yum.repos.d]# yum search vim
已加载插件:fastestmirror
Loading mirror speeds from cached hostfile
====================================================================== N/S matched: vim ======================================================================
vim-X11.x86_64 : The VIM version of the vi editor for the X Window System
vim-common.x86_64 : The common files needed by any version of the VIM editor
vim-enhanced.x86_64 : A version of the VIM editor which includes recent enhancements
vim-filesystem.x86_64 : VIM filesystem layout
vim-minimal.x86_64 : A minimal version of the VIM editor

  名称和简介匹配 only,使用“search all”试试。
[root@10-255-1-40 yum.repos.d]#
5. 再比如
[root@10-255-1-40 yum.repos.d]# yum install gdb
已加载插件:fastestmirror
Loading mirror speeds from cached hostfile
正在解决依赖关系
--> 正在检查事务
---> 软件包 gdb.x86_64.0.7.6.1-100.el7_4.1 将被 升级
---> 软件包 gdb.x86_64.0.7.6.1-114.el7 将被 更新
--> 解决依赖关系完成

依赖关系解决

==============================================================================================================================================================
 Package                          架构                                版本                                         源                                    大小
==============================================================================================================================================================
正在更新:
 gdb                              x86_64                              7.6.1-114.el7                                centos7                              2.4 M

事务概要
==============================================================================================================================================================
升级  1 软件包

总下载量:2.4 M
Is this ok [y/d/N]:
第二种场景
我们服务器本地没有 ISO 镜像,但是我们有所需要的 RPM 包文件列表,我们也可以利用这些 RPM 搭建属于我们自己的本地 yum 源。
1. 准备 RPM 包
假如我们的 RPM 包已经准备好放在如下目录下:/home/Packages/ 。
ls 查看如下:
root@10-255-1-40 Packages]# ls
389-ds-base-1.3.8.4-15.el7.x86_64.rpm                                 libtranslit-m17n-0.0.2-6.el7.x86_64.rpm
389-ds-base-libs-1.3.8.4-15.el7.x86_64.rpm                            libudisks2-2.7.3-8.el7.x86_64.rpm
abattis-cantarell-fonts-0.0.25-1.el7.noarch.rpm                       libunistring-0.9.3-9.el7.x86_64.rpm
abrt-2.1.11-52.el7.centos.x86_64.rpm                                  libunwind-1.2-2.el7.x86_64.rpm
abrt-addon-ccpp-2.1.11-52.el7.centos.x86_64.rpm                       libusal-1.1.11-25.el7.x86_64.rpm
abrt-addon-kerneloops-2.1.11-52.el7.centos.x86_64.rpm                 libusb-0.1.4-3.el7.x86_64.rpm
abrt-addon-pstoreoops-2.1.11-52.el7.centos.x86_64.rpm                 libusbmuxd-1.0.10-5.el7.x86_64.rpm
abrt-addon-python-2.1.11-52.el7.centos.x86_64.rpm                     libusbx-1.0.21-1.el7.x86_64.rpm
abrt-addon-vmcore-2.1.11-52.el7.centos.x86_64.rpm                     libusbx-devel-1.0.21-1.el7.x86_64.rpm
...
2. 准备 yum 源配置文件
[mytest]
name=[mytest]
baseurl=file:///home/Packages
gpgcheck=0
enabled=1
将它保存为 mytest.repo,放在 /etc/yum.repos.d/ 目录下:
[root@10-255-1-40 yum.repos.d]# ls
bak  mytest.repo
[root@10-255-1-40 yum.repos.d]#

[root@10-255-1-40 yum.repos.d]# cat mytest.repo
[mytest]
name=[mytest]
baseurl=file:///home/Packages
gpgcheck=0
enabled=1
[root@10-255-1-40 yum.repos.d]#
3. 安装 createrepo 工具
[root@10-255-1-40 ~]# yum install createrepo -y
4. 创建本地 yum 源数据库文件
[root@10-255-1-40 ~]# createrepo /home/Packages/
Spawning worker 0 with 10 pkgs
Workers Finished
Saving Primary metadata
Saving file lists metadata
Saving other metadata
Generating sqlite DBs
Sqlite DBs complete
[root@10-255-1-40 ~]#
5. 清除原有 yum 配置
[root@10-255-1-40 ~]# yum clean all
6. 重建缓存(元数据)
[root@10-255-1-40 ~]# yum makecache 重建缓存
[root@10-255-1-40 home]# yum makecache
已加载插件:fastestmirror
mytest                                                                                                                                 | 2.9 kB  00:00:00
(1/3): mytest/filelists_db                                                                                                             | 5.3 kB  00:00:00
(2/3): mytest/other_db                                                                                                                 | 5.9 kB  00:00:00
(3/3): mytest/primary_db                                                                                                               | 7.5 kB  00:00:00
Determining fastest mirrors
元数据缓存已建立
[root@10-255-1-40 home]#
7. 测试一下
[root@10-255-1-40 ~]# yum search yum-utils
已加载插件:fastestmirror
Loading mirror speeds from cached hostfile
=================================================================== N/S matched: yum-utils ===================================================================
yum-utils.noarch : Utilities based around the yum package manager

  名称和简介匹配 only,使用“search all”试试。
[root@10-255-1-40 ~]#
第三种场景
对外公开的 yum 源,要求:
- 这个 yum 源服务器要能够定期自动更新 yum 源
- 使用 CentOS 官方标准源保持更新
- Linux ( mini ) 客户端可以在使用的时候直接使用源,比如直接命令:
yum –y install gdb*
1. 开始配置 yum 源服务器
2. 安装 Nginx 服务
我们使用 Nginx 配置 yum 源 Web 服务器:
[root@10-255-1-40 yum.repos.d]# yum install nginx -y
[root@10-255-1-40 nginx]# pwd
/etc/nginx
[root@10-255-1-40 nginx]# vim nginx.conf
[root@10-255-1-40 html]# systemctl  status nginx
● nginx.service - The nginx HTTP and reverse proxy server
   Loaded: loaded (/usr/lib/systemd/system/nginx.service; disabled; vendor preset: disabled)
   Active: inactive (dead)

12月 31 13:36:05 10-255-1-40 systemd[1]: Unit nginx.service cannot be reloaded because it is inactive.
[root@10-255-1-40 html]#
[root@10-255-1-40 html]# systemctl  start nginx
[root@10-255-1-40 html]# systemctl  status nginx
● nginx.service - The nginx HTTP and reverse proxy server
   Loaded: loaded (/usr/lib/systemd/system/nginx.service; disabled; vendor preset: disabled)
   Active: active (running) since 一 2018-12-31 13:48:21 UTC; 4s ago
  Process: 3803 ExecStart=/usr/sbin/nginx (code=exited, status=0/SUCCESS)
  Process: 3800 ExecStartPre=/usr/sbin/nginx -t (code=exited, status=0/SUCCESS)
  Process: 3798 ExecStartPre=/usr/bin/rm -f /run/nginx.pid (code=exited, status=0/SUCCESS)
 Main PID: 3806 (nginx)
   CGroup: /system.slice/nginx.service
           ├─3806 nginx: master process /usr/sbin/nginx
           └─3807 nginx: worker process

12月 31 13:48:21 10-255-1-40 systemd[1]: Starting The nginx HTTP and reverse proxy server...
12月 31 13:48:21 10-255-1-40 nginx[3800]: nginx: the configuration file /etc/nginx/nginx.conf syntax is ok
12月 31 13:48:21 10-255-1-40 nginx[3800]: nginx: configuration file /etc/nginx/nginx.conf test is successful
12月 31 13:48:21 10-255-1-40 systemd[1]: Failed to read PID from file /run/nginx.pid: Invalid argument
12月 31 13:48:21 10-255-1-40 systemd[1]: Started The nginx HTTP and reverse proxy server.
[root@10-255-1-40 html]#
3. 测试 Nginx 服务
方法1:
http://116.85.5.228 ,如图:

方法2:
[root@10-255-1-40 html]# curl http://127.0.0.1:80/
4. 开始配置 CentOS 镜像
在 Nginx HTML 下面建立以下目录:
[root@10-255-1-40 nginx]# tree
.
├── html
│   ├── 404.html
│   ├── 50x.html
│   ├── centos
│   │   └── didiyun
│   │       ├── 5
│   │       ├── 6
│   │       └── 7
│   │           ├── 7.0
│   │           ├── 7.1
│   │           ├── 7.2
│   │           ├── 7.3
│   │           ├── 7.4
│   │           ├── 7.5
│   │           └── 7.6
│   │               ├── x86
│   │               └── x86_64
...
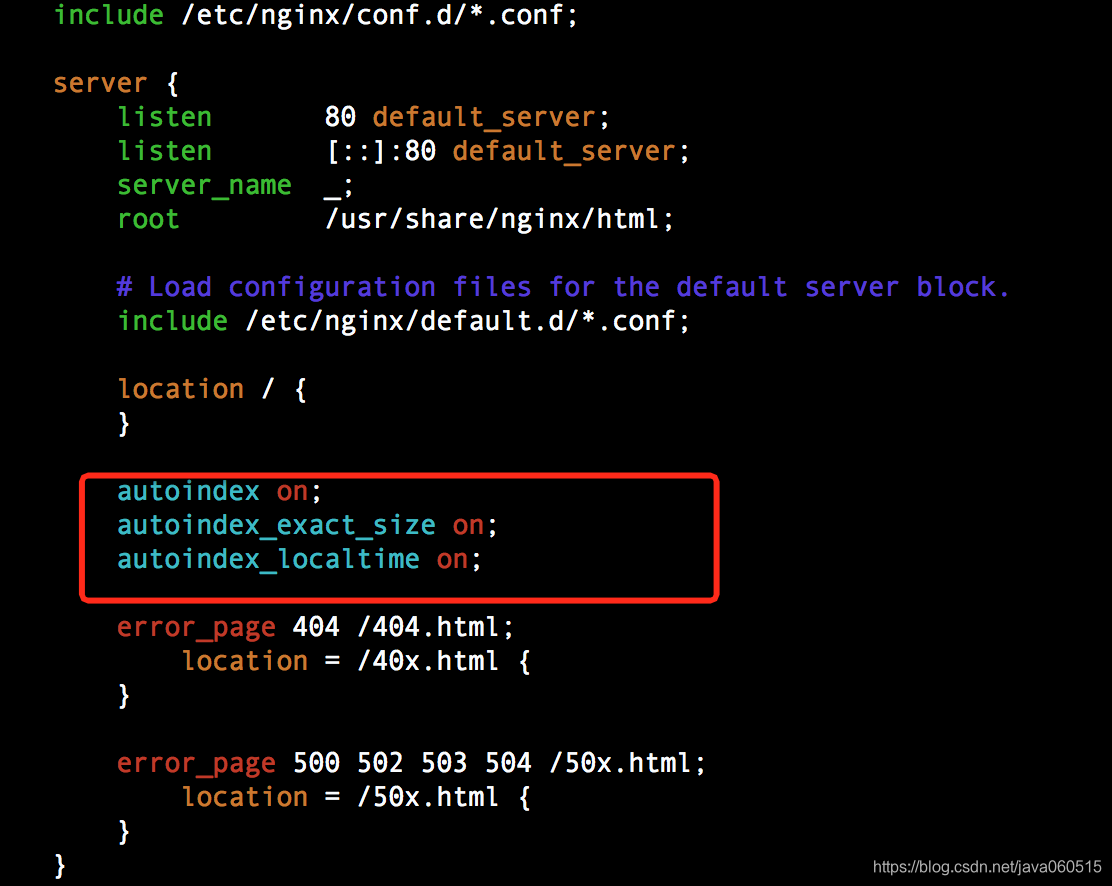
5. 修改 Nginx HTML
增加如下内容:
...
        <h1>Welcome to <strong>didiyun</strong> on Internet!</h1>

    <div class="content">
    <p style="font-weight:bolder;color:blue;font-size:30px;">ALL of the packages in the below:</p>
    <br/>

    <a href="http://didiyun.com/centos/didiyun">DiDiyun</a><br/>
    These packagers from of CentOS ISO.<br/>
   </div>
    ...
6. 重启 Nginx服务
[root@10-255-1-40 yum.repos.d]# systemctl restart nginx
使用滴滴云分配的 EIP 访问如下:

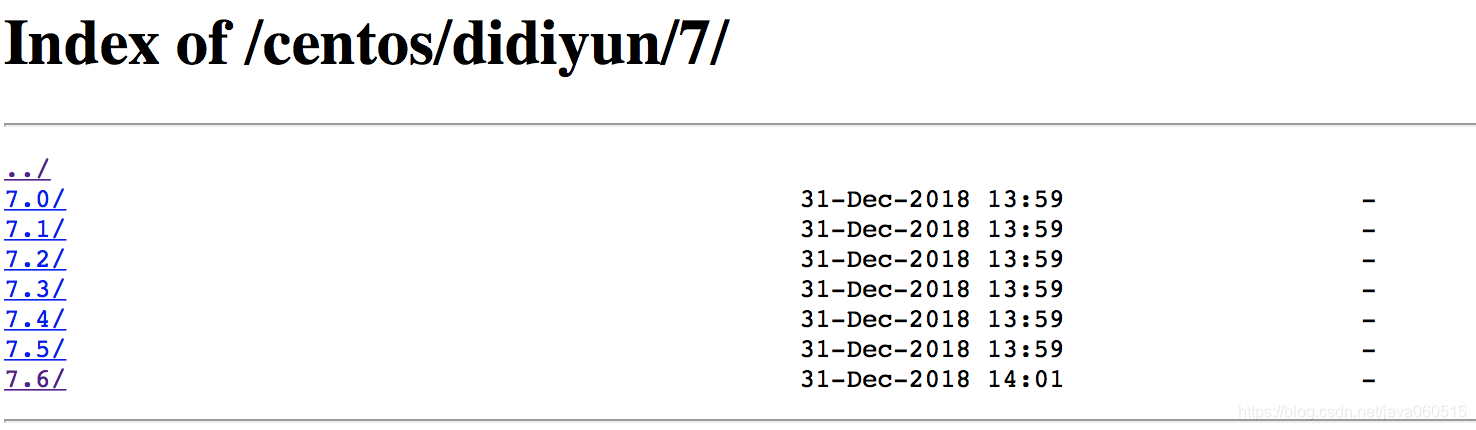
7. 配置 repo
[root@10-255-1-40 yum.repos.d]# cat Base7.repo
#########################################
\#          Centos SYSTEM YUM            #
#########################################
[base7]
name=CentOS-7 - Base
baseurl=http://mirrors.intra.didiyun.com/centos/7/os/x86_64
gpgkey=http://mirrors.intra.didiyun.com/centos/RPM-GPG-KEY-CentOS-7
enabled=1
gpgcheck=1

[updates7]
name=CentOS-7 - Updates
baseurl=http://mirrors.intra.didiyun.com/centos/7/updates/x86_64/
gpgkey=http://mirrors.intra.didiyun.com/centos/RPM-GPG-KEY-CentOS-7
enabled=1
gpgcheck=1

[extras7]
name=CentOS-7 - Extras
baseurl=http://mirrors.intra.didiyun.com/centos/7/extras/x86_64/
gpgkey=http://mirrors.intra.didiyun.com/centos/RPM-GPG-KEY-CentOS-7
enabled=1
gpgcheck=1

[centosplus7]
name=CentOS-7 - Plus
baseurl=http://mirrors.intra.didiyun.com/centos/7/centosplus/x86_64/
gpgkey=http://mirrors.intra.didiyun.com/centos/RPM-GPG-KEY-CentOS-7
gpgcheck=1
enabled=0

[root@10-255-1-40 yum.repos.d]#
8. 同步镜像
reposync -n --repoid=extras7 --repoid=updates7 --repoid=base7 -p /usr/share/nginx/html/centos/didiyun/7/7.6/x86_64/
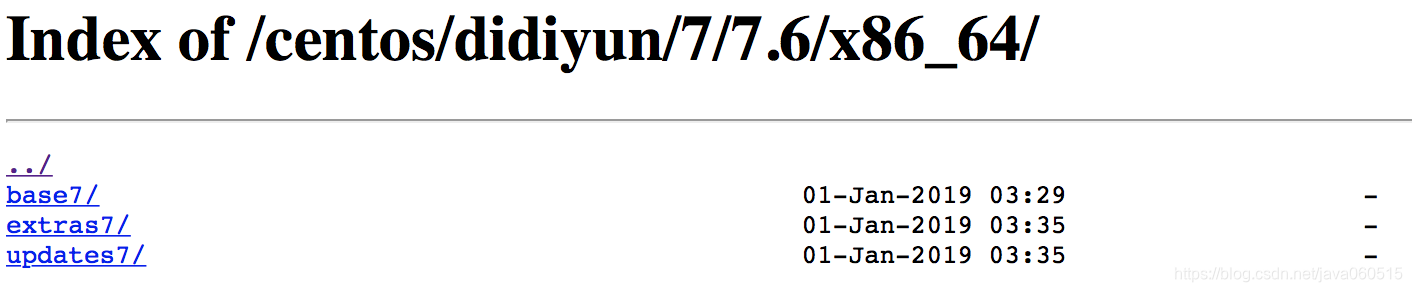
同步完后如下:
[root@10-255-1-40 x86_64]# ls
base7  extras7  updates7
[root@10-255-1-40 x86_64]#
如果出现同步后没有发现对应的文件和目录,请检查 repo 文件是否有错误。
这样 yum 源的 Server 端就建立好了。然后进行建仓,即 yum 源仓库,供 Client 端检索使用。
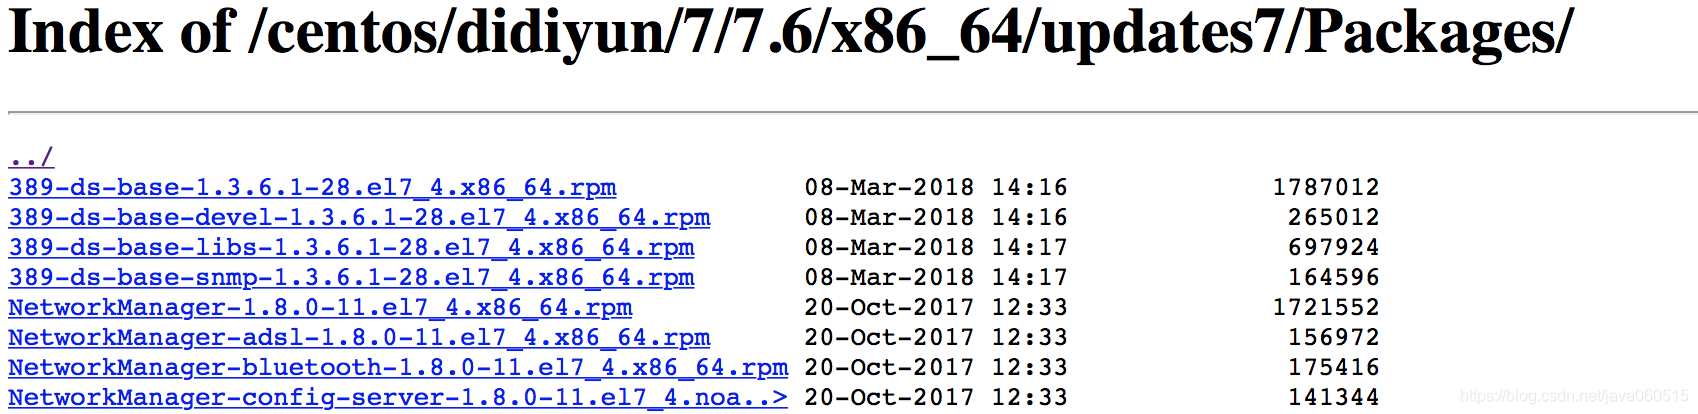
9. 配置 yum 源缓存元数据
[root@10-255-1-40 yum.repos.d]# createrepo -p /usr/share/nginx/html/centos/didiyun/7/7.6/x86_64/base7/Packages/
Spawning worker 0 with 9591 pkgs
Workers Finished
Saving Primary metadata
Saving file lists metadata
Saving other metadata
Generating sqlite DBs
Sqlite DBs complete
您在 /var/spool/mail/root 中有新邮件
[root@10-255-1-40 yum.repos.d]#
如图:
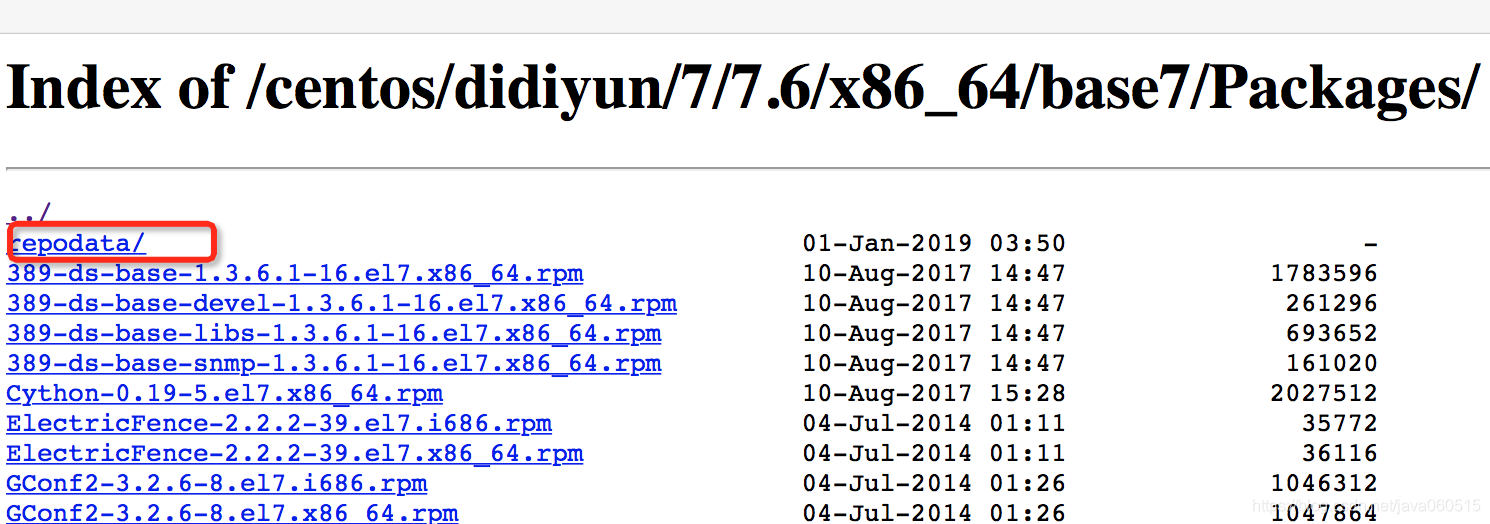
接下来 Client 端配置后就可以直接使用这些 didiyun yum 源安装软件了。
10. 准备测试客户端
我们再启动一台滴滴云主机,开始做如下配置:
客户端的 yum 配置:
- 安装优先级控制软件:
使用 yum 来安装 yum install yum-plugin-priorities -y 。
这个是优先级控制工具,可以控制 Client 端进行 yum 源的先后使用查找。
- 备份客户端系统原有的 yum 源,此处要注意,域名需要自己购买,这里只是举例。
mkdir –p /etc/yum.repos.d/bak

mv /etc/yum.repos.d/*  /etc/yum.repos.d/bak/

vim /etc/yum.repos.d/Base.repo
[centos7]
name=source_from_didiyun
baseurl=http://didiyun.com/centos/didiyun/7/7.6/x86_64/base7/Packages
gpgcheck=0
enable=1
priority=1
- 清除本地缓存和重新建立缓存
yum clean all 清除所有缓存

yum makecache 建立缓存

yum repolist 查看yum源列表
现在我们新的滴滴云 yum 源已经搭建好了,而且也设置了优先级,我们可以测试安装软件了。
我们来测试一下安装 xz 相关。
[root@10-254-134-88 yum.repos.d]# yum search xz-devel
已加载插件:fastestmirror
Loading mirror speeds from cached hostfile
=================================================================== N/S matched: xz-devel ====================================================================
xz-devel.i686 : Devel libraries & headers for liblzma
xz-devel.x86_64 : Devel libraries & headers for liblzma

  名称和简介匹配 only,使用“search all”试试。
[root@10-254-134-88 yum.repos.d]# yum install xz-devel
已加载插件:fastestmirror
Loading mirror speeds from cached hostfile
正在解决依赖关系
--> 正在检查事务
---> 软件包 xz-devel.x86_64.0.5.2.2-1.el7 将被 安装
--> 解决依赖关系完成

依赖关系解决

==============================================================================================================================================================
 Package                              架构                               版本                                       源                                   大小
==============================================================================================================================================================
正在安装:
 xz-devel                             x86_64                             5.2.2-1.el7                                centos7                              46 k

事务概要
==============================================================================================================================================================
安装  1 软件包

总下载量:46 k
安装大小:165 k
Is this ok [y/d/N]:
11. 配置滴滴云 yum 源自动更新机制
这里我们先简单写个脚本定期更新 CentOS 7.4 的镜像:
 [root@10-255-1-40 opt]# ls
updateyurepo.sh
[root@10-255-1-40 opt]# cat updateyurepo.sh
\#!/bin/bash

reposync -n --repoid=extras7 --repoid=updates7 --repoid=base7 -p /usr/share/nginx/html/centos/didiyun/7/7.4/x86_64/


[root@10-255-1-40 opt]#
 [root@10-255-1-40 opt]# crontab -e
 利用-e写入30 18 * * 6 bash /opt/updateyurepo.sh内容
crontab: installing new crontab
查看:
[root@10-255-1-40 opt]# crontab -l
30 18 * * 6 bash /opt/updateyurepo.sh
[root@10-255-1-40 opt]#
这样每周 6 六点半自动更新 CentOS 7.4 yum 源。
我们后续会根据具体的版本来设置更新,做到每个版本独立更新。