一、简介
ElasticSearch只能处理文本,不能直接处理文档。Ingest-Attachment是一个开箱即用的插件,替代了较早版本的Mapper-Attachment插件,使用它可以实现对(PDF,DOC,EXCEL等)主流格式文件的文本抽取及自动导入。
Elasticsearch5.x新增一个新的特性Ingest Node,此功能支持定义命名处理器管道pipeline,pipeline中可以定义多个处理器,在数据插入ElasticSearch之前进行预处理。而Ingest Attachment Processor Plugin提供了关键的预处理器attachment,支持自动对入库文档的指定字段作为文档文件进行文本抽取。
由于ElasticSearch是基于JSON格式的文档数据库,所以附件文档在插入ElasticSearch之前必须进行Base64编码。
思考:在处理xls和xlsx格式的时候,无法将sheet分开索引,只能将整个文件当做一个文档插入es中。目前没有想到什么好的方法。
二、环境
ElasticSearch-5.4.2下载地址:https://artifacts.elastic.co/downloads/elasticsearch/elasticsearch-5.4.2.zip
Kibana-5.4.2:https://artifacts.elastic.co/downloads/kibana/kibana-5.4.2-windows-x86.zip
elasticsearch和kibana的zip包下载之后解压分别去他们的bin目录下双击运行elasticsearch.bat和kibana.bat即可使用简单的单机版,用来测试非常方便。Elasticsearch默认使用的是9200端口,接下来在浏览器中打开链接http://localhost:9200验证是否安装成功。
Ingest-attachment插件下载地址:https://artifacts.elastic.co/downloads/elasticsearch-plugins/ingest-attachment/ingest-attachment-5.4.2.zip
参考官网(https://www.elastic.co/guide/en/elasticsearch/plugins/5.4/plugin-management-custom-url.html#plugin-management-custom-url)安装:bin\elasticsearch-plugin install file:///C:\Users\jk\Desktop\ingest-attachment-5.4.2.zip
Cygwin(用于使用curl和perl脚本的解码功能)
安装可参考:https://www.cnblogs.com/feipeng8848/p/8555648.html
三、实现步骤
3.1 建立自己的文本抽取管道pipeline
可参考:https://www.elastic.co/guide/en/elasticsearch/plugins/5.4/using-ingest-attachment.html
在Cygwin中执行curl命令(其实也可直接在Kibana中执行命令从而没必要安装Cygwin)
curl -X PUT "localhost:9200/_ingest/pipeline/attachment" -d '{
 "description" : "Extract attachment information",
 "processors":[
 {
    "attachment":{
        "field":"data",
        "indexed_chars" : -1,
        "ignore_missing":true
     }
 },
 {
     "remove":{"field":"data"}
 }]}'
3.2 载入数据
方法一:直接载入base64源码
首先要确定base64编码正确,否则因为乱码可能无法正确生成attachment。
可在http://encode.urih.com/和http://decode.urih.com/先进行编解码测试。
curl -X PUT "localhost:9200/pdftest/pdf/1?pipeline=attachment" -d '
{
   "data":"5oiR54ix5L2g"
}'
在Kibana中执行GET pdftest/_search可得:
{
  "took": 0,
  "timed_out": false,
  "_shards": {
    "total": 5,
    "successful": 5,
    "failed": 0
  },
  "hits": {
    "total": 1,
    "max_score": 1,
    "hits": [
      {
        "_index": "pdftest",
        "_type": "pdf",
        "_id": "1",
        "_score": 1,
        "_source": {
          "attachment": {
            "content_type": "text/plain; charset=UTF-8",
            "language": "lt",
            "content": "我爱你",
            "content_length": 4
          }
        }
      }
    ]
  }
}
注:如果在创建管道的时候不删除data即创建命令为
curl -X PUT "localhost:9200/_ingest/pipeline/attachment" -d '{
 "description" : "Extract attachment information",
 "processors":[
 {
    "attachment":{
        "field":"data",
        "indexed_chars" : -1,
        "ignore_missing":true
     }
 }]}'

 最终插入结果为:
         "_source": {
          "data": "5oiR54ix5L2g",
          "attachment": {
            "content_type": "text/plain; charset=UTF-8",
            "language": "lt",
            "content": "我爱你",
            "content_length": 4
          }
        }
方法二:载入文件的同时进行转码导入
这里我将写有“我爱你”三个字的hehe.txt放在了Windows的桌面上,在Cygwin中可以使用perl脚本的解码功能:base64 -w 0 /cygdrive/c/Users/jk/Desktop/hehe.txt | perl -pe's/\n/\\n/g'
参数解释:-w, --wrap=字符数 在指定的字符数后自动换行(默认为76),0 为禁用自动换行
解码:echo 5oiR54ix5L2g | base64 -d -i
curl -X PUT "localhost:9200/pdftest/pdf/1?pipeline=attachment" -d '
{
   "data":"'`base64 -w 0 /cygdrive/c/Users/jk/Desktop/hehe.txt | perl -pe's/\n/\\n/g'`'"
}'
最终插入结果同上。
注意:如果换成pdf格式或者txt文件中有很多内容导致解码后的字符串长度过大的话,则会报错:-bash: /cygdrive/c/Windows/system32/curl: Argument list too long
解释:该错误表示执行命令的参数太长,超过系统允许的最大值,这个值通过ARG_MAX参数控制。这个是Linux系统一直以来都有的限制。查看这个限制可以通过命令“getconf ARG_MAX”来实现
解决:使用curl命令的-d参数发送json文件的方式绕过限制
echo '{"data":"'`base64 -w 0 /cygdrive/c/Users/jk/Desktop/hehe.pdf | perl -pe's/\n/\\n/g'`'"}' > hehe.txt
curl -X PUT "localhost:9200/pdftest/pdf/1?pipeline=attachment" -d @hehe.txt
最终插入结果为:
        "_source": {
          "attachment": {
            "date": "2018-10-20T08:00:17Z",
            "content_type": "application/pdf",
            "author": "jk",
            "language": "lt",
            "content": "我爱你",
            "content_length": 7
          }
        }
3.3 全文索引,查询指定字段,注意查询字段名称
快别用Cygwin了各种问题(关键是Cygwin还没有玩得很溜),在Kibana里输方便还不出其他莫名其妙的问题。如在Cygwin输入查询命令:
curl -X GET localhost:9200/pdftest/pdf/_search?pretty -d '
{
  "query":{
    "match":{
      "attachment.content":"爱"
    }
  }
}'
报错:
"type" : "json_parse_exception",
"reason" : "Invalid UTF-8 start byte 0xb0\n at [Source: org.elasticsearch.transport.netty4.ByteBufStreamInput@69645e80; line: 5, column: 30]"
解决:在Cygwin中执行命令:export LC_ALL=“zh_CN” 而不是:export LC_ALL=“zh_CN.UTF-8” 然后执行locale命令可查看设置。LC_ALL,它是一个宏,如果该值设置了,则该值会覆盖所有LC_*的设置值,LANG的值不受该宏影响。zh代表中文,CN代表大陆地区,GBK或UTF-8表示字符集
Kibana中输入:
GET pdftest/_search
{
    "query" : {
        "match" : {
            "attachment.content":"爱"
        }
    }
}
四、补充:安装中文分词插件
IK Analysis for Elasticsearch是开源社区比较流行的中文分词插件
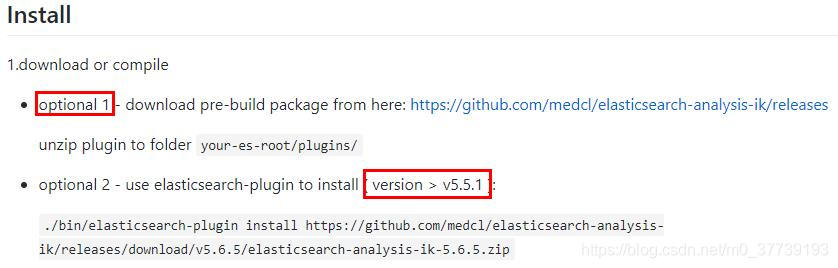
官网:https://github.com/medcl/elasticsearch-analysis-ik
本来想用这两种方法安装:
.\bin\elasticsearch-plugin install https://github.com/medcl/elasticsearch-analysis-ik/releases/download/v5.4.2/elasticsearch-analysis-ik-5.4.2.zip
bin\elasticsearch-plugin install file:///C:\Users\jk\Desktop\elasticsearch-analysis-ik-5.4.2.zip
但是却总是报错:
ERROR: `elasticsearch` directory is missing in the plugin zip
后来只能用了这种方法:在Elasticsearch安装目录下的文件夹plugins中新建文件夹ik,将elasticsearch-analysis-ik-5.4.2.zip解压到这里即可
其实官网里已经说明了低于5.5.1版本的用解压的方式安装了:
ik_smart: 会做最粗粒度的拆分
ik_max_word: 会将文本做最细粒度的拆分。
测试1:
GET /_analyze
{
  "analyzer": "ik_smart",
  "text":"中华人民共和国"
}
结果:
{
  "tokens": [
    {
      "token": "中华人民共和国",
      "start_offset": 0,
      "end_offset": 7,
      "type": "CN_WORD",
      "position": 0
    }
  ]
}
测试2:
GET /_analyze
{
  "analyzer": "ik_max_word",
  "text":"中华人民共和国"
}
结果:
{
  "tokens": [
    {
      "token": "中华人民共和国",
      "start_offset": 0,
      "end_offset": 7,
      "type": "CN_WORD",
      "position": 0
    },
    {
      "token": "中华人民",
      "start_offset": 0,
      "end_offset": 4,
      "type": "CN_WORD",
      "position": 1
    },
    {
      "token": "中华",
      "start_offset": 0,
      "end_offset": 2,
      "type": "CN_WORD",
      "position": 2
    },
    {
      "token": "华人",
      "start_offset": 1,
      "end_offset": 3,
      "type": "CN_WORD",
      "position": 3
    },
    {
      "token": "人民共和国",
      "start_offset": 2,
      "end_offset": 7,
      "type": "CN_WORD",
      "position": 4
    },
    {
      "token": "人民",
      "start_offset": 2,
      "end_offset": 4,
      "type": "CN_WORD",
      "position": 5
    },
    {
      "token": "共和国",
      "start_offset": 4,
      "end_offset": 7,
      "type": "CN_WORD",
      "position": 6
    },
    {
      "token": "共和",
      "start_offset": 4,
      "end_offset": 6,
      "type": "CN_WORD",
      "position": 7
    },
    {
      "token": "国",
      "start_offset": 6,
      "end_offset": 7,
      "type": "CN_CHAR",
      "position": 8
    }
  ]
}
参考:https://blog.csdn.net/wenxindiaolong061/article/details/82562450