俺是一名小菜鸟,这是俺第一篇博客。在文中有引用个别前辈大神的博客。如有侵权请告知,俺会尽快处理。
需求:
前段时间有个需求:做一个类似跑酷的彩带散落动画效果。
查资料:
按照初始想法+同事模糊建议,先在网上收罗了一堆雪花飘落效果。发现并不满足需求,网上大多数案例都是平面的飘落效果。缺少一点灵动(旋转)。在一个查询资料里的偶然中发现一个好东西:使用Camera实现3D旋转飘落的效果博客:模仿荷包启动动画点击打开链接。发现一个之前从未用过的好东西graphics.Camera类。Camera可以实现普通雪花飘落没有的旋转效果,该的具体介绍及使用就不做格外介绍了。需要详细了解的朋友们自行找一下度娘了。
想法:
最初想法将Camera的旋转效果合成到网上已有的雪花飘落项目即可。因为两个项目都不是自己写的遇到一些列的困难。最后选择了一步一步的,自己用自己掌握的自定义view去实现。
1.写一个FallView 继承View,实现单个雪花图片旋转飘落。
2.写一个SnowFallView继承RelativeLayout用于存放List<FallView>以实现多个雪花图片飘落效果。
实现:
注:由于俺的水平有限,无暂未考虑性能优化的深入问题。仅求实现效果。
因为时间问题、代码成熟度不够好等原因,本文只讲第1点FallView的实现,直接上代码,里面有详细注释
package com.walke.anim.camera;

import android.content.Context;
import android.graphics.Bitmap;
import android.graphics.BitmapFactory;
import android.graphics.Camera;
import android.graphics.Canvas;
import android.graphics.Matrix;
import android.graphics.Paint;
import android.support.annotation.Nullable;
import android.util.AttributeSet;
import android.view.View;

import com.walke.anim.R;

/**
 * Created by walke.Z on 2018/4/20.
 * 雪花飘落效果:
 * 1,单个飘落效果
 * a.onDraw 使用 canvas.drawBitmap()方法绘制雪花
 * b.改变绘制位置实现动画效果
 */

public class FallView extends View {

    private Bitmap mSnow;

    /**
     * 控件宽度
     */
    private int mWidth;
    /**
     * 控件高度
     */
    private int mHeight;

    /**
     * 画笔
     */
    private Paint mPaint;
    /**
     *
     */
    private float mX1;
    /**
     *
     */
    private float mY1 = 0;

    /**
     * graphics 包中的类,用于实现旋转
     */
    Camera mCamera;
    /**
     * 飘落速度
     */
    private float mSpeed = 1.5f;

    public FallView(Context context) {
        this(context, null);
    }

    public FallView(Context context, @Nullable AttributeSet attrs) {
        this(context, attrs, 0);
    }

    public FallView(Context context, @Nullable AttributeSet attrs, int defStyleAttr) {
        super(context, attrs, defStyleAttr);
        mSnow = BitmapFactory.decodeResource(getContext().getResources(), R.mipmap.image_snow_96);
        mPaint = new Paint();
        mCamera = new Camera();
    }

    private void resizeBitmap(float scale) {
        Matrix m = new Matrix();
        m.setScale(scale, scale);
        mSnow = Bitmap.createBitmap(mSnow, 0, 0, mSnow.getWidth(), mSnow.getHeight(), m, true);
    }


    @Override
    protected void onSizeChanged(int w, int h, int oldw, int oldh) {
        super.onSizeChanged(w, h, oldw, oldh);
        mWidth = w;
        mHeight = h;
        mX1 = (mWidth - mSnow.getWidth()) / 2;
    }

    private float degrees = 0;

    @Override
    protected void onDraw(Canvas canvas) {
        super.onDraw(canvas);

        //使用 graphics.Camera -------
        Matrix mMatrix = new Matrix();
        mCamera.save(); // 记录一下初始状态。save()和restore()可以将图像过渡得柔和一些。

        //旋转角度
        if (degrees < 360) {
            degrees += 6;
        } else {
            degrees = 0;
        }
        mCamera.rotateY(degrees);

        // 平移--下落
        if (mY1 > -(mHeight - mSnow.getHeight())) {
            mY1 -= mSpeed;//注意这里是 -
        }
        mCamera.translate(mX1, mY1, 0);// mY1: -50


        mCamera.getMatrix(mMatrix);
        int centerX = (mWidth) / 2;
        int centerY = mSnow.getHeight() / 2;

        mMatrix.preTranslate(-centerX, -centerY);
        mMatrix.postTranslate(centerX, centerY);

        mCamera.restore();
//        Log.i("walke", "FallView draw: -------> mX1 = "+mX1+" ---> mY1 = "+mY1 );
        canvas.drawBitmap(mSnow, mMatrix, mPaint);// 画图由左上角开始

        // 普通图片向下应用用以下两行代码即可
        // canvas.drawBitmap(mSnow, mX1, mY1, mPaint);// 画图由左上角开始
        // mY1+=2;

        invalidate();//60帧每秒
    }
}
布局使用:
<?xml version="1.0" encoding="utf-8"?>
<LinearLayout xmlns:android="http://schemas.android.com/apk/res/android"
              android:layout_width="match_parent"
              android:layout_height="match_parent"
              android:orientation="vertical">

    <com.walke.anim.camera.FallView
        android:layout_width="match_parent"
        android:layout_height="200dp"
        android:background="#79a1f7"/>


</LinearLayout>
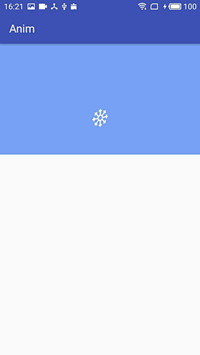
效果图片截屏,没弄gif图