版权声明:本文为博主原创文章,未经博主允许不得转载。 https://blog.csdn.net/z_x_Qiang/article/details/86618299
1.切换到编辑模式创建一个view
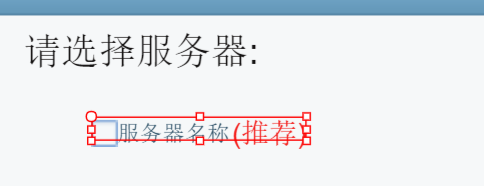
2.在view中设置显示于给checkbox和一个文本内容
选中这两个对象,ctrl+b 设置box;
在点击box,ctrl+b 选择list;则box就在list对象的下面(层级关系);
当我们此时拉伸list的时候,box的列表也就出现了;


给每一个checkbox设置逻辑处理:
let ServiceListView  = (function(_super){
    Laya.class(ServiceListView,"ServiceListView",_super);

    function ServiceListView(){
        ServiceListView.super(this);
        let data=[];
        for(let i=0;i<100;i++){
            data[i] = this.getData(i,false);
        }
        this.position = null;
        this.checked = false;
        this.list.dataSource = data;
        this.list.selectEnable = true;
        //设置 list 选择改变时的监听回调;selectHandler是list 容器的事件的回调注册方式;
        // this.list.selectHandler = Laya.Handler.create(this,this.onSelectChanaged,null,false);
        this.list.mouseHandler = new Laya.Handler(this,this.onMouse);
    }
    let proto = ServiceListView.prototype;
    // proto.onSelectChanaged = function(index){
    //     //index 是选中的下标;
    //     console.log("index:"+index);
    // };
    proto.onMouse = function(e,index){
        if(e.type == Laya.Event.CLICK){
            //这里每一点击都要设置checkbox的一个状态,不然就响应了checkbox的默认事件处理;
            if(this.position!==null){
                this.checked=false;
                this.list.setItem(this.position,this.getData(this.position,this.checked));
            }
            this.position = index;
            this.checked=true;
            this.list.setItem(this.position,this.getData(this.position,this.checked));
        }
    };
    proto.getData=function(position,checked){
        return {
                    checkBox:{label:"服务器"+(position+1),selected:checked},
                    txType:{text:(position==0) ? "(推荐)" : ""}
                };
    }
    return ServiceListView;
})(ServiceListUI);
扫描二维码关注公众号,回复:
5075097 查看本文章
