1、创建maven项目,添加项目所需依赖
<!--springboot项目依赖的父项目-->
    <parent>
        <groupId>org.springframework.boot</groupId>
        <artifactId>spring-boot-starter-parent</artifactId>
        <version>2.0.0.RELEASE</version>
    </parent>

    <dependencies>
        <!--注入springboot启动器-->
        <dependency>
            <groupId>org.springframework.boot</groupId>
            <artifactId>spring-boot-starter-web</artifactId>
        </dependency>

        <!--注入springboot对thymeleaf视图技术的支持-->
        <dependency>
            <groupId>org.springframework.boot</groupId>
            <artifactId>spring-boot-starter-thymeleaf</artifactId>
        </dependency>
    </dependencies>
2、创建controller
package com.bjsxt.controller;

import org.springframework.stereotype.Controller;
import org.springframework.ui.Model;
import org.springframework.web.bind.annotation.RequestMapping;

/**
 * Created by Administrator on 2019/2/8.
 */
@Controller
public class IndexController {

    @RequestMapping("/toIndex")
    public String toIndex(Model model){
        model.addAttribute("msg","index页面");
        return "index";
    }
}
3、创建thymeleaf模版文件index.html
目录位置:src/main/resources/templates
templates:该目录是安全的。意味着该目录下的内容是不允许外界直接访问的。
<!DOCTYPE html>
<html lang="en">
<head>
    <meta charset="UTF-8">
    <title>thymeleaf</title>
</head>
<body>
    <span th:text="${msg}"></span>
    <hr>
    <span th:text="hello"></span>
</body>
</html>
4、创建启动器,启动在浏览器中访问
package com.bjsxt;

import org.springframework.boot.SpringApplication;
import org.springframework.boot.autoconfigure.SpringBootApplication;

/**
 * Created by Administrator on 2019/2/8.
 */
@SpringBootApplication
public class App {

    public static void main(String[] args){
        SpringApplication.run(App.class,args);
    }
}
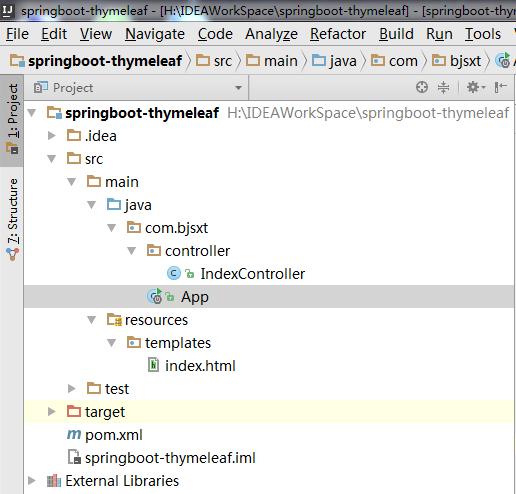
目录结构