wechat_devtools 64位(来自官网)
链接:https://pan.baidu.com/s/1FvyOSxxZFfspJuz0bc25Vg
提取码:hwvq
小程序开发基础组件(开发文档):
https://developers.weixin.qq.com/miniprogram/dev/component/
apps.json
{
	"pages":[
    	"pages/index/index",
    	"pages/firstpages/first",
    	"pages/logs/logs"
    ],
     "window":{
    "backgroundTextStyle":"light",
    "navigationBarBackgroundColor": "#fff",
    "navigationBarTitleText": "WeChat",
    "navigationBarTextStyle":"black"
  }
}
注意:不能多加逗号
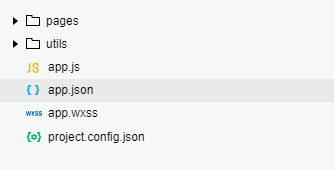
1.pages包含数组,即每个页面,每个页面包含.js(配置页面入口,脚本逻辑文件)和.wxml文件(配置布局与UI,模板文件),【.json(配置文件).wxss(样式文件)】非必须
pages字段 —— 用于描述当前小程序所有页面路径,这是为了让微信客户端知道当前你的小程序页面定义在哪个目录。
window字段 —— 定义小程序所有页面的顶部背景颜色,文字颜色定义等。
| 属性 | 描述 |
|---|---|
| navigationBarBackgroundColor | 导航栏背景颜色 |
| navigationBarTextStyle | 导航栏标题颜色,仅支持 black / white |
| navigationBarTitleText | 导航栏标题文字内容 |
| navigationStyle | 导航栏样式,仅支持以下值:default 默认样式 custom 自定义导航栏,只保留右上角胶囊按钮。 |
| backgroundTextStyle | 下拉 loading 的样式,仅支持 dark / light,默认dark |
| backgroundColor | 窗口的背景色,默认#fff |
tabBar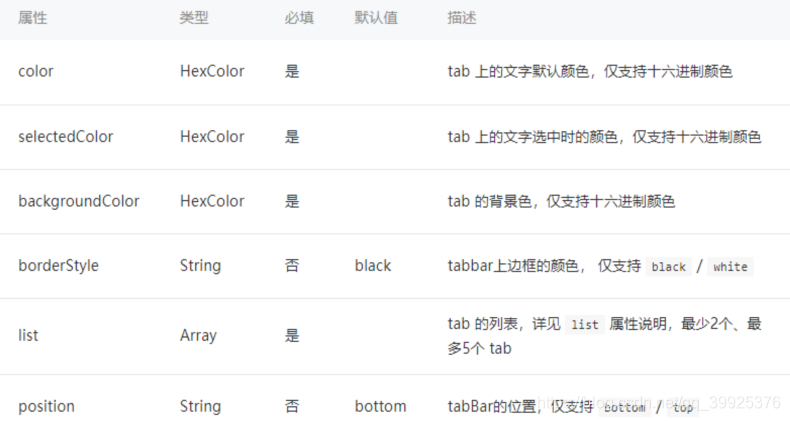
2.开发者工具在每个项目的根目录都会生成一个 project.config.json,你在工具上做的任何配置都会写入到这个文件,当你重新安装工具或者换电脑工作时,你只要载入同一个项目的代码包,开发者工具就自动会帮你恢复到当时你开发项目时的个性化配置,其中会包括编辑器的颜色、代码上传时自动压缩等等一系列选项。
first.js
 Page({
  		data: {
    		text :"内容001",
    		btntext :"这是按钮内容",
    		show : true,
    		news:['aaa', 'bbb'],
  		},

  		btnclink : function()
 		{
   			console.log("按钮被点击")
  			var isShow=this.data.show;
    		console.log("isShow :" + isShow)
	   	 	var newsdata = this.data.news;
    		newsdata.shift()
    		this.setData({text: "内容002", show:!isShow,news:newsdata})
  		}
})
first.wxml
	<include src="../tempdatas/tempdata" />        /*导入模板 1个*/
	<button type="default" >default</button>
	<button type="primary" bindtap="btnclink">{{btntext}}</button>

	<view wx:if="{{show}}">{{text}} 1</view>
	<view wx:else>{{text}} 2</view>
	<view wx:for="{{news}}" wx:for-item="item">
	{{index}} - {{item}}
	</view>          /*循环数组*/

	<import src="../tempdatas/footer" />		/*导入模板2个以上并选择其中一个*/
	<template is="footer1" data="{{text:'导入的内容'}}" />
index.js
Page({
  data: {
    motto: 'Hello World',
    userInfo: {},
    hasUserInfo: false,
    canIUse: wx.canIUse('button.open-type.getUserInfo')
  },
  //事件处理函数
  view1clink :function(event){
    console.log("view1clink")
    console.log(event)
  },

  view2clink: function () {
    console.log("view2clink")
  },

  view3clink: function (event) {
    console.log("view3clink")
    console.log(event)
  },
 )}
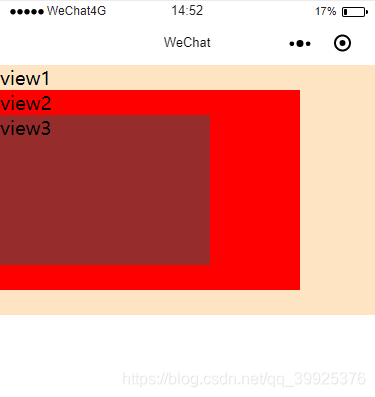
index.wxml
<!--index.wxml-->
<view class="view1" bindtap='view1clink'>
	view1
  	<view class="view2" bindtap='view2clink'>
  		view2
   	  <view class="view3" bindtap='view3clink'>
  			view3
   	  </view>
 	</view>
</view>

index.wxss
.view1{
  height: 500rpx;
  width: 100%;
  background-color:bisque;
}

.view2{
  height: 400rpx;
  width: 80%;
  background-color: red;
}

.view3{
  height: 300rpx;
  width: 70%;
  background-color: rgb(150, 44, 44);
}
3.网页编程采用的是 HTML + CSS + JS ,其中 HTML 是用来描述当前这个页面的结构,CSS 用来描述页面的样子,JS 通常是用来处理这个页面和用户的交互。 WXML 充当的就是类似 HTML 的角色。
4.通过 {{ }} 的语法把一个变量绑定到界面上,我们称为数据绑定。仅仅通过数据绑定还不够完整的描述状态和界面的关系,还需要 if/else, for等控制能力,在小程序里边,这些控制能力都用 wx: 开头的属性来表达。
5.app.json 是当前小程序的全局配置,用于指定小程序由哪些页面组成,包括了小程序的所有页面路径、界面表现、网络超时时间、底部 tab 等。配置路径时不需要后缀名,因此页面名字必须一样,框架会自动去寻找对于位置的 .json, .js, .wxml, .wxss 四个文件进行处理。