今天学习了springboot的两大常用模版:thymeleaf和freemarker
1、springboot之thymeleaf模板
Thymeleaf的优点:它就是html页面。下面直接上代码
使用步骤:
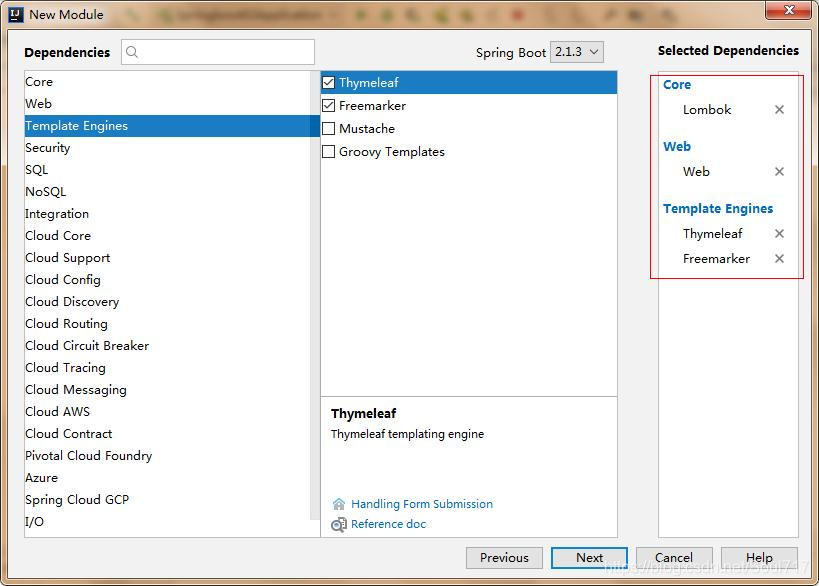
1.新建modul时勾选Thymeleaf,自动添加相关pom依赖 (我就thymeleaf,freemarker一起用了,不会冲突)
2.配置application.yml文件
Spring Boot官方文档建议在开发时将缓存关闭,那就在application.yml文件中加入下面这行
spring.thymeleaf.cache=false
正式环境还是要将缓存开启的
server:
  servlet:
    context-path: /springboot02

spring:
    thymeleaf:
      cache: false   #项目开发完后改为true
3.html开发的相关指令
页面加上:<html xmlns:th="http://www.thymeleaf.org"> 自动提示
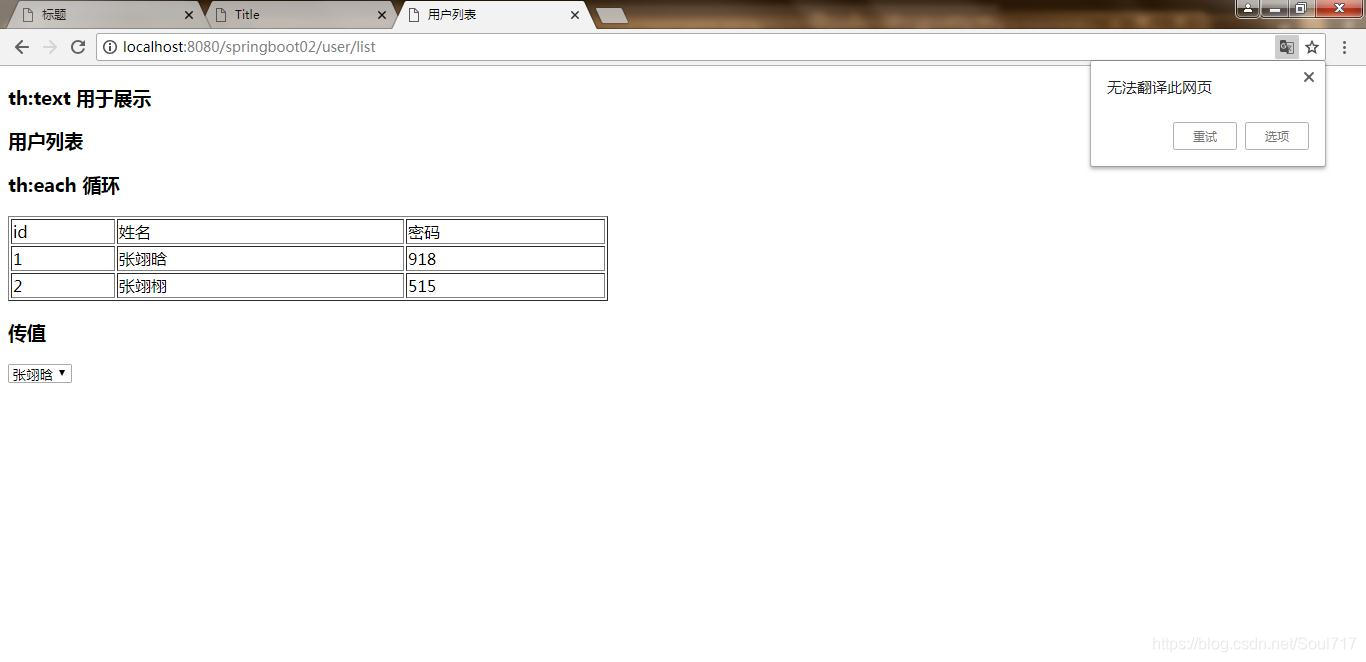
例子:user/list.html
<!DOCTYPE html>
<html lang="en">
<html xmlns:th="http://www.thymeleaf.org">
<head>
    <meta charset="UTF-8">
    <title>用户列表</title>
</head>
<body>
<h3>th:text 用于展示</h3>
<h3 th:text="${title}"></h3>

<h3>th:each 循环</h3>
<table border="1px" width="600px">
    <thead>
      <tr>
          <td>id</td>
          <td>姓名</td>
          <td>密码</td>
      </tr>

    </thead>

    <tbody>
    <tr th:each="user:${users}">
        <td th:text="${user.uid}"></td>
        <td th:text="${user.uname}"></td>
        <td th:text="${user.pwd}"></td>
    </tr>
    </tbody>
</table>

<h3>传值</h3>
<select>
    <option th:each="user:${users}" th:value="${user.uid}" th:text="${user.uname}"></option>
</select>
</body>
</html>
controller
// ----------------------------------thymeleaf---------------------------------------------------
    @RequestMapping("/user/list")
    public ModelAndView userlsit(){
        ModelAndView modelAndView=new ModelAndView();
        modelAndView.setViewName("user/list");
        modelAndView.addObject("title","用户列表");
       List<UserEntity> list=new ArrayList<>();
       list.add(new UserEntity(1,"张翊晗","918"));
       list.add(new UserEntity(2,"张翊栩","515"));
       modelAndView.addObject("users",list);
        return  modelAndView;
    }
效果 :
2、springboot之freemarker模板
1.导入pom依赖 ( 新建时有了)
<dependency>
<groupId>org.springframework.boot</groupId>
<artifactId>spring-boot-starter-freemarker</artifactId>
</dependency>
2.配置application.yml文件
application.yml文件的默认配置
spring:
  freemarker:
    # 设置模板后缀名
    suffix: .ftl
    # 设置文档类型
    content-type: text/html
    # 设置页面编码格式
    charset: UTF-8
    # 设置页面缓存
    cache: false
    # 设置ftl文件路径,默认是/templates,为演示效果添加role
    template-loader-path: classpath:/templates/role
  mvc:
    static-path-pattern: /static/**
3.配置 .ftl的界面
Settings--->Editor-->File and Code Templates
extension:ftl 跟application.yml 中的模版后缀名要一致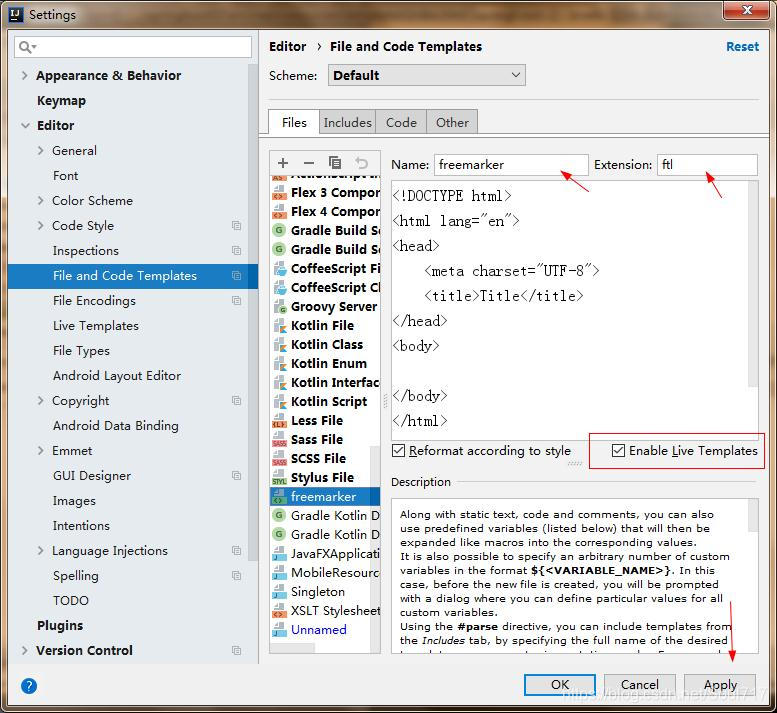
4.标页面签的使用
list.ftl页面
<!DOCTYPE html>
<html lang="en">
<head>
<meta charset="UTF-8">
<title>Title</title>
<#include 'comment.ftl'>
</head>
<body>
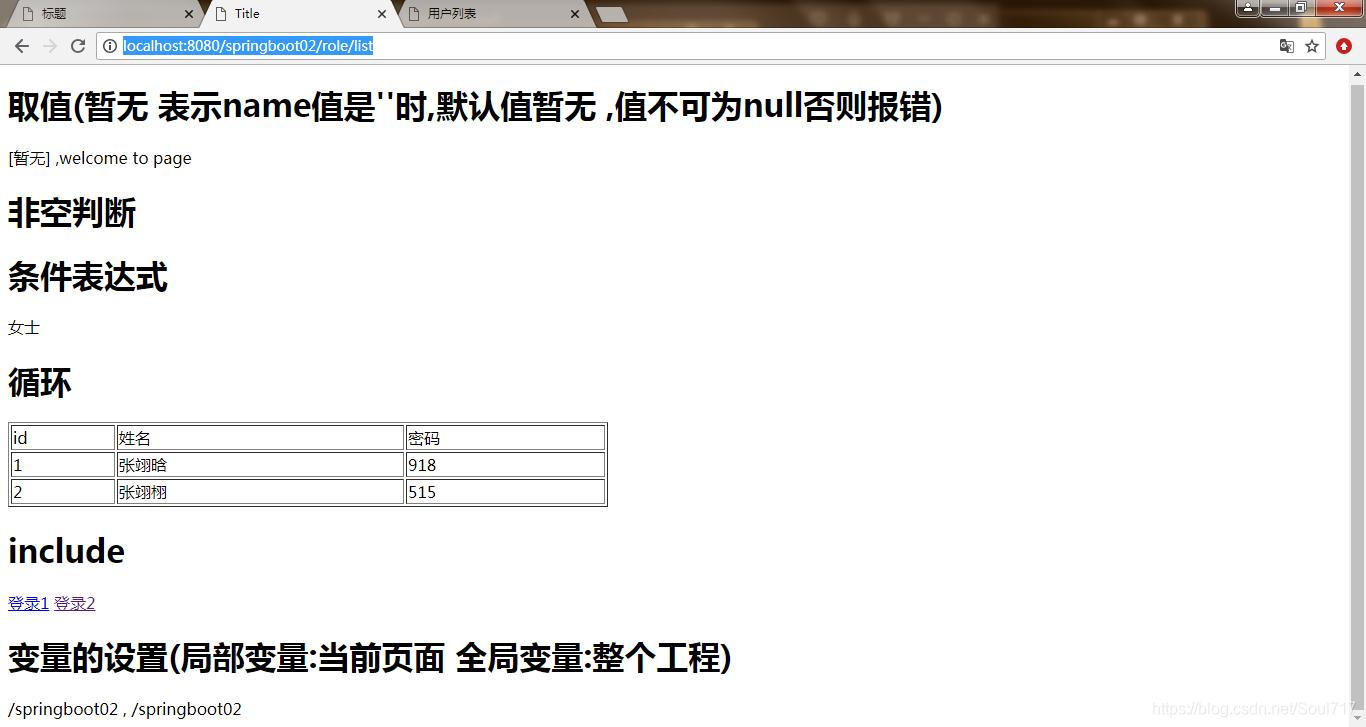
<h1>取值(${name!'暂无'} 表示name值是''时,默认值暂无 ,值不可为null否则报错)</h1>
[${name!'暂无'}] ,welcome to page
<h1>非空判断</h1>
<#if name?exists>
存在的
</#if>
<h1>条件表达式</h1>
<#if sex='女'>
女士
<#elseif sex='男'>
男士
<#else>
保密
</#if>
<h1>循环</h1>
<table border="1px" width="600px">
<thead>
<tr>
<td>id</td>
<td>姓名</td>
<td>密码</td>
</tr>
</thead>
<#list users as u>
<tbody>
<tr>
<td>${u.uid}</td>
<td>${u.uname}</td>
<td>${u.pwd}</td>
</tr>
</#list>
</tbody>
</table>
<h1>include</h1>
<#include 'foot.ftl'>
<h1>变量的设置(局部变量:当前页面 全局变量:整个工程)</h1>
<#-- 相当于<c:set></c:set>-->
<#--局部变量-->
<#assign ctx1>
${springMacroRequestContext.contextPath}
</#assign>
<#--全局变量-->
<#global ctx2>
${springMacroRequestContext.contextPath}
</#global>
${ctx1},${ctx2}
</body>
</html>controller
 //--------------------------------freemarker--------------------------------------------------
    @RequestMapping("/role/list")
    public ModelAndView rolelsit(){
        ModelAndView modelAndView=new ModelAndView();
        modelAndView.setViewName("list");
        modelAndView.addObject("name",null);
        modelAndView.addObject("sex","女");
        List<UserEntity> list=new ArrayList<>();
        list.add(new UserEntity(1,"张翊晗","918"));
        list.add(new UserEntity(2,"张翊栩","515"));
        modelAndView.addObject("users",list);
        return  modelAndView;
    }

    @RequestMapping("/toLogin")
    public String toLogin(){
           return  "login";
    }


    @RequestMapping("/role1/list")
    public ModelAndView rolelist1(){
        ModelAndView modelAndView=new ModelAndView();
        modelAndView.setViewName("xx");
        return  modelAndView;
    }
foot.ftl
<a href="login.ftl">登录1</a>
<a href="${ctx}/toLogin">登录2</a>
login.ftl
<!DOCTYPE html>
<html lang="en">
<head>
    <meta charset="UTF-8">
    <title>Title</title>
</head>
<body>
登录成功
</body>
</html>
  <#assign  ctx>
       ${springMacroRequestContext.contextPath}
   </#assign>
<base href="${ctx}/">  <#--base标签作用: static/js/test.js就等于${ctx}/static/js/test.js  默认前面加上${ctx}-->
<script type="text/javascript" src="static/js/test.js"></script>
test.js
function f() {
    alert('test')
}
效果图