说明:此编译教程只针对于早期的OpenPose版本(2017.09),最新的版本不一定适用。请参照github上官方的README文档进行编译。
OpenPose是CMU 开源的一个实时多人关键点检测库( real-time multi-person keypoint detection),包括人体关键点,手部关键点,脸部关键点检测,以及姿态估计。
##1.我的环境配置##
系统: Ubuntu 16.04
CUDA版本:cuda_8.0.61_375.26_linux.run
cuDNN版本:cudnn-8.0-linux-x64-v5.1.tgz
OpenCV:3.3.0
GPU型号:NVIDIA GTX 1080
OpenPose版本:1.1.0 Jul 2017
##2.安装依赖##
(已经安装过caffe的小伙伴可以不看这一步)
OpenPose相当于对caffe做了一些修改的定制版caffe,所以依赖的安装参考caffe的安装就可以了。
Ubuntu 16.04 安装配置Caffe 图文详解 :http://www.linuxidc.com/Linux/2016-12/138870.htm
包括:依赖包,nividia驱动,CUDA,cuDNN
##3.OpenPose相关下载##
OpenPose下载:https://github.com/CMU-Perceptual-Computing-Lab/openpose
相关paper:[CVPR2017] Realtime Multi-Person 2D Pose Estimation using Part Affinity Fields
下载链接:https://arxiv.org/abs/1611.08050
##4.OpenPose安装##
参考自:https://github.com/CMU-Perceptual-Computing-Lab/openpose/blob/master/doc/installation.md#installation---script-compilation
因为我以前安装caffe的时候已经手动安装了OpenCV 3.3.0,所以我没有选择脚本安装,而是选的手动安装。如果没有安装OpenCV的可以直接选择脚本安装,OpenCV的非编译安装方式也很简单:sudo apt-get install libopencv-dev。
以下我将主要介绍手动安装方式。
###安装方式1:脚本安装##
Installation - Script Compilation
Highly important: This script only works with CUDA 8 and Ubuntu 14 or 16. Otherwise, see doc/installation_cmake.md or Installation - Manual Compilation.
Required: CUDA, cuDNN, OpenCV and Atlas must be already installed on your machine.
CUDA must be installed. You should reboot your machine after installing CUDA.
cuDNN: Once you have downloaded it, just unzip it and copy (merge) the contents on the CUDA folder, e.g. /usr/local/cuda-8.0/. Note: We found OpenPose working ~10% faster with cuDNN 5.1 compared to cuDNN 6. Otherwise, check Compiling without cuDNN.
OpenCV can be installed with apt-get install libopencv-dev. If you have compiled OpenCV 3 by your own, follow Manual Compilation. After both Makefile.config files have been generated, edit them and uncomment the line # OPENCV_VERSION := 3. You might alternatively modify all Makefile.config.UbuntuXX files and then run the scripts in step 2.
In addition, OpenCV 3 does not incorporate the opencv_contrib module by default. Assuming you have OpenCV 3 compiled with the contrib module and you want to use it, append opencv_contrib at the end of the line LIBRARIES += opencv_core opencv_highgui opencv_imgproc in the Makefile file.
Atlas can be installed with sudo apt-get install libatlas-base-dev. Instead of Atlas, you can use OpenBLAS or Intel MKL by modifying the line BLAS := atlas in the same way as previosuly mentioned for the OpenCV version selection.
Build Caffe & the OpenPose library + download the required Caffe models for Ubuntu 14.04 or 16.04 (auto-detected for the script) and CUDA 8:
bash ./ubuntu/install_caffe_and_openpose_if_cuda8.sh
###安装方式2:手动安装###
首先是安装caffe:
进入 3rdparty/caffe/文件夹
cd 3rdparty/caffe/
根据你的系统和cuda版本选择以下命令
我的系统是16.04,cuda是8.0,所以选的cp Makefile.config.Ubuntu16_cuda8.example Makefile.config
cp Makefile.config.Ubuntu14_cuda7.example Makefile.config # Ubuntu 14, cuda 7
cp Makefile.config.Ubuntu14_cuda8.example Makefile.config # Ubuntu 14, cuda 8
cp Makefile.config.Ubuntu16_cuda7.example Makefile.config # Ubuntu 16, cuda 7
cp Makefile.config.Ubuntu16_cuda8.example Makefile.config # Ubuntu 16, cuda 8
如果你的OpenCV是3版本,需要将Makefile.config里的 OPENCV_VERSION := 3的注释去掉。
# Uncomment if you're using OpenCV 3
 OPENCV_VERSION := 3
编译caffe,
#-j后面的数字写成你cpu的核数即可
make all -j4 && make distribute -j4
接下来是安装OpenPose:
进到OpenPose的主目录下的Model文件夹,并执行getModels.sh下载caffe的模型文件
cd models
bash ./getModels.sh
下载完成后回到OpenPose主目录,和安装caffe的时候一样,将ubuntu目录下的与你系统对应的Makefile.config.example 文件复制到主目录下。如果你用的OpenCV 3版本,这里同样要将Makefile.config里的 OPENCV_VERSION := 3的注释去掉。
意思就是说前面编译caffe的时候对Makefile.config做了什么修改,这里要做出同样的修改,否则编译可能会出错。
cd ..
cp ubuntu/Makefile.config.Ubuntu16_cuda8.example Makefile.config
make all -j4
顺利的话,到这里就安装好了。如果出错了,先找到问题,make clean 一下之后再make all即可。
想卸载的话直接删掉OpenPose目录即可。
##5.OpenPose测试##
视频测试:
# human pose
./build/examples/openpose/openpose.bin --video examples/media/video.avi
# human pose with face and hands
./build/examples/openpose/openpose.bin --video examples/media/video.avi --face --hand
摄像头测试:
# human pose
./build/examples/openpose/openpose.bin
# human pose with face and hands
./build/examples/openpose/openpose.bin --face --hand
图片测试:
# human pose
./build/examples/openpose/openpose.bin --image_dir examples/media/
# human pose with face and hands
./build/examples/openpose/openpose.bin --image_dir examples/media/ --face --hand
如果运行报错,在命令前加上sudo再尝试。
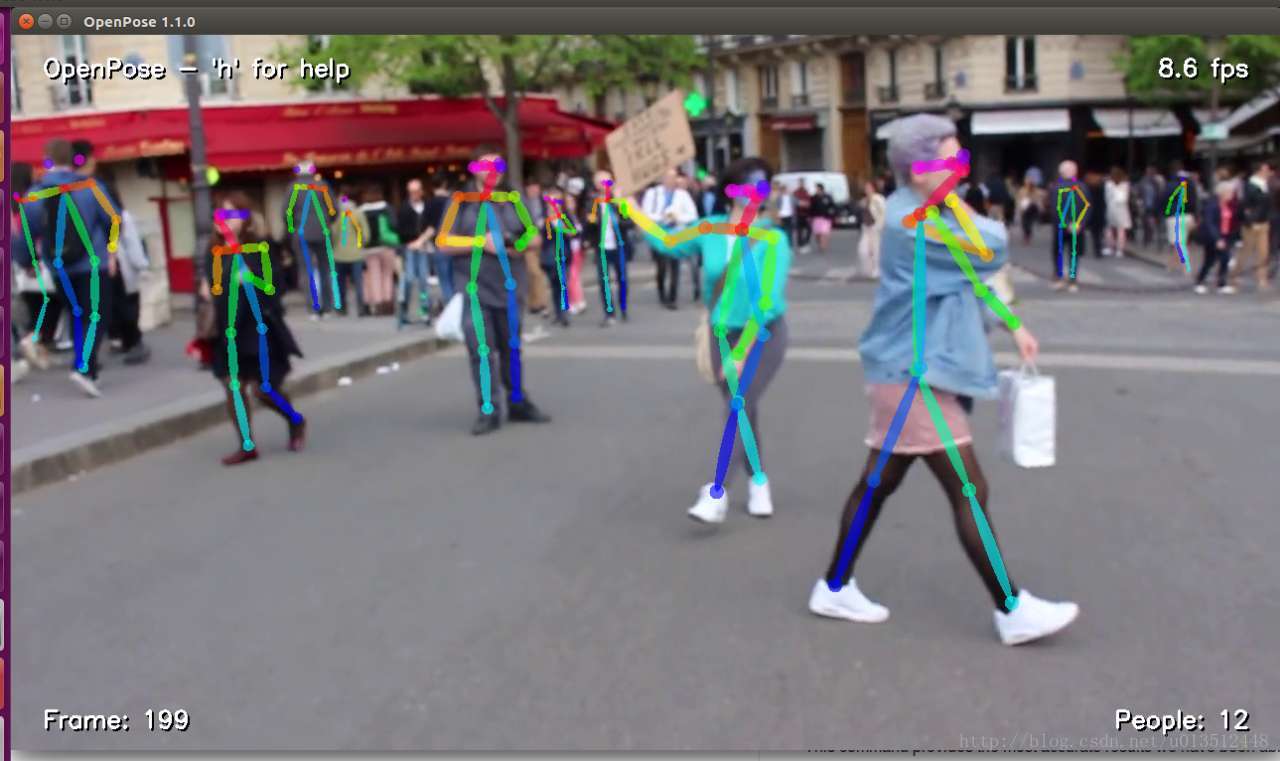
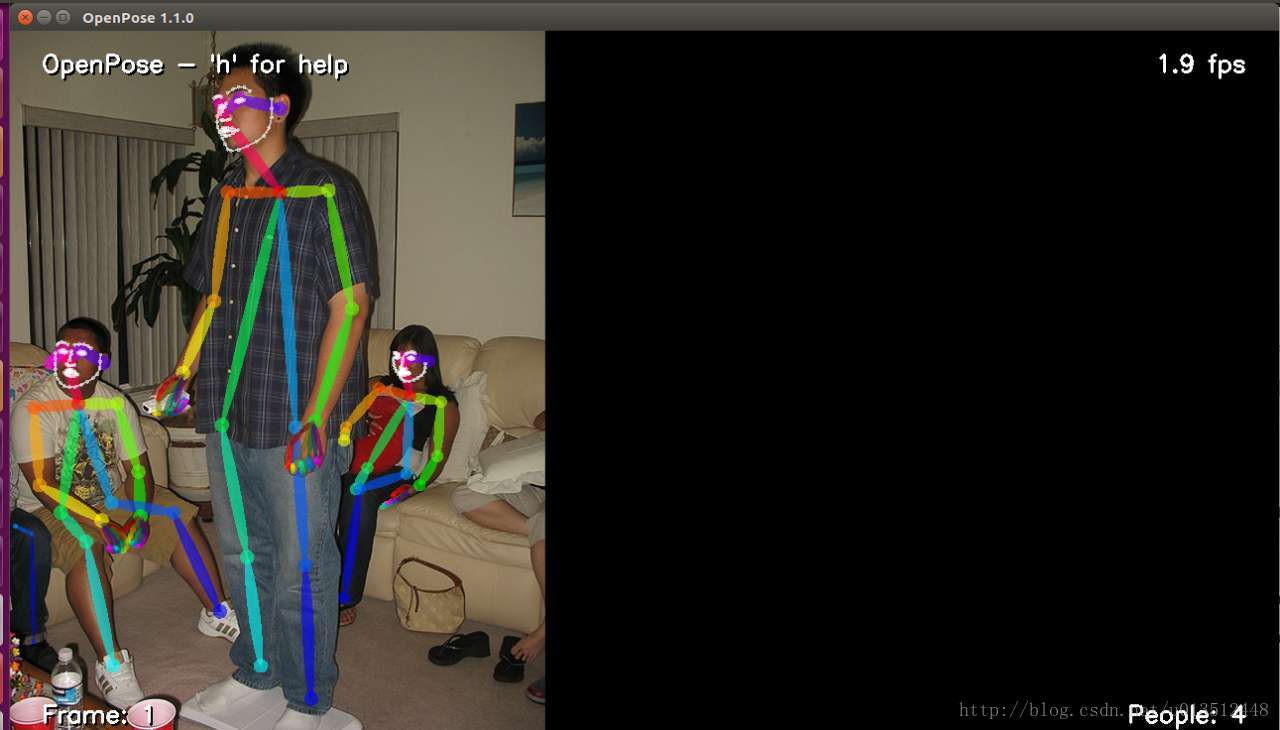
下面是视频和图片的测试结果: