导语:本文主要聚焦在如何使用 Yocto 在 Ubuntu 上创建一个最小化的 Linux 发行版。Yocto 项目在嵌入式 Linux 的世界非常著名,这是因为它用起来非常灵活、方便。Yocto 的目标是为嵌入式软硬件开发商创建自己的 Linux 发行版。本文我们将会创建一个可以运行在 QEMU 上的最小化的 Linux,并且在 QEMU 上实际运行。
开发机注意:
a、最少 4-6 GB 内存
b、最新版的 Ubuntu 系统(本文使用了 16.04 LTS)
c、磁盘剩余空间至少 60-80 GB
d、在创建 Linux 发行版之前先安装下面的软件包
e、下载最新的 Yocto(Poky 是其最小开发环境)稳定分支
f、在使用yocto时使用普通账号(非root)
详细步骤
1、Ubuntu修改apt-get源,首先备份系统自带apt-get源配置文件/etc/apt/sources.list
cp /etc/apt/sources.list /etc/apt/sources.list.bak
2、编辑源配置文件/etc/apt/sources.list,替换内容为:
#阿里云源
deb http://mirrors.aliyun.com/ubuntu/ trusty main restricted universe multiverse
deb http://mirrors.aliyun.com/ubuntu/ trusty-security main restricted universe multiverse
deb http://mirrors.aliyun.com/ubuntu/ trusty-updates main restricted universe multiverse
deb http://mirrors.aliyun.com/ubuntu/ trusty-proposed main restricted universe multiverse
deb http://mirrors.aliyun.com/ubuntu/ trusty-backports main restricted universe multiverse
deb-src http://mirrors.aliyun.com/ubuntu/ trusty main restricted universe multiverse
deb-src http://mirrors.aliyun.com/ubuntu/ trusty-security main restricted universe multiverse
deb-src http://mirrors.aliyun.com/ubuntu/ trusty-updates main restricted universe multiverse
deb-src http://mirrors.aliyun.com/ubuntu/ trusty-proposed main restricted universe multiverse
deb-src http://mirrors.aliyun.com/ubuntu/ trusty-backports main restricted universe multiverse
#清华大学源
deb http://mirrors.tuna.tsinghua.edu.cn/ubuntu/ xenial main restricted
deb http://mirrors.tuna.tsinghua.edu.cn/ubuntu/ xenial-updates main restricted
deb http://mirrors.tuna.tsinghua.edu.cn/ubuntu/ xenial universe
deb http://mirrors.tuna.tsinghua.edu.cn/ubuntu/ xenial-updates universe
deb http://mirrors.tuna.tsinghua.edu.cn/ubuntu/ xenial multiverse
deb http://mirrors.tuna.tsinghua.edu.cn/ubuntu/ xenial-updates multiverse
deb http://mirrors.tuna.tsinghua.edu.cn/ubuntu/ xenial-backports main restricted universe multiverse
deb http://mirrors.tuna.tsinghua.edu.cn/ubuntu/ xenial-security main restricted
deb http://mirrors.tuna.tsinghua.edu.cn/ubuntu/ xenial-security universe
deb http://mirrors.tuna.tsinghua.edu.cn/ubuntu/ xenial-security multiverse
3、更新测试一下
apt-get update4、安装相关工具
apt-get install wget git-core unzip make gcc g++ build-essential subversion sed autoconf automake texi2html texinfo coreutils diffstat python-pysqlite2 docbook-utils libsdl1.2-dev libxml-parser-perl libgl1-mesa-dev libglu1-mesa-dev xsltproc desktop-file-utils chrpath groff libtool xterm gawk fop5、下载poky(创建一个工作目录,下载poky)
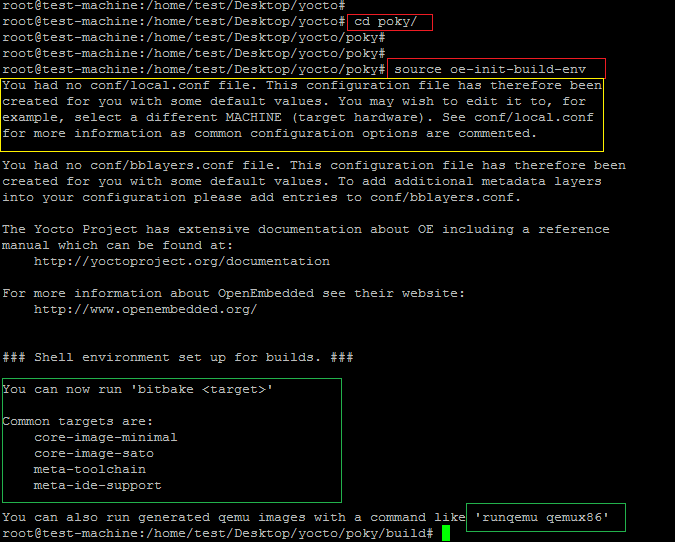
git clone git://git.yoctoproject.org/poky.git6、下载完成之后进入 poky目录,然后运行下面的命令为 Yocto 开发环境设置(设置/导出)一些环境变量。
source oe-init-build-env
或者
. ./oe-init-build-env
如下所示,在运行了 open embedded (oe) 的构建环境脚本之后,终端里的路径会自动切换到 build 目录,以便进行之后行发行版的的配置和构建。
7、进入conf目录,修改配置文件 local.conf。这是 Yocto 用来设置目标机器细节和 SDK 的目标架构的配置文件。
如下所示,放开下列注释。
#注释掉其它#MACHINE ?= 只保留下面一行
MACHINE ?= "qemux86-64"
#解开下列注释
DL_DIR ?= "${TOPDIR}/downloads"
SSTATE_DIR ?= "${TOPDIR}/sstate-cache"
TMPDIR ?= "${TOPDIR}/tmp"
PACKAGE_CLASSES ?= "package_rpm"
SDKMACHINE ?= "i686"
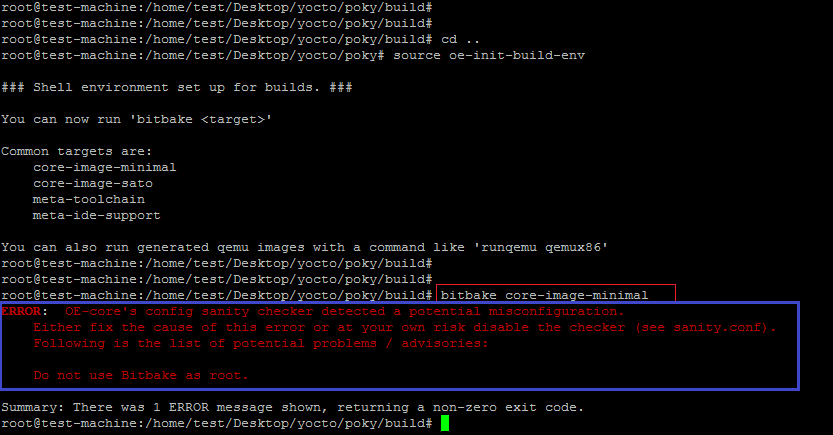
EXTRA_IMAGE_FEATURES ?= "debug-tweaks"8、修改好配置之后,开始编译构建(运行下面命令,这一过程可能会报错,注意检查磁盘空间,另外不能使用root用户)
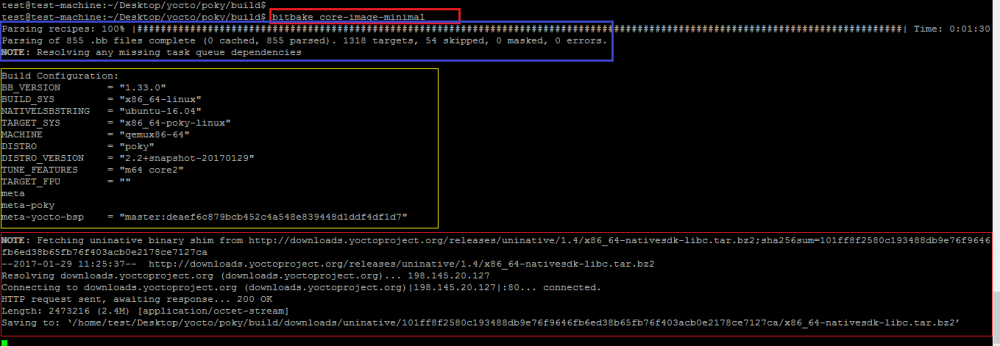
bitbake core-image-minimal失败提示不能使用root用户
正常编译会有进度条,最后成功也有相应的信息
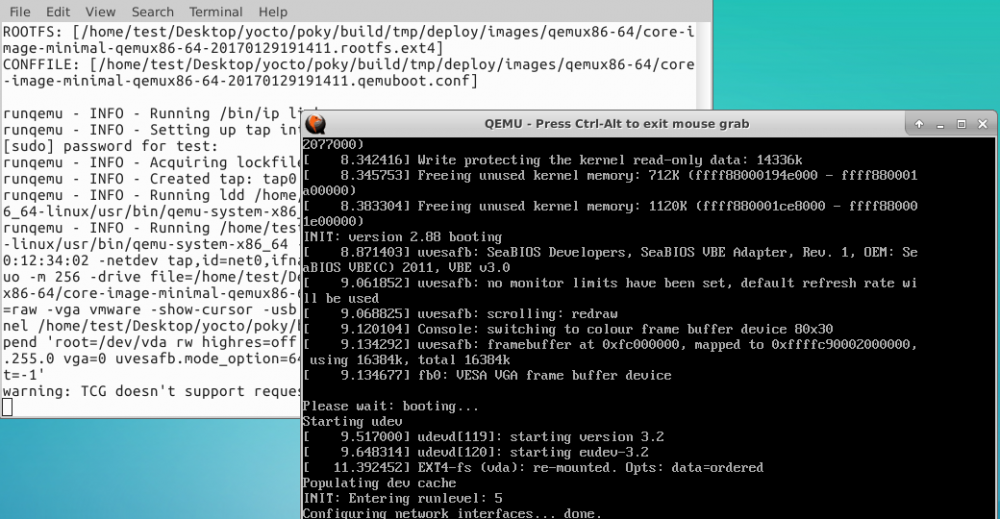
编译好的新镜像位于 build/tmp/deploy/images/qemux86-64
9、运行编译好的发行版linux
runqemu qemux86-64会弹出一个信的终端窗口,这个就是刚刚编译好的linux(下图黑色窗口)
参考资料:
ubuntu镜像修改:https://www.cnblogs.com/scotth/p/6533397.html
yocto操作:https://www.linuxprobe.com/ubuntu-yocto-linux.html
yocto介绍:https://blog.csdn.net/yanghanxing110/article/details/77737471