文章目录
一、maven 插件 springloaded
1.1、添加依赖
在 spring-boot-maven-plugin 插件配置中添加 springloaded 依赖。
<build>
    <plugins>
        <plugin>
            <groupId>org.springframework.boot</groupId>
            <artifactId>spring-boot-maven-plugin</artifactId>
            <dependencies>
                <dependency>
                    <groupId>org.springframework</groupId>
                    <artifactId>springloaded</artifactId>
                    <version>1.2.5.RELEASE</version>
                </dependency>
            </dependencies>
        </plugin>
    </plugins>
</build>
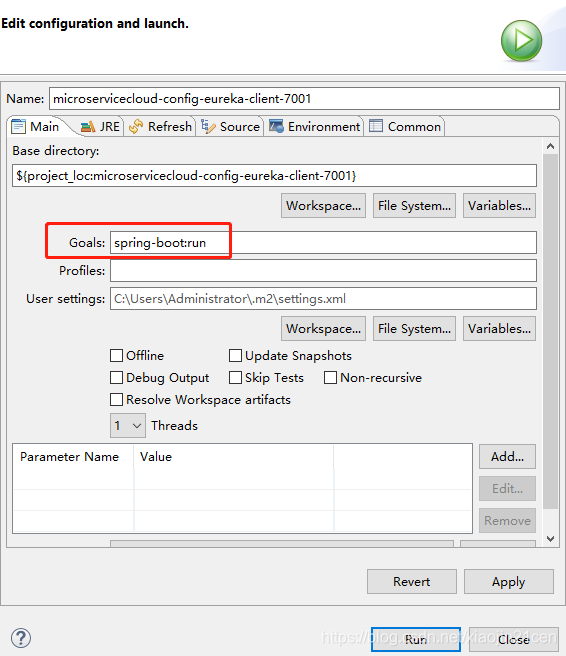
1.2、启动
mvn spring-boot:run
必须通过此命令启动应用, 修改代码或页面才会更新。
操作步骤如下:
(a)、选中工程,右键操作如图所示:
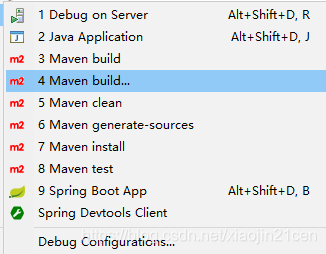
(b)、输入 spring-boot:run 命令:
1.3、注意事项:
-
此方式 只对
mvn spring-boot:run命令启动的应用有效,而对直接运行 SpringApplication.java 启动应用无效 。 -
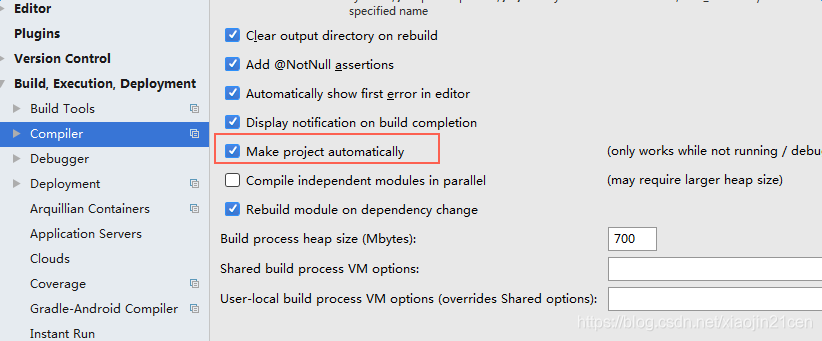
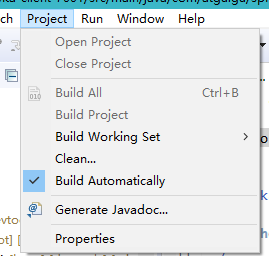
如果发现没有热部署效果,则需要检查 IDE 有没有打开自动编译:
Idea 配置的设置:
eclipse 的设置:
-
如果使用 Thymeleaf 模板引擎,需要把模板默认缓存设置为 false
在 application.properties 中添加:
#禁止thymeleaf缓存(建议:开发环境设置为false,生成环境设置为true )
spring.thymeleaf.cache=false
二、 依赖 spring-boot-devtools 热部署模块
2.1、添加依赖
pom.xml 添加依赖:
<!-- 热部署模块 -->
<dependency>
    <groupId>org.springframework.boot</groupId>
    <artifactId>spring-boot-devtools</artifactId>
    <optional>true</optional>    <!-- 这个需要为 true 热部署才有效 -->
</dependency>
2.2、启动
通过项目主程序 SpringApplication 入口启动。修改文件后,自动编译加载生效。