最近一段时间重新学习一边SpringCloud(有半年不用了),这里简单记录一下。
我用的是IntelliJ IDEA开发工具, SpringBoot的版本是2.1.3.RELEASE。
1. 构建Maven项目
整个的SpringCloud的项目是在Maven项目中的,这个Maven只做容纳其他项目使用, 比如后面Fegin/Config/Zipkin等项目。
用IntelliJ IDEA工具, File->Project->spring Initializr, 然后点击next, 填写Group和Artifact等信息.
比如我填写的GroupId是com.xum, ArtifactId是demo, 然后next, 在这里我们什么也不选择,再次点击next,
最后选择存放位置,然后Finshed.
把生成pom.xml改成如下(因为这个只是做存放项目使用, 还要把这个src文件也删除了)
<?xml version="1.0" encoding="UTF-8"?>
<project xmlns="http://maven.apache.org/POM/4.0.0"
         xmlns:xsi="http://www.w3.org/2001/XMLSchema-instance"
         xsi:schemaLocation="http://maven.apache.org/POM/4.0.0 http://maven.apache.org/xsd/maven-4.0.0.xsd">
    <modelVersion>4.0.0</modelVersion>

    <groupId>com.xum</groupId>
    <artifactId>demo</artifactId>
    <version>1.0-SNAPSHOT</version>

</project>
2. 构建Eureka-Server项目
在我们生成的Demo项目上右键点击New->Module->spring Initializr, 然后next, 填写Group和Artifact等信息,
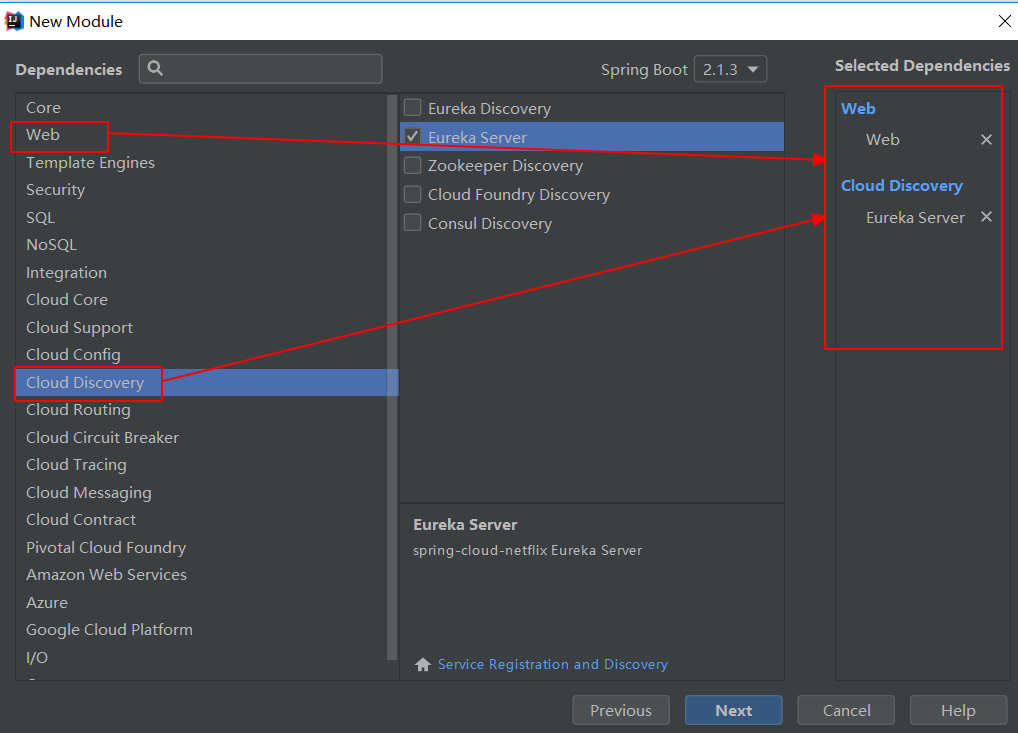
这里Artifact填写eureka-server,再次next, 如下图
选择Web下的web和Cloud Discovery下的Eureka Server.
生成的pom.xml文件如下
<?xml version="1.0" encoding="UTF-8"?>
<project xmlns="http://maven.apache.org/POM/4.0.0" xmlns:xsi="http://www.w3.org/2001/XMLSchema-instance"
         xsi:schemaLocation="http://maven.apache.org/POM/4.0.0 http://maven.apache.org/xsd/maven-4.0.0.xsd">
    <modelVersion>4.0.0</modelVersion>
    <parent>
        <groupId>org.springframework.boot</groupId>
        <artifactId>spring-boot-starter-parent</artifactId>
        <version>2.1.3.RELEASE</version>
        <relativePath/> <!-- lookup parent from repository -->
    </parent>
    <groupId>com.xum</groupId>
    <artifactId>eureka-server</artifactId>
    <version>0.0.1-SNAPSHOT</version>
    <name>eureka-server</name>
    <description>Demo project for Spring Boot</description>

    <properties>
        <project.build.sourceEncoding>UTF-8</project.build.sourceEncoding>
        <project.reporting.outputEncoding>UTF-8</project.reporting.outputEncoding>
        <java.version>1.8</java.version>
        <spring-cloud.version>Greenwich.RELEASE</spring-cloud.version>
    </properties>

    <dependencies>
        <dependency>
            <groupId>org.springframework.cloud</groupId>
            <artifactId>spring-cloud-starter-netflix-eureka-server</artifactId>
        </dependency>
        <dependency>
            <groupId>org.springframework.boot</groupId>
            <artifactId>spring-boot-starter-actuator</artifactId>
        </dependency>
        <dependency>
            <groupId>org.springframework.boot</groupId>
            <artifactId>spring-boot-starter-test</artifactId>
            <scope>test</scope>
        </dependency>
    </dependencies>

    <dependencyManagement>
        <dependencies>
            <dependency>
                <groupId>org.springframework.cloud</groupId>
                <artifactId>spring-cloud-dependencies</artifactId>
                <version>${spring-cloud.version}</version>
                <type>pom</type>
                <scope>import</scope>
            </dependency>
        </dependencies>
    </dependencyManagement>

    <build>
        <plugins>
            <plugin>
                <groupId>org.springframework.boot</groupId>
                <artifactId>spring-boot-maven-plugin</artifactId>
            </plugin>
        </plugins>
    </build>

    <repositories>
        <repository>
            <id>spring-milestones</id>
            <name>Spring Milestones</name>
            <url>https://repo.spring.io/milestone</url>
        </repository>
    </repositories>

</project>
然后在src->main->resources下新建application.yml文件,把其他的都删除, 内容如下
server:
  port: 8761
eureka:
  instance:
    hostname: localhost
  client:
    registerWithEureka: false
    fetchRegistry: false
    serviceUrl:
      defaultZone: http://${eureka.instance.hostname}:${server.port}/eureka/
最后在EurekaServerApplication 上面添加@EnableEurekaServer这个注解
package com.xum.eurekaserver;

import org.springframework.boot.SpringApplication;
import org.springframework.boot.autoconfigure.SpringBootApplication;
import org.springframework.cloud.netflix.eureka.server.EnableEurekaServer;

@EnableEurekaServer
@SpringBootApplication
public class EurekaServerApplication {

    public static void main(String[] args) {
        SpringApplication.run(EurekaServerApplication.class, args);
    }

}
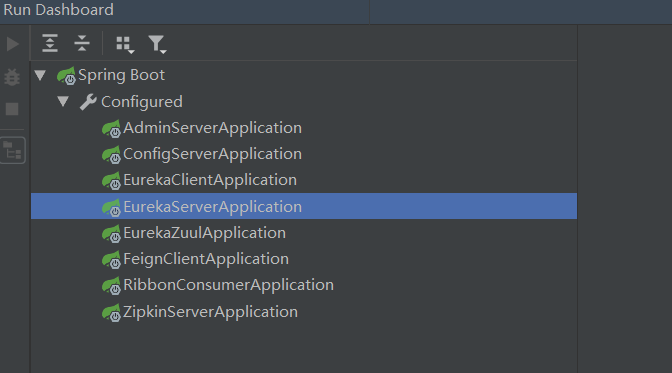
通过Run DashBoard运行eureka-server
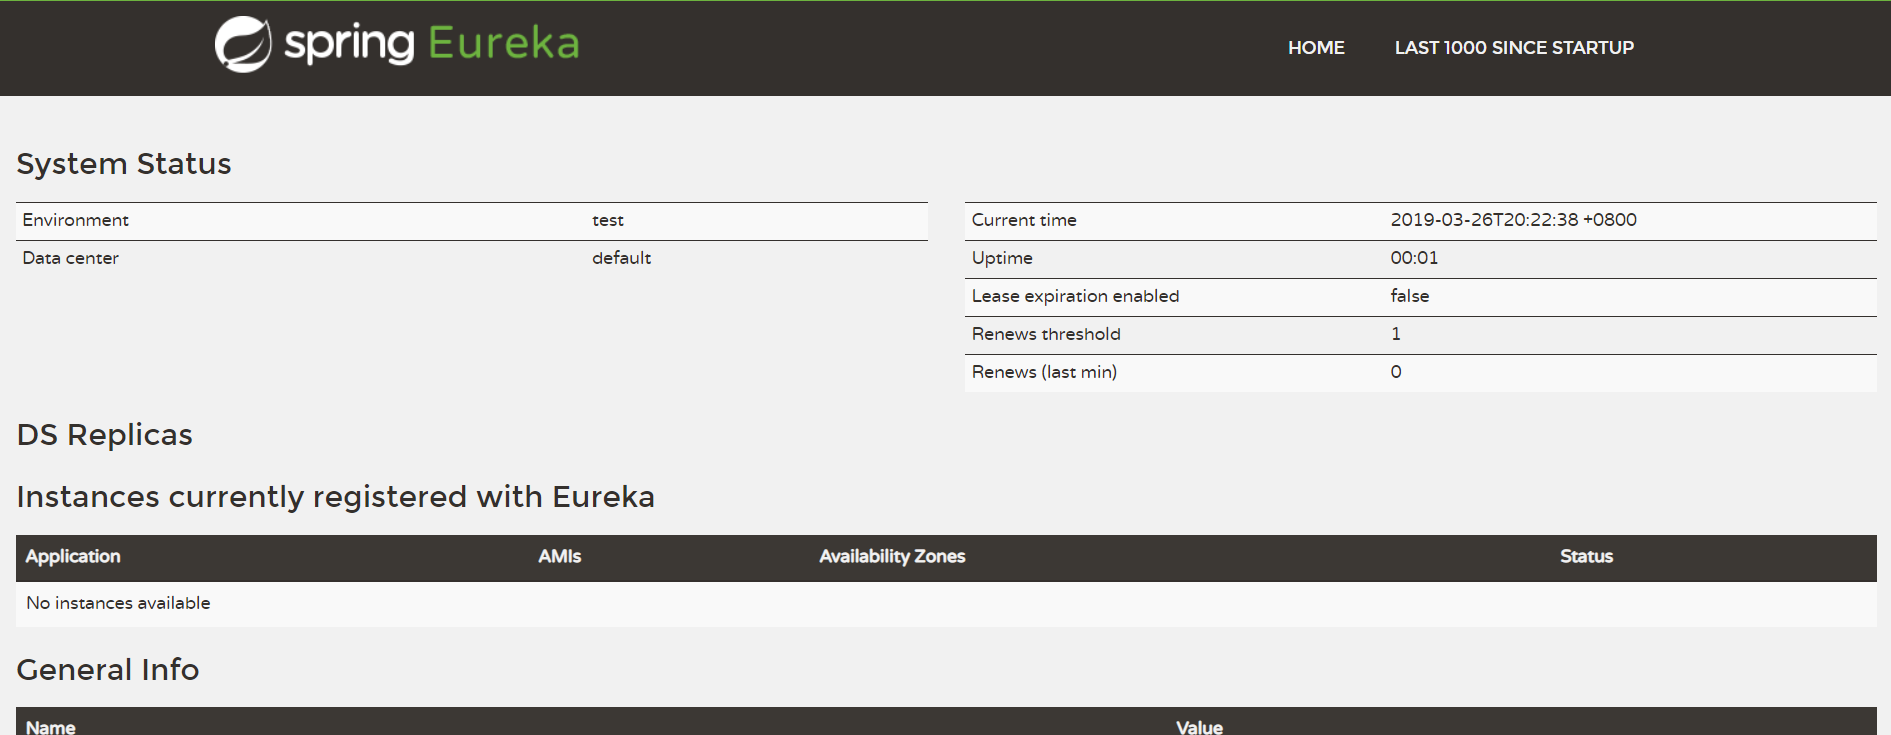
运行成功以后,用浏览器打开http://localhost:8761, 显示如下,说明eureka-server搭建成功.
下一节将如何构建eureka-client.