专题系列分类:玩转SpringBoot2.x系列教程
SpringBoot 为我们提供自动配置相关操作,SpringBoot 大量starter依赖就是通过自动配置来实现的。我在上一篇博客 玩转springboot2.x 之自定义HttpClient start依赖 中其实已经介绍如何进行操作,今天我们主要介绍一下不通过外部依赖 在我们SpringBoot项目内定义自动配置。我们还是拿HttpClient 的自动配置为案例来介绍。
SpringBoot 项目内定义自动配置
默认进行自动配置方式
创建SpringBoot项目 首先引入 httpClient 依赖
		<dependency>
			<groupId>org.apache.httpcomponents</groupId>
			<artifactId>httpclient</artifactId>
		</dependency>
我们无需在引入自动配置依赖 因为springboot项目默认提供了
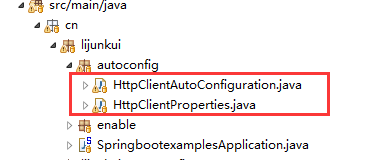
属性配置类和自动配置类和玩转springboot2.x 之自定义HttpClient start依赖 内容一模一样我就不在进行阐述了,需要查看代码请移步 玩转springboot2.x 之自定义HttpClient start依赖 。我想说的是我们在SpringBootApplication 启动类包含的包内定义 属性配置类和自动配置类 就无需定义spring.factories 来配置配置类的路径了。
具体目录如下:
如果我们自动配置类和属性配置类在SpringbootexamplesApplication 包外如下图:

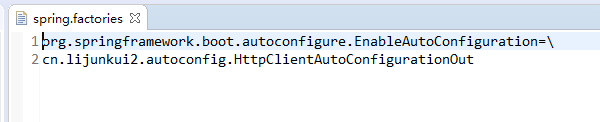
我们就需要在resource 配置 spring.factories 指定自动配置类路径才会生效。
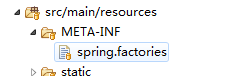
spring.factories内容如下图:
手动进行自动配置方式
如果我们的属性配置类和自动配置类定义在启动类的外部,我们也可以不定义 spring.factories 指定自动配置类路径。通过自定义 @EnableXXX 注解方式 来使我们的自动配置生效。
首先我们先定义 @EnableHttpClient 注解 并在 该注解上声明@Import(HttpClientAutoConfigurationOut.class) 该注解表示将HttpClientAutoConfigurationOut自动配置引入Spring 中。
@EnableHttpClient 注解具体内容如下:
package cn.lijunkui.enable;

import java.lang.annotation.ElementType;
import java.lang.annotation.Retention;
import java.lang.annotation.RetentionPolicy;
import java.lang.annotation.Target;

import org.springframework.context.annotation.Import;

import cn.lijunkui2.autoconfig.HttpClientAutoConfigurationOut;

@Target(value = { ElementType.TYPE })
@Retention(RetentionPolicy.RUNTIME)
@Import(HttpClientAutoConfigurationOut.class)
public @interface EnableHttpClient {

}
定义完注解后 将 @EnableHttpClient注解配置在SpringBoot的启动类上。如下图所示:
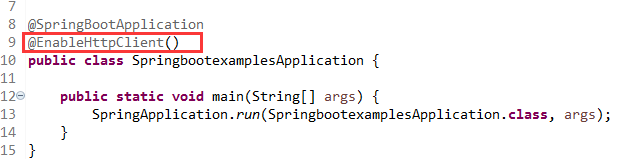
启动SpringBoot项目 httpClient自动配置就会生效。