Http与Https&跨域请求&表单重复提交
一、http与https:
1、http和https的区别:

2、https的优缺点:

3、https原理:
我们都知道 HTTPS 能够加密信息,以免敏感信息被第三方获取,所以很多银行网站或电子邮箱等等安全级别较高的服务都会采用 HTTPS 协议。
客户端在使用 HTTPS 方式与 Web 服务器通信时有以下几个步骤,如图所示。
(1)客户使用 https 的 URL 访问 Web 服务器,要求与 Web 服务器建立 SSL 连接。
(2)Web 服务器收到客户端请求后,会将网站的证书信息(证书中包含公钥)传送一份给客户端。
(3)客户端的浏览器与 Web 服务器开始协商 SSL 连接的安全等级,也就是信息加密的等级。
(4)客户端的浏览器根据双方同意的安全等级,建立会话密钥,然后利用网站的公钥将会话密钥加密,并传送给网站。
(5)Web 服务器利用自己的私钥解密出会话密钥。
(6)Web 服务器利用会话密钥加密与客户端之间的通信。

二、http请求模拟
1、httpClient:
1)、get方式:
            // 创建默认连接
			CloseableHttpClient httpClient = HttpClients.createDefault();
			// 创建get请求
			HttpGet httpGet = new HttpGet("get方式请求地址");
			CloseableHttpResponse response = httpClient.execute(httpGet);
			int code = response.getStatusLine().getStatusCode();
			// 获取状态
			System.out.println("http请求结果:" + code);
			if (code == 200) {
				System.out.println(EntityUtils.toString(response.getEntity()));
				//将string转换html框架
			}
			response.close();
			httpClient.close();
2)、post请求方式:
/**
	 * 发送 post请求访问本地应用并根据传递参数不同返回不同结果
	 */
	static public void post() {
		// 创建默认的httpClient实例.
		CloseableHttpClient httpclient = HttpClients.createDefault();
		// 创建httppost
		HttpPost httppost = new HttpPost("post方式请求地址");
		// 创建参数队列
		List<NameValuePair> formparams = new ArrayList<NameValuePair>();
		formparams.add(new BasicNameValuePair("userName", "yinyuyou"));
		UrlEncodedFormEntity uefEntity;
		try {
			uefEntity = new UrlEncodedFormEntity(formparams, "UTF-8");
			httppost.setEntity(uefEntity);
			System.out.println("executing request " + httppost.getURI());
			CloseableHttpResponse response = httpclient.execute(httppost);
			try {
				HttpEntity entity = response.getEntity();
				if (entity != null) {
					System.out.println("--------------------------------------");
					System.out.println("Response content: " + EntityUtils.toString(entity, "UTF-8"));
					System.out.println("--------------------------------------");
				}
			} finally {
				response.close();
			}
		} catch (ClientProtocolException e) {
			e.printStackTrace();
		} catch (UnsupportedEncodingException e1) {
			e1.printStackTrace();
		} catch (IOException e) {
			e.printStackTrace();
		} finally {
			// 关闭连接,释放资源
			try {
				httpclient.close();
			} catch (IOException e) {
				e.printStackTrace();
			}
		}
	}
3)、pom依赖导入:
 <!-- https://mvnrepository.com/artifact/org.apache.httpcomponents/httpclient -->
    <dependency>
	<groupId>org.apache.httpcomponents</groupId>
	<artifactId>httpclient</artifactId>
	<version>4.3.5</version>
    </dependency>
2、http请求工具postman:
3、Spring模拟HTTP请求—RestTemplate:
4、前端ajax请求:
$.ajax({
			type : 'post',
			dataType : "text",
			url : "http://a.a.com/a/FromUserServlet",
			data : "userName=yinyuyou&userAge=19",
			success : function(msg) {
				alert(msg);
			}
		});
三、长连接和短连接:
1、介绍:
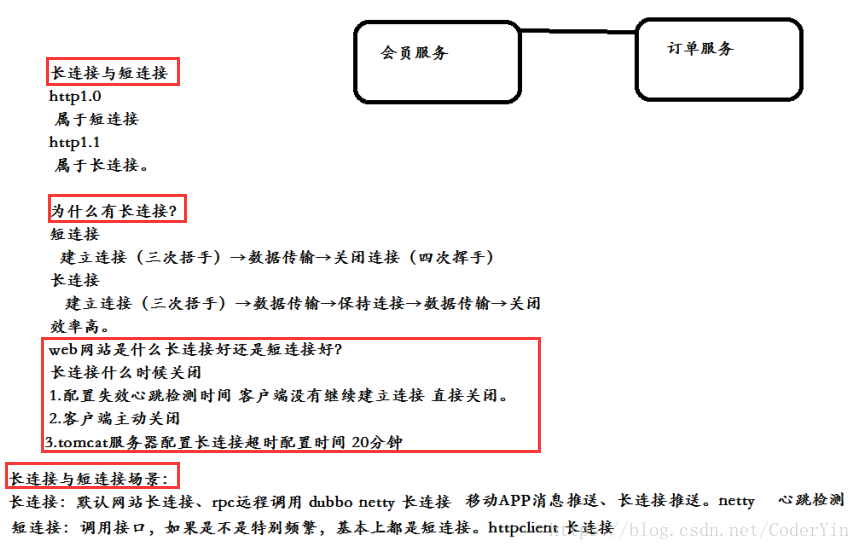
在HTTP/1.0中,默认使用的是短连接:也就是说,浏览器和服务器每进行一次HTTP操作,就建立一次连接,但任务结束就中断连接。如果客户端浏览器访问的某个HTML或其他类型的 Web页中包含有其他的Web资源,如JavaScript文件、图像文件、CSS文件等;当浏览器每遇到这样一个Web资源,就会建立一个HTTP会话。
从 HTTP/1.1起,默认使用长连接:用以保持连接特性。使用长连接的HTTP协议,会在响应头有加入这行代码:Connection:keep-alive
在使用长连接的情况下,当一个网页打开完成后,客户端和服务器之间用于传输HTTP数据的 TCP连接不会关闭,如果客户端再次访问这个服务器上的网页,会继续使用这一条已经建立的连接。Keep-Alive不会永久保持连接,它有一个保持时间,可以在不同的服务器软件(如Apache)中设定这个时间。实现长连接要客户端和服务端都支持长连接。
HTTP协议的长连接和短连接,实质上是TCP协议的长连接和短连接。
火狐浏览器查看每个接口的http协议和长短连接情况:

四、跨域请求
1、跨域介绍:
跨域介绍(针对ajax请求):跨域其实是浏览器安全机制请求访问的域名与ajax请求地址不一致,浏览器会直接无法返回请求结果。也就是说在a.a.com项目中访问b.b.com接口会产生跨域问题。
跨域原因产生:在当前域名请求网站中,默认不允许通过ajax请求发送其他域名。
报错信息:

2、解决方法:
1)使用后台response添加header:
protected void doGet(HttpServletRequest req, HttpServletResponse resp) throws ServletException, IOException {
		String userName = req.getParameter("userName");
		JSONObject jsonObject = new JSONObject();
		jsonObject.put("userName", userName);
		resp.getWriter().println(jsonObject.toJSONString());
		// 使用后台response添加header:
		resp.setHeader("Access-Control-Allow-Origin", "*");
	}
2)使用JSONP:
前台ajax请求代码:
        $.ajax({
			type : "GET",
			async : false,
			url : "http://a.a.com/a/FromServlet?userName=131420",
            //dataType类型一定要是jsonp类型的
			dataType : "jsonp",
            //服务端用于接收callback调用的function名的参数
			jsonp : "jsonpCallback",
			success : function(data) {
				alert(data["userName"]);
			},
			error : function() {
				alert('fail');
			}
		});
后台servlet代码:
    @Override
protected void doGet(HttpServletRequest req, HttpServletResponse resp) throws
ServletException, IOException {
		String userName = req.getParameter("userName");
		JSONObject jsonObject = new JSONObject();
		jsonObject.put("userName", userName);
        //接受前台的jsonpCallback参数
		String jsonpCallback = req.getParameter("jsonpCallback");
		resp.getWriter().println(jsonpCallback+"("+jsonObject.toJSONString()+")");
	}
请求地址url:

总结:JSONP只支持get请求不支持post请求!
jsonp实现原理博客推荐:http://www.cnblogs.com/wqhwe/p/5816941.html
3)内部通过httpclient转发:
实现步骤:ajax请求本网址后台接口,后台接口再访问目标网址接口返回结果给前台。
前台代码:
$(document).ready(function() {
		$.ajax({
			type : "GET",
			async : false,
			url : "http://b.b.com/b/FromServlet?userName=1314520",
			dataType : "json",
			success : function(data) {
				alert(data["userName"]);
			},
			error : function() {
				alert('fail');
			}
		});

	});
后台代码1(后台转发代码):
@Override
	protected void doGet(HttpServletRequest req, HttpServletResponse resp) throws ServletException, IOException {
           this.doPost(req, resp);
	}

	@Override
	protected void doPost(HttpServletRequest req, HttpServletResponse resp) throws ServletException, IOException {

		// 创建默认连接
		CloseableHttpClient httpClient = HttpClients.createDefault();
		// 创建get请求
		HttpGet httpGet = new HttpGet("http://a.a.com/a/FromServlet?userName=" + req.getParameter("userName"));
		CloseableHttpResponse response = httpClient.execute(httpGet);
		int code = response.getStatusLine().getStatusCode();
		// 获取状态
		System.out.println("http请求结果:" + code);
		if (code == 200) {
			String result = EntityUtils.toString(response.getEntity());
			System.out.println(result);
			resp.getWriter().print(result);
			response.close();
			httpClient.close();
			// 将string转换html框架
		}

	}
后台代码2(目标接口代码):
@Override
	protected void doGet(HttpServletRequest req, HttpServletResponse resp) throws ServletException, IOException {
		String userName = req.getParameter("userName");
		JSONObject jsonObject = new JSONObject();
		jsonObject.put("userName", userName);
		resp.getWriter().println(jsonObject.toJSONString());
	}
4)使用接口网关:
使用nginx转发。
5)使用SpringCloud网关
五、防止表单重复提交
1、问题产生:
网络延迟、页面刷新、点击后退(重写加载)、回退
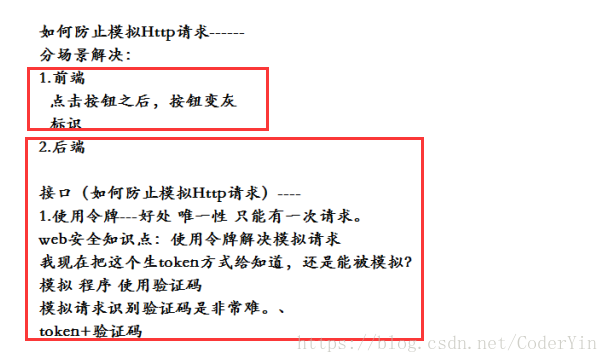
2、解决方法:使用token令牌
token令牌操作步骤:1、在打开表单的时候进入后台生成一个唯一的koken然后转发到表单提交页面中去(设置一个type为disable的input输入框),在表单提交的时候再次将改input框中的token拿出然后和session中进行比较,比较成功后就删除这样就可以从根本上防止表单重复提交。
代码介绍:
<form action="${pageContext.request.contextPath}/DoFormServlet"
		method="post" onsubmit="return isFlag()">
	<input type="hidden" value="${sessionToken}" name="sessionToken">
	用户名:<input type="text" name="userName">
	<input  on type="submit" value="提交"   id="submit">
	</form>
@Override
protected void doGet(HttpServletRequest req, HttpServletResponse resp) throws ServletException, IOException {
// 生成一个唯一的uuid,存放在session中,其实在真正的项目中生成的令牌也就是token是放在redis中的
String token = UUID.randomUUID().toString();
req.getSession().setAttribute("sessionToken", token);
req.getRequestDispatcher("from.jsp").forward(req, resp);
}@Override
protected void doPost(HttpServletRequest req, HttpServletResponse resp) throws ServletException, IOException {
req.setCharacterEncoding("UTF-8");
if(!isFlag(req)){
resp.getWriter().write("fail");
System.out.println("已经重复提交....");
return;
}
String userName = req.getParameter("userName");
try {
Thread.sleep(300);
} catch (Exception e) {
// TODO: handle exception
}
System.out.println("往数据库插入数据...." + userName);
resp.getWriter().write("success");
}
public boolean isFlag(HttpServletRequest request) {
String token = request.getParameter("sessionToken");
if (StringUtils.isEmpty(token)) {
System.out.println("token为null");
return false;
}
String sessionToken = (String) request.getSession().getAttribute("sessionToken");
if (StringUtils.isEmpty(sessionToken)) {
System.out.println("sessionToken为null,请不要重复提交..");
return false;
}
if (!sessionToken.equals(token)) {
System.out.println("请不要伪造token...sessionToken:" + sessionToken + ",token:" + token);
return false;
}
//删除token
request.getSession().removeAttribute("sessionToken");
return true;
}
六、网页XSS攻击:
1、网络攻击手段:
SQL注入:
XSS攻击(谷歌,360进行拦截,火狐没有拦截):(使用转义进行解决)
CSRF(模拟请求):(token+验证码防止人工重复提价表单)
DOS(压力测试):Nginx
XSS攻击(脚本注入):在A页面通过表单提交数据在B页面进行展示,人为的注入脚本字段从而破坏页面原始的展示内容。
代码介绍:
//表单页面
<form action="${pageContext.request.contextPath}/XssDemo" method="post">
	<input type="text" name="userName"/>
	<input type="submit">
</form>
//后台接受
@Override
	protected void doPost(HttpServletRequest req, HttpServletResponse resp) throws ServletException, IOException {
		String userName = req.getParameter("userName");
		req.setAttribute("userName", userName);
		req.getRequestDispatcher("showUserName.jsp").forward(req, resp);
	}
//数据展示页面
<body>
userName:${userName}
</body>
//如果你在表单页面输入 <script>location.href="https://www.baidu.com"</script> 他会直接跳转到该页面
使用转义进行解决:
//定义一个过滤器
public class XssFilter implements Filter{

	public void init(FilterConfig filterConfig) throws ServletException {

	}

	public void doFilter(ServletRequest request, ServletResponse response, FilterChain chain)
			throws IOException, ServletException {
		System.out.println("xssDofilter.....");
		HttpServletRequest req = (HttpServletRequest) request;
		XssHttpServletRequest xssHttpServletRequest = new XssHttpServletRequest(req);
		//放行
        chain.doFilter(xssHttpServletRequest, response);

	}

	public void destroy() {

	}


}

//定义一个参数处理类
public class XssHttpServletRequest extends HttpServletRequestWrapper{

	private HttpServletRequest request;

	public XssHttpServletRequest(HttpServletRequest request) {
		super(request);
		this.request = request;
	}

	@Override
	public String getParameter(String name) {
		String value = request.getParameter(name);
		System.out.println("没有转换:value"+value);
        //使用该工具类需要导包
		if(!StringUtils.isEmpty(value)) {
			value = StringEscapeUtils.escapeHtml4(value);
			System.out.println("转换过后:value"+value);
		}
		return value;
	}

}

pom文件,工具类需要
<dependency>
			<groupId>org.apache.commons</groupId>
			<artifactId>commons-lang3</artifactId>
			<version>3.4</version>
		</dependency>

//当然你还要在web.xml中进行过滤器定义