版权声明:本文为博主原创文章,未经博主允许不得转载。 https://blog.csdn.net/carson0408/article/details/86240618
Spring Boot生成项目中有一个application.properties的文件,用于定义属性,那么如何在编程时使用这些属性就涉及到属性配置的问题。这里主要讲解两个方法,一种是直接用@Value("$(属性名)")注解来实现,由于有了@SpringBootApplication这个组合注解,可以直接使用@Value即可;另一种方法就是可以将属性与一个Bean关联起来,只需要读取Bean对应的属性即可获取需要的属性。
首先是通过IDEA创建一个spring boot项目。
1.常规属性配置
application.properties
demo.name = Person.java
demo.author = Carson
入口类:
package com.carson.demo;

import org.springframework.beans.factory.annotation.Value;
import org.springframework.boot.SpringApplication;
import org.springframework.boot.autoconfigure.SpringBootApplication;
import org.springframework.web.bind.annotation.RequestMapping;
import org.springframework.web.bind.annotation.RestController;


@RestController
@SpringBootApplication//开启自动配置
public class DemoApplication {
    @Value("${demo.author}")
    private String demoAuthor;

    @Value("${demo.name}")
    private String demoName;

    @RequestMapping("/")
    String index(){
        return "this demo's name is:"+demoName+",and its author is:"+demoAuthor;
    }

    public static void main(String[] args) {
        SpringApplication.run(DemoApplication.class, args);
    }

}
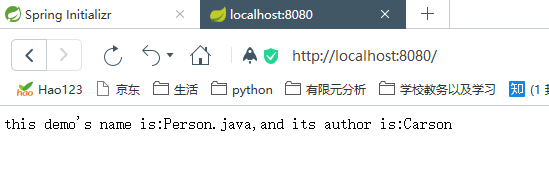
运行之后,在浏览器输入http://localhost:8080,得到如下结果:
虽然这种方式能够便于理解,并且完成属性的配置,但是如果属性多的话,会导致注解的冗余。于是便可以使用Bean的思想,将这些属性包装进一个Bean中。
2.类型安装的配置(基于properties)
Spring Boot中有一个注解@ConfigurationProperties可以直接加载Properties配置文件,且需要在入口类上配置。
Application.properties:
demo.name = Person.java
demo.author = Carson James
类型安全的Bean
package com.carson.demo;

import org.springframework.boot.context.properties.ConfigurationProperties;
import org.springframework.stereotype.Component;

@Component
@ConfigurationProperties(prefix = "demo")
public class DemoSettings {
    private String name;
    private String author;

    public String getAuthor() {
        return author;
    }

    public void setAuthor(String author) {
        this.author = author;
    }

    public String getName() {
        return name;
    }

    public void setName(String name) {
        this.name = name;
    }
}
这个过程会出现如下警告:
扫描二维码关注公众号,回复:
5748835 查看本文章

![]()
这是因为Spring Boot 1.5之后取消了 @ConfigurationProperties的locations属性,所以应当把配置文件放在默认位置,并忽略此警告。
入口类:
package com.carson.demo;

import org.springframework.beans.factory.annotation.Autowired;
import org.springframework.beans.factory.annotation.Value;
import org.springframework.boot.SpringApplication;
import org.springframework.boot.autoconfigure.SpringBootApplication;
import org.springframework.web.bind.annotation.RequestMapping;
import org.springframework.web.bind.annotation.RestController;


@RestController
@SpringBootApplication//开启自动配置
public class DemoApplication {

    @Autowired
    private DemoSettings demoSettings;

    @RequestMapping("/")
    String index(){
        return "this demo's name is:"+demoSettings.getName()+",and its author is:"+demoSettings.getAuthor();
    }

    public static void main(String[] args) {
        SpringApplication.run(DemoApplication.class, args);
    }

}
运行之后,在浏览器输入http://localhost:8080,即可看到如下结果:

以上是两种形式的属性配置,很明显第二者更方便,将属性包装成一个Bean,更符合面向对象的思想。