版权声明:最终版权归YBAidam所有 https://blog.csdn.net/Aidam_Bo/article/details/89097622
Canny一类的边缘检测算法可以根据像素之间的差异,检测出轮廓边界的像素,但它没有将轮廓作为一个整体。所以要将轮廓提起出来,就必须将这些边缘像素组装成轮廓。
OpenCV中有一个很强大的函数,它可以从二值图像中找到轮廓:findContours函数。
有时我们还需要把找到的轮廓画出来,那就要用到函数drawContours了。
findContours函数和那就要用到函数drawContours函数一般配套使用。
#include "opencv2/imgproc.hpp"
#include "opencv2/highgui.hpp"
#include <iostream>
using namespace cv;
using namespace std;
void main()
{
Mat original = imread("test5.jpg");
namedWindow("My original");
imshow("My original", original);
Mat gray = original;
cvtColor(gray, gray, CV_RGB2GRAY);//灰度化
int thresh_size = (100 / 4) * 2 + 1; //自适应二值化阈值
adaptiveThreshold(gray, gray, 255, CV_ADAPTIVE_THRESH_GAUSSIAN_C, CV_THRESH_BINARY_INV, thresh_size, thresh_size / 3);
//morphologyEx(gray, gray, MORPH_OPEN, Mat());//形态学开运算去噪点
imshow("gray", gray);
vector<vector<Point> > contours;
findContours(gray, contours, CV_RETR_EXTERNAL, CV_CHAIN_APPROX_NONE); //找轮廓
vector<vector<Point>> contours1;
for (int i = 0; i < contours.size(); ++i)
{
contours1.push_back(contours[i]);
}
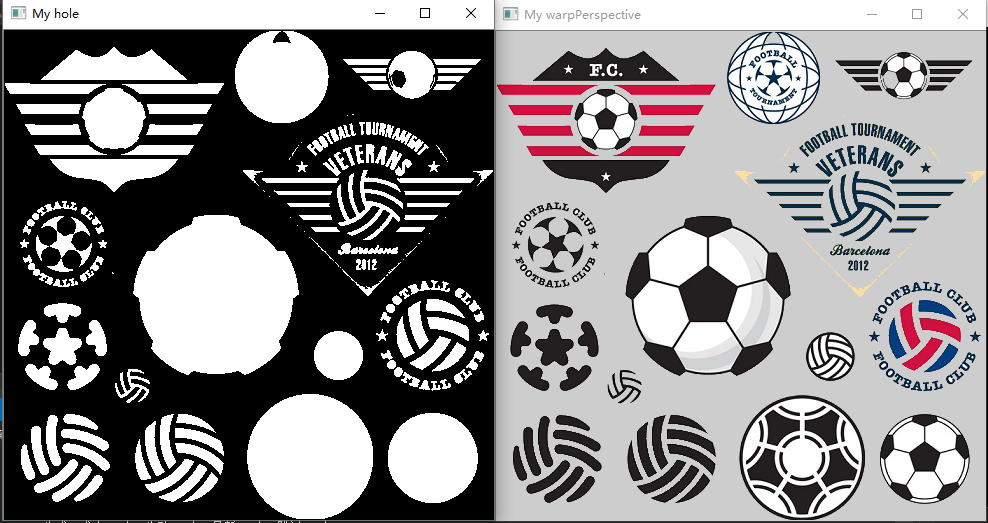
Mat hole(gray.size(), CV_8U, Scalar(0)); //遮罩图层
drawContours(hole, contours1, -1, Scalar(255), CV_FILLED); //在遮罩图层上,用白色像素填充轮廓,得到MASK
namedWindow("My hole");
imshow("My hole", hole);
Mat crop(original.rows, original.cols, CV_8UC3);
original.copyTo(crop, hole);//将原图像拷贝进遮罩图层
namedWindow("My warpPerspective");
imshow("My warpPerspective", crop);
waitKey(0);
}右下角的图就是提取出来的轮廓图,真的是非常精准。不过精准只是因为原图的形状比较简单,如果遇到复杂图片,那情况就不太乐观了。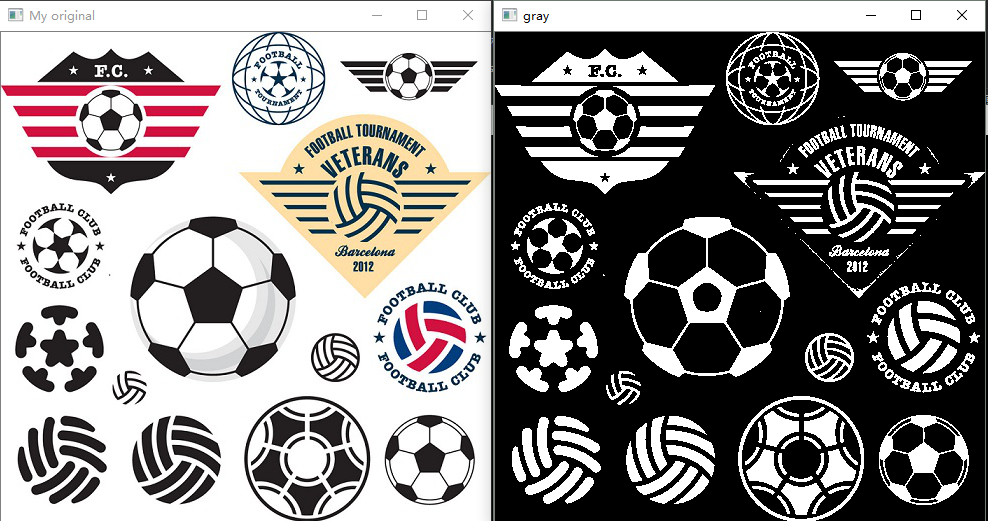
使用多边形把轮廓包围
在实际应用中,常常会有将检测到的轮廓用多边形表示出来的需求。比如在一个全家福中,我想用一个矩形框将我自己的头像框出来,这样就需要这方面的知识了。
OpenCv这方面的函数总结如下:
- 返回指定点集最外部矩形边界:boundingRect()
- 寻找给定的点集可旋转的最小包围矩形:minAreaRect()
- 寻找最小包围圆形:minEnclosingCircle()
- 用椭圆拟合二维点集:fitEllipse()
- 逼近多边形曲线:approxPolyDP()
下面给出这些函数用法的综合案例。
#include "opencv2/highgui/highgui.hpp"
#include "opencv2/imgproc/imgproc.hpp"
#include <iostream>
#include <stdio.h>
#include <stdlib.h>
using namespace cv;
using namespace std;
Mat src; Mat src_gray;
int thresh = 100;
int max_thresh = 255;
RNG rng(12345);
/// 函数声明
void thresh_callback(int, void*);
/** @主函数 */
int main(int argc, char** argv)
{
/// 载入原图像, 返回3通道图像
src = imread("test5.jpg", 1);
/// 转化成灰度图像并进行平滑
cvtColor(src, src_gray, CV_BGR2GRAY);
blur(src_gray, src_gray, Size(3, 3));
/// 创建窗口
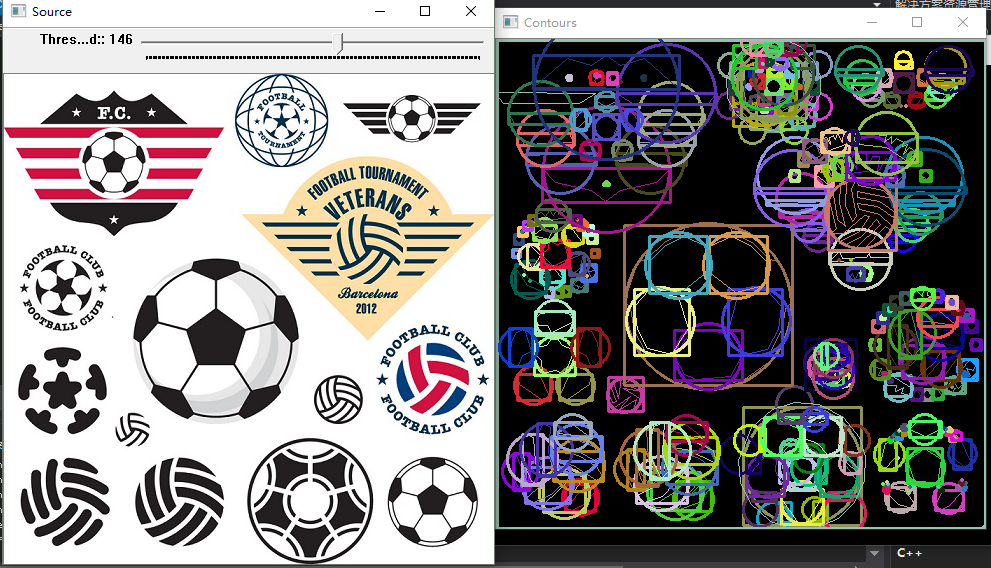
char* source_window = "Source";
namedWindow(source_window, CV_WINDOW_AUTOSIZE);
imshow(source_window, src);
createTrackbar(" Threshold:", "Source", &thresh, max_thresh, thresh_callback);
thresh_callback(0, 0);
waitKey(0);
return(0);
}
/** @thresh_callback 函数 */
void thresh_callback(int, void*)
{
Mat threshold_output;
vector<vector<Point> > contours;
vector<Vec4i> hierarchy;
/// 使用Threshold检测边缘
threshold(src_gray, threshold_output, thresh, 255, THRESH_BINARY);
/// 找到轮廓
findContours(threshold_output, contours, hierarchy, CV_RETR_TREE, CV_CHAIN_APPROX_SIMPLE, Point(0, 0));
/// 多边形逼近轮廓 + 获取矩形和圆形边界框
vector<vector<Point> > contours_poly(contours.size());
vector<Rect> boundRect(contours.size());
vector<Point2f>center(contours.size());
vector<float>radius(contours.size());
for (int i = 0; i < contours.size(); i++)
{
approxPolyDP(Mat(contours[i]), contours_poly[i], 3, true);
boundRect[i] = boundingRect(Mat(contours_poly[i]));
minEnclosingCircle(contours_poly[i], center[i], radius[i]);
}
/// 画多边形轮廓 + 包围的矩形框 + 圆形框
Mat drawing = Mat::zeros(threshold_output.size(), CV_8UC3);
for (int i = 0; i< contours.size(); i++)
{
Scalar color = Scalar(rng.uniform(0, 255), rng.uniform(0, 255), rng.uniform(0, 255));
drawContours(drawing, contours_poly, i, color, 1, 8, vector<Vec4i>(), 0, Point());
rectangle(drawing, boundRect[i].tl(), boundRect[i].br(), color, 2, 8, 0);
circle(drawing, center[i], (int)radius[i], color, 2, 8, 0);
}
/// 显示在一个窗口
namedWindow("Contours", CV_WINDOW_AUTOSIZE);
imshow("Contours", drawing);
}
下面两张不同阈值的效果图把检测到的轮廓分别用多边形、圆形、矩形框出来了。
图像的矩
图像的矩到底是什么?
矩是概率与统计中的一个概念,是随机变量的一种数字特征。
有点抽象,简而言之,矩就是图像的特征信息,比如大小、位置、方向等。
OpenCV提供了一些函数来计算图像的矩:
- 矩的重心、主轴、面积等特征计算:moments()
- 计算轮廓面积:contourArea()
- 计算轮廓长度:arcLength()
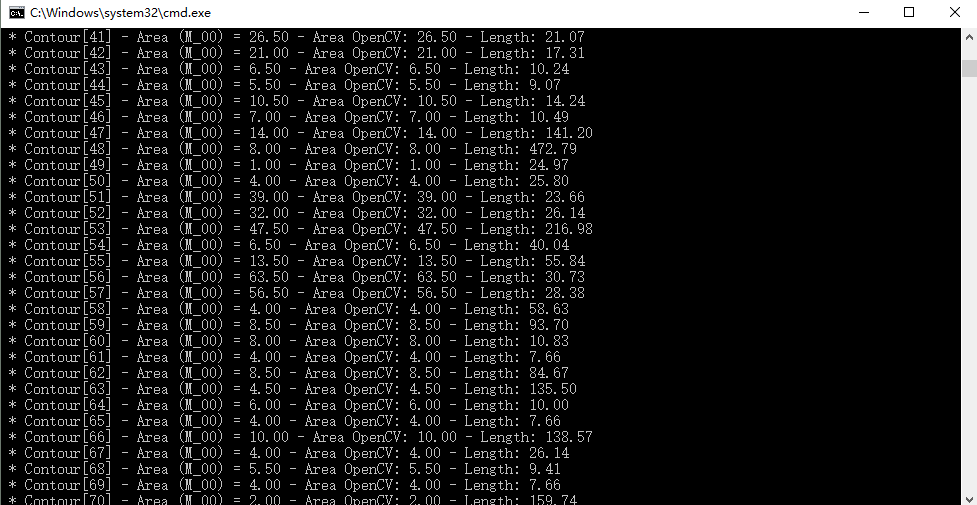
下面的程序,使用了两种方法计算轮廓面积,第一种使用了moments()函数(程序里的mu[i].m00),第二种使用了contourAra()函数进行面积计算,大家可以看一下两种方法计算出来的面积有没有差别。
#include "opencv2/highgui/highgui.hpp"
#include "opencv2/imgproc/imgproc.hpp"
#include <iostream>
#include <stdio.h>
#include <stdlib.h>

using namespace cv;
using namespace std;

Mat src; Mat src_gray;
int thresh = 100;
int max_thresh = 255;
RNG rng(12345);

/// 函数声明
void thresh_callback(int, void*);

/** @主函数 */
int main()
{
    /// 读入原图像, 返回3通道图像数据
    src = imread("lol10.jpg");

    /// 把原图像转化成灰度图像并进行平滑
    cvtColor(src, src_gray, CV_BGR2GRAY);
    blur(src_gray, src_gray, Size(3, 3));

    /// 创建新窗口
    char* source_window = "Source";
    namedWindow(source_window, CV_WINDOW_AUTOSIZE);
    imshow(source_window, src);

    createTrackbar(" Canny thresh:", "Source", &thresh, max_thresh, thresh_callback);
    thresh_callback(0, 0);

    waitKey(0);
    return(0);
}

/** @thresh_callback 函数 */
void thresh_callback(int, void*)
{
    Mat canny_output;
    vector<vector<Point> > contours;
    vector<Vec4i> hierarchy;

    /// 使用Canndy检测边缘
    Canny(src_gray, canny_output, thresh, thresh * 2, 3);
    /// 找到轮廓
    findContours(canny_output, contours, hierarchy, CV_RETR_TREE, CV_CHAIN_APPROX_SIMPLE, Point(0, 0));

    /// 计算矩
    vector<Moments> mu(contours.size());
    for (int i = 0; i < contours.size(); i++)
    {
        mu[i] = moments(contours[i], false);
    }

    ///  计算中心矩:
    vector<Point2f> mc(contours.size());
    for (int i = 0; i < contours.size(); i++)
    {
        mc[i] = Point2f(mu[i].m10 / mu[i].m00, mu[i].m01 / mu[i].m00);
    }

    /// 绘制轮廓
    Mat drawing = Mat::zeros(canny_output.size(), CV_8UC3);
    for (int i = 0; i< contours.size(); i++)
    {
        Scalar color = Scalar(rng.uniform(0, 255), rng.uniform(0, 255), rng.uniform(0, 255));
        drawContours(drawing, contours, i, color, 2, 8, hierarchy, 0, Point());
        circle(drawing, mc[i], 4, color, -1, 8, 0);
    }

    /// 显示到窗口中
    namedWindow("Contours", CV_WINDOW_AUTOSIZE);
    imshow("Contours", drawing);

    /// 通过m00计算轮廓面积并且和OpenCV函数比较
    printf("\t Info: Area and Contour Length \n");
    for (int i = 0; i< contours.size(); i++)
    {
        printf(" * Contour[%d] - Area (M_00) = %.2f - Area OpenCV: %.2f - Length: %.2f \n", i, mu[i].m00, contourArea(contours[i]), arcLength(contours[i], true));
        Scalar color = Scalar(rng.uniform(0, 255), rng.uniform(0, 255), rng.uniform(0, 255));
        drawContours(drawing, contours, i, color, 2, 8, hierarchy, 0, Point());
        circle(drawing, mc[i], 4, color, -1, 8, 0);
    }
}
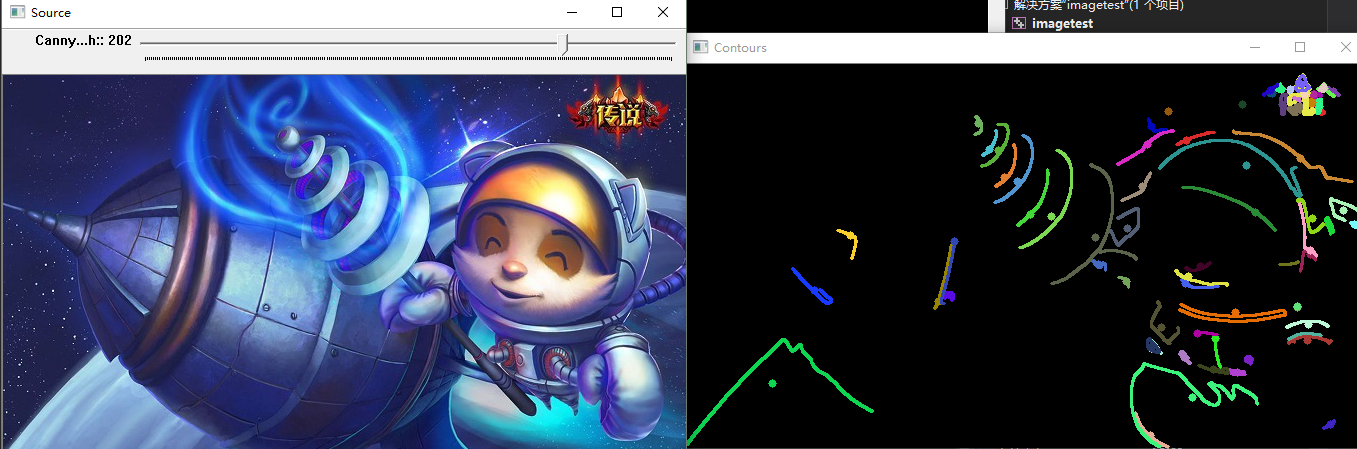

从结果看来,两种方法计算得到的面积是一样的。