原文地址:https://blog.csdn.net/crazy_jialin/article/details/80435213
本文讲述一下在vue项目中搭建element-ui框架,并实现模块的按需加载。
准备工作:在此之前,需要大家搭建一个简单的vue+webpack项目,本文讲述的操作是基于这个项目的,所以,需要大家准备一下,具体操作步骤请参考博客( https://blog.csdn.net/crazy_jialin/article/details/80422964 )。
第一步:安装element-ui
$ npm install -S element-ui 第二步:使用babel-plugin-component来实现element-ui模块按需加载
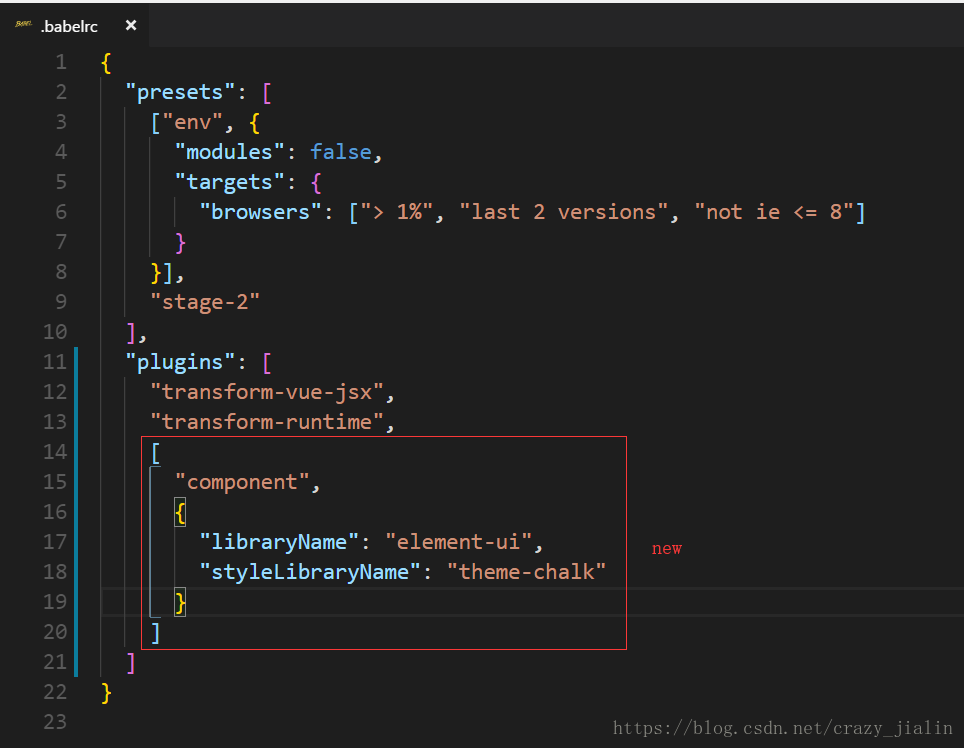
$ npm install babel-plugin-component -D然后,在 .babelrc的plugins中添加element-ui组件配置:
    [
      "component",
      {
        "libraryName": "element-ui",
        "styleLibraryName": "theme-chalk"
      }
    ]
使用:
经过以上配置之后,我们就可以按照自己需求来引用element-ui的组件了(具体配置项选项请参考element-ui官方文档:http://element-cn.eleme.io/#/zh-CN/component/quickstart)
这里使用几个模块作为示例:
1. 在main.js引用需要的模块(你也可以在你需要的组件内部引用)
import Vue from 'vue'

import {Row,Col,Button,Notification,Message} from 'element-ui'  //按需引用element-ui组件
//将element组件内容挂载到Vue上
Vue.use(Row);
Vue.use(Col);
Vue.use(Button);
Vue.prototype.$notify = Notification;
Vue.prototype.$message = Message;

import App from './App'
import router from './router/index.js'

Vue.config.productionTip = false

/* eslint-disable no-new */
new Vue({
  el: '#app',
  router,
  components: { App },
  template: '<App/>'
})
2、 在APP.vue中使用引用的模块(可以在APP.vue以及内部其他组件使用)
<template>
  <div id="app">
    <img src="./assets/logo.png">
     <!-- 使用col和button组件 -->
    <el-row>
      <el-button>默认按钮</el-button>
      <el-button type="primary">主要按钮</el-button>
      <el-button type="success">成功按钮</el-button>
      <el-button type="info">信息按钮</el-button>
      <el-button type="warning">警告按钮</el-button>
      <el-button type="danger">危险按钮</el-button>
    </el-row>
    <router-view/>
  </div>
</template>

<script>
export default {
  name: 'App',
  mounted(){
   //使用Message组件
    this.$message({
      type:'success',
      message:'element-ui安装成功'
    });
   //使用Message组件
    this.$notify({
      title: '成功',
      message: 'element-ui安装成功',
      type: 'success'
    });
  }
}
</script>

<style>
#app {
  font-family: 'Avenir', Helvetica, Arial, sans-serif;
  -webkit-font-smoothing: antialiased;
  -moz-osx-font-smoothing: grayscale;
  text-align: center;
  color: #2c3e50;
  margin-top: 60px;
}
</style>
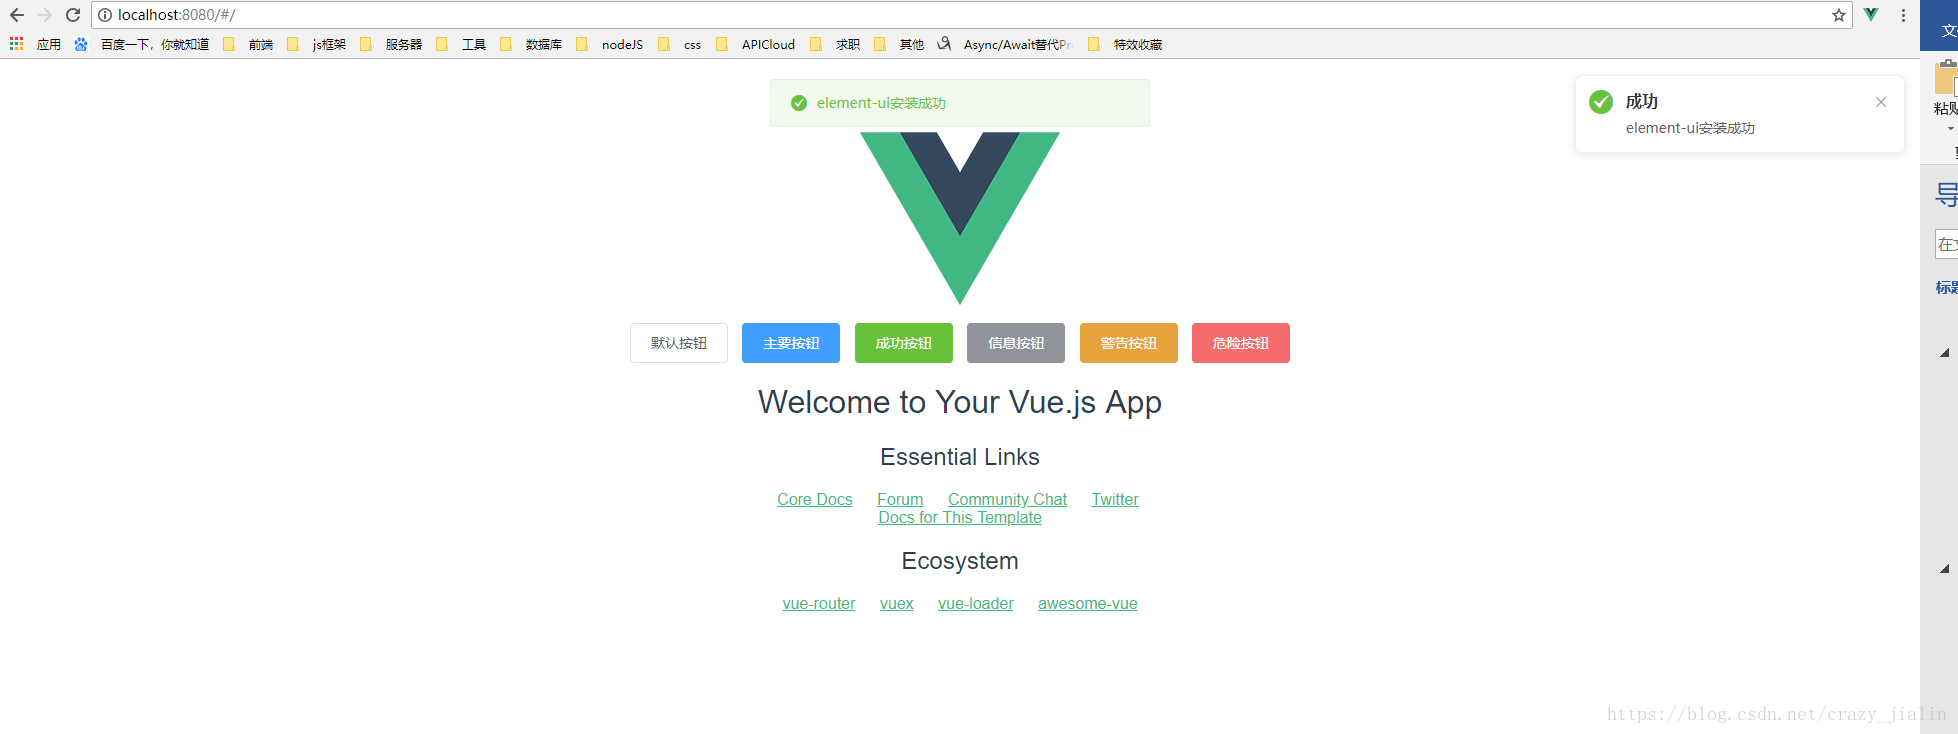
3、这样,把项目跑起来($ npm run dev)后,浏览器打开localhost:8080,看到如下画面,logo下的button组件,提示和通知的Message、Notification组件,说明配置成功了