写在前面
个人网站运行将近2个月了,期间根据酷壳的一篇教程如何免费的让网站启用HTTPS做了一次,中间遇到问题就放下了。昨天孙二狗问我网站地址说要添加友链,出于好奇想看他网站长什么样,顺道也加一下友链。访问后发现他网站已经是https了,于是按捺不住也要把网站https化。以下是采用Let’s Encrypt免费方案,以及过程中遇到的问题和解决办法。
环境
阿里云服务器 ECS
centos 7
nginx
操作步骤
访问 https://certbot.eff.org 选择相应的SoftWare和System。(比如我的Nginx和Centos/Rhel7)
按页面所示步骤执行:

1)安装Certbot
$ yum -y install yum-utils
$ yum-config-manager --enable rhui-REGION-rhel-server-extras rhui-REGION-rhel-server-optional
$ sudo yum install certbot python2-certbot-nginx
2)获取证书
$ sudo certbot --nginx certonly
执行到这一步出问题了,问题大致是 /etc/nginx 下找不到相应文件夹。因为我的Nginx并没有安装在/etc目录下,而是在/usr/bin/nginx。各人情况可能不太一样,可以通过命令查看你的nginx目录:
$ which nginx

解决办法:(这两行命令大致就是使目录之间建立链接)
$ ln -s /usr/local/nginx/sbin/nginx /usr/bin/nginx
$ ln -s /usr/local/nginx/conf/ /etc/nginx
然后,继续执行获取证书时出问题的命令:
$ sudo certbot --nginx certonly
按提示回车就行了~
3)查看nginx配置文件信息 (/usr/local/nginx/conf/nginx.conf)
  1 user  www www;
  2
  3 worker_processes auto;
  4
  5 error_log  /home/wwwlogs/nginx_error.log  crit;
  6
  7 pid        /usr/local/nginx/logs/nginx.pid;
  8
  9 #Specifies the value for maximum file descriptors that can be opened by this process.
 10 worker_rlimit_nofile 51200;
 11
 12 events
 13     {
 14         use epoll;
 15         worker_connections 51200;
 16         multi_accept on;
 17     }
 18
 19 http
 20     {
 21         include       mime.types;
 22         default_type  application/octet-stream;
 23
 24         server_names_hash_bucket_size 128;
 25         client_header_buffer_size 32k;
 26         large_client_header_buffers 4 32k;
 27         client_max_body_size 100m;
 28
 29         sendfile   on;
 30         tcp_nopush on;
 31
 32         keepalive_timeout 60;
 33
 34         tcp_nodelay on;
 35
 36         fastcgi_connect_timeout 300;
 37         fastcgi_send_timeout 300;
 38         fastcgi_read_timeout 300;
 39         fastcgi_buffer_size 64k;
 40         fastcgi_buffers 4 64k;
 41         fastcgi_busy_buffers_size 128k;
 42         fastcgi_temp_file_write_size 256k;
 43
 44         gzip on;
 45         gzip_min_length  1k;
 46         gzip_buffers     4 16k;
 47         gzip_http_version 1.1;
 48         gzip_comp_level 2;
 49         gzip_types     text/plain application/javascript application/x-javascript text/javascript text/css application/xml application/xml+rss;
 50         gzip_vary on;
 51         gzip_proxied   expired no-cache no-store private auth;
 52         gzip_disable   "MSIE [1-6]\.";
 53
 54         #limit_conn_zone $binary_remote_addr zone=perip:10m;
 55         ##If enable limit_conn_zone,add "limit_conn perip 10;" to server section.
 56
 57         server_tokens off;
 58         access_log off;
 59
 60 server
 61     {
 62         #listen [::]:80 default_server ipv6only=on;
 63         server_name www.liangyadong.com liangyadong.com;
 64         index index.html index.htm index.php;
 65         root  /home/wwwroot/default;
 66
 67         if (-f $request_filename/index.html){
 68             rewrite (.*) $1/index.html break;
 69         }
 70
 71         if (-f $request_filename/index.php){
 72             rewrite (.*) $1/index.php;
 73         }
 74
 75         if (!-f $request_filename){
 76             rewrite (.*) /index.php;
 77         }
 78
 79         #error_page   404   /404.html;
 80
 81         # Deny access to PHP files in specific directory
 82         #location ~ /(wp-content|uploads|wp-includes|images)/.*\.php$ { deny all; }
 83
 84         include enable-php.conf;
 85
 86         location /nginx_status
 87         {
 88             stub_status on;
 89             access_log   off;
 90         }
 91
 92         location ~ .*\.(gif|jpg|jpeg|png|bmp|swf)$
 93         {
 94             expires      30d;
 95         }
 96
 97         location ~ .*\.(js|css)?$
 98         {
 99             expires      12h;
100         }
101
102         location ~ /.well-known {
103             allow all;
104         }
105
106         location ~ /\.
107         {
108             deny all;
109         }
110
111         access_log  /home/wwwlogs/access.log;
112
113     listen 443 ssl http2; # managed by Certbot
114     ssl_certificate /etc/letsencrypt/live/liangyadong.com/fullchain.pem; # managed by Certbot
115     ssl_certificate_key /etc/letsencrypt/live/liangyadong.com/privkey.pem; # managed by Certbot
116     include /etc/letsencrypt/options-ssl-nginx.conf; # managed by Certbot
117     ssl_dhparam /etc/letsencrypt/ssl-dhparams.pem; # managed by Certbot
118
119 }
120 include vhost/*.conf;
121
122
123 server
124     {
125     if ($host = www.liangyadong.com) {
126         return 301 https://$host$request_uri;
127     } # managed by Certbot
128
129
130     if ($host = liangyadong.com) {
131         return 301 https://$host$request_uri;
132     } # managed by Certbot
133
134
135         listen 80 default_server;
136         server_name www.liangyadong.com liangyadong.com;
137     return 404; # managed by Certbot
138
139 }}
其中,113~139中加了# managed by Certbot注释的就是自动添加的内容。
4)通过步骤3)可以发现需要用到443端口,所以要在防火墙配置文件中进行配置443端口(/etc/sysconfig/iptables)。

5)重启nginx服务,重启防火墙设置。
$ service nginx restart
$ service iptables restart
于是满怀信心的打开自己的网站发现并不能访问!
6)之所以到这里还不行,是因为阿里云服务器有一个安全组规则管理。
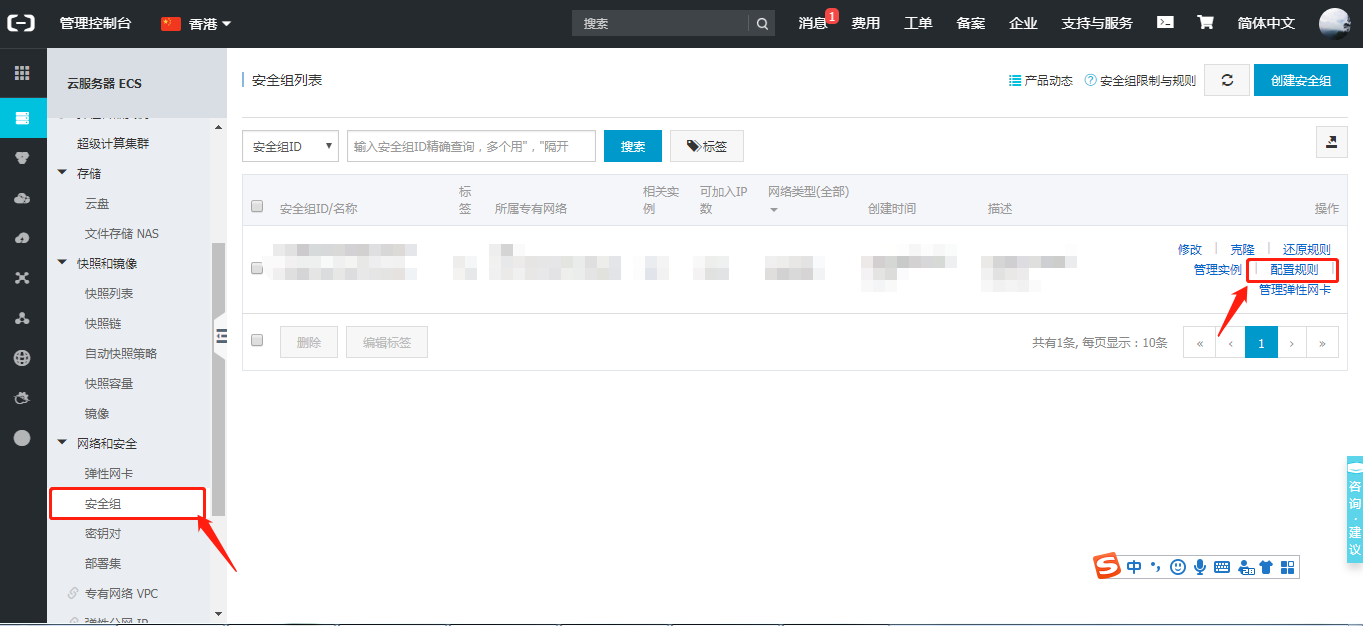
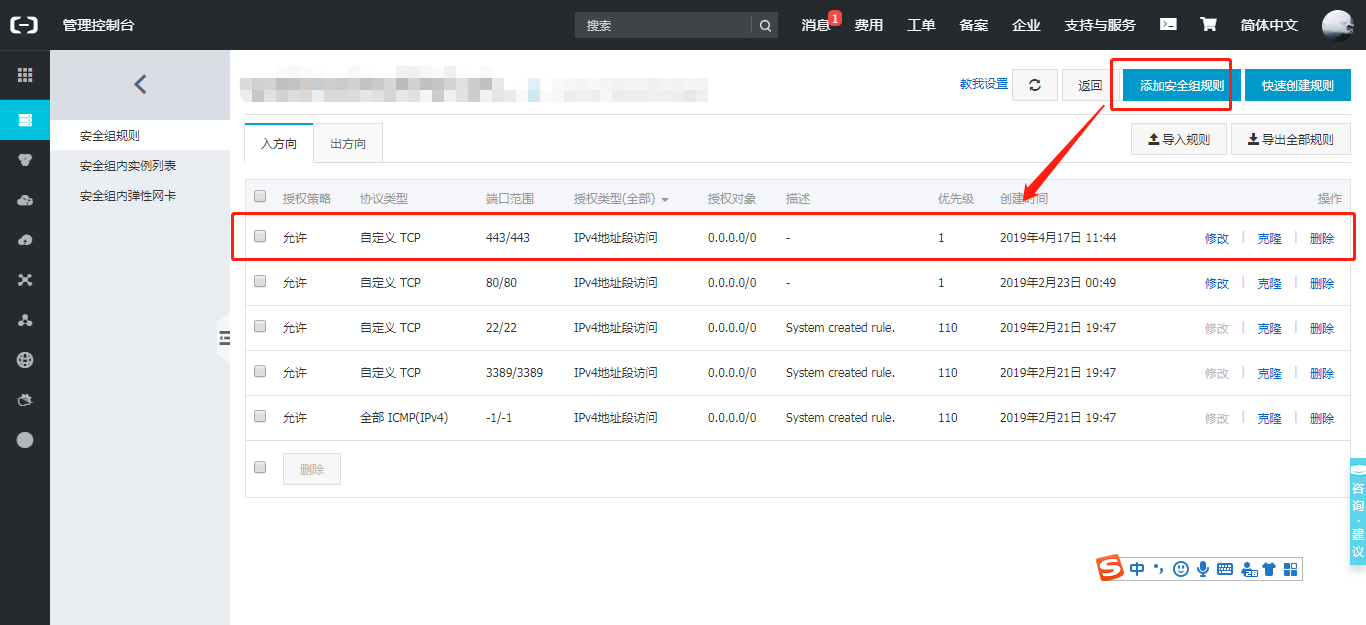
然后添加安全组规则,将443端口添加进来就哦了~
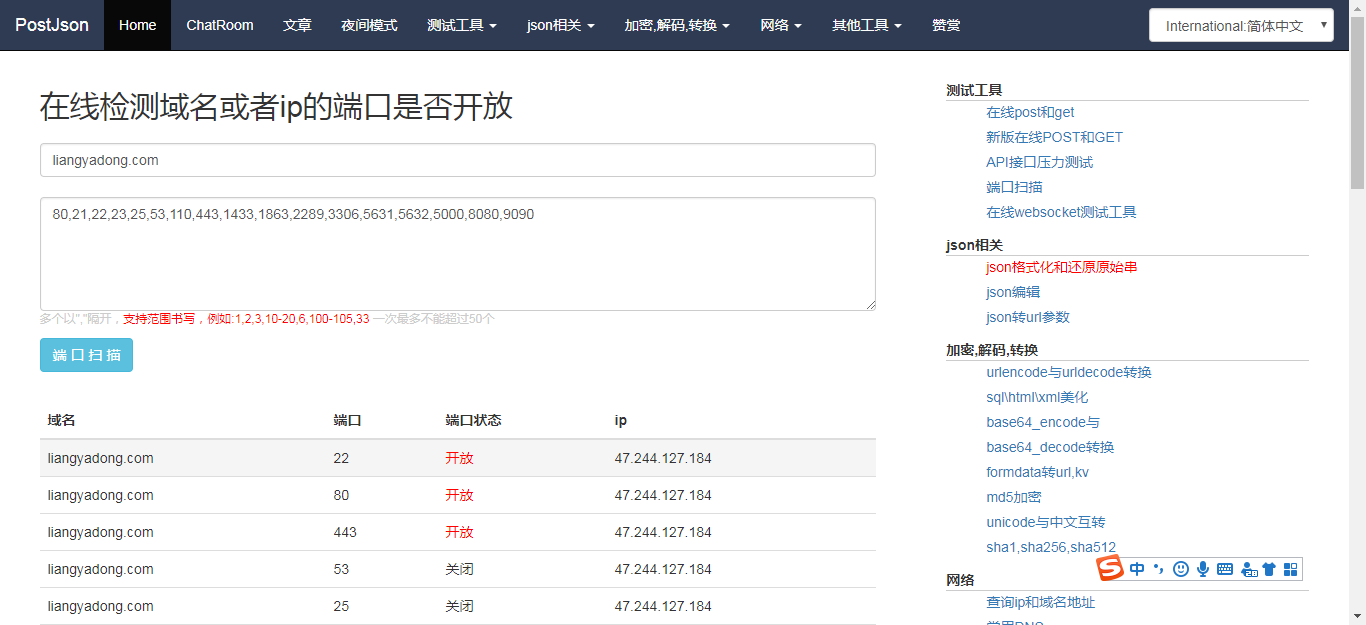
7)验证端口是否已成功开启(在线检测工具http://coolaf.com/tool/port)
8)访问网站验证。
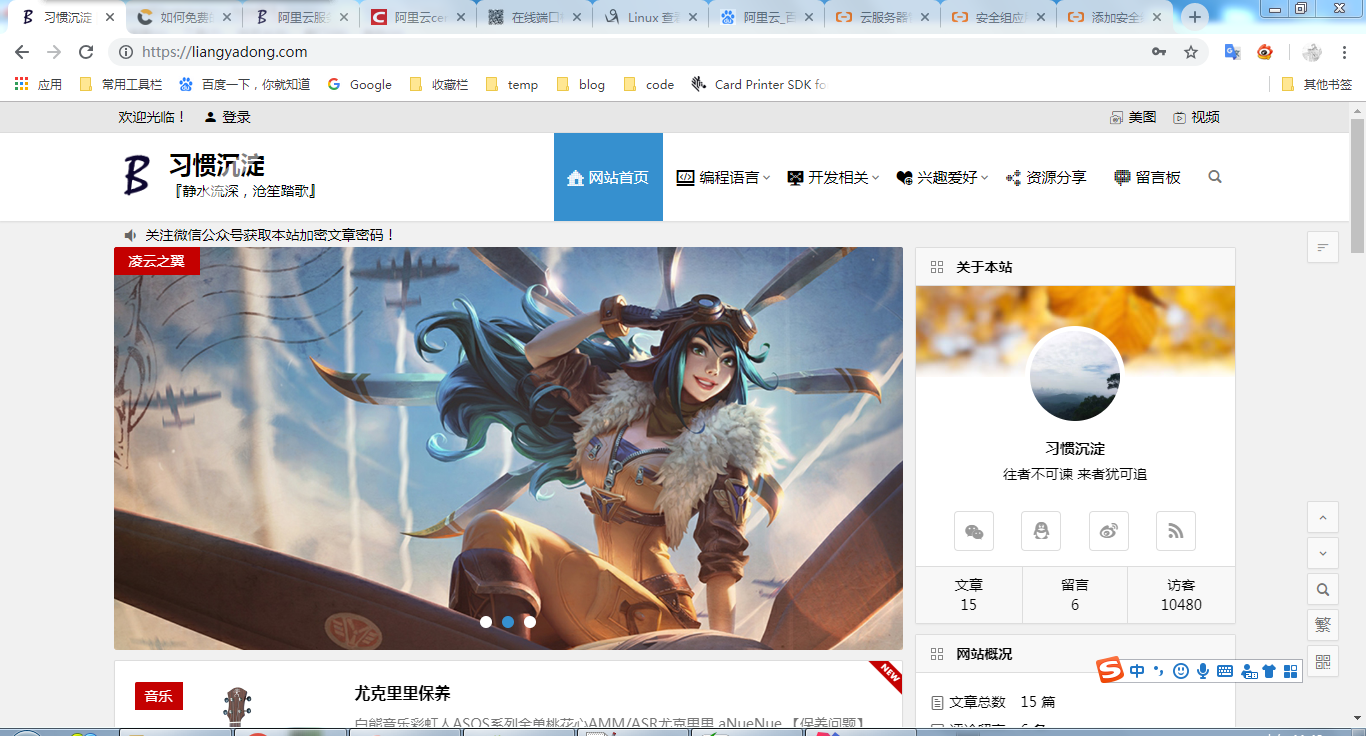
9)明明是https了,为什么不是绿色的锁而是感叹号呢?
原因在于:网站页面上面引用了不是https的资源,最常见的就是友情链接、引用的图片、等地方。
解决办法:
感谢: