1、Kubernetes本地私有仓库
Docker仓库主要用于存放Docker镜像,Docker仓库分为公共仓库和私有仓库,基于registry可以搭建本地私有仓库。使用私有仓库有如下优点:
1)节省网络带宽,针对于每个镜像不用去Docker官网仓库下载;
2)下载Docker镜像从本地私有仓库中下载;
3)组件公司内部私有仓库,方便各部门使用,服务器管理更加统一;
4) 可以基于GIT或者SVN、Jenkins更新本地Docker私有仓库镜像版本。
2、构建Docker 本地私有仓库方法
1)下载Docker registry镜像
docker pull registry
2)启动私有仓库容器,启动命令如下:
mkdir -p /data/registry/
docker run -itd  -p  5000:5000 -v /data/registry/:/tmp/registry docker.io/registry
Docker 本地仓库启动后容器启动,
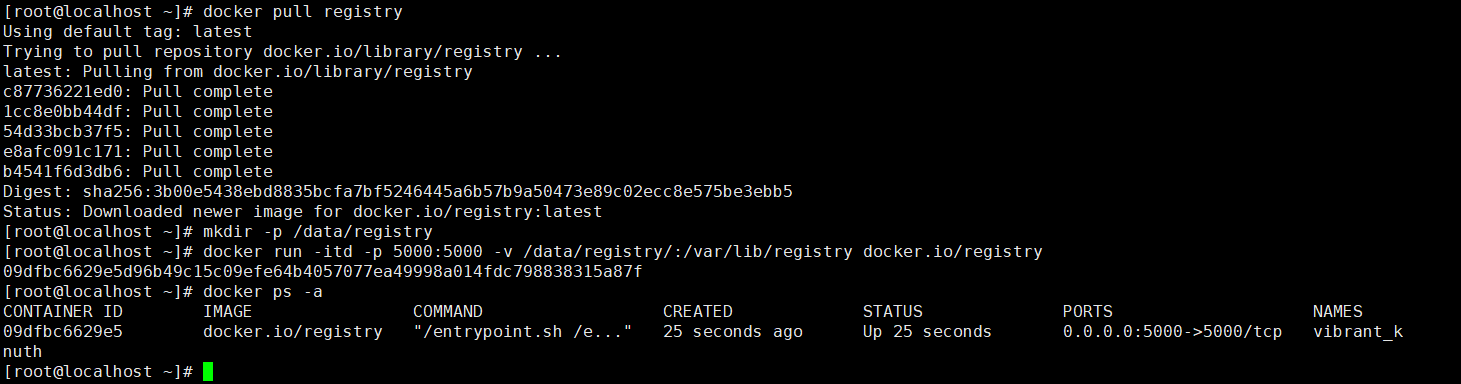
默认情况下,会将仓库存放于容器内的/tmp/registry目录下,这样如果容器被删除,则存放于容器中的镜像也会丢失,所以我们一般情况下会指定本地一个目录挂载到容器内的/tmp/registry下。
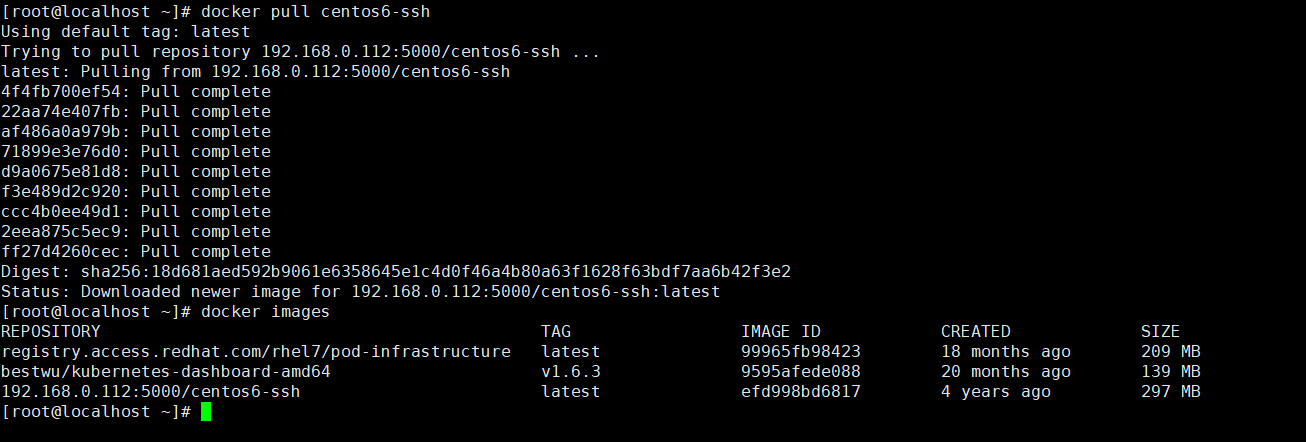
3、上传镜像至本地私有仓库
客户端上传镜像至本地私有仓库,如下以docker.io/lemonbar/centos6-ssh 为例,上传至私有仓库服务器
docker pull docker.io/lemonbar/centos6-ssh
docker tag efd998bd6817 centos6-ssh #改名字
docker rmi docker.io/lemonbar/centos6-ssh
docker tag centos-ssh 192.168.0.112:5000/centos6-ssh
docker push 192.168.0.112:5000/centos6-ssh
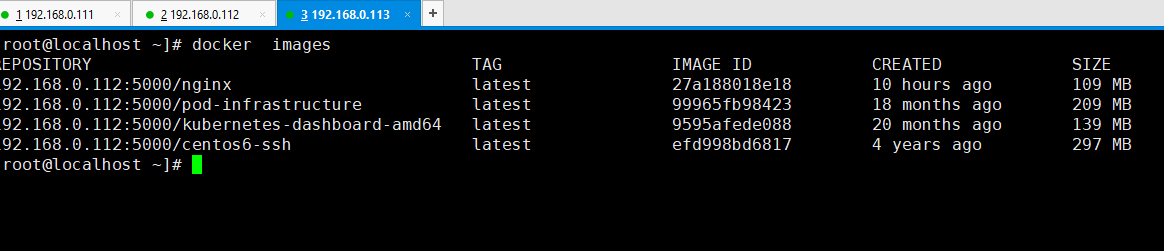
4、检测本地私有仓库:
curl -XGET http://192.168.0.112:5000/v2/_catalog
curl -XGET http://192.168.0.112:5000/v2/centos6-ssh/tags/list
5、在docker配置文件中添加如下代码并且重启
OPTIONS='--selinux-enabled --log-driver=journald --signature-verification=false --insecure-registry 192.168.0.112:5000'
ADD_REGISTRY='--add-registry 192.168.0.112:5000'

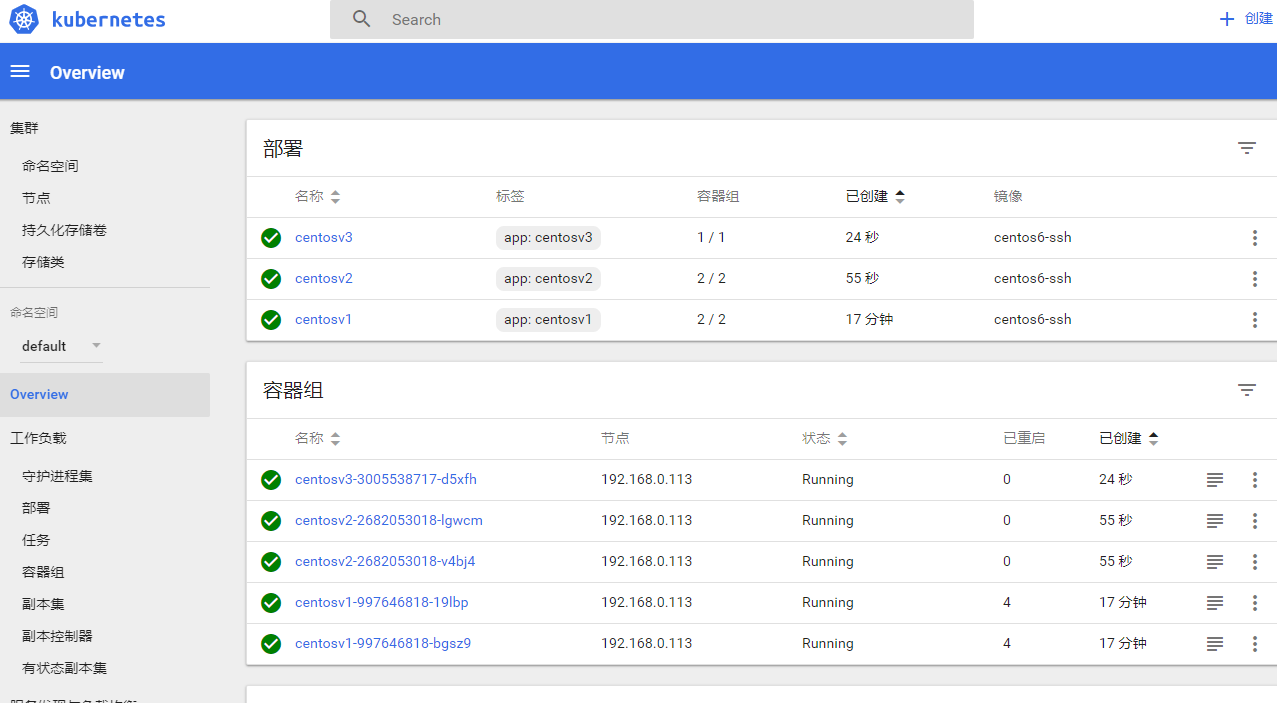
6、Kubernetes Pods配置私有仓库
创建kuber-namespace.yaml
{
"kind": "Namespace",
"apiVersion": "v1",
"metadata": {
"name": "kube-system"
}
}
建kubernetes-dashboard.yaml,读取本地私有仓库,代码如下:
# Copyright 2015 Google Inc. All Rights Reserved.
#
# Licensed under the Apache License, Version 2.0 (the "License");
# you may not use this file except in compliance with the License.
# You may obtain a copy of the License at
#
#     http://www.apache.org/licenses/LICENSE-2.0
#
# Unless required by applicable law or agreed to in writing, software
# distributed under the License is distributed on an "AS IS" BASIS,
# WITHOUT WARRANTIES OR CONDITIONS OF ANY KIND, either express or implied.
# See the License for the specific language governing permissions and
# limitations under the License.

# Configuration to deploy release version of the Dashboard UI.
#
# Example usage: kubectl create -f <this_file>

kind: Deployment
apiVersion: extensions/v1beta1
metadata:
  labels:
    app: kubernetes-dashboard
    version: latest
  name: kubernetes-dashboard
  namespace: kube-system
spec:
  replicas: 2
  selector:
    matchLabels:
      app: kubernetes-dashboard
  template:
    metadata:
      labels:
        app: kubernetes-dashboard
    spec:
      containers:
      - name: kubernetes-dashboard
        image: 192.168.0.112:5000/kubernetes-dashboard-amd64
        imagePullPolicy: Always
        ports:
        - containerPort: 9090
          protocol: TCP
        args:
          # Uncomment the following line to manually specify Kubernetes API server Host
          # If not specified, Dashboard will attempt to auto discover the API server and connect
          # to it. Uncomment only if the default does not work.
          - --apiserver-host=192.168.0.111:8080
        livenessProbe:
          httpGet:
            path: /
            port: 9090
          initialDelaySeconds: 30
          timeoutSeconds: 30
---
kind: Service
apiVersion: v1
metadata:
  labels:
    app: kubernetes-dashboard
  name: kubernetes-dashboard
  namespace: kube-system
spec:
  type: NodePort
  ports:
  - port: 80
    targetPort: 9090
  selector:
    app: kubernetes-dashboard
1)在docker主机添加本地仓库地址 vim /etc/docker/daemon.json
{
"insecure-registries":["192.168.0.112:5000"]
}
2)/etc/kubernetes/kubelet配置文件将KUBELET_POD_INFRA_CONTAINER选项注释,同时添加一个新的KUBELET_POD_INFRA_CONTAINER参数,代码如下,前提需要将pod-infrastructure镜像上传私有仓库
在每台nodes上重启kubelet服务:systemctl restart kubelet.service
#KUBELET_POD_INFRA_CONTAINER="--pod-infra-container-image=registry.access.redhat.com/rhel7/pod-infrastructure:latest"
KUBELET_POD_INFRA_CONTAINER="--pod-infra-container-image=192.168.0.112:5000/pod-infrastructure:latest"
3) nodes上Docker配置文件/etc/sysconfig/docker中,添加如下代码,并重启Docker服务:
ADD_REGISTRY='--add-registry 192.168.0.112:5000'