这篇文章主要讨论使用Elasticdump工具做数据的备份和type删除。
Elasticsearch的备份,不像MYSQL的myslqdump那么方便,它需要一个插件进行数据的导出和导入进行备份和恢复操作,也就是插件:Elasticdump
1、Elasticdump的安装:
[root@master mnt]# npm install elasticdump

2、使用
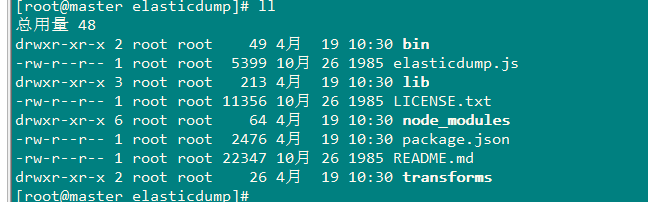
[root@master bin]# pwd
/mnt/elasticsearch-head-master/node_modules/elasticdump/bin
[root@master bin]# ./elasticdump --help
elasticdump: Import and export tools for elasticsearch
version: 4.7.0

Usage: elasticdump --input SOURCE --output DESTINATION [OPTIONS]

--input
                    Source location (required)
--input-index
                    Source index and type
                    (default: all, example: index/type)
--output
                    Destination location (required)
--output-index
                    Destination index and type
                    (default: all, example: index/type)
--limit
                    How many objects to move in batch per operation
                    limit is approximate for file streams
                    (default: 100)

--size
                    How many objects to retrieve
                    (default: -1 -> no limit)

--debug
                    Display the elasticsearch commands being used
                    (default: false)

--quiet
                    Suppress all messages except for errors
                    (default: false)

--type
                    What are we exporting?
                    (default: data, options: [data, settings, analyzer, mapping, alias])
--delete
                    Delete documents one-by-one from the input as they are
                    moved.  Will not delete the source index
                    (default: false)
--headers
                    Add custom headers to Elastisearch requests (helpful when
                    your Elasticsearch instance sits behind a proxy)
                    (default: '{"User-Agent": "elasticdump"}')
--params
                    Add custom parameters to Elastisearch requests uri. Helpful when you for example
                    want to use elasticsearch preference
                    (default: null)
--searchBody
                    Preform a partial extract based on search results
                    (when ES is the input, default values are
                      if ES > 5
                        `'{"query": { "match_all": {} }, "stored_fields": ["*"], "_source": true }'`
                      else
                        `'{"query": { "match_all": {} }, "fields": ["*"], "_source": true }'`
--sourceOnly
                    Output only the json contained within the document _source
                    Normal: {"_index":"","_type":"","_id":"", "_source":{SOURCE}}
                    sourceOnly: {SOURCE}
                    (default: false)
--ignore-errors
                    Will continue the read/write loop on write error
                    (default: false)
--scrollTime
                    Time the nodes will hold the requested search in order.
                    (default: 10m)
--maxSockets
                    How many simultaneous HTTP requests can we process make?
                    (default:
                      5 [node <= v0.10.x] /
                      Infinity [node >= v0.11.x] )
--timeout
                    Integer containing the number of milliseconds to wait for
                    a request to respond before aborting the request. Passed
                    directly to the request library. Mostly used when you don't
                    care too much if you lose some data when importing
                    but rather have speed.
--offset
                    Integer containing the number of rows you wish to skip
                    ahead from the input transport.  When importing a large
                    index, things can go wrong, be it connectivity, crashes,
                    someone forgetting to `screen`, etc.  This allows you
                    to start the dump again from the last known line written
                    (as logged by the `offset` in the output).  Please be
                    advised that since no sorting is specified when the
                    dump is initially created, there's no real way to
                    guarantee that the skipped rows have already been
                    written/parsed.  This is more of an option for when
                    you want to get most data as possible in the index
                    without concern for losing some rows in the process,
                    similar to the `timeout` option.
                    (default: 0)
--noRefresh
                    Disable input index refresh.
                    Positive:
                      1. Much increase index speed
                      2. Much less hardware requirements
                    Negative:
                      1. Recently added data may not be indexed
                    Recommended to use with big data indexing,
                    where speed and system health in a higher priority
                    than recently added data.
--inputTransport
                    Provide a custom js file to use as the input transport
--outputTransport
                    Provide a custom js file to use as the output transport
--toLog
                    When using a custom outputTransport, should log lines
                    be appended to the output stream?
                    (default: true, except for `$`)
--awsChain
                    Use [standard](https://aws.amazon.com/blogs/security/a-new-and-standardized-way-to-manage-credentials-in-the-aws-sdks/) location and ordering for resolving credentials including environment variables, config files, EC2 and ECS metadata locations
                    _Recommended option for use with AWS_
--awsAccessKeyId
--awsSecretAccessKey
                    When using Amazon Elasticsearch Service protected by
                    AWS Identity and Access Management (IAM), provide
                    your Access Key ID and Secret Access Key
--awsIniFileProfile
                    Alternative to --awsAccessKeyId and --awsSecretAccessKey,
                    loads credentials from a specified profile in aws ini file.
                    For greater flexibility, consider using --awsChain
                    and setting AWS_PROFILE and AWS_CONFIG_FILE
                    environment variables to override defaults if needed
--transform
                    A javascript, which will be called to modify documents
                    before writing it to destination. global variable 'doc'
                    is available.
                    Example script for computing a new field 'f2' as doubled
                    value of field 'f1':
                        doc._source["f2"] = doc._source.f1 * 2;

--httpAuthFile
                    When using http auth provide credentials in ini file in form
                    `user=<username>
                    password=<password>`

--support-big-int
                    Support big integer numbers
--retryAttempts
                    Integer indicating the number of times a request should be automatically re-attempted before failing
                    when a connection fails with one of the following errors `ECONNRESET`, `ENOTFOUND`, `ESOCKETTIMEDOUT`,
                    ETIMEDOUT`, `ECONNREFUSED`, `EHOSTUNREACH`, `EPIPE`, `EAI_AGAIN`
                    (default: 0)

--retryDelay
                    Integer indicating the back-off/break period between retry attempts (milliseconds)
                    (default : 5000)
--parseExtraFields
                    Comma-separated list of meta-fields to be parsed
--fileSize
                    supports file splitting.  This value must be a string supported by the **bytes** module.
                    The following abbreviations must be used to signify size in terms of units
                    b for bytes
                    kb for kilobytes
                    mb for megabytes
                    gb for gigabytes
                    tb for terabytes

                    e.g. 10mb / 1gb / 1tb
                    Partitioning helps to alleviate overflow/out of memory exceptions by efficiently segmenting files
                    into smaller chunks that then be merged if needs be.

--s3AccessKeyId
                    AWS access key ID
--s3SecretAccessKey
                    AWS secret access key
--s3Region
                    AWS region
--s3Bucket
                    Name of the bucket to which the data will be uploaded
--s3RecordKey
                    Object key (filename) for the data to be uploaded
--s3Compress
                    gzip data before sending to s3
--tlsAuth
                    Enable TLS X509 client authentication
--cert, --input-cert, --output-cert
                    Client certificate file. Use --cert if source and destination are identical.
                    Otherwise, use the one prefixed with --input or --output as needed.
--key, --input-key, --output-key
                    Private key file. Use --key if source and destination are identical.
                    Otherwise, use the one prefixed with --input or --output as needed.
--pass, --input-pass, --output-pass
                    Pass phrase for the private key. Use --pass if source and destination are identical.
                    Otherwise, use the one prefixed with --input or --output as needed.
--ca, --input-ca, --output-ca
                    CA certificate. Use --ca if source and destination are identical.
                    Otherwise, use the one prefixed with --input or --output as needed.
--inputSocksProxy, --outputSocksProxy
                    Socks5 host address
--inputSocksPort, --outputSocksPort
                    Socks5 host port
--help
                    This page

Examples:

# Copy an index from production to staging with mappings:
elasticdump \
  --input=http://production.es.com:9200/my_index \
  --output=http://staging.es.com:9200/my_index \
  --type=mapping
elasticdump \
  --input=http://production.es.com:9200/my_index \
  --output=http://staging.es.com:9200/my_index \
  --type=data

# Backup index data to a file:
elasticdump \
  --input=http://production.es.com:9200/my_index \
  --output=/data/my_index_mapping.json \
  --type=mapping
elasticdump \
  --input=http://production.es.com:9200/my_index \
  --output=/data/my_index.json \
  --type=data

# Backup and index to a gzip using stdout:
elasticdump \
  --input=http://production.es.com:9200/my_index \
  --output=$ \
  | gzip > /data/my_index.json.gz

# Backup the results of a query to a file
elasticdump \
  --input=http://production.es.com:9200/my_index \
  --output=query.json \
  --searchBody '{"query":{"term":{"username": "admin"}}}'

------------------------------------------------------------------------------
Learn more @ https://github.com/taskrabbit/elasticsearch-dump
3、elasticsearchdump的使用
'#拷贝analyzer如分词
elasticdump \
  --input=http://production.es.com:9200/my_index \
  --output=http://staging.es.com:9200/my_index \
  --type=analyzer
'#拷贝映射
elasticdump \
  --input=http://production.es.com:9200/my_index \
  --output=http://staging.es.com:9200/my_index \
  --type=mapping
'#拷贝数据
elasticdump \
  --input=http://production.es.com:9200/my_index \
  --output=http://staging.es.com:9200/my_index \
  --type=data
'#拷贝所有索引
elasticdump
--input=http://production.es.com:9200/
--output=http://staging.es.com:9200/
--all=true
# 备份到标准输出,且进行压缩(这里有一个需要注意的地方,我查询索引信息有6.4G,用下面的方式备份后得到一个789M的压缩文件,这个压缩文件解压后有19G):
elasticdump \
  --input=http://production.es.com:9200/my_index \
  --output=$ \
  | gzip > /data/my_index.json.gz

# 把一个查询结果备份到文件中
elasticdump \
  --input=http://production.es.com:9200/my_index \
  --output=query.json \
  --searchBody '{"query":{"term":{"username": "admin"}}}'
# Copy a single shard data:
elasticdump \
--input=http://es.com:9200/api \
--output=http://es.com:9200/api2 \
--params='{"preference" : "_shards:0"}'
# Backup aliases to a file
elasticdump \
--input=http://es.com:9200/index-name/alias-filter \
--output=alias.json \
--type=alias
# Import aliases into ES
elasticdump \
--input=./alias.json \
--output=http://es.com:9200 \
--type=alias
# Backup templates to a file
elasticdump \
--input=http://es.com:9200/template-filter \
--output=templates.json \
--type=template
# Import templates into ES
elasticdump \
--input=./templates.json \
--output=http://es.com:9200 \
--type=template
# Split files into multiple parts
elasticdump \
--input=http://production.es.com:9200/my_index \
--output=/data/my_index.json \
--fileSize=10mb
# Export ES data to S3
elasticdump \
--input=http://production.es.com:9200/my_index \
--s3Bucket "${bucket_name}" \
--s3AccessKeyId "${access_key_id}" \
--s3SecretAccessKey "${access_key_secret}" \
--s3RecordKey "${file_name}"
扫描二维码关注公众号,回复:
5943560 查看本文章

3、实例操作
1. 将es集群中的某个company的数据导出到文件中。
[root@master bin]# ./elasticdump --input http://192.168.200.100:9200/company --output /mnt/company.json
Fri, 19 Apr 2019 03:39:20 GMT | starting dump
Fri, 19 Apr 2019 03:39:20 GMT | got 2 objects from source elasticsearch (offset: 0)
Fri, 19 Apr 2019 03:39:20 GMT | sent 2 objects to destination file, wrote 2
Fri, 19 Apr 2019 03:39:20 GMT | got 0 objects from source elasticsearch (offset: 2)
Fri, 19 Apr 2019 03:39:20 GMT | Total Writes: 2
Fri, 19 Apr 2019 03:39:20 GMT | dump complete

2、删除该index下的data
[root@master mnt]# curl -XDELETE '192.168.200.100:9200/company'
查看删除情况:
3、恢复:
[root@master bin]# ./elasticdump elasticdump --input /mnt/company.json --output "http://192.168.200.100:9200/company"
Fri, 19 Apr 2019 03:46:56 GMT | starting dump
Fri, 19 Apr 2019 03:46:56 GMT | got 2 objects from source file (offset: 0)
Fri, 19 Apr 2019 03:46:57 GMT | sent 2 objects to destination elasticsearch, wrote 2
Fri, 19 Apr 2019 03:46:57 GMT | got 0 objects from source file (offset: 2)
Fri, 19 Apr 2019 03:46:57 GMT | Total Writes: 2
Fri, 19 Apr 2019 03:46:57 GMT | dump complete

