首先说说graphQL。这是一个用来管理api接口的工具。
应用场景如下:
项目一期首页初始化接口A需要数据B和数据C两个参数
到了项目二期首页初始化接口A需要的数据多了数据D少了数据B。这样后端接口A要相应的增加数据D和删除数据B,前端也要做相应的修改。多次迭代可能有需要加回数据B这样会做大量的无用功。
graphQL能让后端添加需要新增的字段而不用删除不需要的字段并且前端只拿需要用的字段。这样前端不会拿到多余的数据造成占用内存,后端在多次迭代中也不用对接口进行大量的修改。
下面我们就来试一下吧。
首先我们的数据库要先有数据
前面的章节有提到插入的方法https://blog.csdn.net/qq_40816649/article/details/88059295


有了数据之后我们要使用graphQL需要安装两个插件graphql和koa-graphql
npm install graphql koa-graphql --save
配置到路由主文件中
const router = require('koa-router')()
const Schema = require('../app/graphql/Schema')
const graphqlHTTP = require('koa-graphql');

router.prefix('/test')//设置该路由的通用头部

router.all('/graphql', graphqlHTTP({
    schema: Schema,
    graphiql: true
}));
module.exports = router
入口文件
const routerIndex= require('./router/routerIndex') //路由实例app.use(routerIndex.routes(),routerIndex.allowedMethods())
启动程序访问localhost:3030/test/graphql端口(我监听的是3030端口)

koa-graphql设置成功。
接下来设置graphql的schema,然后引用到刚才的路由中
const DB=require('../model/graphql');//数据库模型
const {
    GraphQLObjectType,
    GraphQLString,
    GraphQLSchema,
    GraphQLList,
    GraphQLNonNull
} = require('graphql');


//定义导航Schema类型
var GraphQLNav=new GraphQLObjectType({
    name:'nav',
    fields:{
        name:{ type: GraphQLString },
        age:{ type: GraphQLString },
        sport:{ type: GraphQLString },
        work:{type:GraphQLString},
        music:{ type: GraphQLString },
        sex:{ type: GraphQLString },
        friend:{ type: GraphQLString }
    }
})


//定义根(查询用)
var Root = new GraphQLObjectType({
    name: "RootQueryType",
    fields: {
        navList: {
            type: GraphQLList(GraphQLNav),
            async resolve(parent, args) {
                return DB.find({});
            }
        }
    }
})
//Mutation数据库删改增用
const MutationRoot = new GraphQLObjectType({
    name: "Mutation",
    fields: {
        addNav: {
            type: GraphQLNav,
            args: {
                name:{ type: GraphQLString },
                age:{ type: GraphQLString },
                sport:{ type: GraphQLString },
                work:{type:GraphQLString},
                music:{ type: GraphQLString },
                sex:{ type: GraphQLString },
                friend:{ type: GraphQLString }
            },
            async resolve(parent, args) {
                var cateList = await DB.create({
                    name:args.name,
                    age:args.age,
                    sport:args.sport,
                    work:args.work,
                    music:args.music,
                    sex:args.sex,
                    friend:args.friend,
                });
                return cateList
            }
        }
    }
})

module.exports = new GraphQLSchema({
    query: Root,//查询用
    mutation: MutationRoot//增删改用
});
刷新页面如下说明成功了

查询
页面右边输入
query{
navList{
name
}
}

只得到数据库中每条数据的name这个字段(我用的find({})所以查询所有)
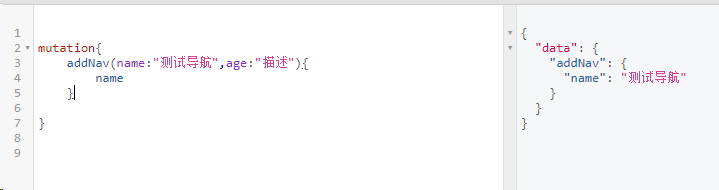
增
页面右边输入
mutation{
addNav(name:"测试导航",age:"描述"){
name
}
}
插入一条数据
前端页面的使用
前端需要在学习graphql语言(上面示例)然后在axios中的query字段中使用
查询
this.$network({
    url: 'test/graphql',
    method: 'post',
    data: {
        query: `mutation{
            addNav(name:"伟江12",age:"24"){
                name
            }
        }
        `
    }
}).then(res => {
    console.log(res)
}).catch(err => {
    console.log(err)
})
增
this.$network({
    url: 'test/graphql',
    method: 'post',
    data: {
        query: `query{
            navList{
                name
            }
        }`
    }
}).then(res => {
    console.log(res)
}).catch(err => {
    console.log(err)
})
后续需要对文件的结构进行优化前期只是为了先跑通graphql,后期可能会将mutation、query以及graphql定义的导航Schema类型从schema中分离出来成单独文件然后分别引用。这样才能适用于大型项目。