在本快速入门中,我们希望通过OpenID Connect协议向我们的IdentityServer添加对交互式用户身份验证的支持。
一旦到位,我们将创建一个将使用IdentityServer进行身份验证的MVC应用程序。
11.1 添加
IdentityServer 内置了 OpenID Connect 需要的所有协议支持。你需要提供必需的 UI 部分,包括 登录、注销、授权确认以及错误页。
因为在每个 IdentityServer 的实现中,视觉、感觉以及实际工作流可能总是有所不同的,所以我们提供了一套基于 MVC 的样例 UI,你可以将其作为启动点来使用。
这套 UI 可以在 快速入门仓库 找到。你还可以克隆或下载这个仓库,将其中的控制器、视图、模型以及 CSS 放到你的 Web 应用程序中。
或者,您可以使用.NET CLI(从src/IdentityServer文件夹中运行):
dotnet new is4ui添加MVC UI后,您还需要在DI系统和管道中启用MVC。当您查看时,*Startup.cs\*您将在ConfigureServices和Configure`方法中找到注释,告诉您如何启用MVC。
运行IdentityServer应用程序,您现在应该看到一个主页。
花一些时间检查控制器和模型,您越了解它们,就越容易进行未来的修改。大多数代码使用“feature folder”样式存在于“Quickstart”文件夹中。如果此样式不适合您,请随意以您想要的任何方式组织代码。
11.2 创建MVC客户端
接下来,您将向您的解决方案添加MVC应用程序。使用ASP.NET Core“Web应用程序”(即MVC)模板。不要在向导中配置“身份验证”设置 - 您将在此快速入门中手动执行此操作。创建项目后,将应用程序配置为在端口5002上运行。
要为OpenID Connect的认证支持添加到MVC应用程序,添加以下内容到Startup中ConfigureServices:
public void ConfigureServices(IServiceCollection services)
{
    services.AddMvc();

    JwtSecurityTokenHandler.DefaultInboundClaimTypeMap.Clear();

    services.AddAuthentication(options =>
        {
            options.DefaultScheme = "Cookies";
            options.DefaultChallengeScheme = "oidc";
        })
        .AddCookie("Cookies")
        .AddOpenIdConnect("oidc", options =>
        {
            options.Authority = "http://localhost:5000";
            options.RequireHttpsMetadata = false;

            options.ClientId = "mvc";
            options.SaveTokens = true;
        });
}AddAuthentication将身份验证服务添加到DI。我们使用cookie来本地登录用户(通过"Cookies"作为DefaultScheme),我们设置为DefaultChallengeScheme为"oidc"因为当我们需要用户登录时,我们将使用OpenID Connect协议。
然后AddCookie,我们使用添加可处理cookie的处理程序。
最后,AddOpenIdConnect用于配置执行OpenID Connect协议的处理程序。Authority表明我们信任IdentityServer。然后我们通过ClientId。识别这个客户。 SaveTokens用于在cookie中保留来自IdentityServer的令牌(稍后将需要它们)。
同样,我们已经关闭了JWT声明类型映射,以允许众所周知的声明(例如'sub'和'idp')流畅地通过:
JwtSecurityTokenHandler.DefaultInboundClaimTypeMap.Clear();然后要确保认证服务执行对每个请求,加入UseAuthentication到Startup中Configure:
public void Configure(IApplicationBuilder app, IHostingEnvironment env)
{
    if (env.IsDevelopment())
    {
        app.UseDeveloperExceptionPage();
    }
    else
    {
        app.UseExceptionHandler("/Home/Error");
    }

    app.UseAuthentication();

    app.UseStaticFiles();
    app.UseMvcWithDefaultRoute();
}
应在管道中的MVC之前添加认证中间件。
最后一步是触发身份验证握手。为此,请转到主控制器并添加[Authorize]其中一个操作。还要修改主视图以显示用户的声明以及cookie属性:
@using Microsoft.AspNetCore.Authentication

<h2>Claims</h2>

<dl>
    @foreach (var claim in User.Claims)
    {
        <dt>@claim.Type</dt>
        <dd>@claim.Value</dd>
    }
</dl>

<h2>Properties</h2>

<dl>
    @foreach (var prop in (await Context.AuthenticateAsync()).Properties.Items)
    {
        <dt>@prop.Key</dt>
        <dd>@prop.Value</dd>
    }
</dl>
如果您现在使用浏览器导航到该控制器,将尝试重定向到IdentityServer - 这将导致错误,因为MVC客户端尚未注册。
11.3 添加对OpenID Connect标识范围的支持
与OAuth 2.0类似,OpenID Connect也使用范围(Scope)概念。同样,范围代表您想要保护的内容以及客户想要访问的内容。与OAuth相比,OIDC中的范围不代表API,而是代表用户ID,名称或电子邮件地址等身份数据。
通过修改方法,添加对标准openid(subject id)和profile(名字,姓氏等)范围(Scope)的支持:Config.cs中GetIdentityResources
public static IEnumerable<IdentityResource> GetIdentityResources()
{
    return new List<IdentityResource>
    {
        new IdentityResources.OpenId(),
        new IdentityResources.Profile(),
    };
}
注意
所有标准范围及其相应的声明都可以在OpenID Connect 规范中找到
11.4 为OpenID Connect隐式流添加客户端
最后一步是将MVC客户端的新配置条目添加到IdentityServer。
基于OpenID Connect的客户端与我们目前添加的OAuth 2.0客户端非常相似。但由于OIDC中的流程始终是交互式的,因此我们需要在配置中添加一些重定向URL。
将以下内容添加到客户端配置中:
public static IEnumerable<Client> GetClients()
{
    return new List<Client>
    {
        // other clients omitted...

        // OpenID Connect implicit flow client (MVC)
        new Client
        {
            ClientId = "mvc",
            ClientName = "MVC Client",
            AllowedGrantTypes = GrantTypes.Implicit,

            // where to redirect to after login
            RedirectUris = { "http://localhost:5002/signin-oidc" },

            // where to redirect to after logout
            PostLogoutRedirectUris = { "http://localhost:5002/signout-callback-oidc" },

            AllowedScopes = new List<string>
            {
                IdentityServerConstants.StandardScopes.OpenId,
                IdentityServerConstants.StandardScopes.Profile
            }
        }
    };
}
11.5 测试客户端
现在终于应该为新的MVC客户端做好一切准备。
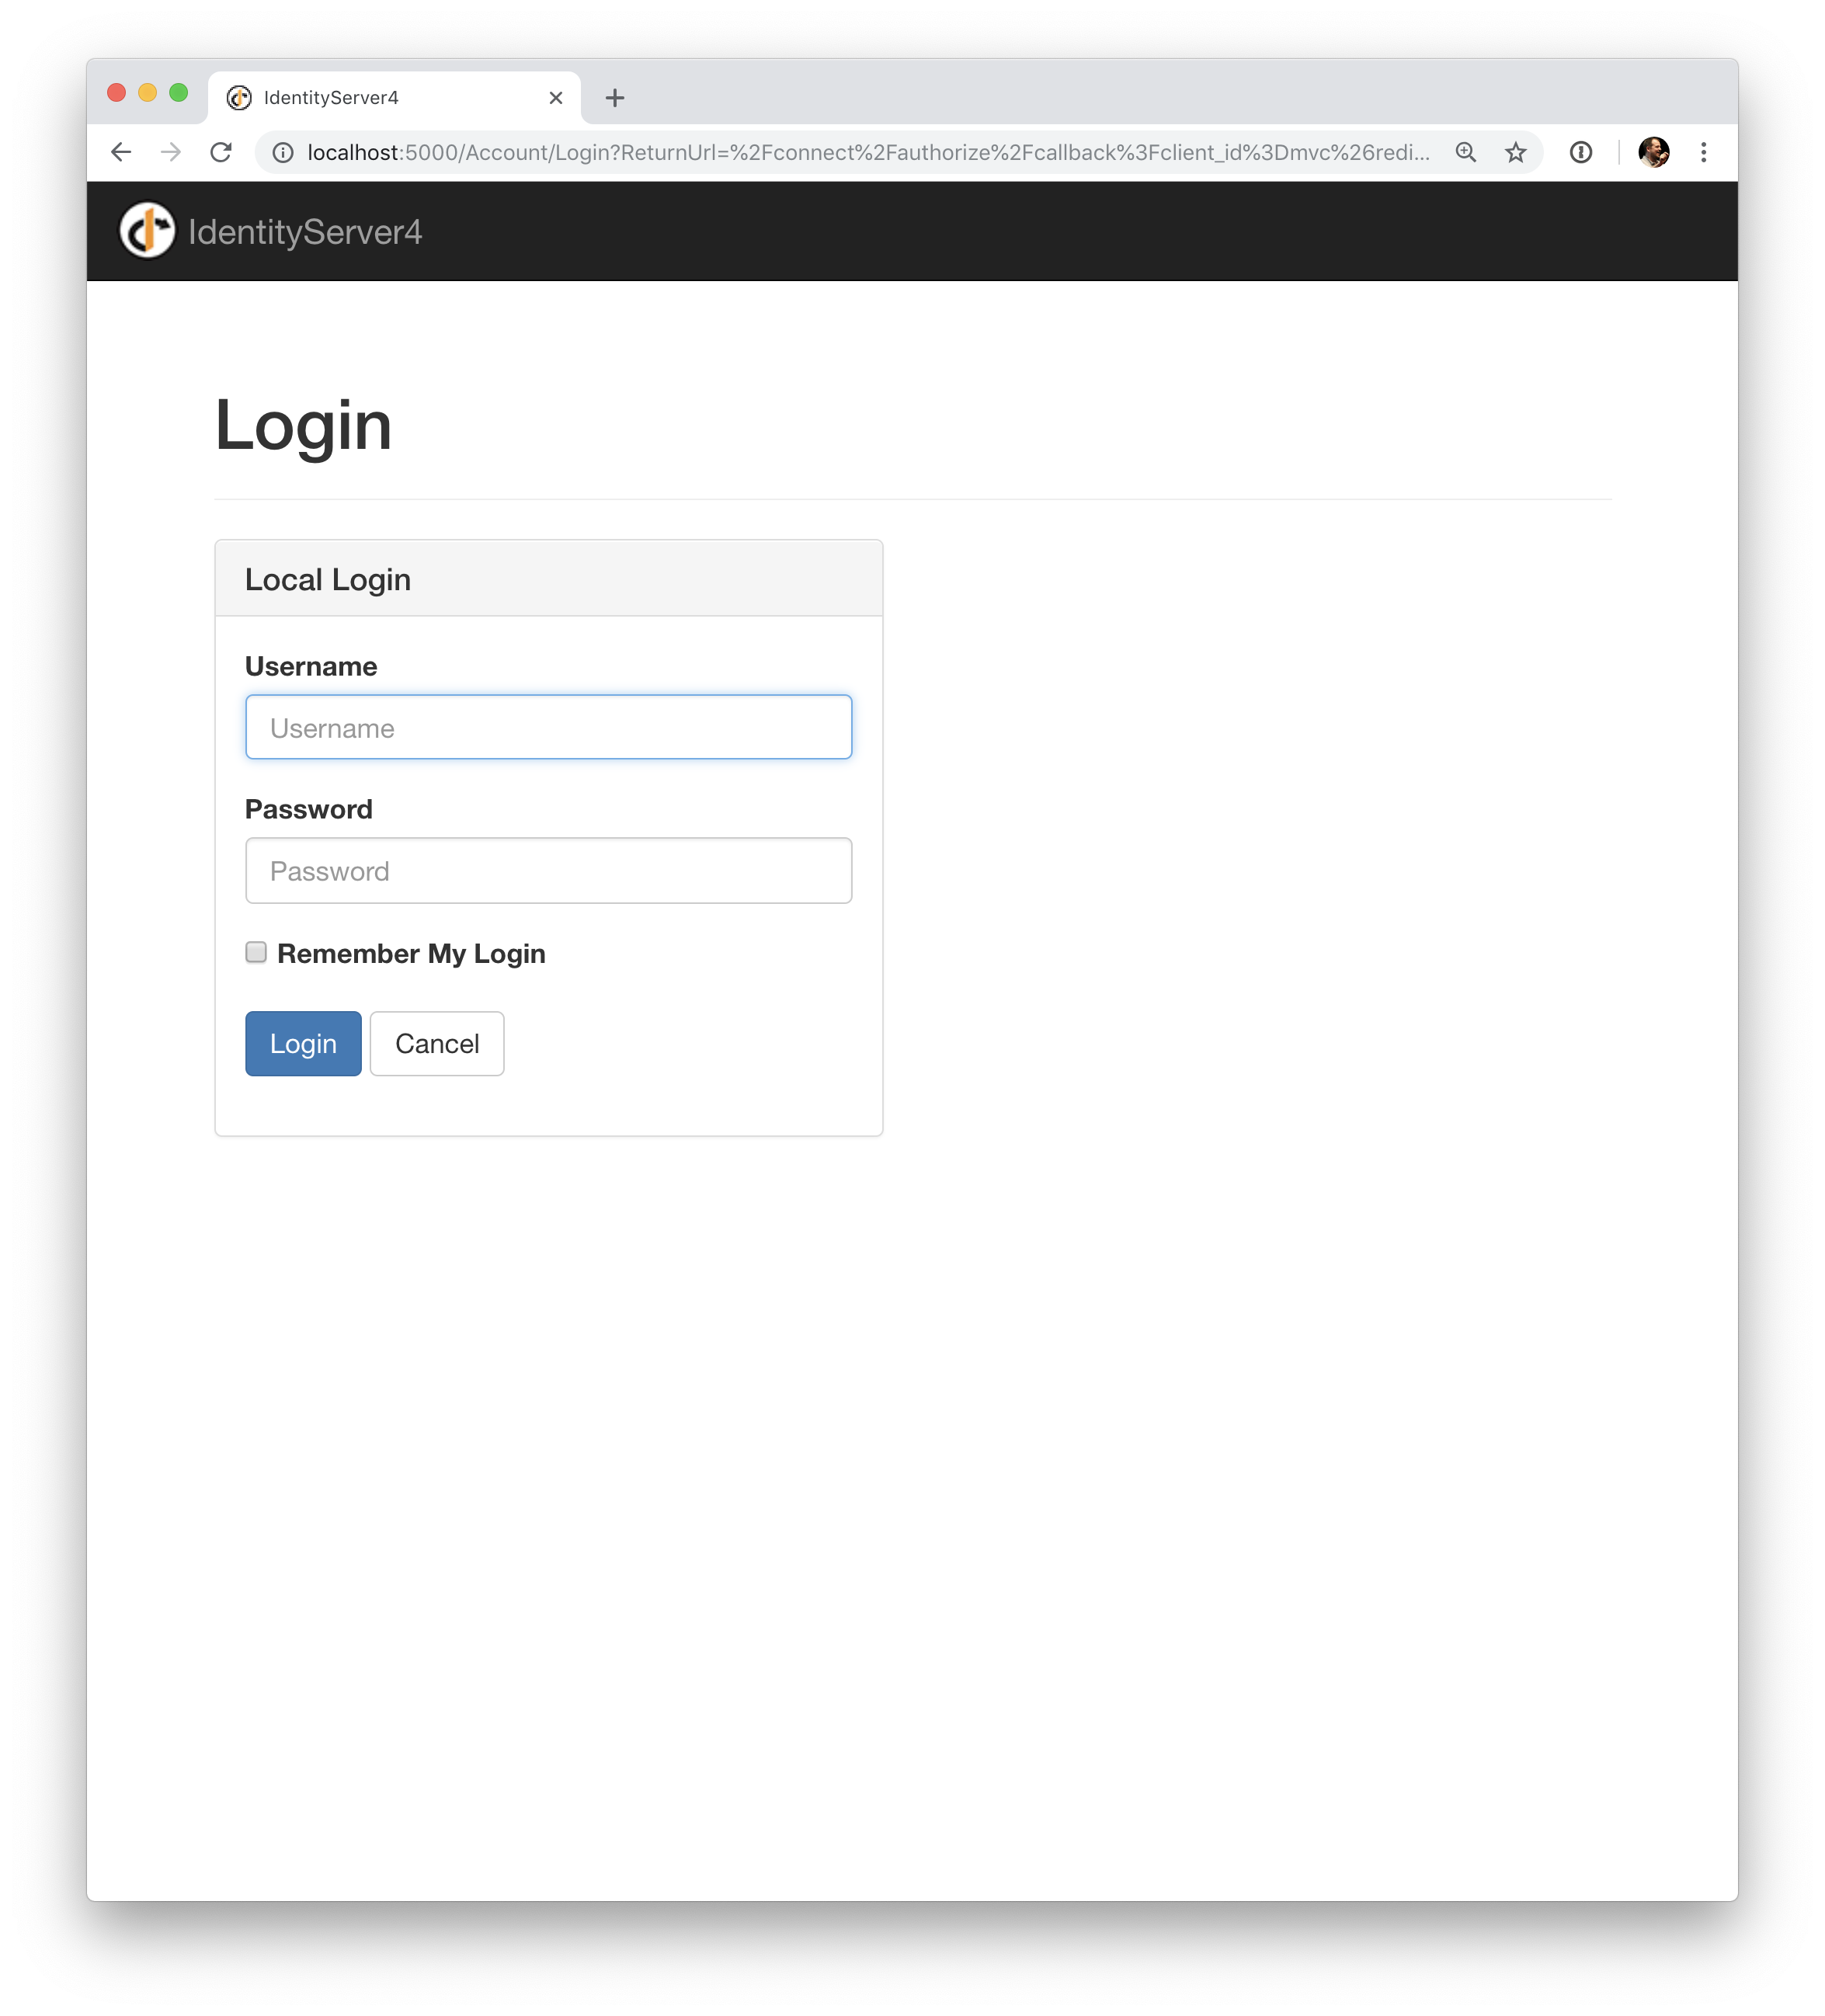
通过导航到受保护的控制器操作来触发身份验证握手。您应该会看到重定向到IdentityServer的登录页面。
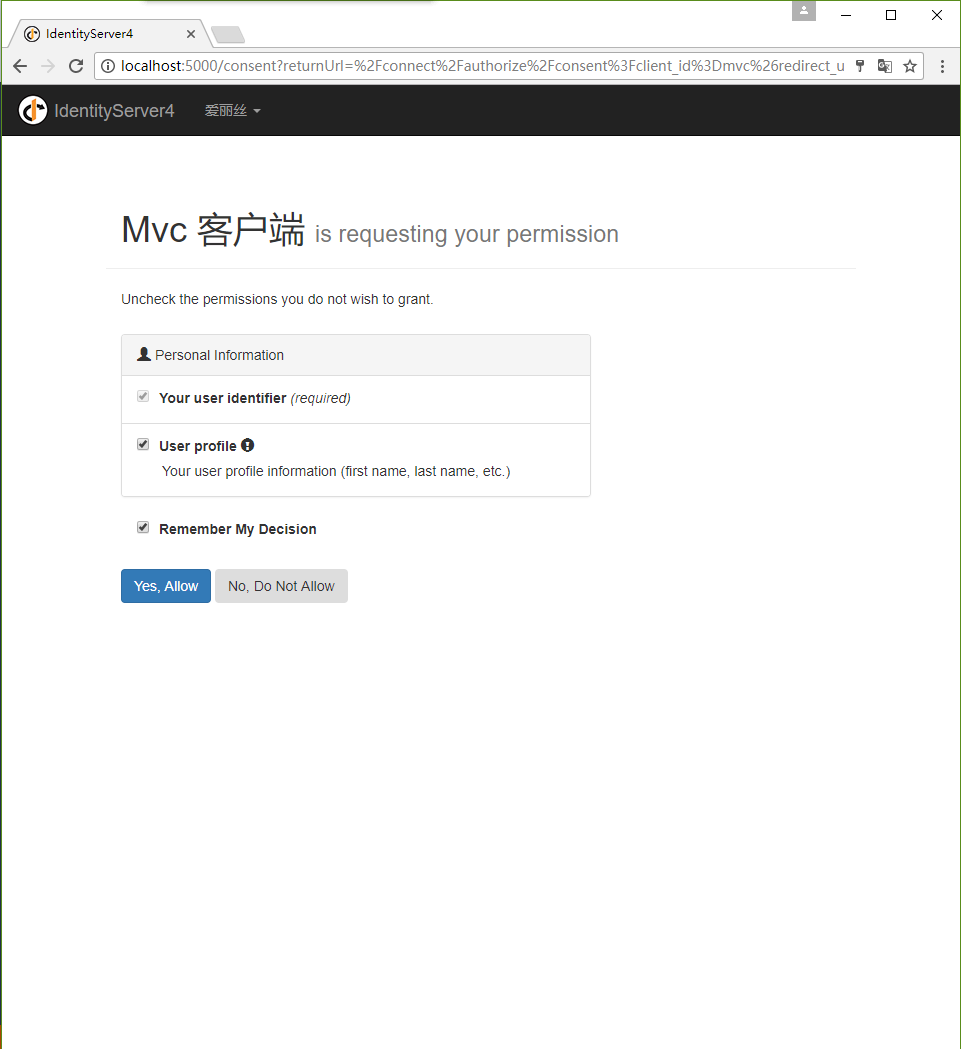
登录成功后,用户将在授权确认页中被呈现出来。在这里用户可以决定他是否想要发布他的身份信息给客户端应用程序。
注意
授权确认页可以通过客户端定义对象的RequireConsent属性被关闭(以每个客户端为单位)。
之后,IdentityServer将重定向回MVC客户端,其中OpenID Connect身份验证处理程序处理响应并通过设置cookie在本地登录用户。最后,MVC视图将显示cookie的内容。
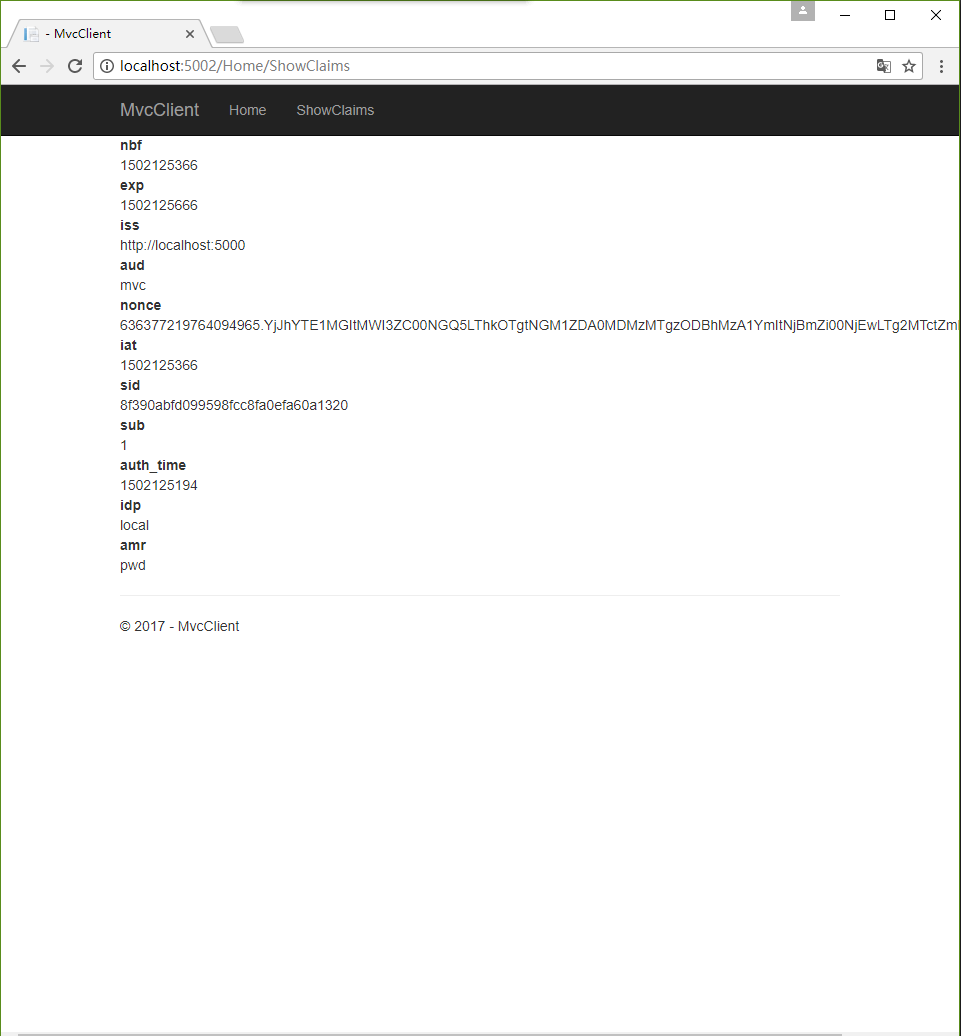
如您所见,cookie包含两部分,即用户的声明和一些元数据。此元数据还包含IdentityServer发出的原始令牌。随意将此令牌复制到https://jwt.io以检查其内容。
11.6 添加注销
最后一步是向MVC客户端添加注销。
使用IdentityServer等身份验证服务,仅清除本地应用程序cookie是不够的。此外,您还需要向IdentityServer进行往返以清除中央单点登录会话。
确切的协议步骤在OpenID Connect处理程序中实现,只需将以下代码添加到某个控制器即可触发注销:
public IActionResult Logout()
{
    return SignOut("Cookies", "oidc");
}
这将清除本地cookie,然后重定向到IdentityServer。IdentityServer将清除其cookie,然后为用户提供返回MVC应用程序的链接。
11.7 进一步的实验
如上所述,OpenID Connect处理程序默认要求配置文件范围。此范围还包括名称或网站等声明。
让我们将这些声明添加到用户,以便IdentityServer可以将它们放入身份标记:
public static List<TestUser> GetUsers()
{
    return new List<TestUser>
    {
        new TestUser
        {
            SubjectId = "1",
            Username = "alice",
            Password = "password",

            Claims = new []
            {
                new Claim("name", "Alice"),
                new Claim("website", "https://alice.com")
            }
        },
        new TestUser
        {
            SubjectId = "2",
            Username = "bob",
            Password = "password",

            Claims = new []
            {
                new Claim("name", "Bob"),
                new Claim("website", "https://bob.com")
            }
        }
    };
}
下次进行身份验证时,您的声明页面现在会显示其他声明。
请随意添加更多的身份信息 - 还有更多的scopes。OpenID Connect中间件上的Scope属性是你用来配置哪些Scopes将在认证期间被发送到IdentityServer的地方。
值得注意的是,对令牌中身份信息的遍历是一个扩展点 - IProfileService。因为我们正在使用AddTestUser,所以默认使用的是TestUserProfileService。你可以检出这里的源代码来查看它的工作原理。