目录
(一)过程说明
云服务器购买与使用
Centos下python3环境部署
Django uwsgi
Django uwsgi+nginx
(二)python3安装部署
(1)云服务器购买与使用
云服务器:基于当下热门虚拟化技术,将服务器资源进行从新分配之后,在网络端分配给大家使用的 虚拟机。有外网ip,我们通过外网ip可以实现互联网访问。
阿里云
百度云
腾讯云,与小程序对接效果好
华为云
景安云
亚马逊
- 购买,看清楚是否有公网ip
- 使用xshell进行远程登录
- 像vm的虚拟机一样操作。
(2)Centos下python3环境部署
1.确定我们开发的python版本和所有的依赖包


依照所需安装
开始在服务器安装python3.6.2
在centos7上安装python3环境,centos系统默认是携带python的,但是centos7默认携带的时候python 的2.7.5版本。Centos7系统当中大量的使用了python2的语法,所以我们安装python3不能卸载和修 改已有的python2的版本信息。
服务器ip:10.10.65.44
检测当前服务器的yum是否可用
Yum list
(1)Yum可用的情况下,我们安装python需要的依赖包
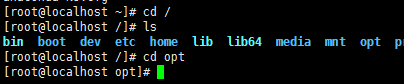
yum -y install zlib-devel bzip2-devel openssl-devel ncurses-devel sqlite-devel readline-devel tk-devel gcc make(2)切换到opt下(好习惯):
(3)执行命令下载python3.6.2包
wget https://www.python.org/ftp/python/3.6.2/Python-3.6.2.tar.xz 
(4)解压文件(大写字母注意):
命令:tar -Jxvf Python3.6.2.tar.xz
解压后:

(5)解压后切换到蓝色文件夹执行配置命令:./configure prefix=/usr/local/python3

(6)编译安装:make && make install
![]()
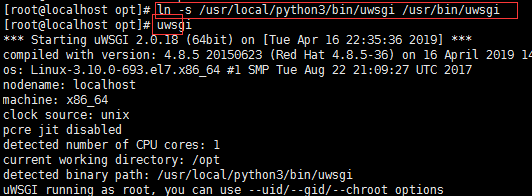
(7)建立软连接
ln -s /usr/local/python3/bin/python3 /usr/bin/python3
ln -s /usr/local/python3/bin/pip3 /usr/bin/pip3

(8)测试成功

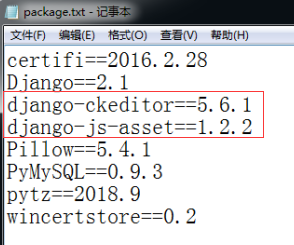
(9)转移项目和package.txt


pip3 install package.txt安装全部,若报错,那单个安装有时能解决此问题
注意package.txt里不能有wxpython,因为linux不支持图形化,装不上,其他同理

(三)安装uwsgi
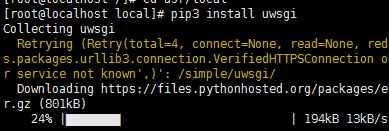
(1)进入local安装uwsgi,安装完后会和pip3同在python3下

(2) 创建软连接和测试uwsgi 和 django的契合
切换到 /opt执行创建软连接命令
关闭防火墙和selinux

进入opt下的项目Ourblog,使用uwsgi的命令启动django
命令: uwsgi --http 10.10.65.44:8000 --file OurBlog/wsgi.py --static-map=/static=static
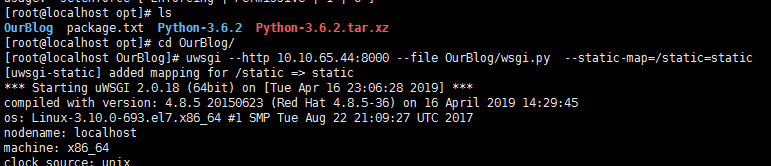
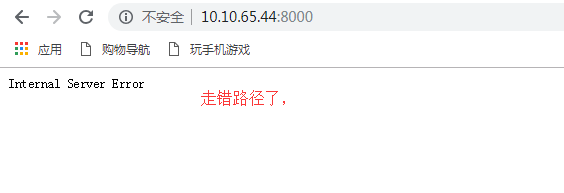
启动完后访问:

修改settings.py文件
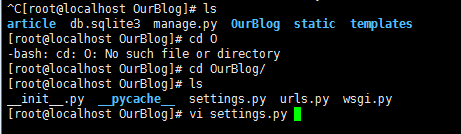

再次执行:因为有两个Ourblog,必须切换到顶级的Ourblog才能有manage.py

正确执行:
uwsgi --http 10.10.65.44:8000 --file OurBlog/wsgi.py --static-map=/static=static
说明:
--http ip端口
--file uwsgi文件位置,wsgi.py和settings同级
--static-map 静态文件路由


使用uwsgi的脚本启动django
(1)在/opt下创建script目录

(2)在script目录下创建uwsgi.ini

uwsgi.ini 中输入如下代码:
[uwsgi]

chdir=/opt/OurBlog
module=OurBlog.wsgi:application
socket=/opt/script/uwsgi.sock
workers=5
pidfile=/opt/script/uwsgi.pid
http=10.10.65.44:9000
static-map=/static=/opt/OurBlog/static
uid=root
gid=root
master=true
vacuum=true
enable-threads=true
thunder-lock=true
harakiri=30
post-buffering=4096
daemonize=/opt/script/uwsgi.log
粘贴后修改成自己服务器的ip,保存退出

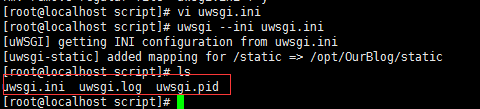
保存退出后执行命令:uwsgi --ini uwsgi.ini 后 Script目录下会出现4个文件uwsgi.ini uwsgi.pid uwsgi.sock uwsgi.log
这里少了uwsgi.sock,
若uwsgi.ini内容输入无误,重启虚拟机试一下,别忘了关防火墙


(四)安装nginx
(1)切换到/opt目录运行命令下载nginx包
wget http://nginx.org/download/nginx-1.12.2.tar.gz

(2)解压包 切入解压目录
tar -zxvf nginx-1.12.2.tar.gz

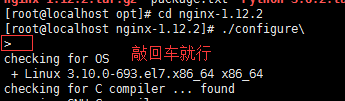
(3)编译安装
./configure \
安装:make && make install
(4)创建软连接
ln -s /usr/local/nginx/sbin/nginx /usr/bin/nginx
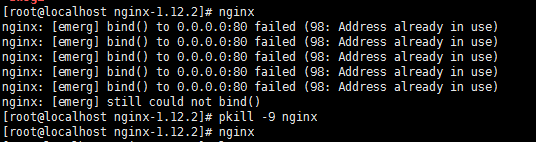
(5)nginx 启动测试
直接输入nginx
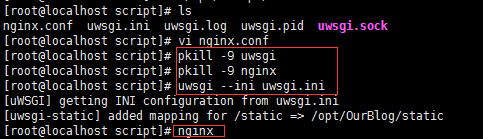
(6)检查运行中的uwsgi,全部关闭

(7)检查nginx也全部关闭,之后只开启nginx
(8)访问10.10.65.44就会出现:

(9)拷贝到/opt/script下按照图片下面的代码标蓝处修改nginx.conf,

#user nobody;
worker_processes 1;
#error_log logs/error.log;
#error_log logs/error.log notice;
#error_log logs/error.log info;
#pid logs/nginx.pid;
events {
worker_connections 1024;
}
http {
include mime.types;
default_type application/octet-stream;
log_format main '$remote_addr - $remote_user [$time_local] "$request" '
'$status $body_bytes_sent "$http_referer" '
'"$http_user_agent" "$http_x_forwarded_for"';
#access_log logs/access.log main;
sendfile on;
#tcp_nopush on;
#keepalive_timeout 0;
keepalive_timeout 65;
#gzip on;
server {
listen 80;
server_name OurBlog;
charset utf-8;
access_log logs/host.access.log main;
gzip_types text/plain application/x-javascript text/css text/javascript application/x-httpd-php application/json text/json image/jpeg image/gif image/png application/octet-stream;
error_log /var/log/nginx/error.log error;
location / {
include uwsgi_params;
uwsgi_connect_timeout 30;
uwsgi_pass unix:/opt/script/uwsgi.sock;
}
location =/static/{
alias /opt/OurBlog/static;
index index.html index.htm;
}
#error_page 404 /404.html;
# redirect server error pages to the static page /50x.html
#
error_page 500 502 503 504 /50x.html;
location = /50x.html {
root html;
}
# proxy the PHP scripts to Apache listening on 127.0.0.1:80
#
#location ~ \.php$ {
# proxy_pass http://127.0.0.1;
#}
# pass the PHP scripts to FastCGI server listening on 127.0.0.1:9000
#
#location ~ \.php$ {
# root html;
# fastcgi_pass 127.0.0.1:9000;
# fastcgi_index index.php;
# fastcgi_param SCRIPT_FILENAME /scripts$fastcgi_script_name;
# include fastcgi_params;
#}
# deny access to .htaccess files, if Apache's document root
# concurs with nginx's one
#
#location ~ /\.ht {
# deny all;
#}
}
# another virtual host using mix of IP-, name-, and port-based configuration
#
#server {
# listen 8000;
# listen somename:8080;
# server_name somename alias another.alias;
# location / {
# root html;
# index index.html index.htm;
# }
#}
# HTTPS server
#
#server {
# listen 443 ssl;
# server_name localhost;
# ssl_certificate cert.pem;
# ssl_certificate_key cert.key;
# ssl_session_cache shared:SSL:1m;
# ssl_session_timeout 5m;
# ssl_ciphers HIGH:!aNULL:!MD5;
# ssl_prefer_server_ciphers on;
# location / {
# root html;
# index index.html index.htm;
# }
#}
}
(10)保存退出后,将uwsgi和nginx都杀死,先启动uwsgi再启动nginx
(11)访问url
