版权声明:来自 Cox 的程序员 https://blog.csdn.net/Coxhuang/article/details/89058429
文章目录
Celery4.3 定时任务
#0 GitHub
https://github.com/Coxhuang/django-celery4
#1 环境
Python3.7
celery==4.3.0
django==2.0.7
redis==3.2.1 # 低版本的redis不兼容celery
#2 需求分析
django项目会在每周一凌晨结算上一周的项目总流水数,需要一个定时任务,到指定的时间,会自动结算
#3 开始
#3.1 创建一个django项目(项目名:celery4)和app(app名:app)
.
├── app # app
│   ├── __init__.py
│   ├── admin.py
│   ├── apps.py
│   ├── migrations
│   │   └── __init__.py
│   ├── models.py
│   ├── tests.py
│   └── views.py
├── celery4 # 项目
│   ├── __init__.py
│   ├── settings.py
│   ├── urls.py
│   └── wsgi.py
├── manage.py
└── templates
#3.2 配置celery
- 在项目下(celery4目录下,和settings.py同级)新建celery.py
from __future__ import absolute_import, unicode_literals
import os
from celery import Celery

# set the default Django settings module for the 'celery' program.
os.environ.setdefault('DJANGO_SETTINGS_MODULE', 'celery4.settings') # 项目名.settings

app = Celery('celery4') # 项目名

# Using a string here means the worker doesn't have to serialize
# the configuration object to child processes.
# - namespace='CELERY' means all celery-related configuration keys
#should have a `CELERY_` prefix.
app.config_from_object('django.conf:settings', namespace='CELERY')

# Load task modules from all registered Django app configs.
app.autodiscover_tasks()
- 配置定时任务
settings.py
from celery.schedules import crontab
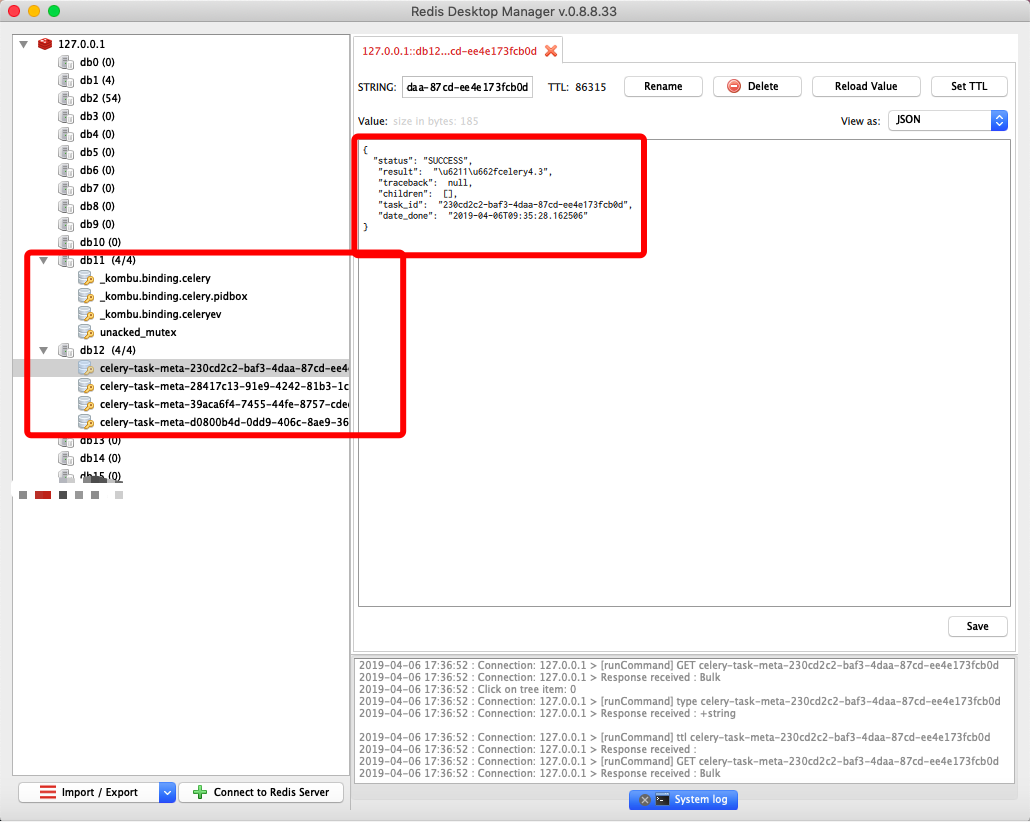
CELERY_BROKER_URL = 'redis://127.0.0.1:6379/11' # redis作为中间件
CELERY_ACCEPT_CONTENT = ['json']
CELERY_TASK_SERIALIZER = 'json'
CELERY_RESULT_BACKEND = 'redis://127.0.0.1:6379/12' # 数据结果存储地址
from datetime import timedelta
CELERY_BEAT_SCHEDULE = {
'celery4_text': { # 任务名(随意起)
'task': 'app.tasks.text', # 定时任务函数路径
'schedule': timedelta(seconds=30), # 任务循环时间
"args": (4,9), # 参数
},
- 在app下新建tasks.py文件(一定要是tasks.py)
from celery import shared_task
from app.models import xxx # 数据库,方便显示
from datetime import datetime

now = datetime.now()


@shared_task
def text(a,b):

    c = a+b
    xxx.objects.create(
        name = c,
        tim = now
    ) # 每执行一次,就会生成一条数据


    return "我是celery4.3"
#3.3 启动celery
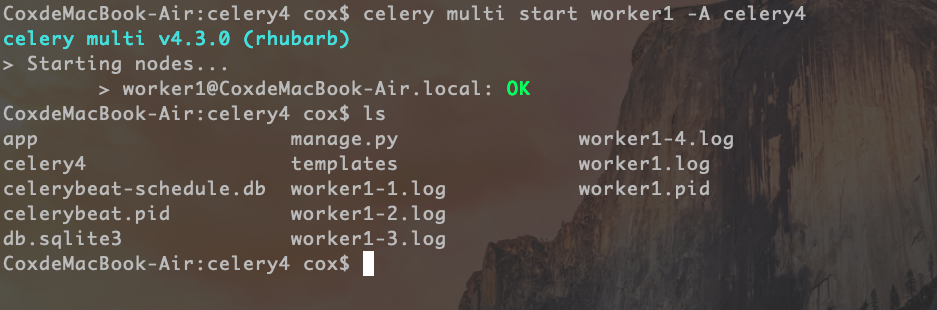
- 启动worker(在项目目录下,能看到manage.py文件的目录)
# celery4是项目名
celery multi start worker1 -A celery4
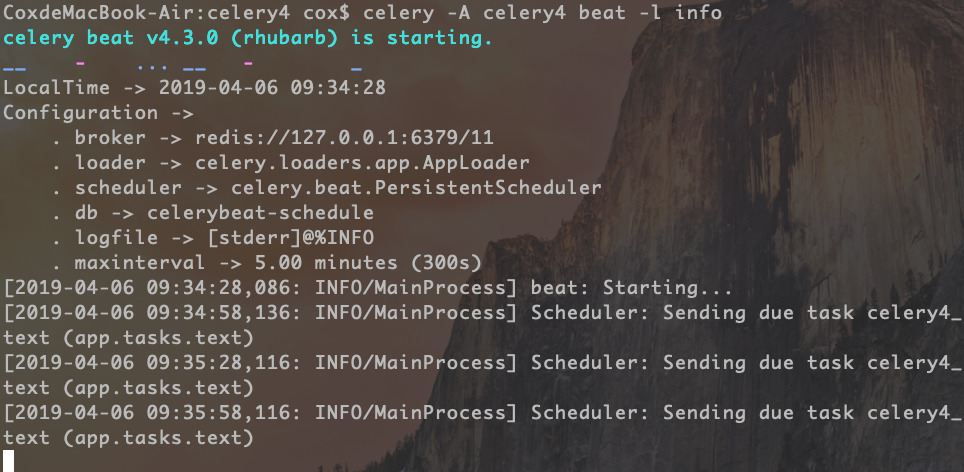
- 启动beat
# celery4是项目名
celery -A celery4 beat -l info

#3.4 脚本启动celery(win环境不支持脚本启动)
- 关闭所有celery
vim celery4-stop.sh
#!/bin/sh
PROCESS=`ps -ef|grep celery|grep -v grep|grep -v PPID|awk '{ print $2}'`
for i in $PROCESS
do
  echo "Kill the $1 process [ $i ]"
  kill -9 $i
done
- 关闭指定的celery-beat
#!/bin/sh
ps -ef |grep celery |grep beat |grep xxx项目名 |awk '{print $2}' | xargs kill -9
使用
sh celery4-stop.sh
- 启动worker / beat
vim celery4.sh
#!/bin/sh
case $1 in
   start) cd /xxx/xxx/celery4 && celery multi start worker1 -A celery4 && sudo celery -A celery4 beat -l info  >  out.file  2>&1  & ;; #
   stop) su root /xxx/xxx/celery4-stop.sh start ;;
   *) echo "require start|stop" ;;
esac
使用
sh celery4.sh
#3.5 注意
- 如果需要修改tasks,name请清空任务队列,最保险的就是把redis的数据全部清空,把项目目录下的celery的pid/db删掉
#4 django配置
from celery.schedules import crontab
CELERY_BROKER_URL = 'amqp://guest@localhost//' # RabbitMQ 作为中间件
CELERY_ACCEPT_CONTENT = ['json']
CELERY_TASK_SERIALIZER = 'json'
# CELERYBEAT_SCHEDULER = 'djcelery.schedulers.DatabaseScheduler'
CELERY_RESULT_BACKEND = 'redis://127.0.0.1:6379/13' # 数据结果存储地址
from datetime import timedelta
#4.1 使用RabbitMQ做中间人
CELERY_BROKER_URL = 'amqp://guest:guest@localhost//' # RabbitMQ 作为中间件,guest:guest是RabbitMQ的默认账号密码
#4.2 使用数据库存储定时任务
对于django项目,如果使用数据库存储定时任务,各有优缺点(针对我的项目)
- 优点: 可以在djcelery的数据库表中,修改定时任务的时间
- 缺点: 如果在代码中将定时任务要执行的函数修改了,需要把djcelery中的表清空,否则,celery不会执行新的定时函数,回到数据库中执行旧的任务
所以,在这里,django中不配置使用数据库存储定时任务,这样每次修改之后,执行的都是新的定时任务函数(前提把队列清空)
CELERYBEAT_SCHEDULER = 'djcelery.schedulers.DatabaseScheduler'
#5 其他命令
#5.1 清空任务队列
还来不及被worker消费的任务都会存放到任务队列中,如何清空任务队列?
celery -A proj purge
#5.2 使用flower(安装flower)
celery -A proj flower --port=5555