1、开启Mongodb
如图进入D盘:
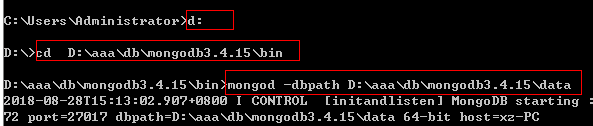
D:\aaa\db\mongodb3.4.15\bin
D:\aaa\db\mongodb3.4.15\data
再开一个cmd:
D:\aaa\db\bin
开机命令:mongod --dbpath +mongodb的安装路径(也就是bin目录所在的路径)
示例:
mongod --dbpath D:\aaa\db\mongodb3.4.15\bin
mongod --dbpath D:\aaa\db\bin
要管理数据库,必须先开机,管理数据库:mongo (一定要在新的cmd中输入)
那么我们就能在系统的任何盘符,使用mongo命令了:
mongo 使用数据库
mongod 开机
mongoimport 导入数据
数据导入(整个数据库):将源代码目录下sql文件夹(acltest.dmp/acltest)的内容,拷贝到mongodb安装目录的bin目录下,命令行方式进入mongodb安装目录的bin目录下,运行 mongorestore -d acltest acltest.dmp/acltest,将数据导入acltest表。
参数说明:mongoimport --db test --collection restaurants --drop --file primer-dataset.json
       -db test  想往哪个数据库里面导入
       --collection restaurants  想往哪个集合中导入
       --drop 把集合清空
       --file primer-dataset.json  哪个文件
数据导出(单个表):D:\aaa\db\mongodb3.4.15\bin>mongoexport -d iflashbuy_log -c area -o c:\area.dat
       参数说明:
       -d 指明使用的库, 本例中为” iflashbuy_log”
       -c 指明要导出的表, 本例中为”area”
       -o 指明要导出的文件名及目录, 本例中为”area.dat”
       从上面可以看到导出的方式使用的是JSON 的样式
数据导出(整个数据库):
D:\aaa\db\mongodb3.4.15\bin> mongodump -h 127.0.0.1:27017 -d acltest -o c:\area.dat
        参数说明:
        -h: MongDB所在服务器地址,例如:127.0.0.1,当然也可以指定端口号:127.0.0.1:27017
        -d: 需要备份的数据库实例,例如:test
        -o: 备份的数据存放位置,例如:/home/mongodump/,当然该目录需要提前建立,这个目录里面存放该数据库实例的备份数据。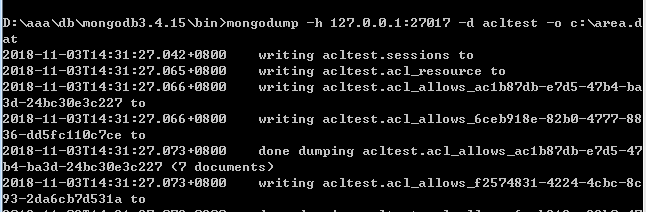
开机命令:
--dbpath就是选择数据库文档所在的文件夹。
也就是说,mongoDB中,真的有物理文件,对应一个个数据库。U盘可以拷走。
一定要保持,开机这个CMD不能动了,不能关,不能ctrl+c。 一旦这个cmd有问题了,数据库就自动关闭了。
所以,应该再开一个cmd。输入
那么,运行环境就是mongo语法了。
列出所有数据库:
show dbs
使用某个数据库:
use 数据库名字
如果想新建数据库,也是use。use一个不存在的,就是新建。
查看当前所在数据库:
db
插入数据:

student就是所谓的集合。集合中存储着很多json。
student是第一次使用,集合将自动创建。
2、命令大全:
MongoDB常用操作命令大全
https://blog.csdn.net/piaocoder/article/details/52384756
清屏:
cls
查看所有数据库列表:
show dbs
使用数据库、创建数据库:
use itcast
查看所有的表:

查看表中的数据:

如果真的想把这个数据库创建成功,那么必须插入一个数据。
数据库中不能直接插入数据,只能往集合(collections)中插入数据。不需要创建集合,只需要写语法:
db.student.insert({“name”:”xiaoming”});
db.student 系统发现student是一个陌生的集合名字,所以就自动创建了集合。
删除数据库,删除当前所在的数据库
db.dropDatabase();
3、插入数据
插入数据,随着数据的插入,数据库创建成功了,集合也创建成功了。没有student集合会自动创建
db.student.insert({"name":"xiaoming"});
我们不可能一条一条的insert。所以,我们希望用sublime在外部写好数据库的形式,然后导入数据库:
1 mongoimport --db test --collection restaurants --drop --file primer-dataset.json
-db test 想往哪个数据库里面导入
--collection restaurants 想往哪个集合中导入
--drop 把集合清空
--file primer-dataset.json 哪个文件
这样,我们就能用sublime创建一个json文件,然后用mongoimport命令导入,这样学习数据库非常方便。
4、查找数据
查找数据,用find。find中没有参数,那么将列出这个集合的所有文档:
db.restaurants.find()
精确匹配:
db.student.find({"score.shuxue":70});
多个条件:
db.student.find({"score.shuxue":70 , "age":12})
大于条件:
db.student.find({"score.yuwen":{$gt:50}});
或者。寻找所有年龄是9岁,或者11岁的学生
db.student.find({$or:[{"age":9},{"age":11}]});
查找完毕之后,打点调用sort,表示升降排序。
db.restaurants.find().sort( { "borough": 1, "address.zipcode": 1 } )
5、修改数据
修改里面还有查询条件。你要该谁,要告诉mongo。
查找名字叫做小明的,把年龄更改为16岁:
db.student.update({"name":"小明"},{$set:{"age":16}});
查找数学成绩是70,把年龄更改为33岁:
db.student.update({"score.shuxue":70},{$set:{"age":33}});
更改所有匹配项目:"
By default, the update() method updates a single document. To update multiple documents, use the multi option in the update() method.
db.student.update({"sex":"男"},{$set:{"age":33}},{multi: true});
完整替换,不出现$set关键字了:
db.student.update({"name":"小明"},{"name":"大明","age":16});
6、删除数据
db.restaurants.remove( { "borough": "Manhattan" } )
By default, the remove() method removes all documents that match the remove condition. Use the justOne option to limit the remove operation to only one of the matching documents.
db.restaurants.remove( { "borough": "Queens" }, { justOne: true } )