一、日志切割(企业中打包日志)
在实际的生产环境中每一天的日志文件都是要打包备份的,如果每天都手动的去截取日志,重命名这样就很不方便,所以我们编写一个脚本并建立一个定时任务来进行这些工作
1.编辑脚本文件,加权限
[root@server1 nginx]# ls
client_body_temp fastcgi_temp logs sbin uwsgi_temp
conf html proxy_temp scgi_temp
[root@server1 nginx]# cd logs/
[root@server1 logs]# ls
access.log access.log.bak error.log nginx.pid
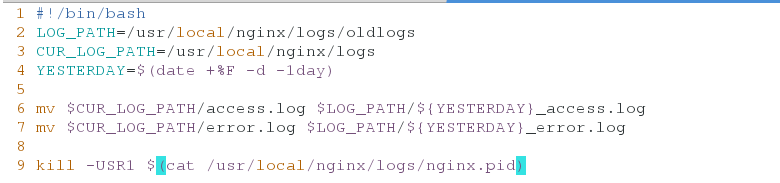
[root@server1 logs]# vim backup.sh
[root@server1 logs]# ls
access.log access.log.bak backup.sh error.log nginx.pid

脚本内容如下:
  1 #!/bin/bash
  2 LOG_PATH=/usr/local/nginx/logs/oldlogs
  3 CUR_LOG_PATH=/usr/local/nginx/logs
  4 YESTERDAY=$(date +%F -d -1day)
  5
  6 mv $CUR_LOG_PATH/access.log $LOG_PATH/${YESTERDAY}_access.log
  7 mv $CUR_LOG_PATH/error.log $LOG_PATH/${YESTERDAY}_error.log
  8
  9 kill -USR1 $(cat /usr/local/nginx/logs/nginx.pid)
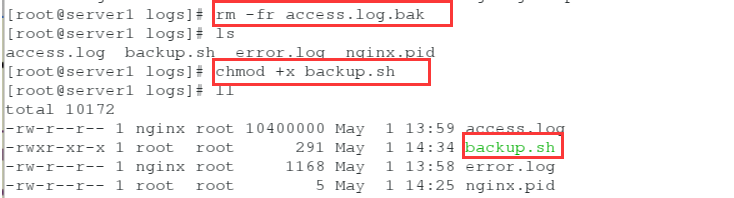
[root@server1 logs]# rm -fr access.log.bak
[root@server1 logs]# ls
access.log  backup.sh  error.log  nginx.pid
[root@server1 logs]# chmod +x backup.sh
[root@server1 logs]# ll
2.创建目录
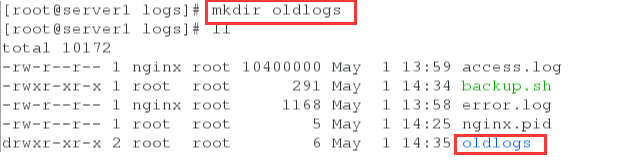
[root@server1 logs]# mkdir oldlogs
[root@server1 logs]# ll
3.执行脚本,查看目录
[root@server1 logs]# ./backup.sh
[root@server1 logs]# ll oldlogs/


4.创建定时任务
[root@server1 logs]# crontab -e
no crontab for root - using an empty one
crontab: installing new crontab
[root@server1 logs]#
[root@server1 logs]# crontab -l
0 0 * * * /bin/bash /usr/local/nginx/logs/backup.sh
[root@server1 logs]#

二、压缩抓包
1.编辑配置文见,打开gzip开关
[root@server1 ~]# cd /usr/local/nginx/conf/
[root@server1 conf]# vim nginx.conf
[root@server1 conf]#
[root@server1 conf]# pwd
/usr/local/nginx/conf

 33     gzip  on;
 34     gzip_min_length 1;
 35     gzip_comp_level 2;
 36     gzip_types text/plain application/x-javascript text/css application/xml text/jav    ascript application/x-httpd/php images/jpeg images/gif images/png;

2.重新编辑测试页
[root@server1 conf]# cd ../html
[root@server1 html]# ls
50x.html index.html
[root@server1 html]# vim index.html
[root@server1 html]# cp /etc/passwd .
[root@server1 html]# ls
50x.html index.html passwd
[root@server1 html]# rm -fr index.html
[root@server1 html]# ls
50x.html passwd
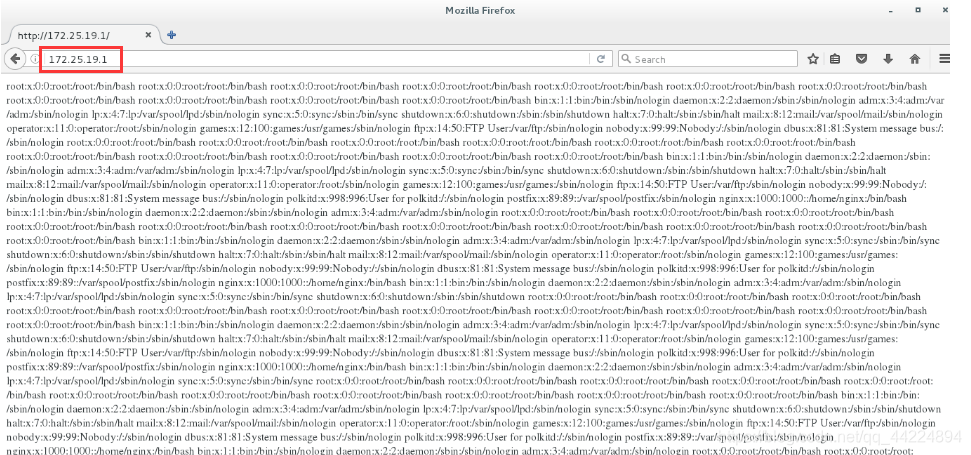
[root@server1 html]# mv passwd index.html
[root@server1 html]# ls
50x.html index.html
[root@server1 html]# vim index.html ##将原文件的内容复制多次
[root@server1 html]# du -sh index.html
124K index.html

可以看到现在测试we年的大小是124k

3.重启服务
[root@server1 html]# pwd
/usr/local/nginx/html
[root@server1 html]# ../sbin/nginx -s reload

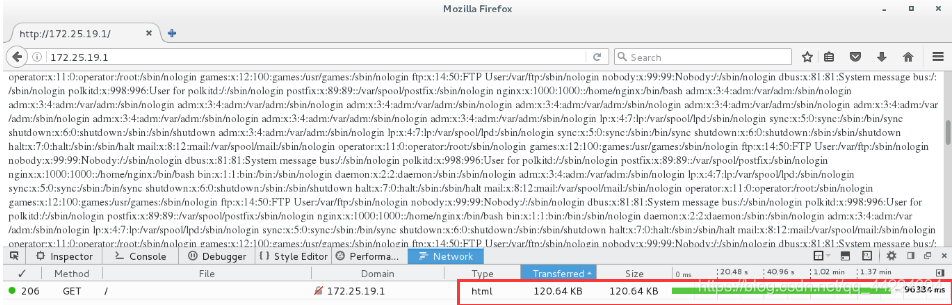
4.打开浏览器测试
按F12,可以看到大小发生变化


5.关闭gzip开关,再次重启服务,浏览器测试,大小发生改变
[root@server1 html]# cd ../conf
[root@server1 conf]# vim nginx.conf
[root@server1 conf]# ../sbin/nginx -s reload


三、客户端的访问控制
1.设置访问速率,一秒一个请求,所以请求十次10秒左右(限制客户端请求的并发量为1个)
(1)编辑配置文件
[root@server1 system]# cd
[root@server1 ~]# cd /usr/local/nginx/conf/
[root@server1 conf]# vim nginx.conf
[root@server1 conf]#
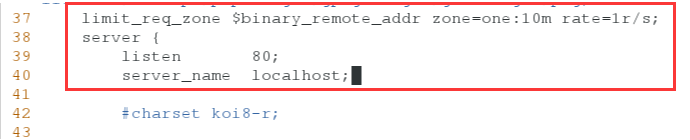
37 limit_req_zone $binary_remote_addr zone=one:10m rate=1r/s;
51 location /search/ {
52 limit_req zone=one;
53 }
[root@server1 conf]# cd ../html
[root@server1 html]# ls
50x.html index.html


(2)创建search目录
[root@server1 html]# mkdir search
[root@server1 html]# cd search/
[root@server1 search]# ls

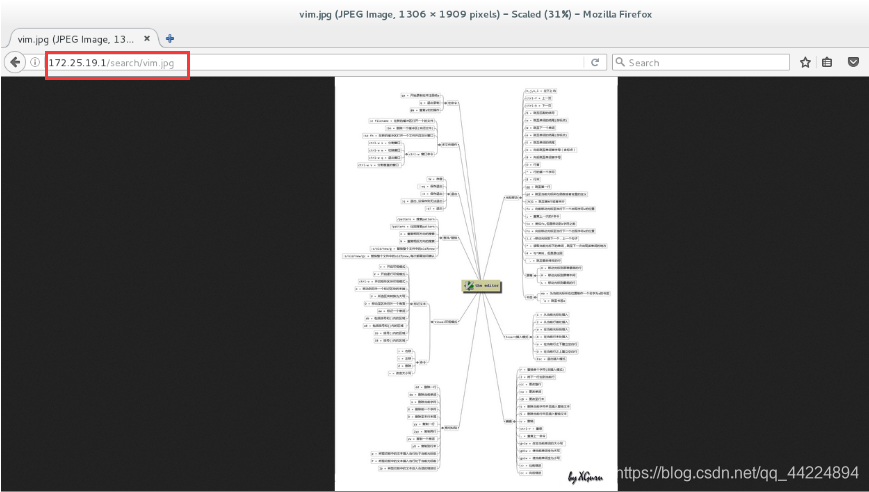
(3)下载一个图片
[root@server1 search]# ls
vim.jpg

(4)语法检测
[root@server1 search]# /usr/local/nginx/sbin/nginx -t
nginx: the configuration file /usr/local/nginx/conf/nginx.conf syntax is ok
nginx: configuration file /usr/local/nginx/conf/nginx.conf test is successful
[root@server1 search]#

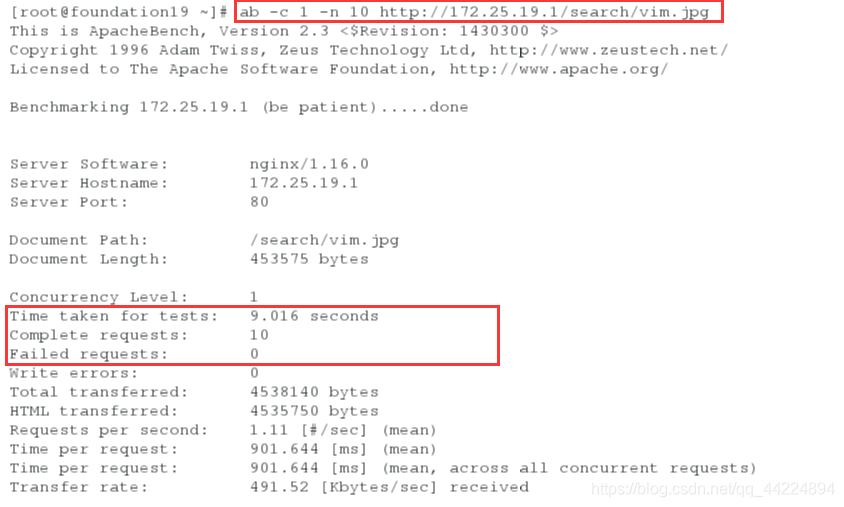
(5)打开浏览器可以看到
(6)物理机测试
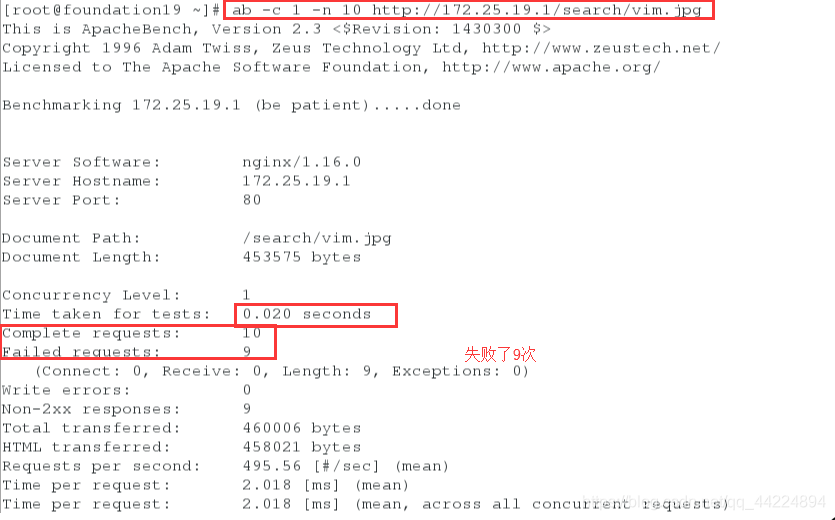
[root@foundation19 ~]# ab -c 1 -n 10 http://172.25.19.1/search/vim.jpg

(7)重启服务,再次测试
[root@server1 search]# systemctl reload nginx

(8)失败9次,只响应了第一个请求,剩下的都被拒绝
[root@foundation19 ~]# ab -c 1 -n 10 http://172.25.19.1/search/vim.jpg
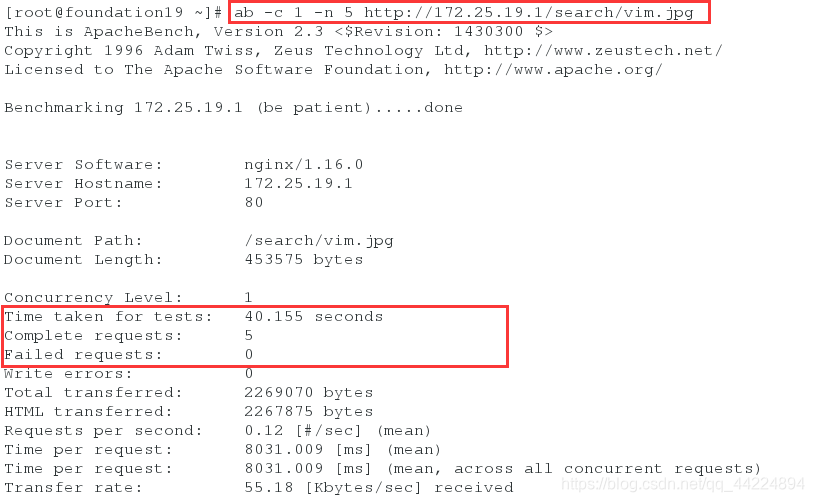
2.burst
(1)编辑配置文件,添加brust=5
[root@server1 search]# cd /usr/local/nginx/conf/
[root@server1 conf]# vim nginx.conf


 51         location /search/ {
 52                 limit_req zone=one burst=5;
 53         }
[root@server1 conf]# systemctl reload nginx


测试:
[root@foundation19 ~]# ab -c 1 -n 5 http://172.25.19.1/search/vim.jpg
10秒左右

3.设置每秒访问50k,访问5次,444*5 = 2000 ,2000/50=40秒
[root@server1 conf]# vim nginx.conf
[root@server1 conf]# systemctl reload nginx
[root@server1 conf]# du -sh /usr/local/nginx/html/search/vim.jpg
444K	/usr/local/nginx/html/search/vim.jpg
[root@server1 conf]#


测试:
[root@foundation19 ~]# ab -c 1 -n 5 http://172.25.19.1/search/vim.jpg
40秒左右
4.内置变量,1秒1k
[root@server1 conf]# vim nginx.conf
[root@server1 conf]# systemctl reload nginx

 46         location / {
 47             root   html;
 48             set $limit_rate 1k;
 49             index  index.html index.htm;
 50         }
 51
 52         location /search/ {
 53                 limit_rate 50k;
 54                 limit_req zone=one burst=5;
 55         }
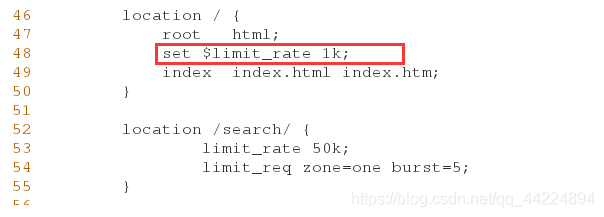
打开浏览器访问,一直转圈


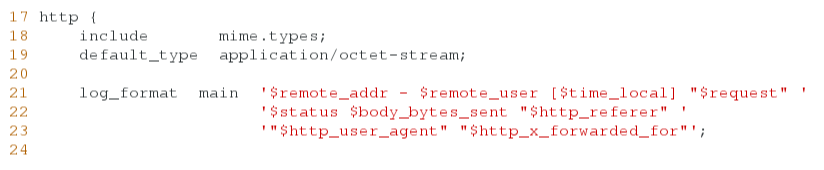
5.自定义日志
[root@server1 conf]# vim nginx.conf
[root@server1 conf]# systemctl reload nginx
[root@server1 conf]#
[root@server1 conf]# cd ../logs/
[root@server1 logs]# ls
access.log  backup.sh  error.log  nginx.pid  oldlogs  westos.access.log
[root@server1 logs]#

 17 http {
 18     include       mime.types;
 19     default_type  application/octet-stream;
 20
 21     log_format  main  '$remote_addr - $remote_user [$time_local] "$request" '
 22                       '$status $body_bytes_sent "$http_referer" '
 23                       '"$http_user_agent" "$http_x_forwarded_for"';

 37     limit_req_zone $binary_remote_addr zone=one:10m rate=1r/s;
 38     server {
 39         listen       80;
 40         server_name  localhost;
 41
 42         #charset koi8-r;
 43
 44         access_log  logs/westos.access.log  main;
 45
 46         location / {
 47             root   html;
 48             #set $limit_rate 1k;
 49             index  index.html index.htm;
 50         }
 51
 52         location /search/ {
 53                 #limit_rate 50k;
 54                 limit_req zone=one burst=5;
 55         }


测试:
[root@foundation19 ~]# ab -c 1 -n 10 http://172.25.19.1/search/vim.jpg
== 验证:==
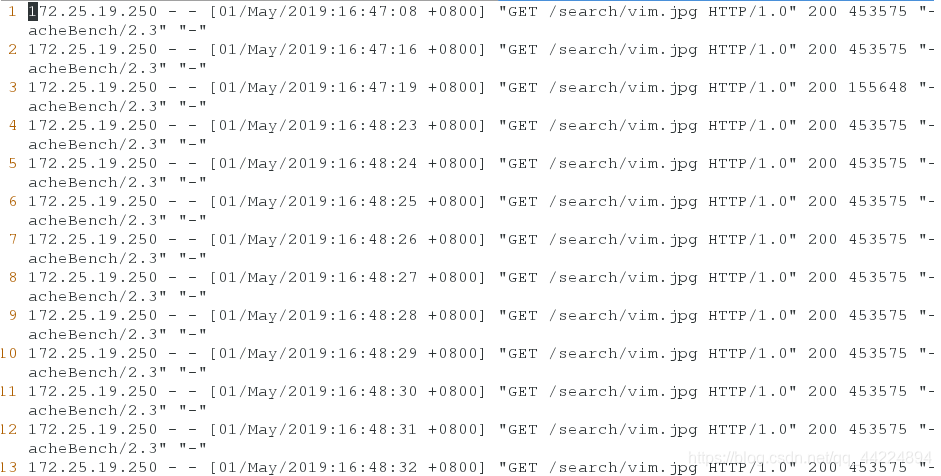
[root@server1 logs]# vim westos.access.log
[root@server1 logs]#