先放项目地址:https://github.com/LiuC520/full_stack_projects/tree/master/web/vue/react_360
其实页面巨丑,写的是reactAR官网。不过我从中学到的是也许要学学reactAR?
我想的大部分,也许是做路由切换页面即可,然后分析代码发现还是一个移动端的项目,我们看看效果

我们来看看代码
//src\main.js
import Vue from 'vue'
import ElementUI from 'element-ui'
import router from './router'
import 'element-ui/lib/theme-chalk/index.css'
import App from './App.vue'

Vue.config.productionTip = false
Vue.use(ElementUI)

new Vue({
    render: h => h(App),
    router
}).$mount('#app')
我们可以看到入口是vue.js还有router.js
我们看看router.js
import Vue from 'vue'
import Router from 'vue-router'

Vue.use(Router)
//这个是用了路由懒加载
const enjoyvr = r => require.ensure([], () => r(require('../pages/enjoyvr.vue')), 'enjoyvr')
const createfirstproject = r => require.ensure([], () => r(require('../pages/createfirstproject.vue')), 'createfirstproject')
const explorecode = r => require.ensure([], () => r(require('../pages/explorecode.vue')), 'explorecode')
const whatisreact360 = r => require.ensure([], () => r(require('../pages/whatisreact360.vue')), 'whatisreact360')
const runtime = r => require.ensure([], () => r(require('../pages/runtime.vue')), 'runtime')
const photosvideos = r => require.ensure([], () => r(require('../pages/photosvideos.vue')), 'photosvideos')
const surfaces = r => require.ensure([], () => r(require('../pages/surfaces.vue')), 'surfaces')
const objects3d = r => require.ensure([], () => r(require('../pages/objects3d.vue')), 'objects3d')
const layout = r => require.ensure([], () => r(require('../pages/layout.vue')), 'layout')
const playaudio = r => require.ensure([], () => r(require('../pages/playaudio.vue')), 'playaudio')
const inputhandle = r => require.ensure([], () => r(require('../pages/inputhandle.vue')), 'inputhandle')
const nativemodules = r => require.ensure([], () => r(require('../pages/nativemodules.vue')), 'nativemodules')
const legacyreactvrapps = r => require.ensure([], () => r(require('../pages/legacyreactvrapps.vue')), 'legacyreactvrapps')
const build = r => require.ensure([], () => r(require('../pages/build.vue')), 'build')
const staticassets = r => require.ensure([], () => r(require('../pages/staticassets.vue')), 'staticassets')
const integrateothersite = r => require.ensure([], () => r(require('../pages/integrateothersite.vue')), 'integrateothersite')
const view = r => require.ensure([], () => r(require('../pages/view.vue')), 'view')
const text = r => require.ensure([], () => r(require('../pages/text.vue')), 'text')
const image = r => require.ensure([], () => r(require('../pages/image.vue')), 'image')
const entity = r => require.ensure([], () => r(require('../pages/entity.vue')), 'entity')
const vrbutton = r => require.ensure([], () => r(require('../pages/vrbutton.vue')), 'vrbutton')
const animated = r => require.ensure([], () => r(require('../pages/animated.vue')), 'animated')
const asyncstorage = r => require.ensure([], () => r(require('../pages/asyncstorage.vue')), 'asyncstorage')
const controllerinfo = r => require.ensure([], () => r(require('../pages/controllerinfo.vue')), 'controllerinfo')
const enviroment = r => require.ensure([], () => r(require('../pages/enviroment.vue')), 'enviroment')

//这个是子路由,跳转页面
const routes = [{
    path: '/',
  component: enjoyvr,
  name:'欣赏示例'
}, {
    path: '/enjoyvr',
  name:'欣赏示例',
    component: enjoyvr,
},
{
    path: '/createfirstproject',
    component: createfirstproject,
  meta: ['创建第一个应用', '添加商铺'],
  name:'创建第一个应用',

}, {
    path: '/explorecode',
    component: explorecode,
  meta: ['探索代码', '添加商品'],
  name:'探索代码',

}, {
    path: '/whatisreact360',
    component: whatisreact360,
  meta: ['什么是react 360', '属性'],
  name:'什么是react 360',
}, {
    path: '/runtime',
    component: runtime,
  meta: ['Runtime运行时', '属性'],
  name:'Runtime运行时',

}, {
    path: '/photosvideos',
    component: photosvideos,
  meta: ['360度照片和视频', '属性'],
  name:'360度照片和视频',

}, {
    path: '/surfaces',
    component: surfaces,
  meta: ['面', '属性'],
  name:'曲面',

},
{
    path: '/objects3d',
    component: objects3d,
  meta: ['三维物体', '属性'],
  name:'三维物体',

},
{
    path: '/layout',
    component: layout,
  meta: ['布局', '属性'],
  name:'布局',

},
{
    path: '/playaudio',
    component: playaudio,
  meta: ['播放音频', '属性'],
  name:'播放音频',

}, {
    path: '/inputhandle',
    component: inputhandle,
  meta: ['输入控制', '属性'],
  name:'输入控制',

}, {
    path: '/nativemodules',
    component: nativemodules,
  meta: ['原生模块', '属性'],
  name:'原生模块',

}, {
    path: '/legacyreactvrapps',
    component: legacyreactvrapps,
  meta: ['迁移react vr项目', '属性'],
  name:'迁移react vr项目',

}, {
    path: '/build',
    component: build,
  meta: ['构建你的项目', '属性'],
  name:'构建你的项目',

}, {
    path: '/staticassets',
    component: staticassets,
  meta: ['静态文件', '属性'],
  name:'静态文件',

}, {
    path: '/integrateothersite',
    component: integrateothersite,
  meta: ['和现有的网页交互', '属性'],
  name:'和现有的网页交互',

}, {
    path: '/view',
    component: view,
  meta: ['view', '属性'],
  name:'view',

}, {
    path: '/text',
    component: text,
  meta: ['text', '属性'],
  name:'text',

}, {
    path: '/image',
    component: image,
  meta: ['image', '属性'],
  name:'image',

}, {
    path: '/entity',
    component: entity,
  meta: ['Entity', '属性'],
  name:'Entity',

}, {
    path: '/vrbutton',
    component: vrbutton,
  meta: ['VrButton', '属性'],
  name:'VrButton',

}, {
    path: '/animated',
    component: animated,
  meta: ['动画', '属性'],
  name:'动画',

}, {
    path: '/asyncstorage',
    component: asyncstorage,
  meta: ['AsyncStorage 存储', '属性'],
  name:'AsyncStorage 存储',
}, {
    path: '/controllerinfo',
    component: controllerinfo,
  meta: ['ControllerInfo 控制器', '属性'],
  name:'ControllerInfo 控制器',
}, {
    path: '/enviroment',
    component: enviroment,
  meta: ['Environment 环境', '属性'],
  name:'Environment 环境',
}
]
export default new Router({
    routes,
    strict: process.env.NODE_ENV !== 'production',
})
我们现在再来看App.js
里面代码很有意思,pc端和移动端的样式在里面处理的
app.js引入了header组件和nav组件
header组件有判断如果是手机就使用一种style,并且还会监听缩放事件到移动端样式
判断是不是手机的方法
 isMobile() {
      let flag = navigator.userAgent.match(
        /(phone|pad|pod|iPhone|iPod|ios|iPad|Android|Mobile|BlackBerry|IEMobile|MQQBrowser|JUC|Fennec|wOSBrowser|BrowserNG|WebOS|Symbian|Windows Phone)/i
      );
      return flag;
    }
监听网页缩放事件
   window.addEventListener("resize", () => {
      // console.log(document.getElementById('header').clientHeight)
      if (window.innerWidth < 783) {
        if (!that.changeStyle) {
          that.changeStyleFun(true);
        }
      } else {
        if (that.changeStyle) {
          that.changeStyleFun(false);
        }
      }
    });
//样式改变
changeStyleFun(isreturn) {
this.changeStyle = isreturn;
},//完整的代码
//src\components\header.vue
<template>
<div class="header" id="header" ref="header">
<div class="left">
<img src="../assets/logo.svg" class="img"/>
<span class="margin_right">React 360</span>
</div>
<div class="right" :class="changeStyle? 'rightContentAround': 'rightContentEnd'">
<a class="margin_right" href='http://www.vr-react.com/oldindex.html' target='_blank'>React VR中文网</a>
<a class="margin_right" href='https://github.com/facebook/react-vr' target='_blank'>github</a>
<a class="margin_right" href='https://facebook.github.io/react-vr/' target='_blank'>英文版</a>
<a class="margin_right" href='http://www.vr-react.com/forum/' target='_blank'>中文论坛</a>
</div>
</div>
</template>
<script>
export default {
name: "Header",
props: {
msg: String
},
data() {
return {
changeStyle: false,
rightWidth: "250px" //最小宽度
};
},
methods: {
changeStyleFun(isreturn) {
this.changeStyle = isreturn;
},
isMobile() {
let flag = navigator.userAgent.match(
/(phone|pad|pod|iPhone|iPod|ios|iPad|Android|Mobile|BlackBerry|IEMobile|MQQBrowser|JUC|Fennec|wOSBrowser|BrowserNG|WebOS|Symbian|Windows Phone)/i
);
return flag;
}
},
mounted() {
let that = this;
/**
* 监听浏览器窗口的变化,
* 如果头部高度大于52,就意味着已经换行了,
* 就需要把下一行的布局变成平分宽度
*/
if (this.isMobile()) {
that.changeStyleFun(true);
return;
}
window.addEventListener("resize", () => {
// console.log(document.getElementById('header').clientHeight)
if (window.innerWidth < 783) {
if (!that.changeStyle) {
that.changeStyleFun(true);
}
} else {
if (that.changeStyle) {
that.changeStyleFun(false);
}
}
});
}
};
</script>
<style lang='less'>
@import "../styles/mixin";
.header {
background-color: rgb(21, 23, 26);
min-height: 52px;
width: 100%;
padding-left: 0;
margin-left: 0;
position: fixed;
top: 0;
color: white;
display: flex;
flex-direction: row;
flex-wrap: wrap;
font-size: 2rem;
}
.margin_right {
margin-right: 1rem;
}
.left {
flex: 1;
min-width: 20rem;
display: flex;
align-items: center;
}
.right {
flex: 1;
min-width: 20rem;
max-width: 50rem;
display: flex;
align-items: center;
margin-right: 1rem;
}
.rightContentEnd {
font-size: 2rem;
justify-content: flex-end;
margin-bottom: 0;
margin-top: 0;
}
.rightContentAround {
font-size: 1rem;
justify-content: space-around;
margin-bottom: 0.5rem;
margin-top: 0.5rem;
}
.img {
width: 5rem;
height: 100%;
}
</style>//src\components\nav\nav.js
//nav.js里面是数据
const data = [{
title: '开始',
each: [{
key: 'enjoyvr',
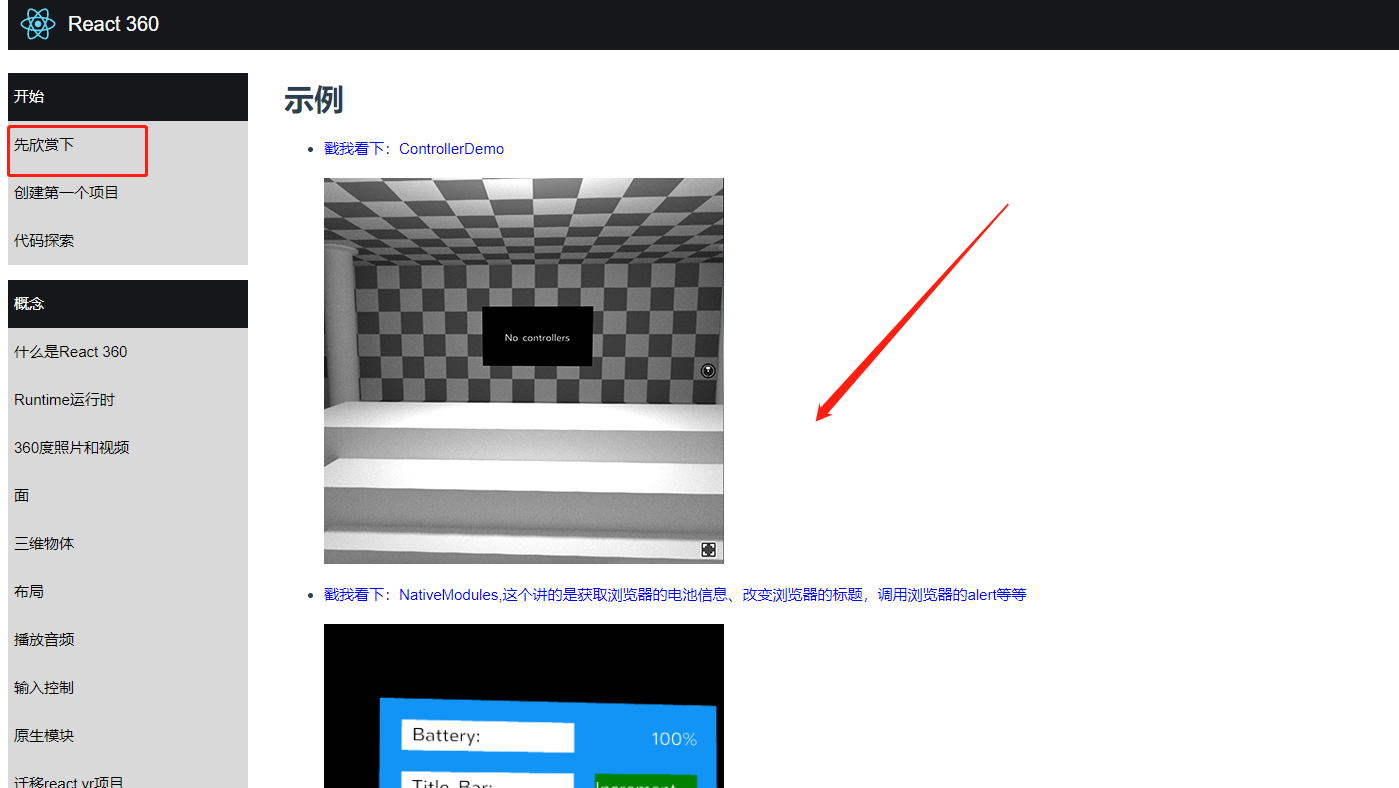
title: '先欣赏下'
},
{
key: 'createfirstproject',
title: '创建第一个项目'
},
{
key: 'explorecode',
title: '代码探索'
}
]
},
{
title: '概念',
each: [{
key: 'whatisreact360',
title: '什么是React 360'
},
{
key: 'runtime',
title: 'Runtime运行时'
},
{
key: 'photosvideos',
title: '360度照片和视频'
},
{
key: 'surfaces',
title: '面'
},
{
key: 'objects3d',
title: '三维物体'
},
{
key: 'layout',
title: '布局'
},
{
key: 'playaudio',
title: '播放音频'
},
{
key: 'inputhandle',
title: '输入控制'
},
{
key: 'nativemodules',
title: '原生模块'
},
{
key: 'legacyreactvrapps',
title: '迁移react vr项目'
}
]
},
{
title: '发布',
each: [{
key: 'build',
title: '构建你的项目'
},
{
key: 'staticassets',
title: '静态文件'
},
{
key: 'integrateothersite',
title: '和现有的网页交互'
},
]
},
{
title: '组件',
each: [{
key: 'view',
title: 'View'
},
{
key: 'text',
title: 'Text'
},
{
key: 'image',
title: 'Image'
},
{
key: 'entity',
title: 'Entity'
},
{
key: 'vrbutton',
title: 'VrButton'
},
]
},
{
title: 'APIs',
each: [{
key: 'animated',
title: 'Animated 动画'
},
{
key: 'asyncstorage',
title: 'AsyncStorage 存储'
},
{
key: 'controllerinfo',
title: 'ControllerInfo 控制器'
},
{
key: 'enviroment',
title: 'Environment 环境'
},
]
}
]
export default datanav.js中的数据,他是循环了两层的
第一步在父组件中进行了一层循环
<template>
  <div>
    <div>
      <EachNav class="nav" ref="nav"
      v-for="(value,key,index) in Data"
      :key="index"
      :title="value.title"
      :subTitles="value.each"
      />
    </div>
  </div>

</template>

<script>
import EachNav from "./eachNav.vue";
import Data from "./nav";

export default {
  name: "Nav",
  components: {
    EachNav
  },
  data() {
    return {
      Data: Data,
      changeStyle: "flex-end",
      rightWidth: "250px" //最小宽度
    };
  },
  methods: {},
  mounted() {}
};
</script>

<style lang='less'>
.nav {
  margin-right: 3rem;
  max-width: 240px;
}
</style>
赋值给subTitles,在子组件中再进行一次循环
//nav.js
//注意路由是value.key,有意思吧~
<template>
  <div class="each_nav_left" ref="left">
    <p class="each_nav_title">{{title}}</p>
    <p class="each_nav_subtitle" v-for="(value, key,index) in subTitles" :key="value.key" @click="onClick(value.key)">{{value.title}}</p>
  </div>
</template>

<script>
export default {
  name: "EachNav",
  props: {
    title: String,
    subTitles: Array
  },
  methods: {
    onClick(key) {
      this.$router.push({ path: key, query: { key: key } });
    }
  }
};
</script>

<style lang='less'>
.each_nav_left {
  max-width: 240px;
  min-width: 240px;
}

.each_nav_title {
  background-color: rgb(21, 23, 26);
  margin-bottom: 0;
  padding-left: 0.5rem;
  height: 4rem;
  color: white;
  font-size: 1.5rem;
  display: flex;
  align-items: center;
}

.each_nav_subtitle {
  margin: 0;
  background-color: rgb(217, 217, 217);
  padding-left: 0.5rem;
  height: 4rem;
  color: black;
  font-size: 1.5rem;
  display: flex;
  align-items: center;
}
</style>
//this.$router.push({path:key,query:{key:key}})
接下来进行的就是不同页面,他们对应不同的组件,我们来分析
代码如下
//src\pages\enjoyvr.vue
<template>
<div class="enjoyvr containerFloatLeft" >
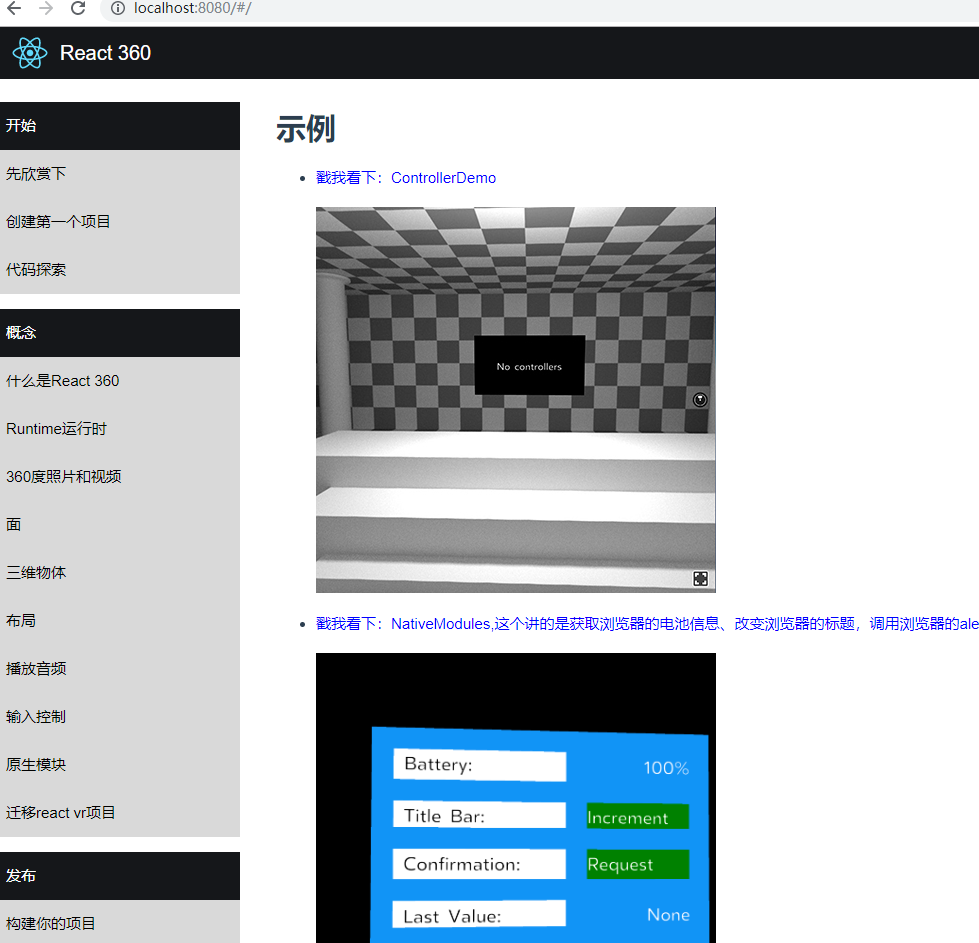
<h1>示例</h1>
<ol>
<li ><a href="./example/ControllerDemo/" target="_blank">戳我看下:ControllerDemo <br/><img class="firstimg" src="../assets/ControllerDemo.jpeg" alt='layoutexample'/></a></li><br/>
<li ><a href="./example/NativeModules/" target="_blank">戳我看下:NativeModules,这个讲的是获取浏览器的电池信息、改变浏览器的标题,调用浏览器的alert等等 <br/><img class="firstimg" src="../assets/NativeModules.png" alt='layoutexample'/></a></li><br/>
<li ><a href="./example/CylindricalPanel/" target="_blank">戳我看下:CylindricalPanel <br/><img class="firstimg" src="../assets/CylindricalPanelDemo.jpeg" alt='layoutexample'/></a></li><br/>
<li ><a href="./example/DashSample/" target="_blank">戳我看下:DashSample,这个是自定义的播放器播放特定的格式的视频 <br/><img class="firstimg" src="../assets/DashSample.png" alt='layoutexample'/></a></li><br/>
<li ><a href="./example/ModelSample/" target="_blank">戳我看下:ModelSample <br/><img class="firstimg" src="../assets/meshexample.png" alt='meshexample'/></a></li><br/>
<li ><a href="./example/VideoSample/" target="_blank">戳我看下:VideoSample,和DashSample一样的,只不过里面的视频格式不一样而已 <br/><img class="firstimg" src="../assets/DashSample.png" alt='layoutexample'/></a></li><br/>
<li ><a href="./example/VideoSample360/" target="_blank">戳我看下:VideoSample360 ,这个是360度的视频哦<br/><img class="firstimg" src="../assets/VideoSample360.png" alt='layoutexample'/></a></li><br/>
<!-- <li ><a href="./example/MultiRoot/" target="_blank">戳我看下:MultiRoot 多个文件注册入口<br/><img class="firstimg" src="../assets/multiroot.png" alt='layoutexample'/></a></li><br/> -->
<li ><a href="./example/layoutexample/" target="_blank">戳我看下:Layout <br/><img class="firstimg" src="../assets/layoutexample.png" alt='layoutexample'/></a></li><br/>
<li><a href="./example/meshexample/" target="_blank">戳我看下:Mesh </a><br/><img class="firstimg" src='../assets/meshexample.png' alt='meshexample'/></li><br/>
<li ><a href="./example/cubeexample/" target="_blank">戳我看下:Cube </a><br/><img class="firstimg" src='../assets/cubeexample.png' alt='cubeexample'/></li><br/>
<li ><a href="./example/tourexample/" target="_blank">戳我看下:Tour </a><br/><img class="firstimg" src='./../assets/tourexample.png' alt='tourexample'/></li>
</ol>
</div>
</template>
<script>
export default {
name: "enjoyvr",
mounted() {
//改變htmltitle裏面的内容的
document.title = "react 360中文网";
}
};
</script>
<style lang='less'>
ol {
display: flex;
flex-direction: column;
}
.enjoyvr {
max-width: 920px;
}
</style>
代码如下
//src\pages\createfirstproject.vue
<template>
  <div class="containerFloatLeft">
    <h2 class="h2">安装工具,创建你的第一个项目</h2>
      <p>这里为你创建react 360 安装必要的工具.</p>
      <p>开始之前,你需要安装node.js,因为react 360是运行在浏览器上的,打包代码是要依赖node的.</p>
      <ol>
        <li><strong>Mac:</strong> mac上推荐使用<a href="http://brew.sh/" target="_blank">homebrew</a>来安装ndoe</li>
        <li><strong>Windows:</strong> 推荐使用<a href="https://nodejs.org/en/download/" target="_blank">nodejs.org</a>下载安装</li>
        <li><strong>Linux:</strong> 推荐使用<a href="https://nodejs.org/en/download/package-manager/" target="_blank">nodejs.org package manager页面</a>,找到对应你的linux版本的node</li>
      </ol>
      <p class="mt20">一旦你的node安装完成,就可以安装<strong>React 360 Cli</strong> 了,这个工具可以创建和管理你的react 360项目,打开终端,安装下面的命令:</p>
      <p class="code">npm install -g react-360-cli</p>

      <p>上面的命令会将最新版的CLI安装到你的电脑上.安装完成就可以生成初始的项目代码了,进入到你要创建项目的文件夹下面,然后运行下面的代码,就可以创建一个名字为Hello360的项目了.</p>
      <p class="code">react-360 init Hello360</p>
      <p>上面项目创建完毕了,你就可以直接进入项目下面看代码了.</p>
      <p class="code">cd Hello360</p>

      <p>当我们打包react 360的项目时,会自动把源码和依赖文件打包成一个文件。如果你比较熟悉web开发,可能遇到到一写打包工具,react 360自带了打包工具.
        <a href="https://github.com/facebook/metro" target="_blank">Metro</a>
        是js的打包工具,可以用来打包React 360和React Native.
      </p>
      <p class="mt20">在开发环境下,打包工具会启动一个本地服务允许你进入自己的项目.它可以在需要的使用用来编译和处理你的代码。当你准备好要发布代码,还可以用来打包生产环境的代码。这些代码可以放到任何一个web服务器上。至此,你可以用下面的命令开启开发环境的服务:</p>
      <p class="code">npm start</p>

      <p>这个服务器将检查您的项目并收集提供JavaScript文件所需的所有数据.为了看你的项目,打开浏览器输入下面的地址就可以看到效果了。
        <a href="http://localhost:8081/index.html" target="_blank">http://localhost:8081/index.html</a>.
        第一次加载需要点儿时间,打包工具在做初始化操作,第一次加载完成,后面即使你修改了代码再加载也会快很多。你可以在终端里面看到项目的加载进度,加载完了,你就可以看到下面的示例
        <img class="firstimg" src="../assets/starter_project.jpg" alt='layoutexample'/>
      </p>


  </div>
</template>

<script>
export default {
  name: "enjoyvr",
  mounted() {
    document.title = "创建第一个项目";
  }
};
</script>

<style lang='less'>
@import "../styles/mixin";
</style>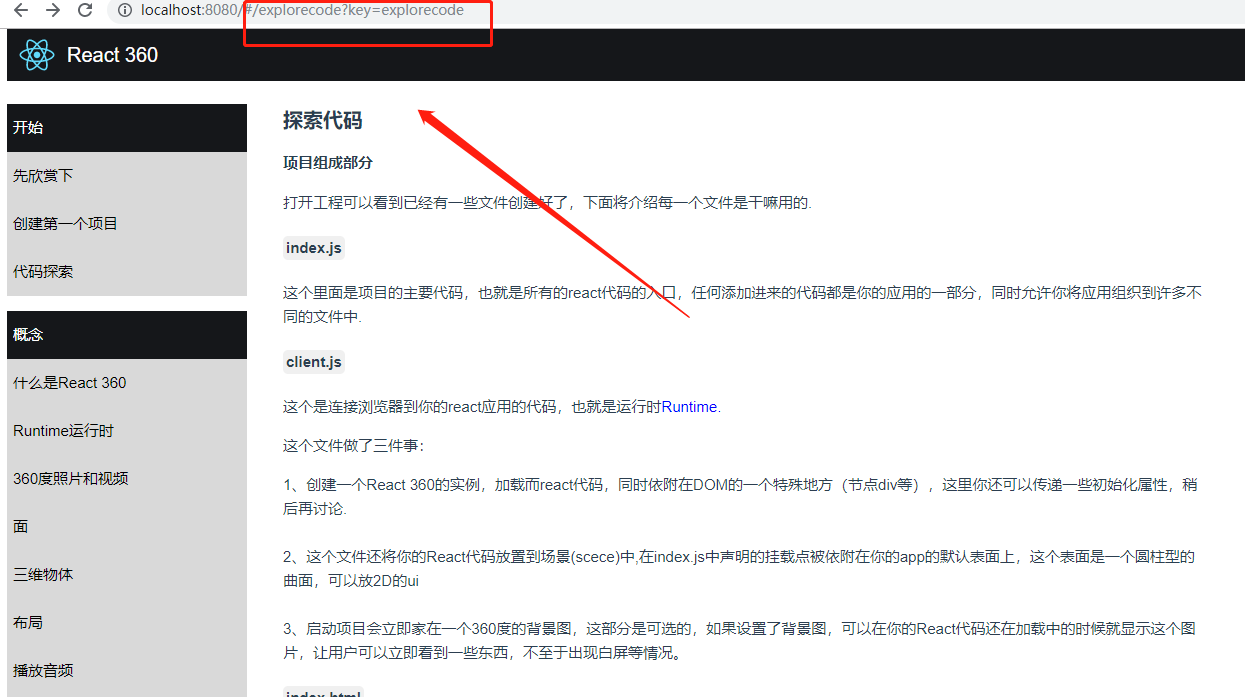
代码如下
//src\pages\explorecode.vue
<template>
<div class="containerFloatLeft">
<h2 class="h2">探索代码</h2>
<h4>项目组成部分</h4>
<p>打开工程可以看到已经有一些文件创建好了,下面将介绍每一个文件是干嘛用的.</p>
<strong class="graybg mt20">index.js</strong>
<p>这个里面是项目的主要代码,也就是所有的react代码的入口,任何添加进来的代码都是你的应用的一部分,同时允许你将应用组织到许多不同的文件中.</p>
<strong class="graybg mt20">client.js</strong>
<p>这个是连接浏览器到你的react应用的代码,也就是运行时<span class="goto" @click="toRuntime">Runtime.</span></p>
<p>这个文件做了三件事:</p>
<p>1、创建一个React 360的实例,加载而react代码,同时依附在DOM的一个特殊地方(节点div等),这里你还可以传递一些初始化属性,稍后再讨论.</p>
<p class="mt20">2、这个文件还将你的React代码放置到场景(scece)中,在index.js中声明的挂载点被依附在你的app的默认表面上,这个表面是一个圆柱型的曲面,可以放2D的ui</p>
<p class="mt20">3、启动项目会立即家在一个360度的背景图,这部分是可选的,如果设置了背景图,可以在你的React代码还在加载中的时候就显示这个图片,让用户可以立即看到一些东西,不至于出现白屏等情况。</p>
<strong class="graybg mt20">index.html</strong>
<p class="mt20">这是你的应用的web页面,它的作用是为你的js代码提供一个挂载点,而且这个文件是全局的,你还可以和其他的web页面进行交互</p>
<h2 class="h2">探索入门项目</h2>
<p class="mt20">打开<span class="graybg">index.js</span>,可以看到react 代码是如何展示在你的屏幕上的,如果你不熟悉React是如何工作的,请先看<a href="https://reactjs.org/" target="_blank">react的开发文档</a></p>
<p class="mt20"><span class="graybg">View</span>和<span class="graybg">Text</span></p>
<p class="mt20">
<span class="graybg">index.js</span>分为几个不同的部分。
最主要的一块是创建一个新的React组件,用在你的应用的最上层的元素,包含两个<span class="graybg"><View></span>元素,一个<span class="graybg"><Text></span>元素.
第一个View填充整个面板,默认大小是1000px * 600px,而且这些表面可以<span class="goto" @click="toRuntime">配置成多种不同的大小和形状</span>
第二个View给包含的Text提供边框和背景。最里面的Text元素将一个字符串转换成字符渲染在屏幕上,欢迎第一次来到React 360的世界。
</p>
<p class="mt20">你可以改变<span class="graybg"><Text></span>里面的内容,改变<span class="graybg">'Welcome to React 360'</span>成其他的字符串,保存文件,刷新下web页面就可以看到改变后的内容了。</p>
<p class="mt20">View和Text在React360里面是最简单的两个交互工具了,View用来包裹其他的内容,或者在屏幕上提供可见的盒子形状,你也可以用来布局可以不渲染任何内容,也可以创建一些列不同的带有边框和背景的效果在简单的应用里面。</p>
<p class="mt20">Text是在屏幕上画字符的,如果你创建了一个2D的UI,这是向用户显示信息,标记UI元素等的关键元素。</p>
<h4>样式</h4>
<p class="mt20">下一块代码是创建样式的,<span class="graybg">StyleSheet</span>是直接从<a href="http://facebook.github.io/react-native/docs/style.html" target="_blank">React Native拿过来的改变</a>
React 360支持和React Native一样的样式属性,在代码底部创建的<span class="graybg">style</span>对象会直接影响你的React cdoe,也即是说样式可以通过这个控制
</p>
<h4>导出React组件</h4>
<p class="mt20">最后一行是用AppRegistry注册你的项目,允许React 360挂载到一个表面上,这个为一个标识符和<strong class="graybg mt20">client.js</strong>一样的</p>
<h2 class="h2">添加状态</h2>
<p class="mt20">React擅长定义依赖于不断变化的状态的应用程序,以某种最引人注目的体验方式使用它。</p>
<h4>创建一个简单的计数器</h4>
<p class="mt20">state可以用来自定时器或者网络来驱动,我们来重写app,创建一个逐渐增加的计数器,替换下面的代码</p>
<p class="code1">
<span class="gray">// Our component will keep track of this state</span> <br/>
state = { <br/>
count : <span class="red">0</span>,<br/>
};<br/>
<span class="gray">// This method increments our count, triggering a re-render</span> <br/>
_incrementCount = () => {<br/>
this.setState({count: this.state.count + <span class="red">1</span>});<br/>
};<br/>
<span class="gray">// Once the component mounts, run the increment method every second</span> <br/>
componentDidMount() {<br/>
setInterval(this._incrementCount, <span class="red">1000</span>);<br/>
};<br/>
render() {<br/>
<span class="gray">// Reference the count in our UI</span> <br/>
return (<br/>
<View style={<span class="red">styles.panel</span>}><br/>
<View style={<span class="red">styles.greetingBox</span>}><br/>
<Text style={<span class="red">styles.greeting</span>}><br/>
{`Count: ${this.state.count}`} <br/>
</Text><br/>
</View><br/>
</View><br/>
);<br/>
}<br/>
</p>
<p class="mt20">刷新应用,你会看到每隔一秒计数就会增加,在React的内容部,每秒状态都会改变,然后你的UI就会重新渲染。</p>
<h4>增加用户输入</h4>
<p class="mt20">大多数状态都不是自动的,都是来自用户的交互。再来改变下我们的应用,用户点击一次计数增加一次,为了手机用户的点击,我们用一个新的组件,<strong class="graybg">VrButton</strong>.VrButton内部包裹了桌面、移动端、VR等设备的点击事件,是React 360中用户交互的核心构建块</p>
<p class="mt20">需要从React-360包里面导入VrButton</p>
<p class="code1">
import {<br/>
AppRegistry,<br/>
StyleSheet,<br/>
Text,<br/>
View,<br/>
VrButton,<br/>
} from 'react-360';
</p>
<p class="mt20">下一步移除<strong class="graybg mt20">componentDidMount() </strong>方法,不再使用定时器了,同时还需要修改render的方法。</p>
<p class="code1">
render() {<br/>
return (<br/>
<View style={<span class="red">styles.panel</span>}><br/>
<VrButton<br/>
onClick={<span class="red">this._incrementCount</span>}<br/>
style={<span class="red">styles.greetingBox</span>}><br/>
<Text style={<span class="red">styles.greeting</span>}><br/>
{`Count: ${this.state.count}`} <br/>
</Text><br/>
</VrButton><br/>
</View><br/>
);<br/>
}<br/>
</p>
<p class="mt20">刷新应用,点击按钮,点击一次数字增加一,你还可以扩展,当鼠标移到按钮上,按钮高亮显示,还可以增加<strong class="graybg">onEnter、onExit</strong>事件,这两个事件在大多数组件上都可以使用,用这些组件,你可以创建出复杂的可交互的应用。</p>
</div>
</template>
<script>
export default {
name: "enjoyvr",
mounted() {
document.title = "代码探索";
},
methods: {
//这里进行了一个路由判断,点击跳转到这个页面。。
toRuntime() {
this.$router.push({ path: "runtime" });
},
toSurface() {
this.$router.push({ path: "surfaces" });
}
}
};
</script>
<style lang='less'>
@import "../styles/mixin";
</style>后续的代码大部分类似,UI和官网http://www.vr-react.com/#/类似
不过,对于左侧切换页面的处理,我觉得处理的非常有意思,使用vue写项目真的好容易哇~~~
精通vuereact就好了~~