在Android与屏幕有关的知识点(一)中,我们对屏幕有关的一些常用概念、基本用法、单位之间转化、截屏等知识点进行了学习.本文将进一步对屏幕有关知识进行学习.
在学习本文前,建议先阅读 Android与屏幕有关的知识点(一)
说明:
(1)本文中涉及测试机的地方,若无特别说明:测试机A指的是分辨率:10802160手机、测试机B指的是分辨率:7201280.
(2)由于笔者所在公司要求不同分辨率手机上,TextView的字体大小、控件宽高相同,并非不同的分辨率手机采用不同的dp、sp.所以在代码设置、自定义属性默认值过程中,都是采用固定数值.如果大家项目中要求适配,请注意修改相应部分.
一.xml与代码中数据的关系
我们先在xml中写一个原生的TextView.设置字体大小为40sp.代码如下:
<?xml version="1.0" encoding="utf-8"?>
<LinearLayout xmlns:android="http://schemas.android.com/apk/res/android"
              xmlns:app="http://schemas.android.com/apk/res-auto"
              android:layout_width="match_parent"
              android:layout_height="match_parent"
              android:orientation="vertical"
    >

    <!--直接xml设置-->
    <TextView
        android:id="@+id/tv_xml"
        android:layout_width="300dp"
        android:layout_height="100dp"
        android:layout_gravity="center_horizontal"
        android:layout_marginTop="20dp"
        android:background="@color/colorPrimary"
        android:text="测试内容"
        android:textSize="40sp"
        />
</LinearLayout>
然后在代码中获取字体大小,代码如下:
@Override
    protected void onCreate(@Nullable Bundle savedInstanceState) {
        super.onCreate(savedInstanceState);
        setContentView(R.layout.activity_dptext);
        mTvXml = (TextView) findViewById(R.id.tv_xml);
        float textSize = mTvXml.getTextSize();
    }
进行断点测试,在测试机A上,mTvXmlTextSize的值为110.0 ;测试机B上,mTvXmlTextSize的值为80.0.
另外,需要补充说明的事:
(1)xml中使用40sp,修改手机系统设置字体,在测试机上的结果不再是110.0、80.0.而是随着系统设置字体的改变而改变.
(2)如果将xml中的40sp换成40dp,在测试机上的结果同样为110.0、80.0.(并且修改手机系统设置 字体大小,都是110.0、80.0)
#二. 关于xml、代码中、自定义属性中使用屏幕相关知识 #

我们在刚才的基础上,再添加2个textView控件. id为tv_code的TextView(第23行)采用原生TextView.我们在代码中设置字体大小、边距.id为tv_custom的TextView(第33行)是继承原生TextView的自定义控件.
xml代码如下:
<?xml version="1.0" encoding="utf-8"?>
<LinearLayout xmlns:android="http://schemas.android.com/apk/res/android"
              xmlns:app="http://schemas.android.com/apk/res-auto"
              android:layout_width="match_parent"
              android:layout_height="match_parent"
              android:orientation="vertical"
    >

    <!--直接xml设置-->
    <TextView
        android:id="@+id/tv_xml"
        android:layout_width="350dp"
        android:layout_height="100dp"
        android:layout_gravity="center_horizontal"
        android:layout_marginTop="20dp"
        android:background="@color/colorPrimary"
        android:text="测试内容"
        android:textSize="40sp"
        />

    <!--通过代码 set的形式-->
    <TextView
        android:id="@+id/tv_code"
        android:layout_width="350dp"
        android:layout_height="100dp"
        android:layout_gravity="center_horizontal"
        android:background="@color/colorAccent"
        android:text="测试内容"
        />

    <!--通过自定义控件属性的形式-->
    <com.mfc.countdowntimerutils.TestTextView
        android:id="@+id/tv_custom"
        android:layout_width="350dp"
        android:layout_height="100dp"
        android:layout_gravity="center_horizontal"
        android:background="@color/colorPrimary"
        android:text="测试内容"
        app:testTextMarginTop="20dp"
        app:testTextSize="40sp"
        />

</LinearLayout>
为了测试的准确性,我们只改变textView字体的大小、textview距离layout_marginTop.
其中,com.mfc.countdowntimerutils.TestTextView 属于继承系统TextView的控件.自定义控件不属于本文谈论范围,对自定义控件不熟或者感兴趣的同学,可以自行谷歌.
com.mfc.countdowntimerutils.TestTextView的属性代码如下(valuse/arrts下):
  <!--自定义字体大小 margintop的TextView-->
    <declare-styleable name="TestTextView">
        <attr name="testTextSize" format="dimension"/>
        <attr name="testTextMarginTop" format="dimension"/>
    </declare-styleable>
自定义TestTextView的代码如下:
@SuppressLint("AppCompatCustomView")
public class TestTextView extends TextView implements ViewTreeObserver.OnGlobalLayoutListener {
private Context mContext;
int marginTop;
public TestTextView(Context context) {
super(context);
}
public TestTextView(Context context, @Nullable AttributeSet attrs) {
super(context, attrs);
this.mContext = context;
init(context, attrs);
}
public TestTextView(Context context, @Nullable AttributeSet attrs, int defStyleAttr) {
super(context, attrs, defStyleAttr);
}
private void init(Context context, AttributeSet attrs) {
mContext = context;
TypedArray typedArray = context.obtainStyledAttributes(attrs, R.styleable
.TestTextView);
if (typedArray != null) {
//①如果xml中使用了TestTextView_testTextSize属性,typedArray.getDimensionPixelOffset
//会根据xml中使用的单位进行内部转化(比如xml中都是使用40sp,不同分辨率手机得到的initTextSize值不同).
//②如果xml中没有使用TestTextView_testTextSize属性,typedArray.getDimensionPixelOffset会直接
//使用默认的值(它不知道单位的,默认值也没有单位)
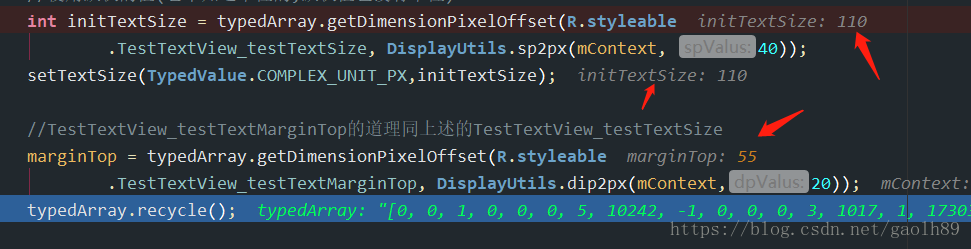
int initTextSize = typedArray.getDimensionPixelOffset(R.styleable
.TestTextView_testTextSize, DisplayUtils.sp2px(mContext, 40));
setTextSize(TypedValue.COMPLEX_UNIT_PX,initTextSize);
//TestTextView_testTextMarginTop的道理同上述的TestTextView_testTextSize
marginTop = typedArray.getDimensionPixelOffset(R.styleable
.TestTextView_testTextMarginTop, DisplayUtils.dip2px(mContext,20));
typedArray.recycle();
post(() -> {
LinearLayout.LayoutParams lp = (LinearLayout.LayoutParams) getLayoutParams();
Log.e("测试元素", "init: " + this);
lp.leftMargin = 0;
lp.rightMargin = 0;
//数据是px
lp.topMargin = marginTop;
lp.bottomMargin = 0;
setLayoutParams(lp);
});
}
}
@Override
public void onGlobalLayout() {
LinearLayout.LayoutParams lp = (LinearLayout.LayoutParams) getLayoutParams();
Log.e("测试元素", "init: " + this);
lp.leftMargin = 0;
lp.rightMargin = 0;
//数据是px
lp.topMargin = marginTop;
lp.bottomMargin = 0;
setLayoutParams(lp);
}
// @Override
// protected void onFinishInflate() {
// super.onFinishInflate();
// getViewTreeObserver().addOnGlobalLayoutListener(this);
// }
}
上述代码中,关于view的绘制使用了 重写onFinishInflate()方法,或者post()方法.如果直接使用的话,就会报空指针.这部分不属于本文谈论的范畴,不再赘述.
另外需要说明2点:
1.查看setTextSize() 方法方法的源码我们可知,该方法有接收一个参数的,即setTextSize(float size)
相关部分源码如下:
/**
     * Set the default text size to the given value, interpreted as "scaled
     * pixel" units.  This size is adjusted based on the current density and
     * user font size preference.
     *
     * <p>Note: if this TextView has the auto-size feature enabled than this function is no-op.
     *
     * @param size The scaled pixel size.
     *
     * @attr ref android.R.styleable#TextView_textSize
     */
    @android.view.RemotableViewMethod
    public void setTextSize(float size) {
        setTextSize(TypedValue.COMPLEX_UNIT_SP, size);
    }
从第14行源码可知,如果只传了一个参数,系统会自动加TypedValue.COMPLEX_UNIT_SP 变成2个参数的.
第一个参数是干嘛用的呢,我们继续点这个方法继续看源码.源码如下:
/**
     * Set the default text size to a given unit and value. See {@link
     * TypedValue} for the possible dimension units.
     *
     * <p>Note: if this TextView has the auto-size feature enabled than this function is no-op.
     *
     * @param unit The desired dimension unit.
     * @param size The desired size in the given units.
     *
     * @attr ref android.R.styleable#TextView_textSize
     */
    public void setTextSize(int unit, float size) {
        if (!isAutoSizeEnabled()) {
            setTextSizeInternal(unit, size, true /* shouldRequestLayout */);
        }
    }
从第7行对unit参数的描述可知:unit是所需的尺寸单位. 往上看TextView对TypedValue.COMPLEX_UNIT_SP常量的描述,这个常量指的就是sp.也就是说.我们setTextSize(14) 就是14sp.很容易误以为是px.
同样的,我们可以设置第一个参数为dp或sp.当然,后面的值也需要对应更换.还是以实现40sp效果为例.如果使用px,代码如下:
mTvCode.setTextSize(TypedValue.COMPLEX_UNIT_PX,DisplayUtils.sp2px(this,40));
2.关于set的padding或者margin方法,或者计算view的宽高等,单位 则是 px.如果你在xml中使用了TestTextView_testTextMarginTop属性,系统在调用typedArray.getDimensionPixelOffset(R.styleable.TestTextView_testTextMarginTop,value)值时,就根据屏幕的分辨率、xml中自定义属性值,自动转化/
3.在使用最原始的textView时,我们在xml中,分别设置
android:textSize="40sp"
android:layout_marginTop="20dp"
为了实现同样的效果,我们使用setTextSize和setMargin的方式也是如何实现的呢:
(1)先看原生的textView但使用代码设置的 方式:
public class TestActivity extends AppCompatActivity {
private TextView mTvXml, mTvCode, mTvCutom;
@Override
protected void onCreate(@Nullable Bundle savedInstanceState) {
super.onCreate(savedInstanceState);
setContentView(R.layout.activity_test);
mTvXml = (TextView) findViewById(R.id.tv_xml);
mTvCode = (TextView) findViewById(R.id.tv_code);
mTvCutom = (TextView) findViewById(R.id.tv_custom);
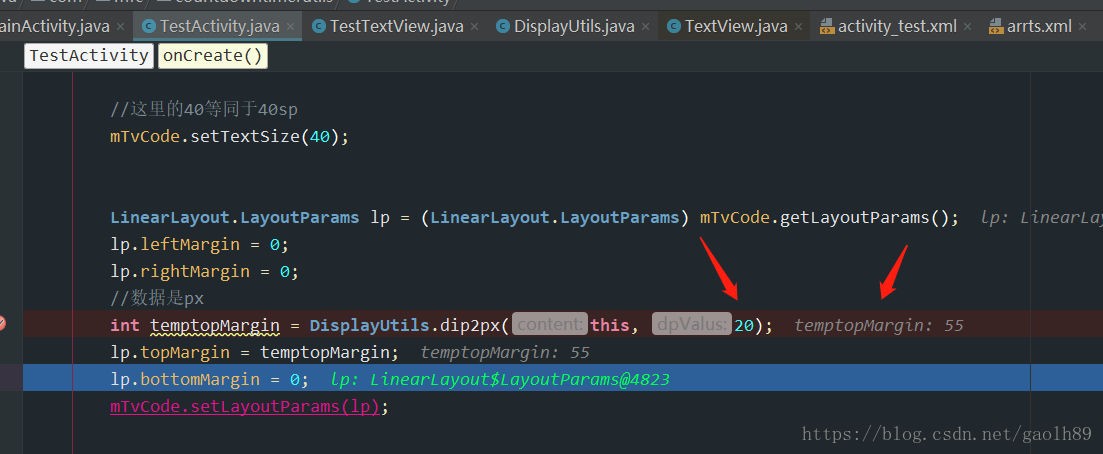
//这里的40等同于40sp
mTvCode.setTextSize(40);
LinearLayout.LayoutParams lp = (LinearLayout.LayoutParams) mTvCode.getLayoutParams();
lp.leftMargin = 0;
lp.rightMargin = 0;
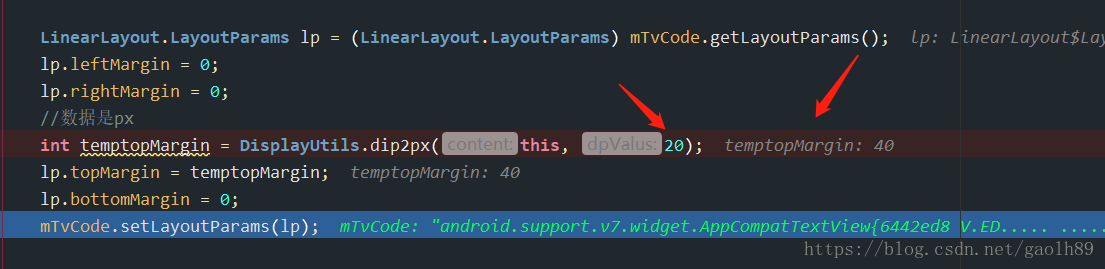
//数据是px
int temptopMargin = DisplayUtils.dip2px(this, 20);
lp.topMargin = temptopMargin;
lp.bottomMargin = 0;
mTvCode.setLayoutParams(lp);
}
}
刚刚已经说过了,setTextSize() 中的 如果是一个参数,数值的单位就是sp.所以直接写 setTextSize(40)即可.
如果想使用2个参数的,写成:
mTvCode.setTextSize(TypedValue.COMPLEX_UNIT_PX,DisplayUtils.sp2px(this,40));
而setMargin的方式,因为赋值的单位是px,而我们一开始的 20dp.所以需要 dp转px后再赋值,即:
 int temptopMargin = DisplayUtils.dip2px(this, 20);
 lp.topMargin = temptopMargin;
这是手机A断点测试的数据.(分辨率: 1080*2160)
这是手机B断点测试的数据.(分辨率: 720*1280)
(2)使用自定义控件的 方式(上述TestTextView.class 代码片段):
①设置字体大小
      int initTextSize = typedArray.getDimensionPixelOffset(R.styleable.TestTextView_testTextSize, DisplayUtils.sp2px(mContext, 40));

      setTextSize(TypedValue.COMPLEX_UNIT_PX,initTextSize);
②设置间距
marginTop = typedArray.getDimensionPixelOffset(R.styleable.TestTextView_testTextMarginTop, DisplayUtils.dip2px(mContext,20));
LinearLayout.LayoutParams lp = (LinearLayout.LayoutParams) getLayoutParams();
Log.e("测试元素", "init: " + this);
lp.leftMargin = 0;
lp.rightMargin = 0;
//数据是px
lp.topMargin = marginTop;
lp.bottomMargin = 0;
setLayoutParams(lp);
同样的, typedArray.getDimensionPixelOffset获取到的值 的单位是px.而setMargin 需要的值的单位也是px.所以直接使用即可.不需要(也不能转换)
这是手机A断点测试的数据
这是手机B断点测试的数据

尤其是7201280的手机B数据就一目了然( 7201280分辨率手机: 1dp=2px)
功能运行后,
在手机A上的效果如下
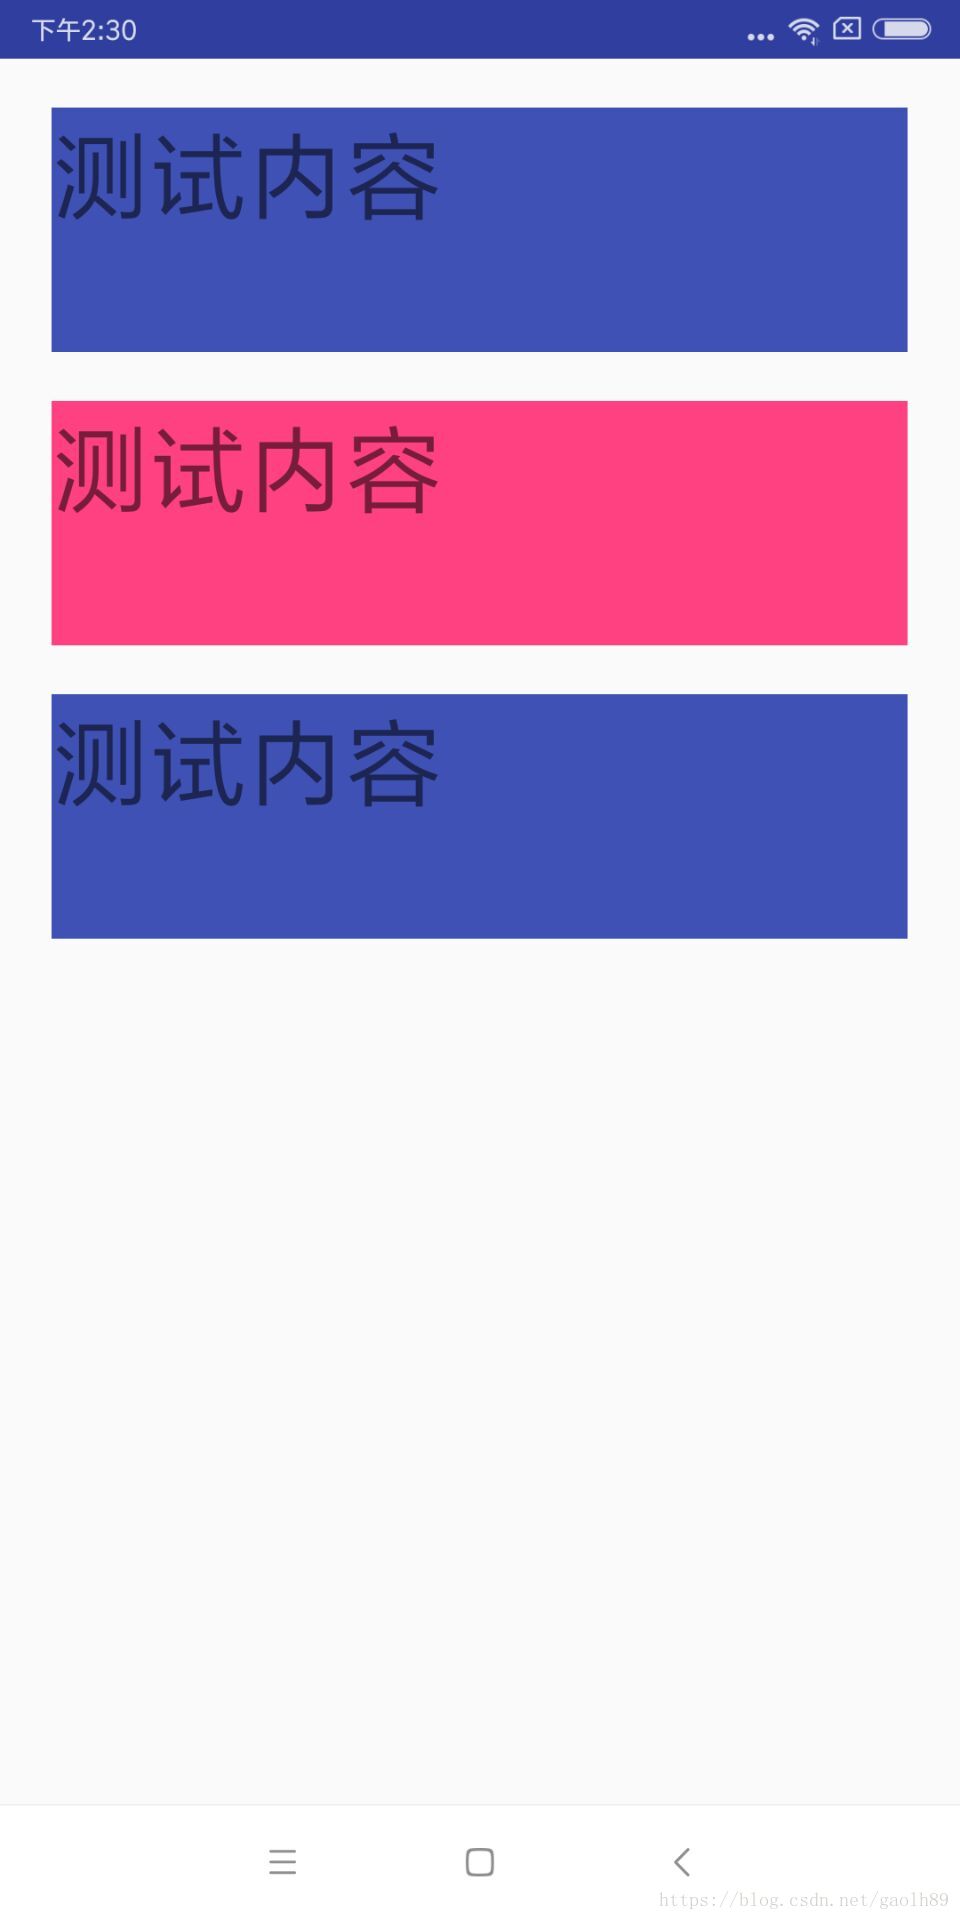
在手机B上的效果如下
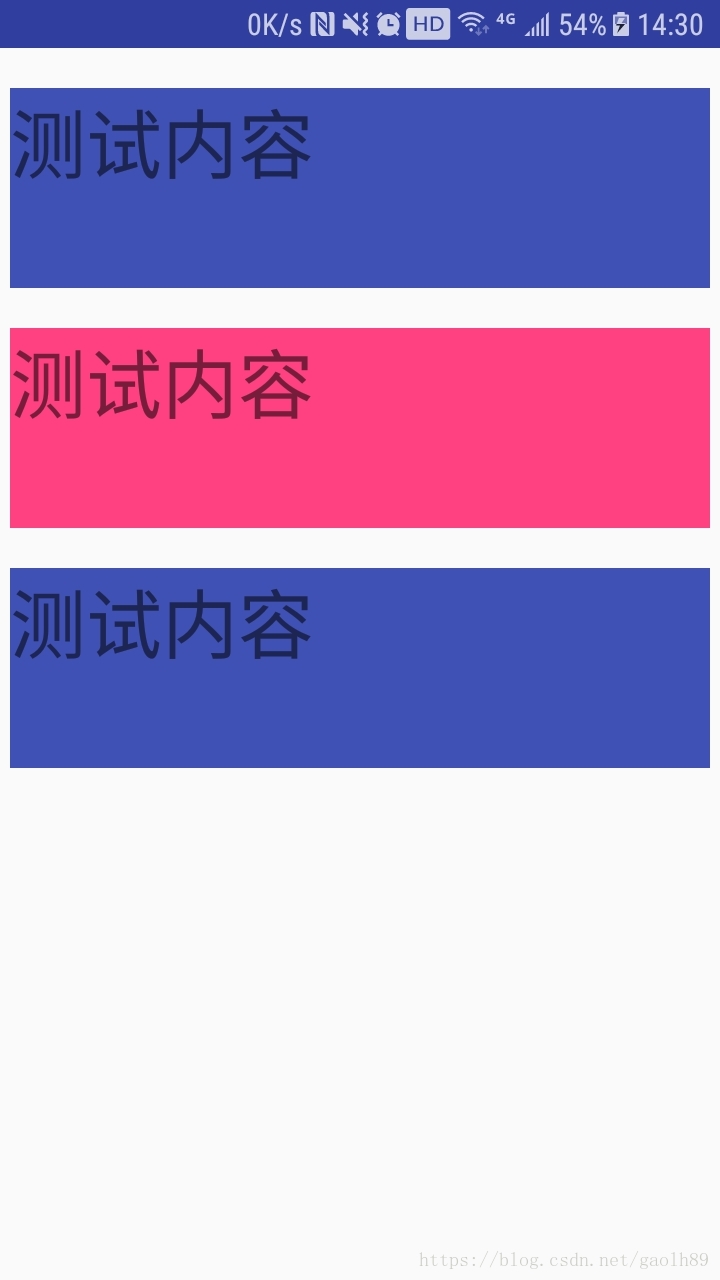
可以发现,三种结果无论是那一张,字体大小, 控件与上边的间距是一样的.从而验证了上述方法的可行性.