一、原理说明
客户直接访问数据库读取数据比较慢,但是通过redis可以提高访问数据库的速度。因为redis是健-值访问方式,所以访问速度快
client --> app(nginx:php,java,python) --> redis --> mysql --> redis --> client
mysql语句分类:
dql 查询语句
dcl 控制语句
dml 修改语句
ddl 删除语句
二、实验环境
server1:172.25.85.1 nginx服务器
server2: 172.25.85.2 redis
server3: 172.25.85.3 mysql
实验前线关闭原来的redis,mysql
killall工具可以杀死所有关键字进程
yum install -y psmisc
killall redis-server
ps ax
三、实验过程
server1
1、安装php的安装包
cd
ls
cd rhel7/
[root@server1 rhel7]# ls
gearmand-1.1.12-18.el7.x86_64.rpm openssl-libs-1.0.2k-16.el7.x86_64.rpm php-pecl-gearman-1.1.2-1.el7.x86_64.rpm
libevent-devel-2.0.21-4.el7.x86_64.rpm php-cli-5.4.16-46.el7.x86_64.rpm php-pecl-igbinary-1.2.1-1.el7.x86_64.rpm
libgearman-1.1.12-18.el7.x86_64.rpm php-common-5.4.16-46.el7.x86_64.rpm php-pecl-redis-2.2.8-1.el7.x86_64.rpm
libgearman-devel-1.1.12-18.el7.x86_64.rpm php-fpm-5.4.16-46.el7.x86_64.rpm php-process-5.4.16-46.el7.x86_64.rpm
libzip-0.10.1-8.el7.x86_64.rpm php-mysql-5.4.16-46.el7.x86_64.rpm php-xml-5.4.16-46.el7.x86_64.rpm
yum remove openssl-devel-1.0.1e-60.el7.x86_64 -y ##删除原来的openssl
yum install -y *
2、开启nginx
cd /usr/local/nginx/
ls
cd conf/
vim nginx.conf
修改如下
46 index index.php index.html index.htm; ##首先访问index.php
78 location ~ \.php$ {
79 root html;
80 fastcgi_pass 127.0.0.1:9000;
81 fastcgi_index index.php;
82 # fastcgi_param SCRIPT_FILENAME /scripts$fastcgi_script_name;
83 include fastcgi.conf;
84 }
nginx -t
nginx
3、开启php
cd /etc/php-fpm.d/
systemctl start php-fpm
systemctl status php-fpm
netstat -antlp ##查看9000端口是否打开
[root@server1 php-fpm.d]# netstat -tnlp
Active Internet connections (only servers)
Proto Recv-Q Send-Q Local Address Foreign Address State PID/Program name
tcp 0 0 0.0.0.0:80 0.0.0.0:* LISTEN 7339/nginx: master
tcp 0 0 0.0.0.0:22 0.0.0.0:* LISTEN 644/sshd
tcp 0 0 127.0.0.1:25 0.0.0.0:* LISTEN 807/master
tcp 0 0 127.0.0.1:9000 0.0.0.0:* LISTEN 7347/php-fpm: maste
4、复制php的测试页面,并复制sql的测试页面给server3
cd /usr/local/nginx/html/
ls
cp ~/test.php index.php
cd
scp test.sql server3:
5、修改php测试页面
vim /usr/local/nginx/html/index.php
修改如下
$redis->connect('172.25.85.2',6379) or die ("could net connect redis server");#
$connect = mysql_connect('172.25.85.3','redis','westos')
server2
6、打开server2的redis,并设置为主redis
[root@server2 utils]# redis-cli
127.0.0.1:6379> INFO
# Replication
role:master
connected_slaves:0
master_replid:8474785f4df7f86f13fcc7da4311a84a371857e2
master_replid2:0000000000000000000000000000000000000000
master_repl_offset:0
second_repl_offset:-1
repl_backlog_active:0
repl_backlog_size:1048576
repl_backlog_first_byte_offset:0
repl_backlog_histlen:0
server3
7、卸载server3所有与数据库相关的东西,重新安装mariadb,并初始化
rpm -e `rpm -qa |grep mysql` --nodeps ##卸载数据库
cd /var/lib/mysql/ ##删除数据
rm -rf *
yum install -y mariadb-server ##安装数据库
systemctl start mariadb ##开启服务
mysql_secure_installation ##安全初始化
8、创建、test数据库,并授权给redis可以访问。
[root@server3 mysql]# mysql -pwestos
MariaDB [(none)]> create database test;
Query OK, 1 row affected (0.00 sec)
MariaDB [(none)]> grant all on test.* to redis@'%' identified by 'westos';
Query OK, 0 rows affected (0.00 sec)
MariaDB [(none)]> flush privileges;
Query OK, 0 rows affected (0.00 sec)
9、导入test数据库的测试文件
[root@server3 ~]# mysql -pwestos < test.sql
测试:
1、访问172.25.85.1,可以访问到server3数据库的数据,第一次访问是从数据库来的,第二次以后是从redis来的数据

2、server2的redis可以访问数据
[root@server2 ~]# redis-cli
127.0.0.1:6379> get 1
"test1"
127.0.0.1:6379> get 2
"test2"
127.0.0.1:6379> get 3
"test3"
3、更新数据库的数据,
MariaDB [(none)]> use test
Reading table information for completion of table and column names
You can turn off this feature to get a quicker startup with -A
Database changed
MariaDB [test]> update test set name='westos' where id=1;
Query OK, 1 row affected (0.06 sec)
Rows matched: 1 Changed: 1 Warnings: 0
MariaDB [test]> select * from test;
+----+--------+
| id | name |
+----+--------+
| 1 | westos |
| 2 | test2 |
| 3 | test3 |
| 4 | test4 |
| 5 | test5 |
| 6 | test6 |
| 7 | test7 |
| 8 | test8 |
| 9 | test9 |
+----+--------+
9 rows in set (0.00 sec)
MariaDB [test]>
4、server2的redis查看数据,还是原来的数据没有改变
127.0.0.1:6379> get 1
"test1"
127.0.0.1:6379> get 1
"test1"
5、在server2设置新的值
127.0.0.1:6379> set 2 redhat
OK
127.0.0.1:6379> get 2
"redhat"
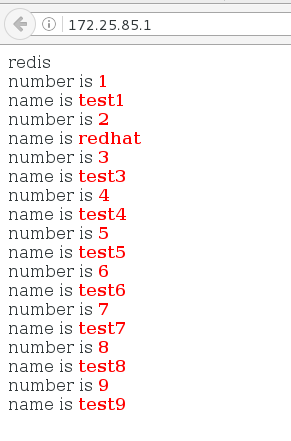
6、访问172.25.38.1
访问到redis修改的数据
到这里,我们已经实现了 redis 作为 mysql 的缓存服务器,但是如果更新了 mysql,redis
中仍然会有对应的 KEY,数据就不会更新,此时就会出现 mysql 和 redis 数据不一致的情
况。所以接下来就要通过 mysql 触发器将改变的数据同步到 redis 中。
~~~~~~~~~~~~~~~~~~~~~~~~~~~~~~~~~~~~~~~~~~~~~~~~~~~~
四、如何实现数据库更新,redis的数据也更新
这需要新的工具gearmand
配置 gearman 实现数据同步
Gearman 是一个支持分布式的任务分发框架:
Gearman Job Server: Gearman 核心程序,需要编译安装并以守护进程形式运行在后台。
Gearman Client:可以理解为任务的请求者。
Gearman Worker:任务的真正执行者,一般需要自己编写具体逻辑并通过守护进程方式
运行,Gearman Worker 接收到 Gearman Client 传递的任务内容后,会按顺序处理。
大致流程:下面要编写的 mysql 触发器,就相当于 Gearman 的客户端。修改表,插入表就相当于直接
下发任务。然后通过 lib_mysqludf_json UDF 库函数将关系数据映射为 JSON 格式,然后
在通过 gearman-mysql-udf 插件将任务加入到 Gearman 的任务队列中,最后通过
redis_worker.php,也就是 Gearman 的 worker 端来完成 redis 数据库的更新。
实际的工作流程
mysql数据更新(client),触发触发器 --> gearmand:4730 (job server)(在server1) --> worker(脚本,php/python/java)
1、前面已经安装过gearmand,这里开启即可
[root@server1 ~]# systemctl start gearmand
[root@server1 ~]# netstat -tnlp
tcp6 0 0 :::4730 :::* LISTEN 2117/gearmand
[root@server1 ~]# php -m ##查询php的模块
[PHP Modules]
gearman
mysql
redis
2、server3 安装gearman的扩展 lib_mysqludf_json
lib_mysqludf_json UDF 库函数将关系数据映射为 JSON 格式。通常,数据库中的数据映
射为 JSON 格式,是通过程序来转换的。
yum install -y unzip ##安装解压工具
unzip lib_mysqludf_json-master.zip ##解压扩展包
cd lib_mysqludf_json-master
ls
yum list mariadb-devel
yum install mariadb-devel.x86_64 -y ##安装数据库的开发包,以安装扩展包
root@server3 lib_mysqludf_json-master]# gcc $(mysql_config --cflags) -shared -fPIC -o lib_mysqludf_json.so lib_mysqludf_json.c
[root@server3 lib_mysqludf_json-master]# mysql -pwestos
MariaDB [(none)]> show global variables like 'plugin_dir'; ##数据库查看模块
+---------------+--------------------------+
| Variable_name | Value |
+---------------+--------------------------+
| plugin_dir | /usr/lib64/mysql/plugin/ |
+---------------+--------------------------+
1 row in set (0.00 sec)
3、拷贝 lib_mysqludf_json.so 模块:
cp lib_mysqludf_json.so /usr/lib64/mysql/plugin/
4、注册 UDF 函数
[root@server3 lib_mysqludf_json-master]# mysql -pwestos
MariaDB [(none)]> CREATE FUNCTION json_object RETURNS STRING SONAME
-> 'lib_mysqludf_json.so';
Query OK, 0 rows affected (0.00 sec)
查看函数
MariaDB [(none)]> select * from mysql.func;
+-------------+-----+----------------------+----------+
| name | ret | dl | type |
+-------------+-----+----------------------+----------+
| json_object | 0 | lib_mysqludf_json.so | function |
+-------------+-----+----------------------+----------+
1 row in set (0.00 sec)
4、安装 gearman-mysql-udf
这个插件是用来管理调用 Gearman 的分布式的队列
tar zxf gearman-mysql-udf-0.6.tar.gz
cd gearman-mysql-udf-0.6
yum install libevent-devel-2.0.21-4.el7.x86_64.rpm -y
yum install libgearman-1.1.12-18.el7.x86_64.rpm libgearman-devel-1.1.12-18.el7.x86_64.rpm -y
cd gearman-mysql-udf-0.6
ls
./configure --with-mysql=/usr/bin/mysql_config --libdir=/usr/lib64/mysql/plugin/
make
make install
注册 UDF 函数
[root@server3 plugin]# mysql -pwestos
MariaDB [(none)]> CREATE FUNCTION gman_do_background RETURNS STRING SONAME
-> 'libgearman_mysql_udf.so';
Query OK, 0 rows affected (0.00 sec)
MariaDB [(none)]> CREATE FUNCTION gman_servers_set RETURNS STRING SONAME
-> 'libgearman_mysql_udf.so';
Query OK, 0 rows affected (0.00 sec)
查看函数
MariaDB [(none)]> select * from mysql.func;
+--------------------+-----+-------------------------+----------+
| name | ret | dl | type |
+--------------------+-----+-------------------------+----------+
| json_object | 0 | lib_mysqludf_json.so | function |
| gman_do_background | 0 | libgearman_mysql_udf.so | function |
| gman_servers_set | 0 | libgearman_mysql_udf.so | function |
+--------------------+-----+-------------------------+----------+
3 rows in set (0.00 sec)
指定 gearman 的服务信息
MariaDB [(none)]> SELECT gman_servers_set('127.25.85.1:4730');
+--------------------------------------+
| gman_servers_set('127.25.85.1:4730') |
+--------------------------------------+
| 127.25.85.1:4730 |
+--------------------------------------+
1 row in set (0.00 sec)
5. 编写 mysql 触发器(根据实际情况编写)
vim test.sql
编写如下
use test;
DELIMITER $$
CREATE TRIGGER datatoredis AFTER UPDATE ON test FOR EACH ROW BEGIN
SET @RECV=gman_do_background('syncToRedis', json_object(NEW.id as
`id`, NEW.name as `name`));
END$$
DELIMITER ;
将触发器导入数据库
mysql -pwestos< test.sql
查看触发器
MariaDB [(none)]> show triggers from test;
+-------------+--------+-------+----------------------------------------------------------------------------------------------------------------+--------+---------+----------+----------------+----------------------+----------------------+--------------------+
| Trigger | Event | Table | Statement | Timing | Created | sql_mode | Definer | character_set_client | collation_connection | Database Collation |
+-------------+--------+-------+----------------------------------------------------------------------------------------------------------------+--------+---------+----------+----------------+----------------------+----------------------+--------------------+
| datatoredis | UPDATE | test | BEGIN
SET @RECV=gman_do_background('syncToRedis', json_object(NEW.id as `id`, NEW.name as `name`));
END | AFTER | NULL | | root@localhost | utf8 | utf8_general_ci | latin1_swedish_ci |
+-------------+--------+-------+----------------------------------------------------------------------------------------------------------------+--------+---------+----------+----------------+----------------------+----------------------+--------------------+
1 row in set (0.00 sec)
6. server1编写 gearman 的 worker 端
vim worker.php
编写如下
<?php
$worker = new GearmanWorker();
$worker->addServer();
$worker->addFunction('syncToRedis', 'syncToRedis');
$redis = new Redis();
$redis->connect('172.25.85.2', 6379);
while($worker->work());
function syncToRedis($job)
{
global $redis;
$workString = $job->workload();
$work = json_decode($workString);
if(!isset($work->id)){
return false;
}
$redis->set($work->id, $work->name); #这条语句就是将 id 作 KEY 和name 作 VALUE 分开存储,需要和前面写的 php 测试代码的存取一致。
}
?>
7、后台运行 worker
[root@server1 ~]# nohup php worker.php &> /dev/null &
[1] 2238
测试:
1、更新mysql中的数据
MariaDB [test]> select * from test;
+----+--------+
| id | name |
+----+--------+
| 1 | westos |
| 2 | test2 |
| 3 | test3 |
| 4 | test4 |
| 5 | test5 |
| 6 | test6 |
| 7 | test7 |
| 8 | test8 |
| 9 | test9 |
+----+--------+
9 rows in set (0.00 sec)
MariaDB [test]> update test set name='redhat' where id=1;
Query OK, 1 row affected (0.82 sec)
Rows matched: 1 Changed: 1 Warnings: 0
2、查看redis的数据
127.0.0.1:6379> get 1
"redhat"
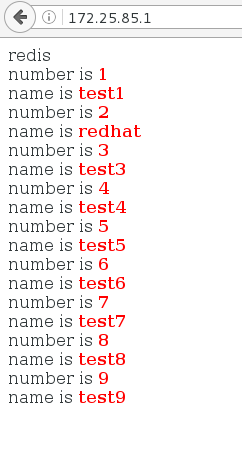
3、外界访问nginx查看数据