- 建立虚拟环境
安装virtualenv:pip install virtualenv
可能出现问题:
	 ImportError: cannot import name 'main'
	 python提示AttributeError:
	 'NoneType' object has no attribute 'append'

	 解决方法: pip install https://github.com/pyinstaller/pyinstaller/tarball/develop
- 创建虚拟环境下的项目目录
virtualenv image
- 激活
进入到new-env目录下进入到scripts文件夹下,windows下dir可以查看有什么文件,运行activate
activate
-
创建项目
django-admin startproject dj01
如果出现问题–>到这里
结构如下-》

dj01/  --项目根目录是一个容器
    manage.py      一个命令行实用程序,可以让你与这个Django项目以不同的方式进行交互
    dj01/              实际Python包为您的项目
        __init__.py   一个空文件,告诉Python这个目录应该考虑一个Python包
        settings.py   Django projec配置
        urls.py       Django projec URL声明
        wsgi.py       WSGI-compatible web服务器的一个入口点为您的项目
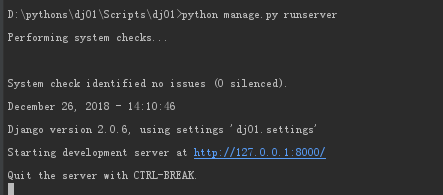
运行以下命令(默认8000端口):
python manage.py runserver

或  python manage.py runserver 8080
结果:
-
创建一个名未Polls的app
python manage.py startapp polls项目结构如下:

-
配置数据库
dj01/settings.py 修改如下字段信息: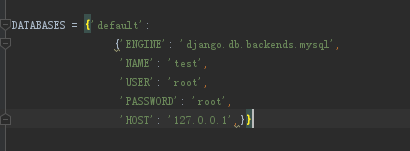
default项目以匹配您的数据库连接设置
ENGINE可以是 [‘django.db.backends.sqlite3’, ‘django.db.backends.postgresql’, ‘django.db.backends.mysql’, or ‘django.db.backends.oracle’]中的一个. 或者其他(这个类似于java中的数据驱动)
NAME数据库名 ( sqlite3 使用 os.path.join(BASE_DIR, ‘db.sqlite3’),)
USER数据库用户名
PASSWORD数据库密码
HOST数据库主机地址 -
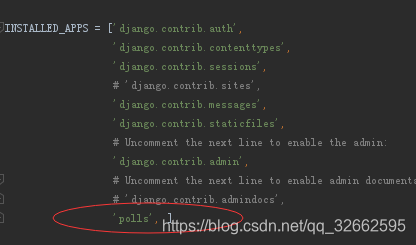
INSTALLED_APPS
文件底部的 INSTALLED_APPS 设置。它保存了当前 Django 实例已激活 的所有 Django 应用。每个应用可以被多个项目使用,而且你可以打包和分发给其他人在他们的项目中使用。
django.contrib.auth – 身份验证系统。
django.contrib.contenttypes – 内容类型框架。
django.contrib.sessions – session 框架。
django.contrib.sites – 网站管理框架。
django.contrib.messages – 消息框架。
django.contrib.staticfiles – 静态文件管理框架。
	python manage.py migrate
		该命令参照settings.py 文件 `INSTALLED_APPS` 所配置的数据库中创建必要的数据库表。每创建一个数据库表你都会看到一条消息,接着你会看到一个提示询问你是否想要在身份验证系统内创建个超级用户。
- 创建models
 	from django.db import models
    	class Question(models.Model):
        	question_text = models.CharField(max_length=200)
        	pub_date = models.DateTimeField('date published')


    	class Choice(models.Model):
    		# ForeignKey
        	question = models.ForeignKey(Question, on_delete=models.CASCADE)
        	choice_text = models.CharField(max_length=200)
        	votes = models.IntegerField(default=0)
- 将polls 加到dj01/settings.py/INSTALLED_APPS 中
执行以下命令:将已经改变的models告诉django,让Django知道你想要更新已存在视图。
python manage.py makemigrations polls
执行结果-
Migrations for 'polls':
  polls/migrations/0001_initial.py:
    - Create model Choice
    - Create model Question
    - Add field question to choice
然后执行以下命令,我们将看到数据库表的生成,以及详细的sql语句。
python manage.py sqlmigrate polls 0001
BEGIN;
--
-- Create model Choice
--
CREATE TABLE "polls_choice" (
    "id" serial NOT NULL PRIMARY KEY,
    "choice_text" varchar(200) NOT NULL,
    "votes" integer NOT NULL
);
--
-- Create model Question
--
CREATE TABLE "polls_question" (
    "id" serial NOT NULL PRIMARY KEY,
    "question_text" varchar(200) NOT NULL,
    "pub_date" timestamp with time zone NOT NULL
);
--
-- Add field question to choice
--
ALTER TABLE "polls_choice" ADD COLUMN "question_id" integer NOT NULL;
ALTER TABLE "polls_choice" ALTER COLUMN "question_id" DROP DEFAULT;
CREATE INDEX "polls_choice_7aa0f6ee" ON "polls_choice" ("question_id");
ALTER TABLE "polls_choice"
  ADD CONSTRAINT "polls_choice_question_id_246c99a640fbbd72_fk_polls_question_id"
    FOREIGN KEY ("question_id")
    REFERENCES "polls_question" ("id")
    DEFERRABLE INITIALLY DEFERRED;

COMMIT;
运行以下命令为model创建数据表
python manage.py migrate
-
Shell API
在manage.py同目录下执行,python manage.py shell进入到shell命令界面,
可进行model操作。# Import the model classes we just wrote. >>> from polls.models import Question, Choice # No questions are in the system yet. >>> Question.objects.all() <QuerySet []> # Create a new Question. # Support for time zones is enabled in the default settings file, so # Django expects a datetime with tzinfo for pub_date. Use timezone.now() # instead of datetime.datetime.now() and it will do the right thing. >>> from django.utils import timezone >>> q = Question(question_text="What's new?", >>>pub_date=timezone.now()) # Save the object into the database. You have to call save() explicitly. >>> q.save() # Now it has an ID. Note that this might say "1L" instead of "1", depending # on which database you're using. That's no biggie; it just means your # database backend prefers to return integers as Python long integer # objects. >>> q.id 1 # Access model field values via Python attributes. >>> q.question_text "What's new?" >>> q.pub_date datetime.datetime(2012, 2, 26, 13, 0, 0, 775217, tzinfo=<UTC>) # Change values by changing the attributes, then calling save(). >>> q.question_text = "What's up?" >>> q.save() # objects.all() displays all the questions in the database. >>> Question.objects.all() <QuerySet [<Question: Question object>]>-
Django Admin
创建超级管理员
-
			执行第一个命令,根据提示完成超级管理员的创建
			 python manage.py createsuperuser

			执行以下命令,启动项目
		 	python manage.py runserver

			然后在在浏览器访问127.0.0.1:8000(根据自己设置的ip和端口访问),将出现以下页面

输入上一步骤创建的用户名和密码进入以下页面。
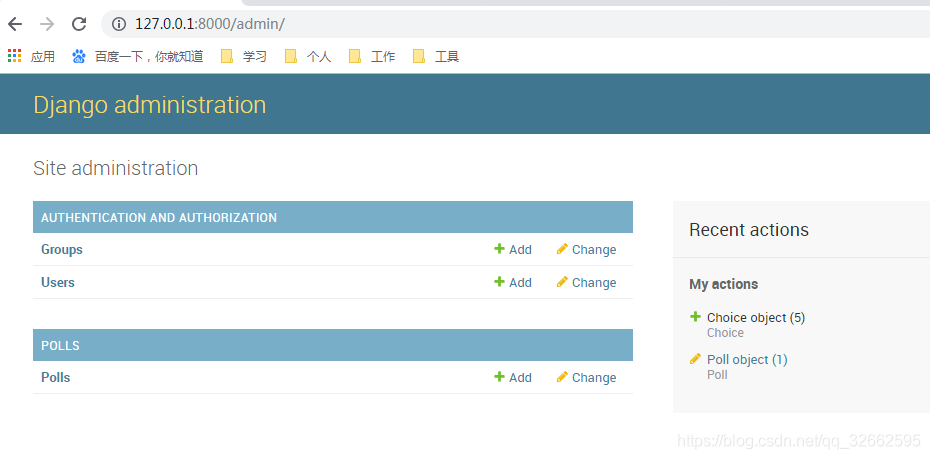
首次进入页面不存在POLLs 标签,需要admin.py中加入以下代码,即可刷新页面即可看到POLLS标签栏。
admin.site.register(Poll)