https://github.com/july1992/springboot_rabbitMQ
1 : 依赖
<dependency>
            <groupId>org.springframework.boot</groupId>
            <artifactId>spring-boot-starter-amqp</artifactId>
        </dependency>
2 :本地rabbitMQ 配置 参考上一篇,这里不要写错端口和host, port默认是5672 不是网址的15672,host不能用本地IP
spring:
  rabbitmq:
    host: 127.0.0.1
    username: guest
    password: guest
    port: 5672
3 : 
4 : 配置转Json的config
package com.vily.springboot_rabbitmq.config;

import org.springframework.amqp.support.converter.Jackson2JsonMessageConverter;
import org.springframework.amqp.support.converter.MessageConverter;
import org.springframework.boot.autoconfigure.amqp.RabbitAutoConfiguration;
import org.springframework.context.annotation.Bean;
import org.springframework.context.annotation.Configuration;

/**
 *  * description :
 *  * Author : Vily
 *  * Date : 2019-06-05
 *
 **/

@Configuration
public class RabbitMqConfig {

    @Bean
    public MessageConverter messageConverter(){

        return new Jackson2JsonMessageConverter();
    }
}
5 : bean , 注意点:Serializable,构造函数,toString
package com.vily.springboot_rabbitmq.bean;

import java.io.Serializable;

/**
 *  * description :
 *  * Author : Vily
 *  * Date : 2019-06-05
 *
 **/

public class Book implements Serializable {

    private int id;

    private String name;

    public Book() {
    }

    public Book(int id, String name) {
        this.id = id;
        this.name = name;
    }

    public int getId() {
        return id;
    }

    public void setId(int id) {
        this.id = id;
    }

    public String getName() {
        return name;
    }

    public void setName(String name) {
        this.name = name;
    }

    @Override
    public String toString() {
        return "Book{" +
                "id=" + id +
                ", name='" + name + '\'' +
                '}';
    }
}
6 : BookService , queues = "hluffy" 是我在http://localhost:15672/#/exchanges/%2F/vily.direct配置的队列名字
package com.vily.springboot_rabbitmq.service;
import com.vily.springboot_rabbitmq.bean.Book;
import org.springframework.amqp.rabbit.annotation.RabbitListener;
import org.springframework.stereotype.Service;
/**
* * description :
* * Author : Vily
* * Date : 2019-06-05
*
**/
@Service
public class BookService {
@RabbitListener(queues = "hluffy")
public void receive(Book book){
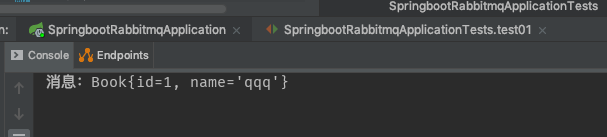
System.out.println("消息:"+book);
}
}
7 :
 @Autowired
    RabbitTemplate rabbitTemplate;


// 发送
    public void test01() {
        rabbitTemplate.convertAndSend("vily.direct", "hluffy", new Book(1, "qqq"));

    }

 // 可以在这里接收,也可以在service里接收
    public void getMsg() {

        Object hluffy = rabbitTemplate.receiveAndConvert("hluffy");

        System.out.println("--------------------------------");
        System.out.println(hluffy);
//        System.out.println(hluffy.getClass());

    }
8 : 结果:
9 : 如果发现获取到的结果为 null 。,可能是该消息已经被消费掉了,重新发送试试
10 : 通过 AmqpAdmin : RabbitMQ 系统管理功能组件 ,创建和删除 Queue,Exchange,Binding
 @Autowired
    AmqpAdmin amqpAdmin;
 /**
     *   通过amqpAdmin 创建交换机,创建队列,创建绑定关系等
     */

    public void creatExchange(){

        // 创建交换机
        amqpAdmin.declareExchange(new DirectExchange("amqp.direct"));
        // 创建消息队列
        amqpAdmin.declareQueue(new Queue("amqp.queue",true));

        // 绑定交换机和消息队列
        amqpAdmin.declareBinding(new Binding("amqp.queue",
                Binding.DestinationType.QUEUE,
                "amqp.direct",
                "amqp.key",
                null));

    }