FastDFS是一个开源的轻量级分布式文件系统,它对文件进行管理,功能包括:文件存储、文件同步、文件访问(文件上传、文件下载)等,解决了大容量存储和负载均衡的问题。特别适合以文件为载体的在线服务,如相册网站、视频网站等等。
FastDFS为互联网量身定制,充分考虑了冗余备份、负载均衡、线性扩容等机制,并注重高可用、高性能等指标,使用FastDFS很容易搭建一套高性能的文件服务器集群提供文件上传、下载等服务。
虚拟机环境
liunx服务器(一):192.168.124.241(tracker)
linux服务器(二):192.168.124.242(storage)
链接:https://pan.baidu.com/s/1duk5TO0qupC6LEYhR4AKzA
提取码:k67x 安装依赖包
yum -y install pcre pcre- gcc-c++ gcc* zlib zlib-devel openssl openssl-devel gc-devel gd gd-devel git
包全部放在/usr/local/src下tar -zxvf 全部解压到/data/server/fastDFS目录下
安装libfastcommon
mkdir  -p /data/server/fastDFS
cd /data/server/fastDFS/libfastcommon-1.0.35
./make.sh
./make install
安装libevent
cd /data/server/fastDFS/libevent-2.0.20-stable
./configure --prefix=/data/server
make clean
make
make install创建tracker目录(安装tracker时才执行此步骤)
mkdir -p /fdfs/trackertracker安装(192.168.124.241)
tar -zxvf FastDFS_v5.08.tar.gz(src解压之后移动到/data/server下)
mv FastDFS /data/server/fastDFS/
编译和安装tracker
cd /data/server/fastDFS/FastDFS
./make.sh
./make.sh install配置tracker
cd /data/server/fastDFS/FastDFS/conf
vim tracker.conf
base_path=/fdfs/tracker   #设置tracker的数据文件和日志目录
max_connections=300      #最大连接数
work_threads=1            #工作线程数,最好和cpu核数相同
http.server_port=8080 #设置http端口号 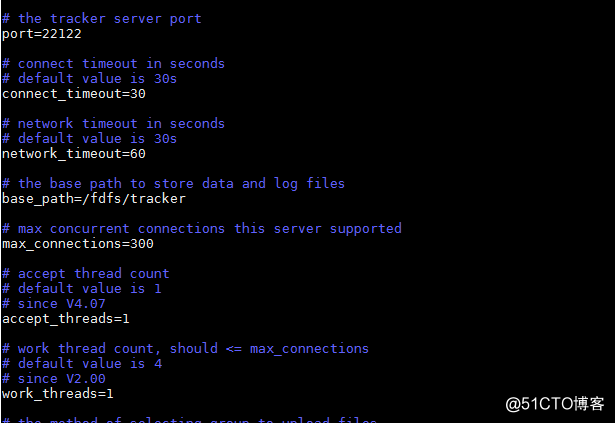

运行
/data/server/fastDFS/FastDFS/tracker/fdfs_trackerd /data/server/fastDFS/FastDFS/conf/tracker.conf
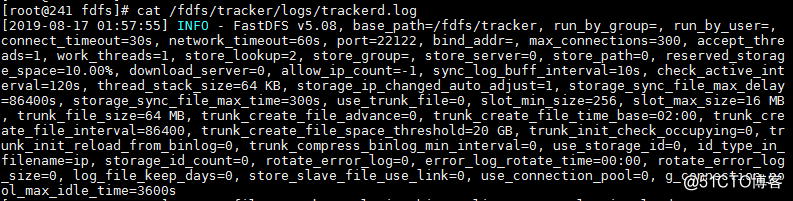
查看tracker启动文件信息
cat /fdfs/tracker/logs/trackerd.log
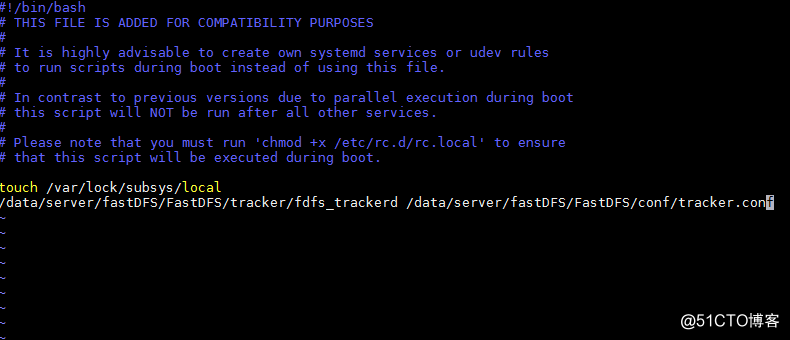
确认启动成功后将tracker设置为开机自启动
vim /etc/rc.d/rc.local
在最后一行添加
/data/server/fastDFS/FastDFS/tracker/fdfs_trackerd /data/server/fastDFS/FastDFS/conf/tracker.conf
在tracker(192.168.31.128)上安装nginx
创建缓存目录
mkdir -p /var/cache/nginx/proxy_cache
安装包准备
nginx源码包
nginx-1.11.5.tar.gz
fastDFS相关插件包
ngx_cache_purge-2.3.tar.gz
pcre-8.34.tar.gz
zlib-1.2.8.tar.gz
最后如下图所示
cd /data/server/fastDFS/FastDFS/nginx-1.11.5
./configure --prefix=/data/server/fastDFS/trackerNginx --add-module=/data/server/fastDFS/ngx_cache_purge-2.3 --with-pcre=/data/server/fastDFS/pcre-8.34/ --with-zlib=/data/server/fastDFS/zlib-1.2.8make编译
make
make install
配置nginx
修改trackerNginx目录下nginx.conf文件(我的配置如下所示)
#user  nobody;
worker_processes  1;
worker_cpu_affinity 1;
worker_rlimit_nofile 65535;
error_log  /data/server/fastDFS/trackerNginx/logs/error.log;
pid       /data/server/fastDFS/trackerNginx/logs/nginx.pid;
#error_log  logs/error.log;
#error_log  logs/error.log  notice;
#error_log  logs/error.log  info;

#pid        logs/nginx.pid;

events {
  worker_connections  1024;
  use epoll;
}

http {
  server_names_hash_bucket_size 128;
  client_header_buffer_size 32k;
  large_client_header_buffers 4 32k;
  client_max_body_size 300m;
  include       mime.types;
  default_type  application/octet-stream;
  log_format  main  '$remote_addr - $remote_user [$time_local] "$request" '
                    '$status $body_bytes_sent "$http_referer" '
                    '"$http_user_agent" "$http_x_forwarded_for"';
  access_log  /data/server/fastDFS/trackerNginx/logs/access.log  main;
  sendfile        on;
  #tcp_nopush     on;
  keepalive_timeout  65;

  gzip  on;
  proxy_redirect off;
  proxy_set_header Host $http_host;
  proxy_set_header X-Real-IP $remote_addr;
  proxy_set_header X-Forwarded-For $proxy_add_x_forwarded_for;
  proxy_connect_timeout 90;
  proxy_send_timeout 90;
  proxy_read_timeout 90;
  proxy_buffer_size 16k;
  proxy_buffers 4 64k;
  proxy_busy_buffers_size 128k;
proxy_temp_file_write_size 128k;
  #设置缓存存储路径、存储方式、分配内存大小、磁盘最大空间、缓存期限
  proxy_cache_path /var/cache/nginx/proxy_cache levels=1:2 keys_zone=http-cache:500m max_size=10g inactive=30d;
  proxy_temp_path /var/cache/nginx/proxy_cache/tmp;
  #设置head的服务器
  upstream fdfs_head {
      server 192.168.124.242:8080  fail_timeout=30s;
  }
  #设置other的服务器
  upstream fdfs_other {
      server 192.168.124.242:8080  fail_timeout=30s;
  }
  server {
      listen       8888;
      server_name  localhost;
  #设置head的负载均衡参数
      location /head/M00 {
          proxy_next_upstream http_502 http_504 error timeout invalid_header;
          proxy_cache http-cache;
          proxy_cache_valid  200 304 12h;
          proxy_cache_key $uri$is_args$args;
          proxy_pass http://fdfs_head;
          expires 30d;
      }

  #设置other的负载均衡参数
      location /other/M00 {
          proxy_next_upstream http_502 http_504 error timeout invalid_header;
          proxy_cache http-cache;
          proxy_cache_valid  200 304 12h;
          proxy_cache_key $uri$is_args$args;
          proxy_pass http://fdfs_other;
          expires 30d;
      }

  location ~ /purge(/.*) {
          allow 127.0.0.1;
          allow 192.168.124.0/24;
          deny all;
          proxy_cache_purge http-cache  $1$is_args$args;
      }
      #charset koi8-r;
 #access_log  logs/host.access.log  main;

     # location / {
       #   root   html;
      #    index  index.html index.htm;
     # }

      #error_page  404              /404.html;

      # redirect server error pages to the static page /50x.html
      #
      error_page   500 502 503 504  /50x.html;
      location = /50x.html {
          root   html;
      }

      # proxy the PHP scripts to Apache listening on 127.0.0.1:80
      #
      #location ~ \.php$ {
      #    proxy_pass   http://127.0.0.1;
      #}

      # pass the PHP scripts to FastCGI server listening on 127.0.0.1:9000
      #
      #location ~ \.php$ {
      #    root           html;
      #    fastcgi_pass   127.0.0.1:9000;
      #    fastcgi_index  index.php;
      #    fastcgi_param  SCRIPT_FILENAME  /scripts$fastcgi_script_name;
      #    include        fastcgi_params;
      #}

      # deny access to .htaccess files, if Apache's document root
      # concurs with nginx's one
      #
      #location ~ /\.ht {
      #    deny  all;
      #}
  }

 }
修改client.conf文件注意:两台机器都要修改
vim /data/server/fastDFS/FastDFS/conf/client.conf
base_path=/fdfs/tracker #日志存放路径(tracker和storage不同)
tracker_server=192.168.124.241:22122
http.tracker_server_port=8080 #tracker服务器的http端口号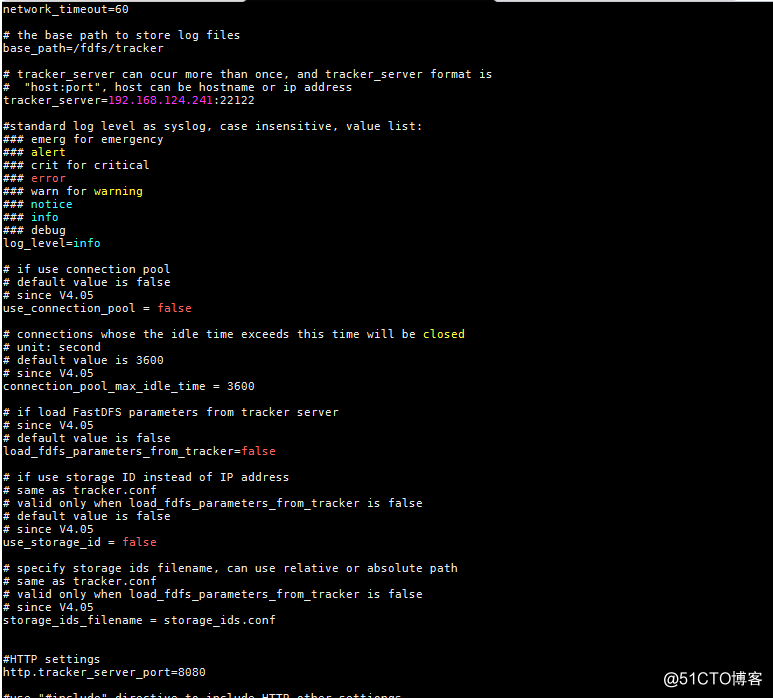
++++++++++++
在storage(192.168.124.242)中安装nginx
安装对应依赖包libfastcommon和libevent(解压放到/data/server/fastDFS目录下然后编译方法跟241机器一样)
mkdir -p /data/server/fastDFS
mkdir -p /fdfs/head/data #存放头像文件
mkdir -p /fdfs/other/data #存放其他文件
mkdir -p /fdfs/storage #storage数据节点
配置
cd /data/server/fastDFS/FastDFS/conf/
vim storage.conf
disabled=false                    #启用配置文件
max_connections=300      #最大连接数
work_threads=1            #工作线程数,最好和cpu核数相同
group_name=head                   #组名,目前我们有3个(head、item、other)
port=23000                        #设置storage的端口号(head、item、other)
base_path=/fdfs/storage           #设置storage的日志目录(需预先创建)
store_path_count=1                #存储路径个数,需要和store_path个数匹配
store_path0=/fdfs/head         #存储路径
tracker_server=192.168.41.241:22122 #tracker服务器的IP地址和端口号
http.server_port=8080             #设置http端口号
cd /fdfs/head/data
ls
如下图所示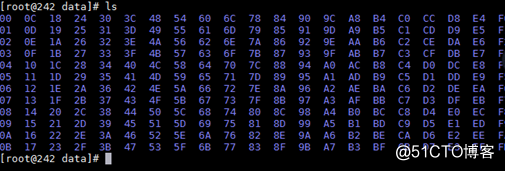
看日志是否启动成功
/data/server/fastDFS/FastDFS/storage/fdfs_storaged /data/server/fastDFS/FastDFS/conf/storage.conf
cat /fdfs/storage/logs/storaged.log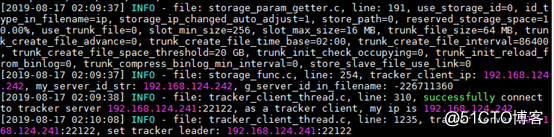
在storage(192.168.41.242)中安装nginx
安装包准备
nginx源码包
nginx-1.11.5.tar.gz
fastDFS相关插件包
fastdfs-nginx-module_v1.16.tar.gz
pcre-8.34.tar.gz
zlib-1.2.8.tar.gz
将nginx和其他插件包全部解压到/usr/local/fastDFS/下
修改fastdfs-nginx-module/src下的config文件中的相关路径参数,否则下面的命令编译不通过。
vim /data/server/fastDFS/FastDFS/fastdfs-nginx-module/src/config
找到第4行,修改前为
CORE_INCS="$CORE_INCS /usr/local/include/fastdfs /usr/local/include/fastcommon/"
修改后为
CORE_INCS="$CORE_INCS /usr/include/fastdfs /usr/include/fastcommon/"
安装nginx
cd /data/server/fastDFS/FastDFS/nginx-1.11.5
./configure --prefix=/data/server/fastDFS/trackerNginx --add-module=/data/server/fastDFS/ngx_cache_purge-2.3 --with-pcre=/data/server/fastDFS/pcre-8.34/ --with-zlib=/data/server/fastDFS/zlib-1.2.8make编译
make
make install
将FastDFS的nginx插件模块的配置文件copy到FastDFS配置文件目录
cp /data/server/fastDFS/fastdfs-nginx-module/src/mod_fastdfs.conf /data/server/fastDFS/FastDFS/conf/mod_fastdfs.conf
配置nginx
worker_processes  1;
events {
    worker_connections  1024;
}

http {
    include       mime.types;
    default_type  application/octet-stream;

sendfile        on;

keepalive_timeout  65;
 server {
        listen       8080;
        server_name  192.168.124.242;
location ~/head/M00 {
            root   /fdfs/head/data;
            ngx_fastdfs_module;
        }

        location ~/other/M00 {                  #组other
            root /fdfs/other/data;
            ngx_fastdfs_module;
        }
error_page   500 502 503 504  /50x.html;
        location = /50x.html {
            root   html;
        }
}
配置mod_fastdfs.conf
vim /data/server/fastDFS/FastDFS/conf/mod_fastdfs.conf
connect_timeout=2
network_timeout=30
base_path=/fdfs/storage
load_fdfs_parameters_from_tracker=true
storage_sync_file_max_delay = 86400
use_storage_id = false
storage_ids_filename = storage_ids.conf
tracker_server=192.168.124.241:22122
storage_server_port=23000
group_name=group1
url_have_group_name = true
store_path_count=1
store_path0=/home/yuqing/fastdfs
log_level=info
log_filename=
response_mode=proxy
if_alias_prefix=
flv_support = true
flv_extension = flv
group_count = 2
[group1]
group_name=head
storage_server_port=23000
store_path_count=1
store_path0=/fdfs/head
[group2]
group_name=other
storage_server_port=23001
store_path_count=1
store_path0=/fdfs/other
修改完毕后启动other组的storage
/data/server/fastDFS/FastDFS/storage/fdfs_storaged /data/server/fastDFS/FastDFS/conf/storage_other.conf restart
查看other目录是否生成了256子目录,生成了则成功
cd /fdfs/other/data/
ls
如下图所示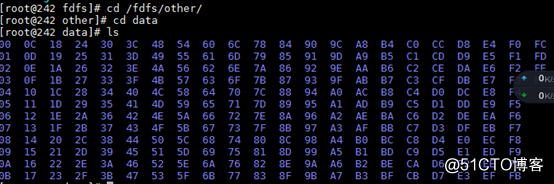
添加开机自启动
vim /etc/rc.d/rc.local
最后一行加入
/usr/local/fastDFS/FastDFS/storage/fdfs_storaged /data/server/fastDFS/FastDFS/conf/storage_other.conf
先运行242的nginx在运行241的nginx
两台机器关闭防火墙
systemctl stop firewalld
setenforce
执行上传命令会生成fileid
/data/server/fastDFS/FastDFS/client/fdfs_upload_file /data/server/fastDFS/FastDFS/conf/client.conf /home/test.png
浏览器访问ip:8080/fileid