一、前言
建立客户端与服务器的Https的连接需要证书进行双向验证后,才可访问。
二、证书类型

不同数字证书部署在服务器上后,用户浏览器访问网站时,展示如下:
1、无证书时
显示不安全标识。

2、域名型(DV)SSL
可以显示安全连接标识,证书无法显示组织信息。

3、企业型(OV)SSL
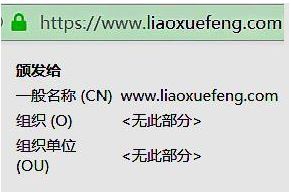
可以显示安全连接标识,证书详细内显示组织信息。

4、增强型(EV)SSL
地址栏绿色,可以显示安全连接标识,地址栏直接显示组织信息。

三、生成SSL证书
证书的创建与作用

生成环境:
Linux: CentOS_7(及以上)
Tomcat: Apache Tomcat_8.5.42(及以上)
OpenSSL: OpenSSL 1.1.0c 下载路径:https://www.openssl.org/source/openssl-1.1.0c.tar.gz
- 制作服务器根证书
1.解压安装
#解压tar包
tar -xzvf openssl-1.1.0c.tar.gz

#进入加压后的文件夹内
cd openssl-1.1.0c

#安装openssl到  /usr/local/openssl 目录,安装之后,编译;这个时候执行需要有耐心,可以查看命令行一直在滚屏,等到滚屏结束,安装编译完成
./config --prefix=/usr/local/openssl && make && make install

#重命名
mv /usr/bin/openssl /usr/bin/openssl.ori
mv /usr/include/openssl /usr/include/openssl.ori

#将安装好的openssl命令软连到对应位置
ln -s /usr/local/ssl/bin/openssl /usr/bin/openssl
ln -s /usr/local/openssl/include/openssl /usr/include/openssl

#在/etc/ld.so.conf文件中写入openssl库文件的搜索路径
echo /usr/local/openssl/lib >> /etc/ld.so.conf


ldconfig -v

openssl version -a
2.生成证书
2.1 创建根证书密钥文件(自己做CA) root.key
#生成命令
openssl genrsa -des3 -out root.key 2048

#输出日志
Generating RSA private key, 2048 bit long modulus
.....................................................................................................................+++
..........................+++
e is 65537 (0x010001)
Enter pass phrase for root.key: ← #在这输入一个新密码
Verifying – Enter pass phrase for root.key: ← 在这重新输入一遍密码
2.2 创建根证书的申请文件 root.csr
#生成命令
openssl req -new -key root.key -out root.csr

#输出日志
Enter pass phrase for root.key: ← 在这输入前面创建的密码
You are about to be asked to enter information that will be incorporated
into your certificate request.
What you are about to enter is what is called a Distinguished Name or a DN.
There are quite a few fields but you can leave some blank
For some fields there will be a default value,
If you enter ‘.’, the field will be left blank.
—–
Country Name (2 letter code) [AU]:CN ← 国家代号,中国输入CN
State or Province Name (full name) [Some-State]:BeiJing ← 省的全名,拼音
Locality Name (eg, city) []:BeiJing ← 市的全名,拼音
Organization Name (eg, company) [Internet Widgits Pty Ltd]:MyCompany Corp. ← 公司英文名
Organizational Unit Name (eg, section) []: ← 可以不输入
Common Name (eg, YOUR name) []: ← 此时不输入
Email Address []:[email protected] ← 电子邮箱,可随意填

Please enter the following ‘extra’ attributes
to be sent with your certificate request
A challenge password []: ← 可以不输入
An optional company name []: ← 可以不输入
2.3 创建一个自当前日期起为期十年的根证书 root.crt
#生成命令
openssl x509 -req -days 3650 -sha256 -extfile /usr/local/openssl/ssl/openssl.cnf -extensions v3_ca -signkey root.key -in root.csr -out root.crt


#输出日志
Signature ok
subject=/C=CN/ST=BeiJing/L=BeiJing/O=MyCompany Corp./[email protected]
Getting Private key
Enter pass phrase for root.key: ← 在这输入前面创建的密码
2.4 根据CA证书生成truststore JKS文件 root.truststore
这一步只针对双向认证,单向不需要
#生成命令
keytool -keystore root.truststore -keypass 123456 -storepass 123456 -alias ca -import -trustcacerts -file /tmp/ca/root.crt
#键入回车后,提示是否信任此证书,输入yes, 则生成truststore成功
- 制作service服务器端证书
1.创建服务器证书密钥 server.key
#生成命令
openssl genrsa -des3 -out server.key 2048


#输出内容为:
Generating RSA private key, 2048 bit long modulus
...........................+++
...............+++
e is 65537 (0x010001)
Enter pass phrase for server.key: ←在这输入前面创建的密码
Verifying - Enter pass phrase for server.key: ← 在这重新输入一遍密码

#运行时会提示输入密码,此密码用于加密key文件(参数des3便是指加密算法,当然也可以选用其他你认为安全的算法.),以后每当需读取此文件(通过openssl提供的命令或API)都需输入口令(密码).如果觉得不方便,也可以去除这个口令,但一定要采取其他的保护措施!


#去除口令的命令
openssl rsa -in server.key -out server.key
2.创建服务器证书的申请文件 server.csr
#生成命令
openssl req -new -key server.key -out server.csr


#输出内容为:
Enter pass phrase for server.key: ← 输入前面创建的密码
You are about to be asked to enter information that will be incorporated
into your certificate request.
What you are about to enter is what is called a Distinguished Name or a DN.
There are quite a few fields but you can leave some blank
For some fields there will be a default value,
If you enter ‘.’, the field will be left blank.
—–
Country Name (2 letter code) [AU]:CN ← 国家名称,中国输入CN
State or Province Name (full name) [Some-State]:BeiJing ← 省名,拼音
Locality Name (eg, city) []:BeiJing ← 市名,拼音
Organization Name (eg, company) [Internet Widgits Pty Ltd]:MyCompany Corp. ← 公司英文名
Organizational Unit Name (eg, section) []: ← 可以不输入
Common Name (eg, YOUR name) []:www.xxx.com ← 服务器主机名(或者IP),若填写不正确,浏览器会报告证书无效,但并不影响使用
Email Address []:[email protected] ← 电子邮箱,可随便填

Please enter the following ‘extra’ attributes
to be sent with your certificate request
A challenge password []: ← 可以不输入
An optional company name []: ← 可以不输入
3.创建自当前日期起有效期为期十年的服务器证书 server.crt
#生成命令
openssl x509 -req -days 3650 -sha256 -extfile /usr/local/openssl/ssl/openssl.cnf -extensions v3_req -CA root.crt -CAkey root.key -CAcreateserial -in server.csr -out server.crt


#输出内容为:
Signature ok
subject=/C=CN/ST=BeiJing/L=BeiJing/O=MyCompany Corp./CN=www.mycompany.com/[email protected]
Getting CA Private Key
Enter pass phrase for root.key: ← 输入前面创建的密码
4.导出.p12文件 server.p12
#生成命令
openssl pkcs12 -export -in /tmp/ca/server.crt -inkey /tmp/ca/server.key -out  /tmp/ca/server.p12 -name "server"

根据命令提示,输入server.key密码,创建p12密码。
5.将.p12 文件导入到keystore JKS文件 server.keystore
#生成命令
keytool -importkeystore -v -srckeystore  /tmp/ca/server.p12 -srcstoretype pkcs12 -srcstorepass 123456 -destkeystore /tmp/ca/server.keystore -deststoretype jks -deststorepass 123456

这里srcstorepass后面的123456为server.p12的密码deststorepass后的123456为keyStore的密码
- 制作Client客户端证书
1.创建客户端证书密钥文件 client.key
#生成命令
openssl genrsa -des3 -out client.key 2048


#输出内容为:
Generating RSA private key, 2048 bit long modulus
...............................+++
.........................+++
e is 65537 (0x010001)
Enter pass phrase for client.key: ← 输入新密码
Verifying – Enter pass phrase for client.key: ← 重新输入一遍密码
2.创建客户端证书的申请文件 client.csr
#生成命令
openssl req -new -key client.key -out client.csr


#输出内容为:
Enter pass phrase for client.key: ← 输入上一步中创建的密码
You are about to be asked to enter information that will be incorporated
into your certificate request.
What you are about to enter is what is called a Distinguished Name or a DN.
There are quite a few fields but you can leave some blank
For some fields there will be a default value,
If you enter ‘.’, the field will be left blank.
—–
Country Name (2 letter code) [AU]:CN ← 国家名称,中国输入CN
State or Province Name (full name) [Some-State]:BeiJing ← 省名称,拼音
Locality Name (eg, city) []:BeiJing ← 市名称,拼音
Organization Name (eg, company) [Internet Widgits Pty Ltd]:MyCompany Corp. ← 公司英文名
Organizational Unit Name (eg, section) []: ← 可以不填
Common Name (eg, YOUR name) []:Lenin ← 自己的英文名,可以随便填
Email Address []:[email protected] ← 电子邮箱,可以随便填

Please enter the following ‘extra’ attributes
to be sent with your certificate request
A challenge password []: ← 可以不填
An optional company name []: ← 可以不填
3.创建一个自当前日期起有效期为十年的客户端证书 client.crt
#生成命令
openssl x509 -req -days 3650 -sha256 -extfile /usr/local/openssl/ssl/openssl.cnf -extensions v3_req -CA root.crt -CAkey root.key -CAcreateserial -in client.csr -out client.crt


#输出内容为:
Signature ok
subject=/C=CN/ST=BeiJing/L=BeiJing/O=MyCompany Corp./CN=www.mycompany.com/[email protected]
Getting CA Private Key
Enter pass phrase for root.key: ← 输入上面创建的密码
4.导出.p12文件 client.p12
#生成命令
openssl pkcs12 -export -in /tmp/ca/client.crt -inkey /tmp/ca/client.key -out  /tmp/ca/client.p12 -name "client"

根据命令提示,输入client.key密码,创建p12密码。
四、配置Tomcat
1.关闭tomcat
tomcat的bin目录下执行
shutdown.sh
2.将证书放入web服务器
将keystore文件(server.keystore) 放在web服务器上
cp /tmp/ca/server.keystore /你的tomcat根目录/conf
将truststore文件(root.truststore) 放在web服务器上
cp /tmp/ca/root.truststore /你的tomcat根目录/conf
3.修改server.xml配置文件
cd /你的tomcat根目录/conf
vi server.xml
找到下面被注释的代码,删除注释符并修改内容(vi命令操作)
<Connector port="8443" protocol="org.apache.coyote.http11.Http11Protocol"
               maxThreads="150" SSLEnabled="true" scheme="https" secure="true"
               keystoreFile="/你的路径/apache-tomcat-8.5.42/conf/server.keystore"
               keystorePass="******"
               truststoreFile="/你的路径/apache-tomcat-8.5.42/conf/root.truststore"
               truststorePass="******"
               clientAuth="false" sslEnabledProtocols="TLSv1.2"
                />

    <!-- Define an AJP 1.3 Connector on port 8009 -->
    <Connector port="8011" protocol="AJP/1.3" redirectPort="8443" />
4.启动tomcat
tomcat的bin目录下执行
startup.sh
5.访问https服务
https://localhost:8443/
https://192.168.1.1:8443/ 你的IP